Oh, éclairs! Just the word brings back such sweet memories. Growing up, my Grandma Sylvie would make these for special occasions, and honestly, the anticipation was half the fun. The golden-brown choux pastry, puffed up impossibly high, filled with that luscious, silky pastry cream, all topped with a shiny chocolate glaze – it was pure magic. I remember peeking into the kitchen, the warm scent of baking mingling with vanilla, and knowing something truly wonderful was about to happen. For years, I thought making éclairs was this incredibly difficult, professional-baker-only kind of thing. But I was so wrong! After many attempts, a few sticky disasters (don’t ask about the exploding éclairs!), and countless cups of coffee with my recipe notebook, I’ve finally landed on an éclair recipe that’s not only foolproof but genuinely brings me so much joy every time I make it. It’s like a hug in pastry form, and way easier than you might think. If you’ve ever loved a good éclair but felt intimidated, this one’s for you!
What are éclairs?
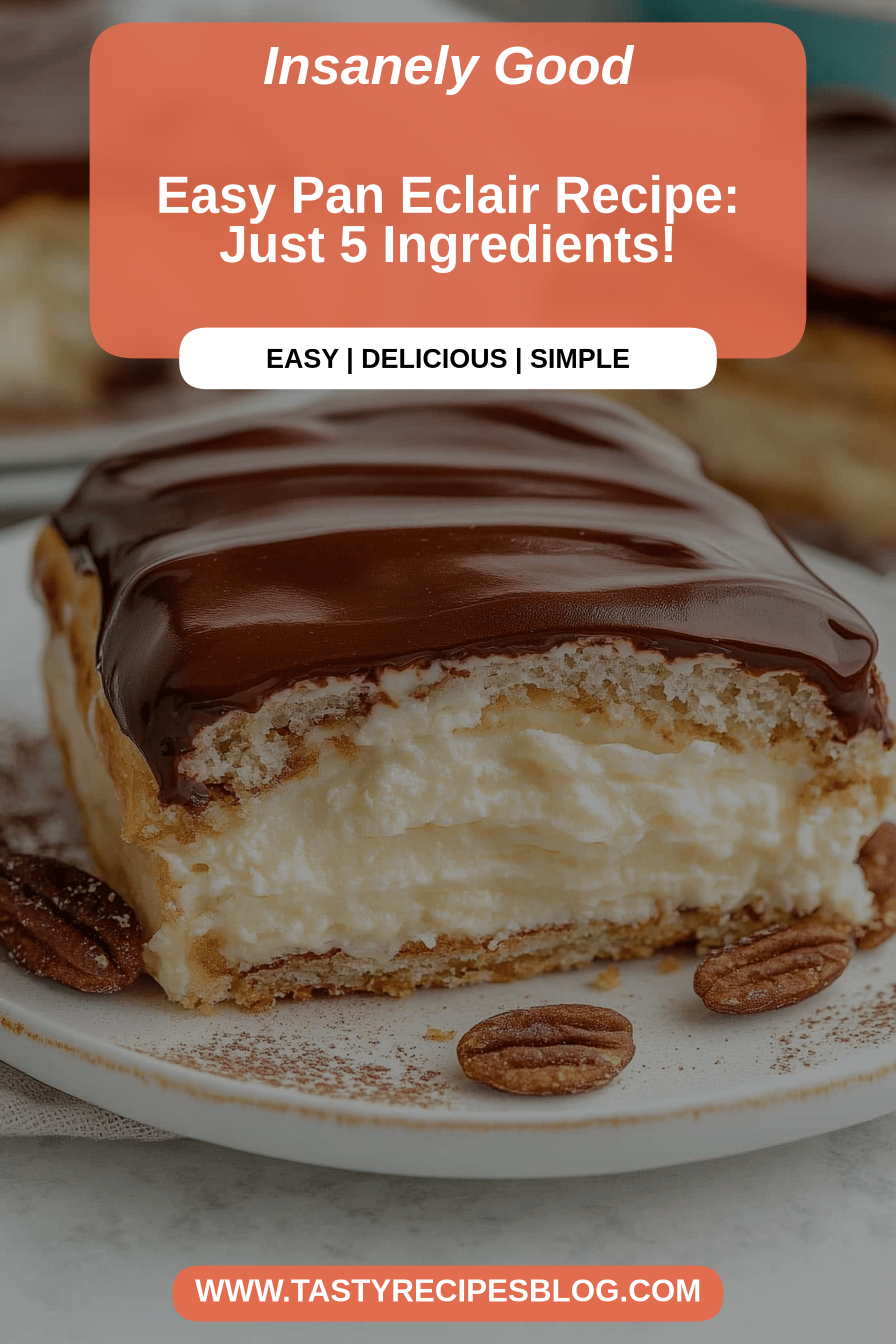
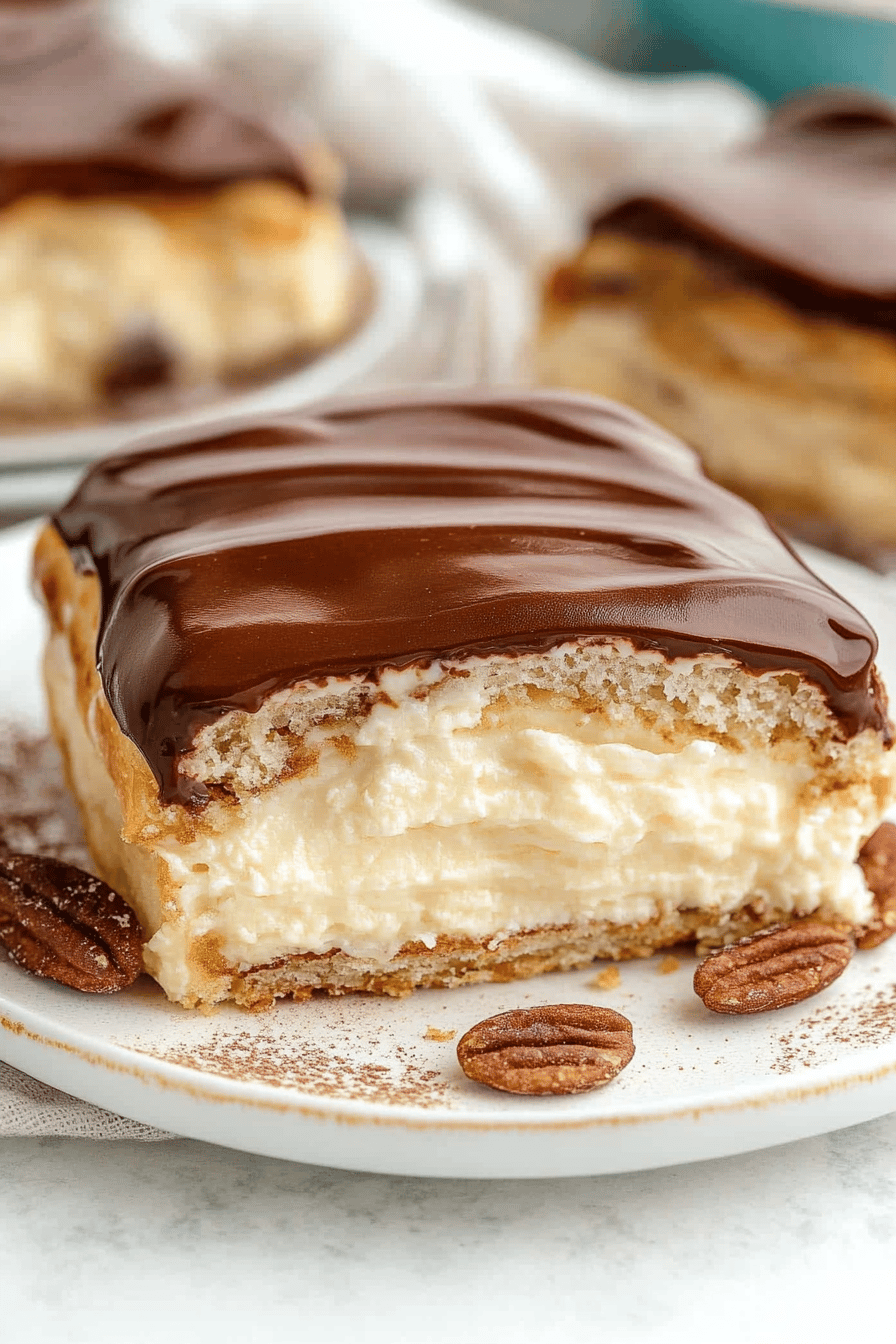
So, what exactly is this delightful dessert we call an éclair? At its heart, an éclair is a long, slim pastry made from choux dough, baked until it’s crisp and hollow inside. Think of it as the elegant cousin of a cream puff. The name itself comes from the French word for “lightning,” which is thought to refer to how quickly they disappear from a plate! After baking, the hollow pastry shells are typically filled with a rich pastry cream – that glorious, custard-like filling that’s smooth and sweet. Then, they’re usually topped with a decadent chocolate glaze that hardens just enough to give you that satisfying slight crack when you bite into it. It’s a classic for a reason, offering a beautiful balance of textures and flavors: the light, airy pastry, the creamy, dreamy filling, and the sweet, sometimes slightly bitter, chocolate. It’s a dessert that feels fancy but is surprisingly approachable for any home baker.
Why you’ll love this recipe?
Honestly, there are so many reasons I keep coming back to this éclair recipe, and I just know you’re going to fall in love with it too. First off, the flavor is absolutely divine. The choux pastry itself has a subtle, almost nutty flavor from being baked just right, and when it’s filled with that velvety Vanilla Bean pastry cream… oh my goodness. It’s pure bliss. And then you get that glossy chocolate glaze on top, which adds just the right amount of sweetness and a touch of decadence. But what truly makes this recipe a winner in my book is its simplicity. I know, I know, éclairs sound intimidating, but I’ve broken it down so you don’t have to fear the choux! The steps are straightforward, and I’ve included all my little tips and tricks to make sure you get that perfect puff every time. Plus, it’s surprisingly budget-friendly. Most of the ingredients are pantry staples, making this a fantastic option when you’re craving something special without breaking the bank. And talk about versatility! While the classic vanilla cream and chocolate glaze are a dream, you can totally mix and match. Raspberry cream? Coffee pastry cream? A caramel glaze? The possibilities are endless, making it perfect for any occasion or craving. It’s also a crowd-pleaser that always impresses, whether it’s for a birthday, a holiday gathering, or just a Tuesday night treat. What I love most is that it feels sophisticated and takes a little effort, but the payoff is enormous. It’s the kind of dessert that makes people say, “Wow, you *made* these?!”
How do I make éclairs?
Quick Overview
Making these delicious éclairs involves creating a simple choux pastry dough, piping it into those signature logs, baking them until golden and hollow, preparing a rich and creamy pastry cream filling, and finishing them off with a beautiful chocolate glaze. The key is gentle handling of the dough and getting that oven temperature just right for a perfect puff. It might sound like a lot, but each step is manageable and surprisingly quick once you get the hang of it. I promise, the end result is so worth it!
Ingredients
For the Choux Pastry (Pâte à Choux):
1 cup water (room temperature is fine, no need to fuss too much here)
1/2 cup unsalted butter, cut into cubes (I swear by good quality butter for flavor!)
1/4 teaspoon salt (just a pinch to enhance everything)
1 cup all-purpose flour (sifted, to avoid lumps and get the smoothest dough)
4 large eggs, at room temperature (this is important for binding)
For the Pastry Cream Filling:
2 cups whole milk (you can use 2% in a pinch, but whole milk makes it extra creamy!)
1/2 cup granulated sugar (adjust slightly if you like it less sweet)
1/4 cup cornstarch (this is our magic thickener!)
4 large egg yolks (save the whites for meringues later!)
2 tablespoons unsalted butter, softened (for that luxurious mouthfeel)
1 teaspoon vanilla extract (use the good stuff if you can!) or a scraped vanilla bean for extra flavor
For the Chocolate Glaze:
1 cup powdered sugar, sifted (sifting is a MUST for a smooth glaze)
1/4 cup unsweetened cocoa powder, sifted (Dutch-processed gives a richer color and flavor)
2-3 tablespoons milk or cream (start with 2, add more to reach desired consistency)
1 tablespoon melted unsalted butter (for shine and silkiness)
Pinch of salt (just to balance the sweetness)
Step-by-Step Instructions
Step 1: Preheat & Prep Pan
First things first, let’s get that oven ready! Preheat your oven to 400°F (200°C). While it’s heating up, grab a couple of baking sheets. Line them with parchment paper. This is non-negotiable for me; it makes cleanup a breeze and prevents any sticking disasters. You can even draw guide lines on your parchment paper with a pencil if you want uniform éclairs, but I usually just eyeball it. Just make sure to leave plenty of space between them because these beauties will puff up!
Step 2: Mix Dry Ingredients
In a medium saucepan (the one you’ll use to make the dough, so no extra dishes!), combine the water, butter, and salt. Place it over medium heat and stir until the butter is completely melted and the mixture just comes to a gentle boil. Once it’s boiling, remove it from the heat immediately. This is where the flour comes in. Dump in all the sifted flour at once. Now, grab a sturdy wooden spoon and stir like mad! You want to mix it vigorously until a smooth ball of dough forms and it starts to pull away from the sides of the pan. Keep stirring for about a minute longer over low heat – this helps to dry out the dough a bit, which is crucial for getting that good puff. It should look like a shaggy, cohesive mass.
Step 3: Mix Wet Ingredients
Now, transfer that cooked dough to the bowl of a stand mixer fitted with the paddle attachment. Or, if you’re using a hand mixer or just really want to get your arm workout in, use a large bowl and a sturdy spoon. Let the dough cool for about 5 minutes. You don’t want it piping hot when you add the eggs, or they’ll scramble! While the dough is cooling, crack your room-temperature eggs into a separate bowl and whisk them lightly, just to break them up. I always check that my eggs are at room temperature before I start; it really helps them incorporate better.
Step 4: Combine
This is where the magic happens! With the mixer on low speed (or if you’re mixing by hand, start gently), gradually add the beaten eggs to the dough, a little bit at a time. It’s going to look weird at first – separated and gloopy. Just keep mixing! Add the next bit of egg only after the previous addition has been fully incorporated. You’re looking for a smooth, glossy, thick batter that slowly falls from the spoon in a “V” shape. It should be thick enough to hold its shape but flexible enough to pipe. If you add too much egg, it’ll be too runny and won’t hold its shape. If you don’t add enough, it might be too stiff. This is the one part where you really need to pay attention to the consistency! You might not need all the egg, or you might need a tiny bit more, depending on your flour and humidity. You’ve got this!
Step 5: Prepare Filling
While the dough is chilling slightly (or while your éclairs are baking, actually!), let’s whip up that glorious pastry cream. In a medium bowl, whisk together the sugar and cornstarch until well combined. Add the egg yolks and whisk until the mixture is pale yellow and slightly thickened. In a separate saucepan, heat the milk over medium heat until it’s just simmering around the edges – don’t let it boil! Slowly, and I mean slowly, pour about half of the hot milk into the egg yolk mixture, whisking constantly. This tempers the yolks so they don’t scramble. Then, pour this tempered mixture back into the saucepan with the remaining milk. Cook over medium heat, whisking constantly (get into those corners!), until the pastry cream thickens considerably, about 3-5 minutes. It should be thick enough to coat the back of a spoon. Remove from the heat, stir in the butter and vanilla extract until smooth and glossy. Pour the pastry cream into a clean bowl, cover it with plastic wrap pressed directly onto the surface (to prevent a skin from forming), and refrigerate until completely chilled and set. I usually give it at least 2-3 hours, or even better, overnight.
Step 6: Layer & Swirl
Okay, back to our dough! Spoon the choux pastry dough into a piping bag fitted with a large round or star tip (about 1/2 inch). Pipe 4-5 inch long logs onto your prepared baking sheets, leaving about 2 inches between them. If you don’t have a piping bag, don’t worry! You can use a large zip-top bag with a corner snipped off, or even two spoons to drop mounds of dough. Once piped, use a damp finger or a small offset spatula to gently smooth down any pointy bits. This helps them bake evenly and look pretty. Sometimes I like to gently press down any little peaks that might have formed.
Step 7: Bake
Pop those baking sheets into your preheated oven. Bake at 400°F (200°C) for about 15-20 minutes, until they’re puffed up and starting to turn golden brown. Now, this is a crucial step: **reduce the oven temperature to 350°F (175°C)** and continue baking for another 20-25 minutes, or until they are a deep golden brown and feel light and hollow when you gently tap them. We want them really dry and crisp so they don’t collapse. You can even poke a small hole in the side of each éclair with a skewer during the last 10 minutes of baking to let any steam escape, which helps them dry out completely. Once they’re done, turn off the oven, crack the door open slightly, and let them sit in the oven for about 10-15 minutes to dry out even more. This helps prevent them from getting soggy.
Step 8: Cool & Glaze
Remove the baked éclairs from the oven and let them cool completely on a wire rack. While they’re cooling, let’s make the glaze. In a medium bowl, whisk together the sifted powdered sugar, sifted cocoa powder, melted butter, and a pinch of salt. Gradually add the milk or cream, one tablespoon at a time, whisking until you have a smooth, pourable glaze. You want it thick enough to coat but thin enough to drizzle. Once the éclairs are completely cool – and I mean *completely* cool, or your glaze will melt right off! – you can start glazing. You can either dip the tops of the éclairs directly into the glaze, or use a spoon to drizzle it artfully over the top. Let the glaze set for about 15-20 minutes.
Step 9: Slice & Serve
Once the glaze is set, it’s time for the best part! You have two main ways to fill these. You can either slice the éclairs in half horizontally and then pipe or spoon the pastry cream into the bottom half before topping with the other half, or you can make a small hole in the bottom or side of the éclair (using a piping tip or a knife) and pipe the pastry cream in that way. The latter is often easier and keeps the shell intact for a cleaner look. I love using a piping bag with a long, thin tip for filling. Serve them immediately for the best texture, or chill them slightly if you prefer them cold. They’re honestly perfect just as they are!
What to Serve It With
Éclairs are pretty much a dessert all on their own, but pairing them with the right accompaniments can elevate the whole experience! For a delightful breakfast treat alongside a strong cup of coffee, a simple éclair is perfection. The slight richness and sweetness are just enough to kickstart your day without being overwhelming. They look pretty elegant on a breakfast plate too, don’t you think? For brunch, I love to serve them as part of a larger spread. Imagine a platter of these alongside some fresh fruit salad, mini quiches, and maybe some delicate scones. They add a touch of sophistication that everyone will appreciate. A mimosa or a sparkling rosé would be a lovely beverage pairing here. As a decadent dessert, of course, éclairs shine. They’re wonderful served with a small scoop of vanilla bean Ice Cream or a drizzle of raspberry coulis. A rich espresso or a smooth dark chocolate liqueur makes for a perfect after-dinner pairing. And for those spontaneous cozy snacks when only something sweet will do? A single éclair with a glass of cold milk is pure comfort. My kids absolutely love them this way after school. One of my favorite traditions is serving them after a big Sunday roast dinner; it’s always a guaranteed hit and feels so special. You really can’t go wrong!
Top Tips for Perfecting Your Éclairs
After making these countless times, I’ve picked up a few little secrets that really make a difference. For the choux pastry, the key is really cooking it thoroughly in the pan after adding the flour. You want to dry it out as much as possible. Stirring it for that extra minute or two over low heat helps evaporate excess moisture, which is what allows the dough to puff up beautifully in the oven. Don’t skip that step! When you’re adding the eggs, remember to do it gradually. The dough should become smooth and glossy, forming a thick ribbon that slowly falls from your spoon. Too runny, and your éclairs will spread too much and be flat; too stiff, and they might not puff up enough. It’s more about the consistency than the exact amount of egg. For the pastry cream, patience is your friend! Whisk constantly when it’s on the stove, especially around the edges and bottom of the pan, to prevent scorching and ensure a smooth, velvety texture. And seriously, press that plastic wrap directly onto the surface of the cream while it’s chilling. It’s the easiest way to avoid that dreaded skin. When it comes to glazing, make sure your éclairs are completely cool. If they’re even slightly warm, the glaze will be too thin and might slide right off, or worse, melt into a sticky mess. For the best shine on the glaze, a tiny bit of melted butter stirred in right before you apply it really works wonders. And if you find your éclairs aren’t puffing up as much as you’d like, double-check your oven temperature! Ovens can be tricky, and a reliable thermometer is a baker’s best friend. Sometimes, adding a tiny bit more flour to the dough if it seems too wet, or a tiny bit more egg if it seems too dry, can be a lifesaver. Don’t be afraid to trust your instincts and adapt based on how the dough looks and feels!
Storing and Reheating Tips
Éclairs are definitely best enjoyed fresh, but sometimes you just can’t eat them all in one sitting (though I’ve come close!). If you have leftovers, proper storage is key to keeping them as delicious as possible. For éclairs stored at room temperature, it’s best to do this only if they are unfilled or filled right before serving. Once filled, they tend to get a bit soggy after a few hours. If you *must* store them at room temp for a short period, keep them in an airtight container and try to consume them within 4-6 hours. For refrigerator storage, this is your best bet for filled éclairs. Store them in an airtight container, and they’ll generally keep well for about 2-3 days. However, the pastry shell might soften a bit over time, so they’re definitely best on day one or two. You can also store the unfilled pastry shells in an airtight container at room temperature for a day or two, and fill them just before serving to maintain their crispness. If you want to get really organized, you can even freeze the baked and cooled unfilled shells! Wrap them tightly in plastic wrap, then place them in a freezer-safe bag. They can be frozen for up to 2 months. To thaw, just let them come to room temperature on the counter, then refresh them in a low oven (around 300°F or 150°C) for about 10 minutes until crisp again before filling. When it comes to glaze timing, if you’re storing filled éclairs in the fridge, it’s best to add the glaze just before serving or within a few hours of glazing. If the glaze sits for too long on a chilled éclair, it can sometimes become a bit sticky or dull.
Frequently Asked Questions
Final Thoughts

So there you have it – my absolute favorite éclair recipe. I truly believe that anyone can make these and achieve delicious, impressive results. The journey from simple ingredients to those elegant, filled pastries is so rewarding, and the taste is just unmatched. It’s a dessert that feels both classic and celebratory, perfect for making any day feel a little more special. If you loved this recipe, you might also want to try my classic Cream Puffs or my rich chocolate lava cakes – they’re just as delightful! I can’t wait to hear what you think of these éclairs. Did they bring back childhood memories for you too? Did your family devour them as quickly as mine does? Please leave a comment below and share your experience, your favorite flavor combinations, or any questions you might have. And if you snap a pic, be sure to tag me on social media – I’d love to see your creations! Happy baking, everyone!
Eclair Recipe
Ingredients
Choux Pastry
- 1 cup Water
- 0.5 cup Unsalted Butter cut into pieces
- 0.25 teaspoon Salt
- 1 cup All-Purpose Flour
- 4 Large Eggs lightly beaten
Pastry Cream
- 2 cups Whole Milk
- 0.5 cup Granulated Sugar
- 0.25 cup Cornstarch
- 0.25 teaspoon Salt
- 2 Large Egg Yolks
- 2 tablespoons Unsalted Butter cut into pieces
- 1 teaspoon Vanilla Extract
Chocolate Ganache
- 4 ounces Semi-Sweet Chocolate chopped
- 0.5 cup Heavy Cream
Instructions
Making the Choux Pastry
- Preheat oven to 400°F (200°C). Line a baking sheet with parchment paper.
- In a saucepan, combine water, butter, and salt. Bring to a boil over medium heat.
- Remove from heat and add flour all at once, stirring vigorously until a smooth dough forms.
- Transfer the dough to a mixing bowl and beat in the eggs one at a time until incorporated.
- Pipe or spoon the dough onto the prepared baking sheet in 4-inch long strips.
- Bake for 25-30 minutes, or until golden brown and puffed up. Let cool completely.
Making the Pastry Cream
- In a saucepan, whisk together milk, sugar, cornstarch, and salt. Bring to a simmer over medium heat.
- In a separate bowl, whisk egg yolks. Temper the yolks with a little of the warm milk mixture.
- Return the yolk mixture to the saucepan and cook, whisking constantly, until thickened. Remove from heat and stir in butter and vanilla extract.
- Transfer the pastry cream to a bowl, cover with plastic wrap (pressing directly onto the surface), and chill for at least 2 hours.
Making the Chocolate Ganache
- Place chocolate in a heatproof bowl. Heat the heavy cream in a saucepan until it simmers.
- Pour the hot cream over the chocolate and let stand for 1 minute. Stir until smooth.
- Let the ganache cool to room temperature.
Assembling the Eclairs
- Cut the cooled choux pastry in half horizontally.
- Fill the bottom halves with pastry cream.
- Top with the ganache and place the top halves of the choux pastry on top.
- Serve immediately or chill until ready to serve.