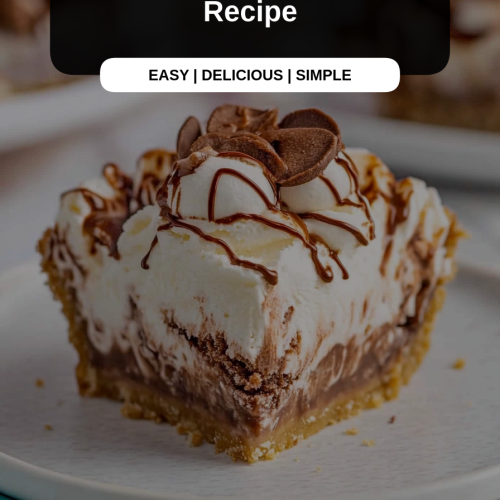
Okay, so picture this: a light, airy pastry shell, impossibly delicate, just begging to be filled with the creamiest, dreamiest filling you can imagine. And then, a little drizzle of glaze to top it all off. That, my friends, is the magic of Cream Puffs. Honestly, if you’ve never made them before, you might think they’re complicated, something you only get at fancy bakeries. But I’m here to tell you, they are surprisingly doable, and oh-so-worth-it. This recipe is like a warm hug in dessert form, and it’s the one I always turn to when I want to impress without stressing. Forget those store-bought treats; these homemade cream puffs are in a league of their own. They’re way better than a store-bought pie, and honestly, the process is way more fun!
What are cream puffs?
So, what exactly are these little clouds of deliciousness? Cream puffs, or profiteroles as they’re sometimes called, are basically hollow pastries made from a choux pastry dough. Now, don’t let the fancy name scare you! Choux pastry is super simple to make. You cook flour, butter, and water (or milk!) on the stovetop until it forms a ball, then you beat in eggs one by one until you get this smooth, glossy dough. When you bake it, the moisture inside turns to steam, puffing up the dough and creating that signature hollow center, perfect for filling. It’s essentially a blank canvas waiting for your favorite fillings and toppings. Think of it as a versatile baking wonder that’s lighter than a cake but just as satisfying.
Why you’ll love this recipe?
There are so many reasons why this cream puff recipe has become a staple in my kitchen. First off, the flavor is just divine. The shells are subtly sweet and have this wonderful tender-crisp texture when they’re fresh from the oven. And the filling? Oh, the filling! I’m going to share my go-to vanilla pastry cream, but honestly, you can play around with it endlessly. The best part, though, is how surprisingly simple they are to make. Once you get the hang of the choux pastry, it’s a breeze. And talking about cost-efficiency, you probably have most of the ingredients in your pantry right now! This recipe also happens to be incredibly versatile. You can make them bite-sized for a party or larger for a more substantial dessert. What I love most about this recipe is the pure joy it brings. There’s something so rewarding about pulling these beautiful puffs out of the oven. They’re truly a step up from a simple cookie, and they always feel a little special, even though they’re so easy. They’re definitely a crowd-pleaser, and I can’t count how many times they’ve disappeared in minutes at family gatherings. It’s a recipe that just makes people happy!
How do I make cream puffs?
Quick Overview
The process is straightforward: we’ll make a simple stovetop dough, pipe it onto a baking sheet, bake until golden and puffed, then fill and glaze them to perfection. It’s a magical transformation from basic ingredients to elegant pastries. The key is getting the dough right and letting them bake fully so they’re crisp on the outside and hollow inside. Don’t worry if they don’t look perfect on the first try; mine certainly didn’t when I first started! The outcome is so rewarding, you’ll be making these again and again.
Ingredients
For the Main Batter (Choux Pastry):
1 cup water (or half water, half milk for a richer shell!)
1/2 cup unsalted butter, cut into pieces
1 teaspoon granulated sugar
1/4 teaspoon salt
1 cup all-purpose flour
4 large eggs, at room temperature
**Pro Tip:** Using a mix of water and milk for the liquid can make the shells a little richer and more tender. And make sure those eggs are at room temperature; they incorporate much better into the dough!
For the Filling (Classic Vanilla Pastry Cream):
2 cups whole milk
1/2 cup granulated sugar, divided
4 large egg yolks
1/4 cup cornstarch
1 teaspoon vanilla extract
2 tablespoons unsalted butter, softened
**My favorite variation:** Sometimes I’ll add a splash of good quality almond extract or even a little orange zest to the filling. It’s delicious!
For the Glaze:
1 cup powdered sugar
2-3 tablespoons milk or heavy cream
1/2 teaspoon vanilla extract
**For a chocolate glaze:** Just whisk in a tablespoon or two of unsweetened cocoa powder with the powdered sugar and milk!
Step-by-Step Instructions
Step 1: Preheat & Prep Pan
First things first, preheat your oven to 400°F (200°C). You want it nice and hot to get that initial puff. Then, grab a baking sheet and line it with parchment paper. This is super important! It stops the puffs from sticking and makes cleanup a breeze. I usually draw 2-inch circles on the parchment paper with a pencil as a guide for piping, then flip the paper over so the pencil marks aren’t in the dough. It sounds fussy, but it really helps get uniform puffs.
Step 2: Mix Dry Ingredients
In a medium saucepan, combine the water (or water/milk mix), butter, sugar, and salt. Place this over medium heat and stir until the butter is completely melted and the mixture just starts to come to a boil. Once it’s boiling, immediately remove it from the heat. Now, quickly dump in the flour all at once. Stir vigorously with a wooden spoon or a sturdy spatula. Keep stirring until the mixture comes together and forms a ball that pulls away from the sides of the pan. This is what we call “drying out” the dough, and it’s a crucial step for those perfect puffs.
Step 3: Mix Wet Ingredients
Let the dough cool in the saucepan for about 5 minutes. It shouldn’t be piping hot, but still warm. While it’s cooling, crack your eggs into a separate bowl. I like to whisk them lightly just to break them up. It’s also a good idea to have them at room temperature so they mix in smoothly. If they’re too cold, they can shock the dough.
Step 4: Combine
Now for the magic part! Add the eggs to the warm dough, one at a time, beating well after each addition. You can use an electric mixer with a paddle attachment for this, or just keep stirring vigorously with your spoon. The dough might look weird and separated at first, but keep beating, and it will come together. You’re looking for a smooth, thick, glossy dough that holds its shape but is also pliable. If you pull a spoonful up, it should form a V-shape. If it’s too stiff, add another egg yolk; if it’s too thin, it might not puff properly. This is where you learn to trust your instincts a bit!
Step 5: Prepare Filling
While the pastry dough is ready, let’s whip up that luscious filling. In a medium bowl, whisk together the egg yolks, sugar, and cornstarch until it’s pale yellow and smooth. In a separate saucepan, heat the milk over medium heat until it’s steaming, but not boiling. Slowly, pour about half of the hot milk into the egg yolk mixture while whisking constantly. This is called tempering, and it prevents your yolks from scrambling! Pour this tempered mixture back into the saucepan with the remaining milk. Cook over medium heat, whisking constantly, until the mixture thickens to a pudding-like consistency. This usually takes about 5-7 minutes. Once thickened, remove from heat, stir in the vanilla extract and softened butter until smooth. Pour this into a clean bowl, press plastic wrap directly onto the surface (to prevent a skin from forming), and refrigerate until completely chilled. This is best made ahead of time!
Step 6: Layer & Swirl
Transfer your choux pastry dough to a piping bag fitted with a large round tip (or a star tip if you like ridges!). If you don’t have a piping bag, you can just use two spoons. Pipe mounds of dough onto your prepared baking sheet, about 2 inches in diameter, leaving some space between them as they will puff up. If you used spoons, just drop spoonfuls onto the sheet. After piping or dropping, you can smooth out any peaks with a wet finger – this helps them bake evenly.
Step 7: Bake
Pop those piped mounds into your preheated oven. Bake for 20 minutes at 400°F (200°C). Then, and this is important, reduce the oven temperature to 350°F (175°C) and bake for another 20-25 minutes. You want them to be deeply golden brown and feel light when you pick them up. If they’re still pale, they might collapse. To ensure they’re fully cooked and dry inside, you can poke a small hole in the side of each puff with a sharp knife or skewer to let the steam escape. Leave them in the turned-off oven with the door slightly ajar for about 10 minutes – this helps them dry out even more and prevents them from deflating. This step is a game-changer for crispy shells!
Step 8: Cool & Glaze
Let the baked shells cool completely on a wire rack. Once they’re cool, you can either slice them in half horizontally with a serrated knife or poke a small hole in the bottom for filling. To make the glaze, whisk together the powdered sugar, milk (start with 2 tablespoons and add more if needed for thinner consistency), and vanilla extract until smooth. It should be thick enough to coat the back of a spoon but still pourable.
Step 9: Slice & Serve
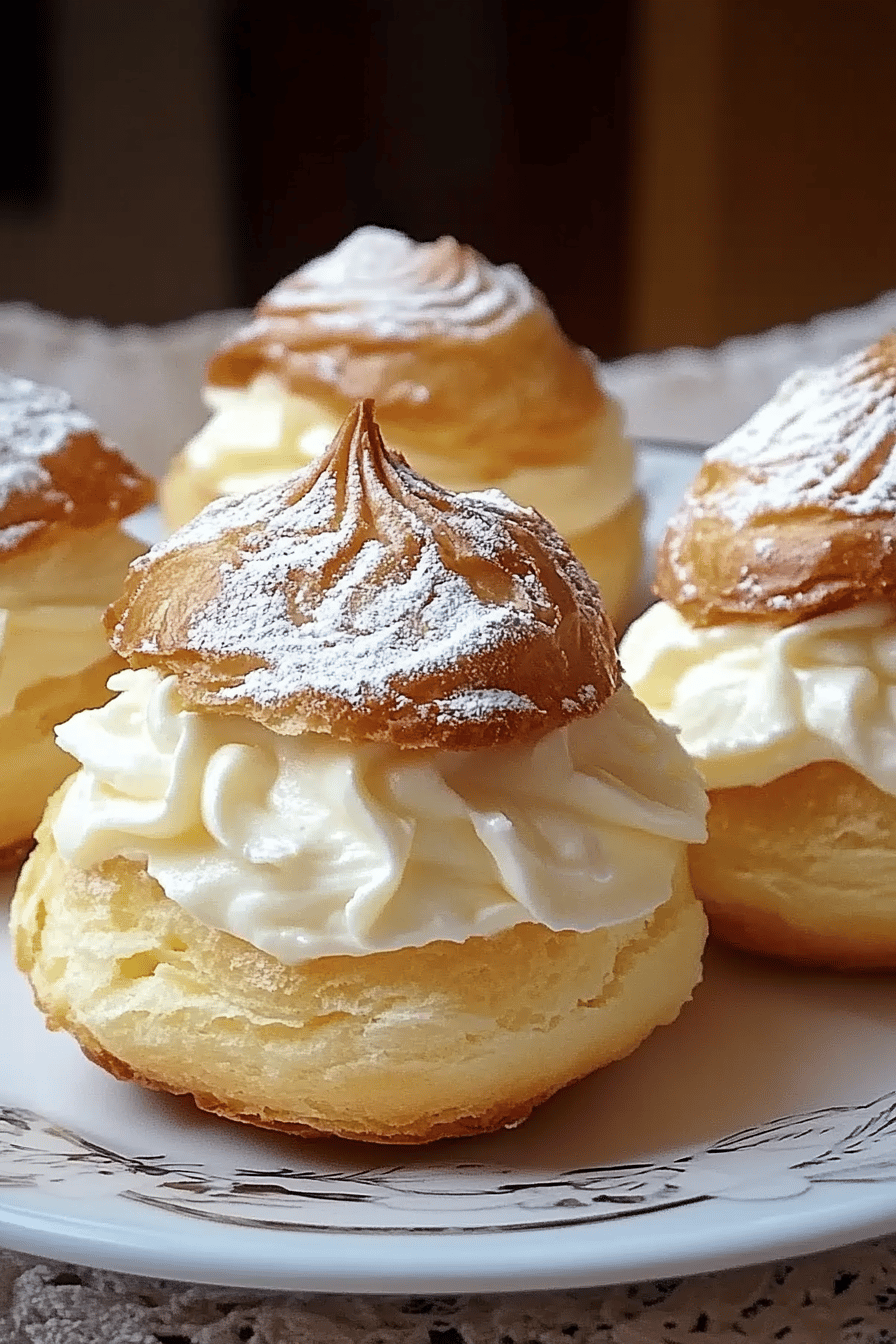
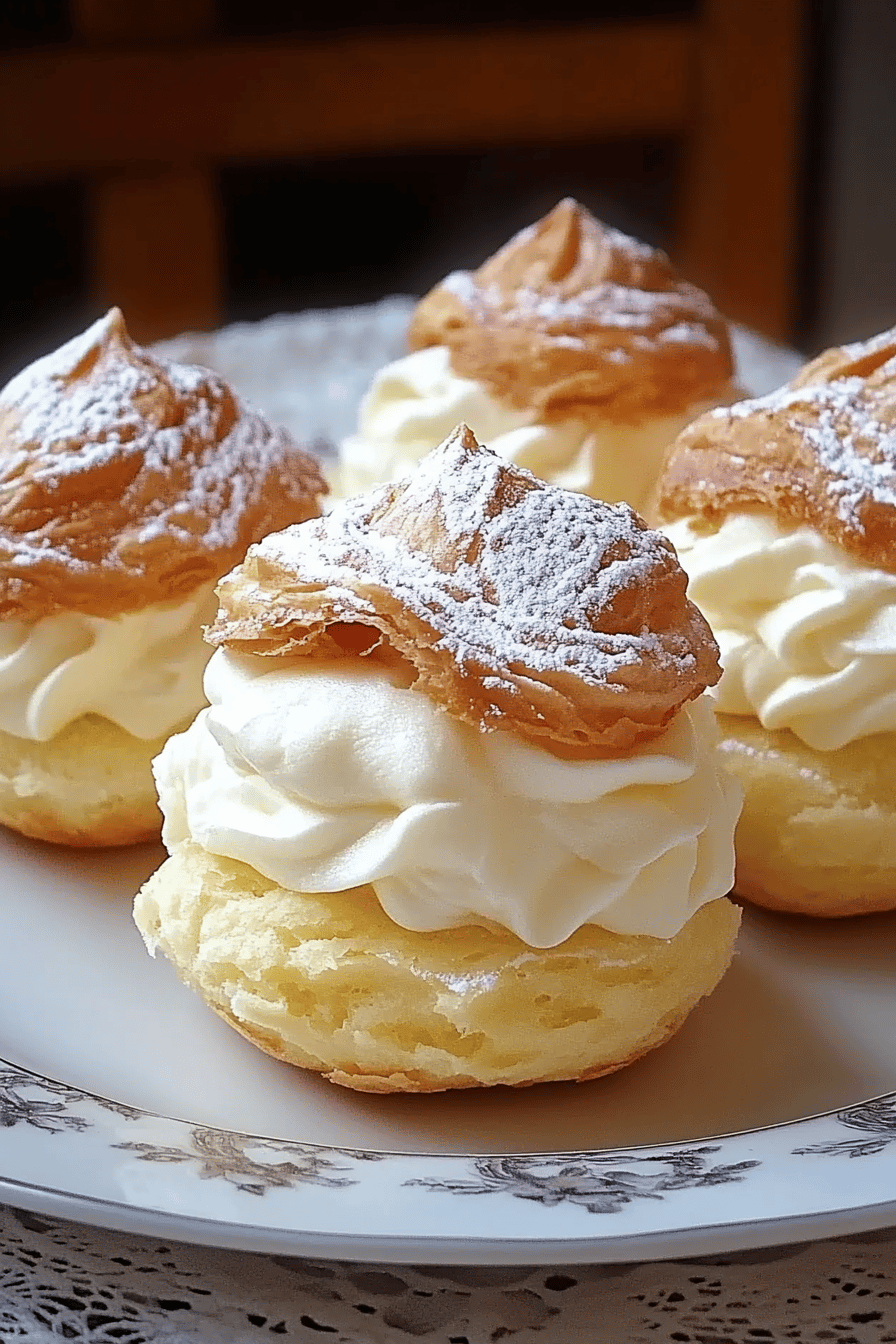
Once the shells are cool and your pastry cream is chilled and wonderfully thick, it’s time to fill them! Spoon or pipe the pastry cream generously into the bottom halves of your cream puffs. Then, place the tops back on. Drizzle the glaze generously over the tops of the filled cream puffs. Let the glaze set for about 10-15 minutes before serving for the best texture. I love serving these with a dusting of powdered sugar or even some fresh berries on the side. They are best enjoyed the same day they are made, for that perfect crisp-to-creamy ratio.
What to Serve It With
Oh, the possibilities are endless! For breakfast, I love a single, mini cream puff alongside a strong cup of coffee. It’s a little treat to start the day that feels indulgent. At brunch, these are absolute stars! Serve them on a tiered stand with some fresh fruit salad and maybe a mimosa. They add such an elegant touch. As a dessert, they’re incredible after a light meal. I often serve them with a raspberry coulis or a sprinkle of toasted slivered almonds. They’re also perfect for a cozy snack on a rainy afternoon. My kids love them with a glass of cold milk, and honestly, who can blame them? I’ve also tried serving them with a small scoop of vanilla bean Ice Cream inside, and that’s just next-level delicious. The key is to let the cream puff shine, so I usually pair them with something that complements their sweetness rather than overpowering it.
Top Tips for Perfecting Your Cream Puffs
Over the years, I’ve picked up a few tricks for making the absolute best cream puffs. When it comes to the choux pastry, the most important thing is ensuring it’s cooked properly on the stovetop. Don’t rush that step! Getting it to form a ball and dry out is key for that initial puff in the oven. Also, make sure your eggs are at room temperature; cold eggs can make the dough seize up and become oily. For the filling, chilling it thoroughly is essential. A warm pastry cream will just melt out of your puffs. I’ve learned the hard way that a good, thick pastry cream is a must. If your filling seems a little too thin, you can always whisk in a bit more cornstarch and gently reheat it until it thickens up again. When it comes to baking, don’t be tempted to open the oven door too early! That rush of cool air can cause them to collapse. Patience is your friend here. And remember that oven temperatures can vary, so trust your eyes and the look of the puffs – they should be a deep golden brown. For ingredient swaps, I’ve experimented with using half-and-half instead of whole milk in the pastry cream for an even richer result, and it was amazing. You can also use a plant-based milk in the choux pastry dough, but I found it resulted in a slightly less crisp shell. For glaze variations, I’ve mixed in a little lemon zest for a bright, zesty kick, or used a bit of melted chocolate for a decadent finish. I also love adding a tiny pinch of espresso powder to the chocolate glaze – it really enhances the chocolate flavor!
Storing and Reheating Tips
Cream puffs are definitely best enjoyed the day they are made because that beautiful crisp shell can get soggy quickly once filled. However, if you do have leftovers, here’s how to store them. If they are unfilled, you can store the baked shells in an airtight container at room temperature for up to 2 days. They might lose a bit of their crispness, but they’ll still be perfectly good for filling later. If they are filled and glazed, your best bet is to store them in the refrigerator. Place them in an airtight container, and they should keep for about 1-2 days. The shell will soften considerably, but the flavor will still be delicious. I’ve tried freezing filled cream puffs, and honestly, the texture just isn’t the same once thawed. The shells get quite mushy. If you really want to freeze them, I’d recommend freezing the unfilled shells. Once they’re baked and completely cooled, you can wrap them tightly in plastic wrap and then place them in a freezer-safe bag or container for up to 1-2 months. To reheat frozen shells, just place them on a baking sheet and warm them in a 300°F (150°C) oven for about 5-10 minutes until they are crisp again. Then, fill and glaze them right before serving.
Frequently Asked Questions
Final Thoughts
There you have it – my tried-and-true recipe for absolutely delightful cream puffs! I really hope you give these a whirl. They’re proof that you don’t need to be a pastry chef to create something truly special and delicious in your own kitchen. The combination of that light, crisp shell with the cool, creamy filling is just heavenly. It’s the kind of dessert that feels fancy but is actually quite approachable. If you love this recipe, you might also enjoy my éclairs or even my classic fruit tart – they’re all in a similar vein of delightful pastry goodness! I can’t wait to hear what you think, and if you try them, please share your creations and any variations you come up with in the comments below! Happy baking, everyone!
Cream Puffs
Ingredients
Puff Pastry
- 1 cup All-purpose flour
- 0.5 cup Unsalted butter Cut into cubes
- 1 cup Water
- 4 large Eggs
- 0.25 teaspoon Salt
Cream Filling
- 2 cup Heavy cream
- 0.5 cup Powdered sugar
- 1 teaspoon Vanilla extract
Instructions
Making the Puffs
- Preheat oven to 400°F (200°C). In a saucepan, combine water, butter, and salt. Bring to a boil.
- Remove from heat and add flour all at once, stirring vigorously until a smooth dough forms and pulls away from the sides of the pan.
- Transfer dough to a bowl and let cool slightly. Add eggs one at a time, mixing until fully incorporated.
- Spoon or pipe dough onto a baking sheet lined with parchment paper. Bake for 30 minutes, or until golden brown and puffed up. Let cool completely.
Making the Filling
- In a bowl, whip heavy cream, powdered sugar, and vanilla extract until stiff peaks form.
- Cut cream puffs in half and fill with the whipped cream.
- Serve immediately.