
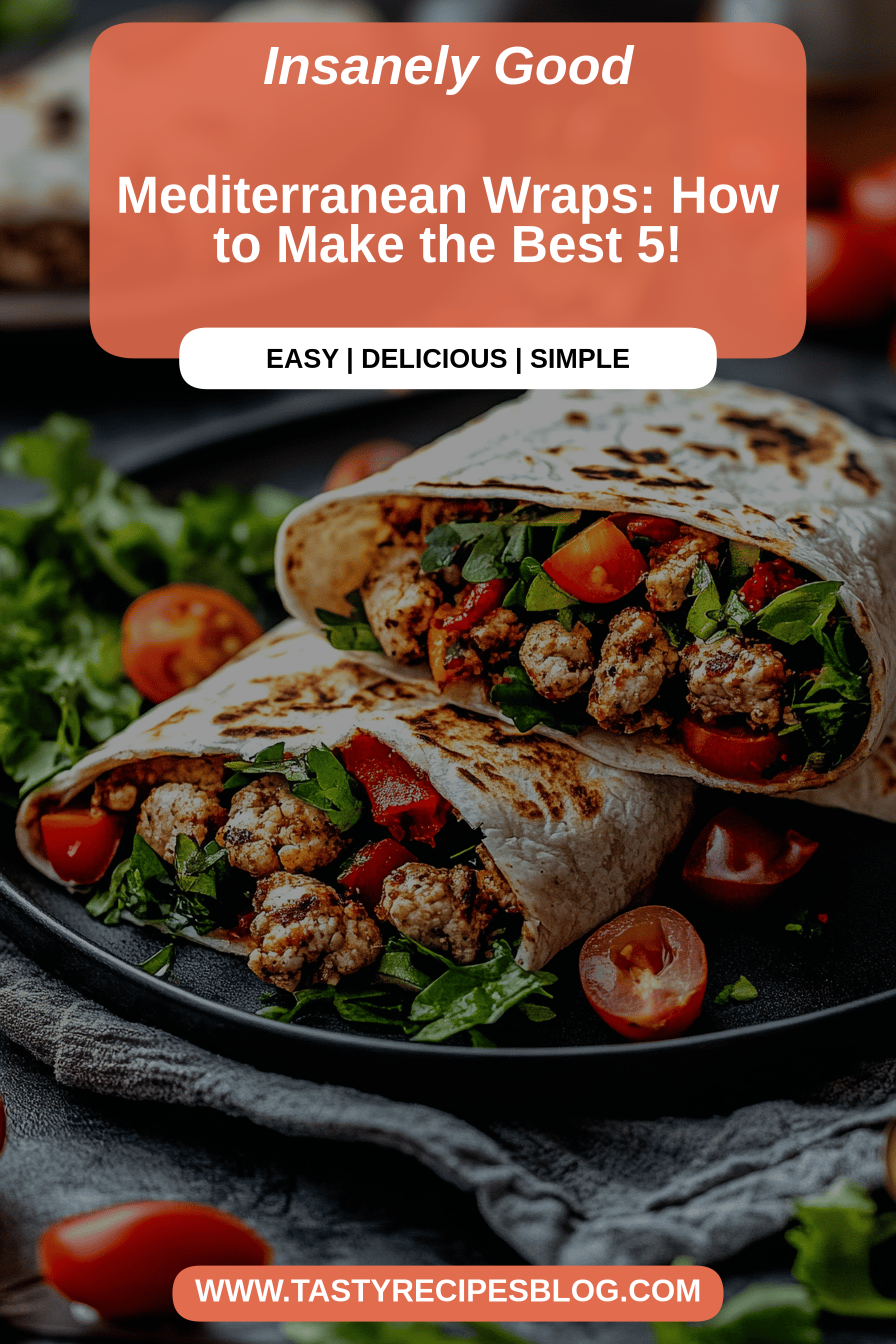
There are some recipes that just stick with you, aren’t there? The ones that become your go-to for lazy weeknights, impress your friends without stressing you out, and always, *always* disappear from the plate in record time. For me, that’s these Mediterranean wraps. I remember the first time I stumbled upon a variation of this idea – it was years ago, and I was desperately trying to find something healthy, quick, and packed with flavor for my kids, who were suddenly VERY picky. It felt like a miracle! They’re so vibrant and fresh, a world away from the usual heavy sandwiches, and honestly, they’ve saved me on more than one occasion when I’ve had unexpected guests or just needed a flavor pick-me-up. If you’ve ever loved a really good Greek salad or craved the zesty brightness of lemon and herbs, you’re going to adore these. They’re not complicated, but they taste like they took hours. Think of them as a sunshine-filled hug in a wrap, bursting with all the best flavors of the Mediterranean coast.
What are Mediterranean wraps?
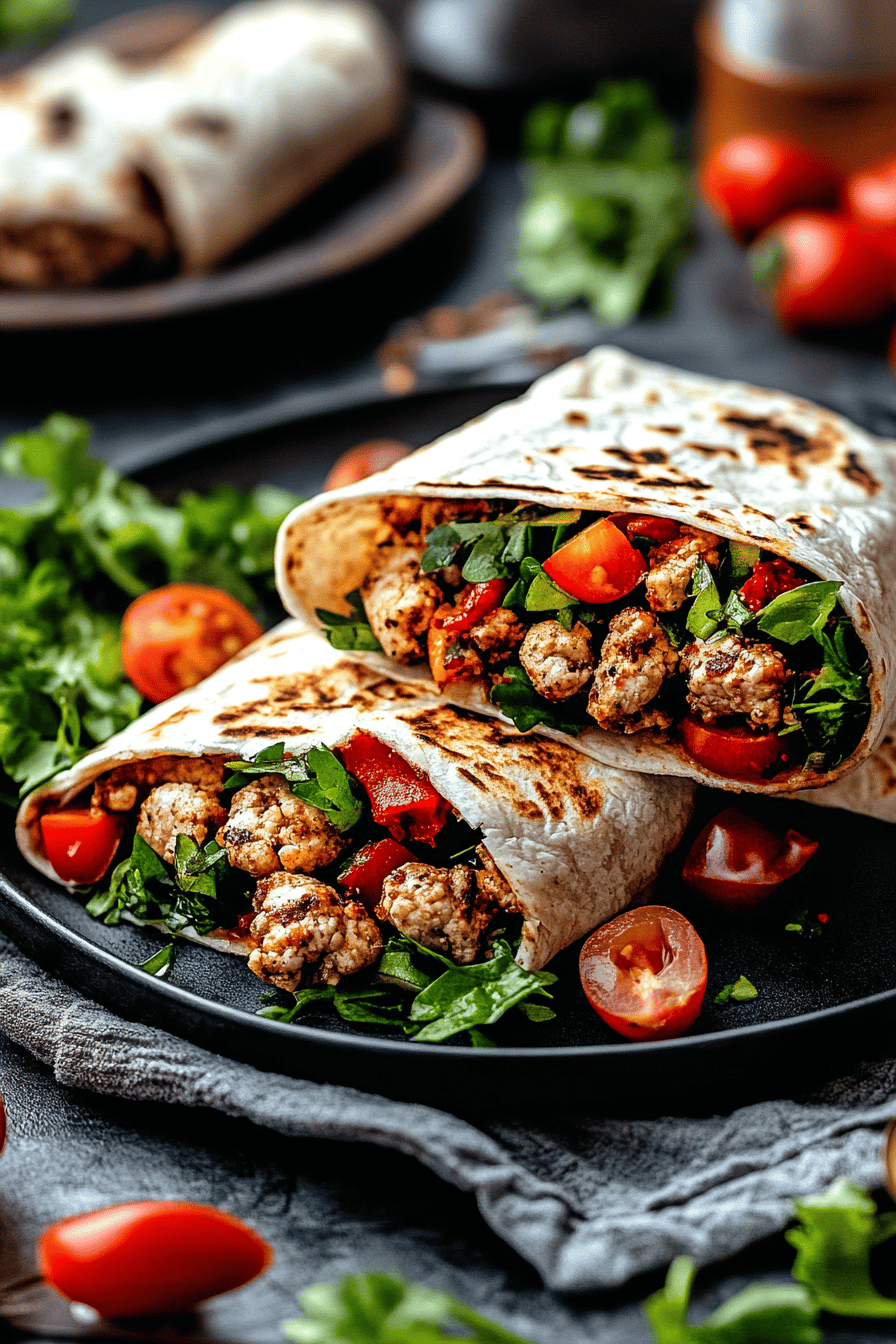
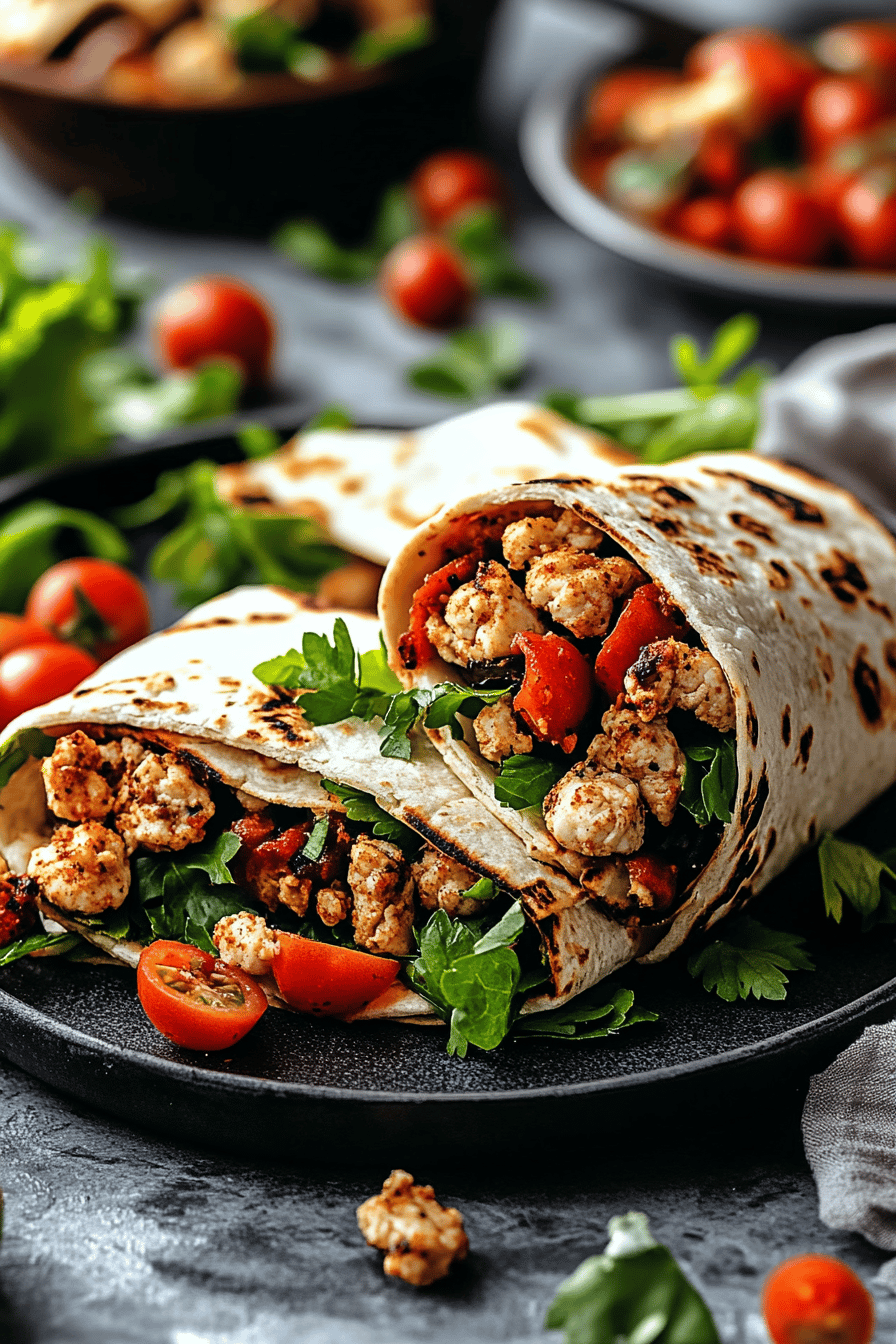
So, what exactly are we talking about when I say “Mediterranean wraps”? It’s not just shoving some hummus and veggies into a tortilla, though that’s a good start! These wraps are a symphony of textures and tastes, designed to transport you straight to a sun-drenched Greek island. We’re talking about tender, flavorful fillings – think perfectly seasoned chicken or chickpeas, crisp cucumbers, juicy tomatoes, briny olives, and creamy feta cheese – all nestled inside soft, warm flatbreads. The magic really happens with the dressing. It’s usually a bright, zesty lemon-herb vinaigrette that ties everything together. It’s essentially a deconstructed, handheld version of your favorite Mediterranean salad, but somehow even better because it’s all wrapped up and ready to go. It’s the kind of meal that feels both indulgent and incredibly good for you, a perfect balance that’s hard to find.
Why you’ll love this recipe?
What are the reasons why this recipe has become a staple in my kitchen rotation?flavor! It’s just incredible. You get that tangy lemon, the savory herbs, the salty feta, the sweet tomatoes, and that satisfying crunch from the veggies. It’s a party in your mouth! And the best part? It’s surprisingly simpleI can whip these up in about 30 minutes from start to finish, which is a lifesaver on busy weeknights when nobody wants tocost-effective. Most of the ingredients are pantry staples or easy to find at any grocery store, and you don’t need anything fancy. What I love most, though, is the versatility. You can totally customize these wraps to your liking. Don’t like olives? Leave them out! Have some leftover roasted vegetables? Toss them in! It’s a recipe that’s really forgiving and adaptable. If you enjoy my Greek Quinoa Salad or my Lemon Herb Roasted Chicken, you’ll find similar flavor profiles here, but in a fun, portable package. This recipe stands out because it’s less about precise technique and more about fresh, vibrant ingredients coming together harmoniously. It’s a guaranteed crowd-pleaser, even with the pickiest eaters.
How to Make Mediterranean Wraps
Quick Overview
The process is wonderfully straightforward. You’ll basically mix up a bright, zesty dressing, prepare your chosen filling (chicken or chickpeas are my favorites!), chop your fresh veggies, and then assemble everything into soft flatbreads. It’s all about layering those delicious Mediterranean flavors. What makes this method special is its speed and simplicity. You don’t need to be a gourmet chef to nail these. It’s the perfect meal for when you want something healthy and delicious without spending hours in the kitchen. I promise, the hardest part will be resisting eating all the filling before you even get to wrap it!
Ingredients
For the Main Filling:
1 pound boneless, skinless chicken breasts, cut into bite-sized pieces (or 2 cans of chickpeas, drained and rinsed)
1 tablespoon olive oil
1 teaspoon dried oregano
1/2 teaspoon garlic powder
Salt and freshly ground Black Pepper to taste
*Tip: For the chicken, I like to use thighs because they stay incredibly juicy, but breasts work great too. Just be careful not to overcook them! If you’re using chickpeas, make sure they’re thoroughly rinsed to get rid of any tinny flavor.*
For the Veggies & Feta:
1 cup cherry tomatoes, halved or quartered
1/2 English cucumber, diced
1/4 red onion, thinly sliced
1/2 cup Kalamata olives, pitted and halved
1/2 cup crumbled feta cheese
Fresh parsley or mint, chopped (for garnish)
*Prep Note: I always try to dice the cucumber and tomatoes to a similar size so you get a bit of everything in each bite. Red onion can be strong, so thinly slicing is key, or you can soak it in cold water for 10 minutes to mellow its bite.*
For the Zesty Lemon-Herb Dressing:
1/4 cup extra virgin Olive oil
2 tablespoons fresh lemon juice
1 teaspoon Dijon mustard
1 clove garlic, minced
1/2 teaspoon dried oregano
Salt and freshly ground black pepper to taste
*Consistency Tip: This dressing is meant to be bright and emulsified. If it seems too thick, add a tiny splash of water. If it’s too thin, a little more Dijon can help thicken it. You can also whisk in a pinch of red pepper flakes for a little heat!*
For the Wraps:
4-6 large whole wheat or spinach tortillas/flatbreads
Hummus, optional (for spreading on the tortilla)
*Serving Suggestion: Warming the tortillas slightly makes them more pliable and less likely to crack when you wrap them. A quick spin in a dry skillet or a few seconds in the microwave does the trick.*
Step-by-Step Instructions
Step 1: Preheat & Prep Pan
If you’re using chicken, start by preheating a large skillet over medium-high heat. You don’t need to add oil just yet, as the chicken will release its own juices. If you’re going with chickpeas, you can skip the preheating for now, as they just need a quick warm-through later.
Step 2: Mix Dry Ingredients
While the pan heats up, in a medium bowl, toss your chicken pieces (if using) with 1 tablespoon of olive oil, 1 teaspoon of dried oregano, 1/2 teaspoon of garlic powder, and a generous pinch of salt and pepper. Make sure each piece is nicely coated. This simple seasoning is the foundation for that delicious, savory flavor.
Step 3: Mix Wet Ingredients
In a small bowl or jar, whisk together all the ingredients for the dressing: 1/4 cup extra virgin olive oil, 2 tablespoons fresh lemon juice, 1 teaspoon Dijon mustard, 1 minced clove of garlic, 1/2 teaspoon dried oregano, and salt and pepper to taste. Keep whisking until it’s well combined and slightly emulsified. It should smell incredibly fresh and zesty!
Step 4: Combine
Add the seasoned chicken to the hot skillet. Cook for about 5-7 minutes, stirring occasionally, until the chicken is cooked through and nicely browned. If using chickpeas, you can add them to the skillet for the last minute or two just to warm them up. Once cooked, remove the chicken (or chickpeas) from the skillet and set aside in a clean bowl.
Step 5: Prepare Filling
Now for the assembly! In a large bowl, combine the halved cherry tomatoes, diced cucumber, thinly sliced red onion, and halved Kalamata olives. Add the cooked chicken or warmed chickpeas to this bowl. Drizzle about half of the zesty lemon-herb dressing over the mixture and toss gently to coat everything. Add about half of the crumbled feta cheese and toss again. You want everything to be nicely coated, but not swimming in dressing.
Step 6: Layer & Swirl
Lay out your tortillas. If you like, spread a thin layer of hummus on each one. Spoon a generous amount of the filling mixture onto the center of each tortilla. Top with a little more feta cheese and a sprinkle of fresh parsley or mint. You want to pile it high, but not so much that it’s impossible to wrap!
Step 7: Bake
This step is optional, but I love it! Fold the sides of the tortilla inwards, then tightly roll from the bottom up to create a neat wrap. You can serve them as is, or for an extra special touch, heat a dry skillet over medium heat and place the seam-side down wraps in the skillet. Cook for 2-3 minutes per side, until lightly golden and slightly toasted. This helps seal the wrap and adds a lovely warmth and texture.
Step 8: Cool & Glaze
These are best served warm, so no cooling is really needed! The “glaze” here is actually the delicious dressing we made. Drizzle any remaining dressing over the top of the wraps or serve it on the side for dipping. The fresh herbs on top add a beautiful finishing touch.
Step 9: Slice & Serve
If you’ve toasted them, they’ll hold their shape beautifully. You can slice them in half diagonally for a more elegant presentation, or just hand them out whole. Serve immediately and watch them disappear!
What to Serve It With
These Mediterranean wraps are pretty much a complete meal on their own, but they also play wonderfully with a few sidekicks. For breakfast, I love pairing one with a strong cup of coffee and maybe some Greek Yogurt on the side. It feels much more substantial than just toast. For a weekend brunch spread, serve them sliced in half alongside a platter of fresh fruit, maybe some more olives and feta, and a pitcher of iced herbal tea. It’s a lighter option than a big quiche but feels just as special. As a lighter dessert, these are surprisingly satisfying, especially with a sprinkle of fresh mint – the bright flavors cleanse the palate beautifully after a meal. And for cozy snacks, a single wrap is perfect. I’ll often make a batch and have one later in the afternoon when that 3 pm slump hits. My family loves them with a side of pita chips for extra crunch, and sometimes we’ll have them with a small bowl of lentil soup during the colder months. They’re incredibly versatile and always a hit!
Top Tips for Perfecting Your Mediterranean Wraps
I’ve made these wraps more times than I can count, and over the years, I’ve picked up a few tricks that really make a difference. When it comes to the Zucchini Prep, if you decide to add it (which I highly recommend for extra moisture and a lovely texture!), make sure to salt it well and let it sit for about 10 minutes to draw out excess water. Then, give it a good squeeze before adding it to the filling. This step is crucial to avoid a watery wrap. For Mixing Advice, my biggest tip is to be gentle! You don’t want to mash up the tomatoes or cucumber. Toss everything just enough to combine. Overmixing can make the filling mushy. When it comes to Swirl Customization, if you’re using a more vibrant filling like my Feta and Spinach Stuffed Chicken, you can swirl that into the mixture before wrapping for a beautiful visual effect. For the general filling, focus on even distribution of ingredients so every bite is balanced. For Ingredient Swaps, feel free to play around! If you don’t have Kalamata olives, green olives will work. If feta isn’t your jam, a sprinkle of goat cheese is delicious. For a vegan version, skip the feta and maybe add some toasted pine nuts for extra texture. Baking Tips are really about personal preference. If you like your wraps crispy, toast them longer. If you prefer them soft, just a quick warm-through is fine. And for Glaze Variations, if you don’t want to use the lemon-herb dressing as a “glaze,” a drizzle of tahini or even a dollop of Greek yogurt can be fantastic alternatives.
Storing and Reheating Tips
These Mediterranean wraps are honestly best enjoyed fresh, but I know life gets busy! If you have leftovers, here’s what I do. For Room Temperature storage, it’s best to wrap them tightly in foil or plastic wrap and eat them within a few hours. They tend to get a little soggy if left out too long, especially with the fresh veggies. For Refrigerator Storage, wrap them individually and tightly in plastic wrap or place them in an airtight container. They’ll keep well for about 2-3 days. I find the textures are still pretty good after a day or two. For Freezer Instructions, I don’t typically freeze these because the fresh vegetables can get a bit watery upon thawing. However, if you *really* need to, I’d recommend making the filling separately and storing it in an airtight container, then assembling and wrapping just before serving. This way, the textures remain much better. For Glaze Timing Advice, if you’re storing leftovers, it’s best to keep the dressing separate. Drizzle it on just before serving to prevent the wraps from becoming soggy. The feta and herbs are fine to add beforehand, but the dressing is best applied fresh!
Frequently Asked Questions
Final Thoughts
I truly hope you give these Mediterranean wraps a try. They’re more than just a recipe to me; they’re a symbol of easy, delicious, healthy eating that my whole family loves. The combination of fresh, vibrant ingredients all wrapped up in a soft tortilla is just perfection. It’s the kind of meal that makes you feel good from the inside out. If you’re looking for other light and flavorful options, you might also enjoy my Lemon Herb Roasted Salmon or my Quinoa Tabbouleh Salad. They share that same fresh, Mediterranean spirit. I can’t wait to hear what you think, or even better, what amazing variations you come up with! Please leave a comment below and let me know how your Mediterranean wraps turned out. And if you snap a photo, tag me on social media – I love seeing your culinary creations!

Mediterranean Wraps
Ingredients
Main Ingredients
- 4 tortillas Large whole-wheat tortillas
- 0.75 cup Hummus
- 1 cup Cucumber diced
- 1 cup Tomatoes diced
- 0.5 cup Red onion thinly sliced
- 0.25 cup Kalamata olives pitted and sliced
- 4 tablespoons Feta cheese crumbled
- 2 tablespoons Lemon juice
- 2 tablespoons Olive oil
- 0.25 teaspoon Dried oregano
- 0.125 teaspoon Salt
- 0.125 teaspoon Black pepper
Instructions
Preparation Steps
- In a small bowl, whisk together lemon juice, olive oil, oregano, salt, and pepper.
- Lay out tortillas. Spread hummus evenly on each tortilla.
- Top with cucumber, tomatoes, red onion, olives, and feta cheese.
- Drizzle with the lemon-herb dressing.
- Fold in the sides of the tortilla and then roll up tightly.
- Cut in half and serve immediately.


