Oh, this Japanese Cotton Cheesecake! If there’s one dessert that has earned a permanent spot in my heart (and my baking rotation), it’s this one. It’s one of those recipes that sounds a little fancy, a little intimidating maybe, but I promise you, it’s surprisingly simple and yields results that are just… well, magical. You know how sometimes you crave something sweet, but you don’t want anything too heavy or dense? That’s where this beauty shines. It’s like a cloud that melts in your mouth, a delicate whisper of sweetness and tang that’s way more sophisticated than your average cheesecake, but still feels wonderfully homey. It reminds me of those little bakeries in Tokyo I used to dream about, where everything looked and tasted like pure artistry. Honestly, if you’ve ever felt like cheesecake was too much work or too rich, this Japanese Cotton Cheesecake is about to change your mind entirely. It’s my secret weapon when friends pop over unexpectedly or when I just need a little moment of pure bliss.
What is Japanese cotton cheesecake?
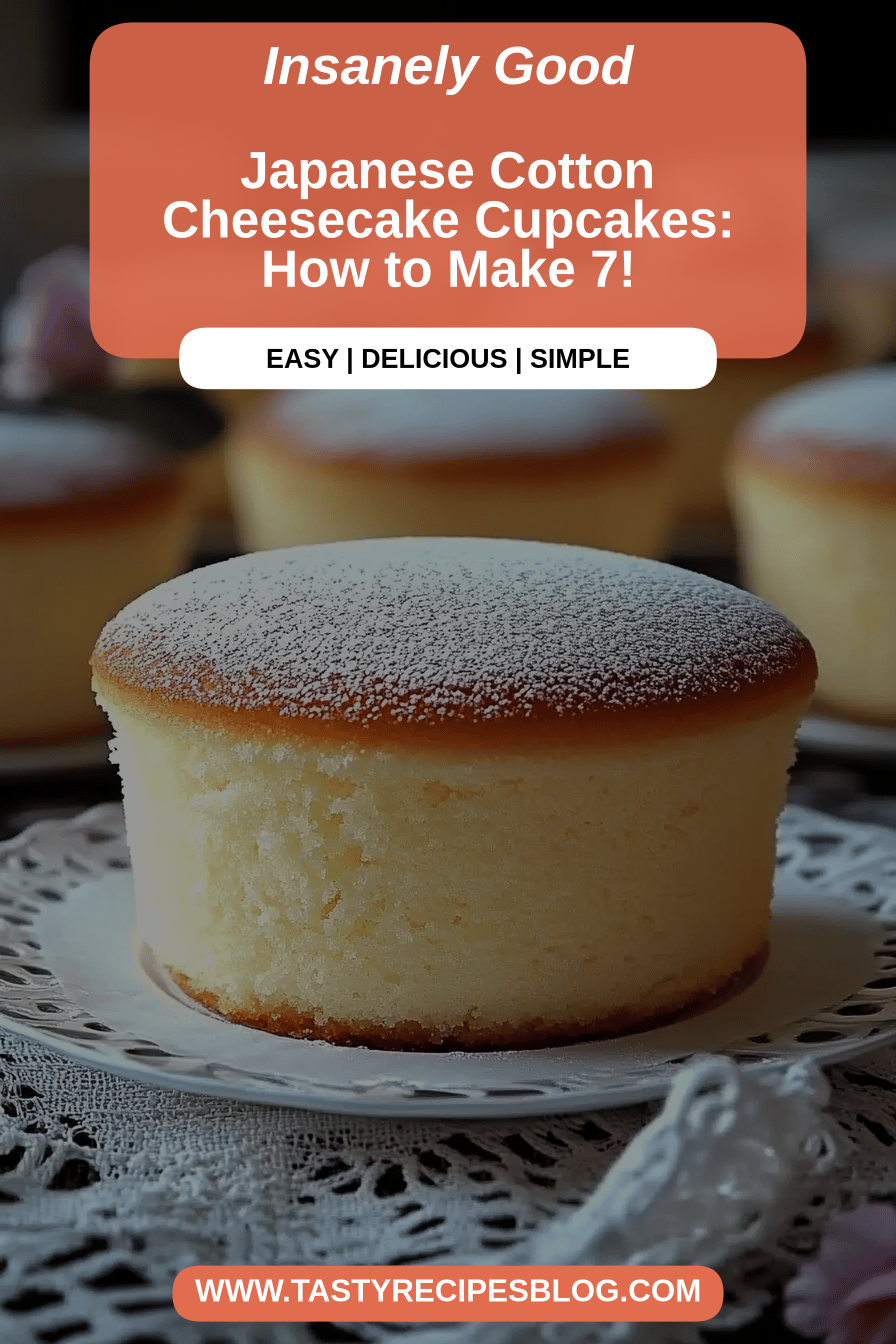
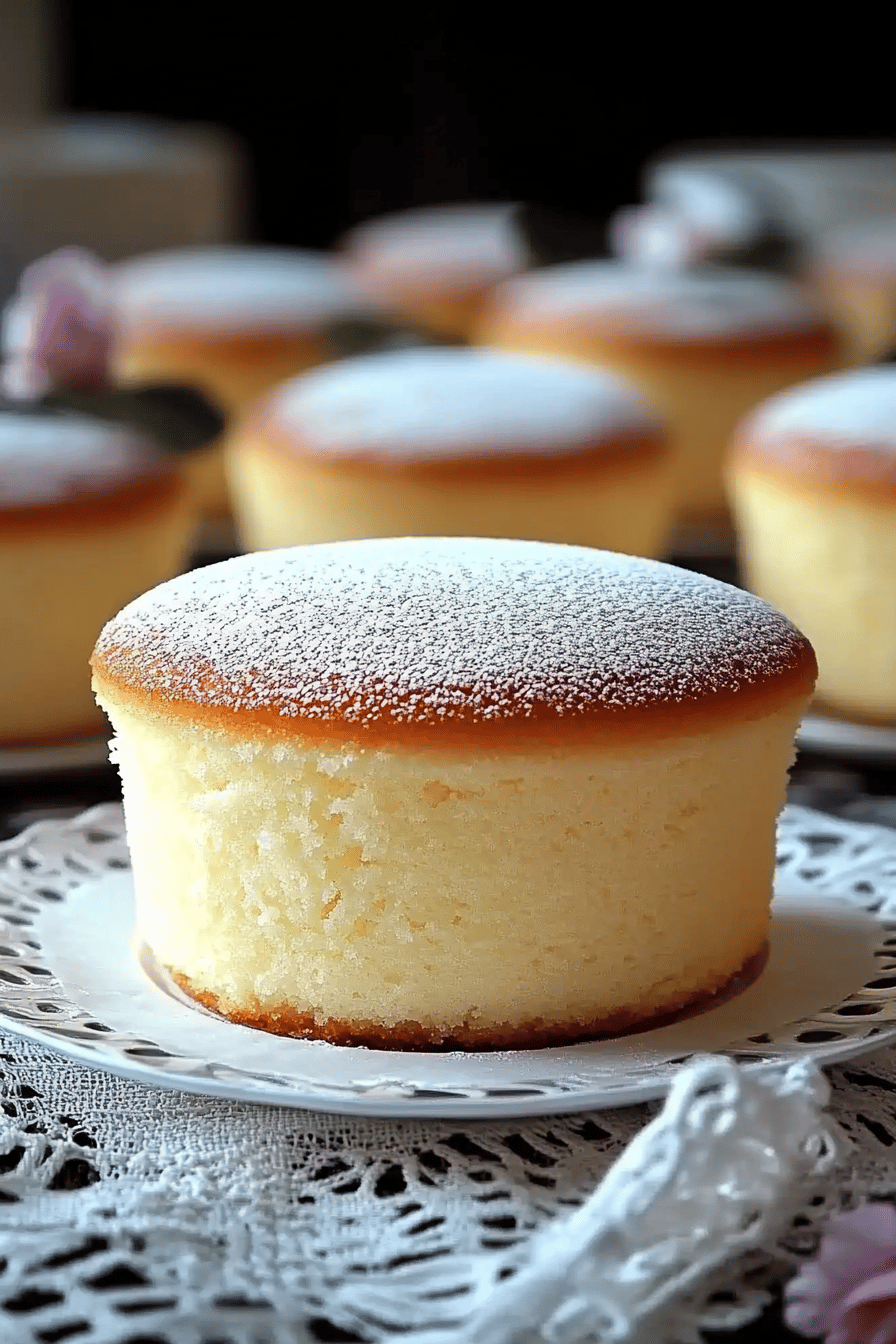
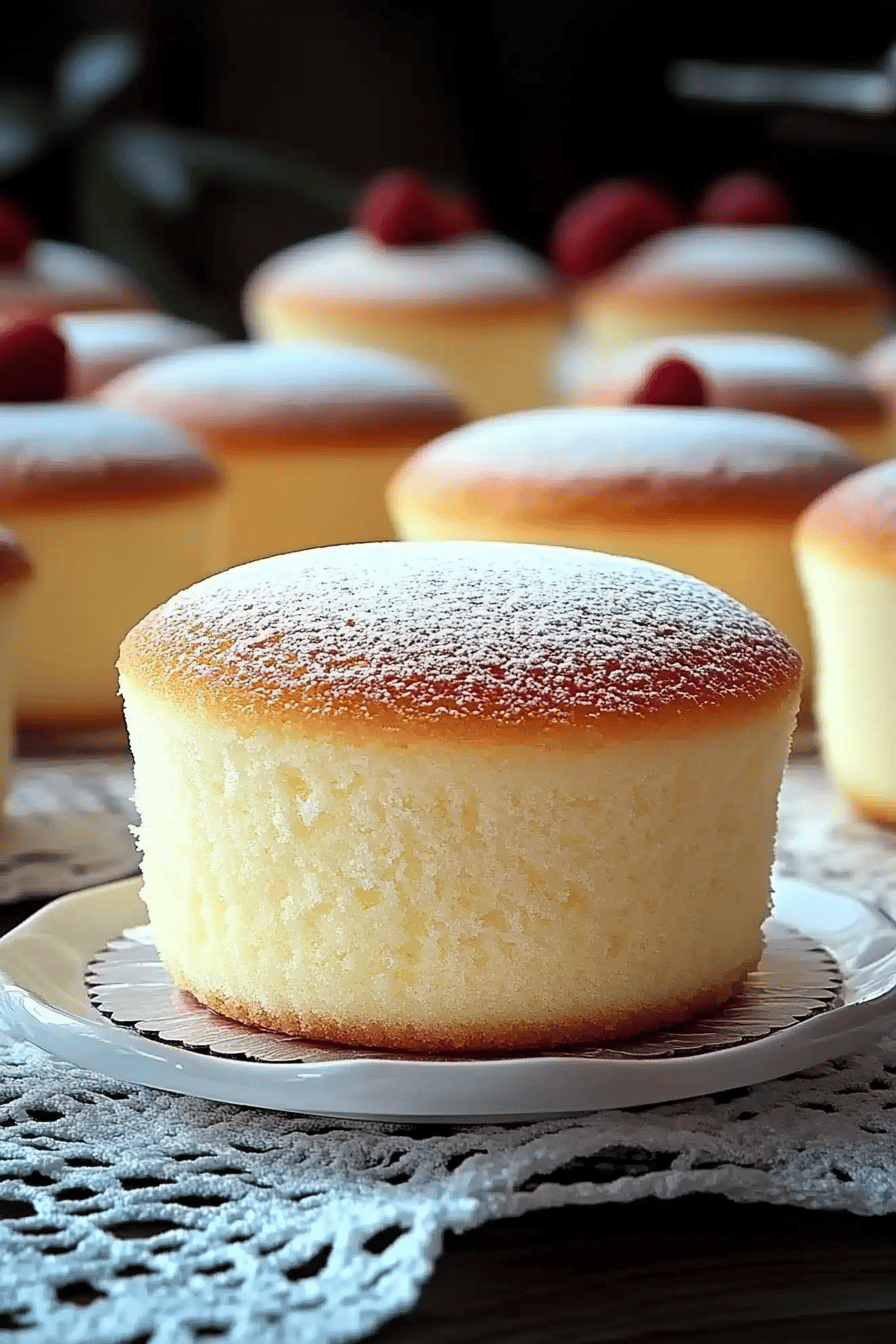
So, what exactly is this delightful dessert? Think of it as the airy, fluffy cousin of the New York-style cheesecake you might be used to. Instead of being dense and rich, this Japanese Cotton Cheesecake is incredibly light and jiggly, almost like a soufflé. The name “cotton” really does describe its texture perfectly – it’s as soft and cloud-like as a piece of cotton. This magic is achieved through a few key techniques, primarily whipping egg whites to stiff peaks and baking it in a water bath, which creates a super humid environment. This gentle cooking method prevents the cheesecake from cracking and ensures that incredibly smooth, delicate texture. It’s not overly sweet, allowing the subtle tang of the Cream Cheese to really sing, complemented by a hint of lemon. It’s essentially a dessert that’s both incredibly satisfying and surprisingly easy to eat, slice after slice!
Why you’ll love this recipe?
Why is this Japanese cotton cheesecake a staple in my kitchen?flavor is just out of this world. It’s this perfect balance of creamy, tangy, and subtly sweet. You get that unmistakable Cream Cheese goodness, but it’s lifted by a bright hint of lemon zest and vanilla, making it refreshing rather than heavy. It’s the kind of dessert that makes you close your eyes with the first bite. Then there’s the simplicity. Despite its sophisticated appearance and texture, it’s not complicated at all. The steps are straightforward, and once you get the hang of it, you’ll be whipping this up with ease. I’ve even made it on a slightly rushed afternoon and had it ready for dessert. And let’s talk about Cost-efficiency: What is the best way to measure cost-efficiency?! Most of the ingredients are pantry staples, which is always a win. No obscure, expensive items needed here, just good old cream cheese, eggs, sugar, and a few flavorings. It feels like a decadent treat without breaking the bank. Plus, the versatility is fantastic. I love it plain, just as it is, but it’s also amazing with a light dusting of powdered sugar, a dollop of fresh berries, or even a spoonful of sweetened condensed milk if you’re feeling extra indulgent. It’s perfect for a quiet afternoon tea, a special occasion brunch, or just when you need a little pick-me-up. What I love most about this specific recipe is how forgiving it is. Even if you’re not an expert baker, following these steps will lead you to a beautiful, delicious cheesecake. It truly stands out because it’s so different from a traditional cheesecake – it’s airy, delicate, and utterly delightful!
How to Make [Recipe Name]
Quick Overview
This Japanese Cotton Cheesecake is all about gentle technique. We’ll whip up a creamy base with Cream Cheese and egg yolks, then fold in perfectly whipped egg whites for that signature lightness. Baking it in a water bath is key – it ensures even cooking and that incredibly soft, melt-in-your-mouth texture. It might sound like a lot, but trust me, each step builds towards that perfect fluffy result. It’s a surprisingly manageable process that rewards you with something truly special.
Ingredients
For the Main Batter:
Cream Cheese: 8 ounces (about 225g), softened. Make sure it’s really softened, like butter-soft, otherwise you’ll end up with lumps, and nobody wants that! I always take mine out of the fridge at least an hour beforehand.
Milk: 1/2 cup (120ml). Whole milk is best for richness, but I’ve tested this with almond milk and it actually made it even creamier, which was a delightful surprise!
Unsalted Butter: 4 tablespoons (56g). Good quality butter makes a difference in flavor.
All-Purpose Flour: 4 tablespoons (30g). Sifted, of course. Sifting is your friend here, it helps prevent lumps and makes everything incorporate more smoothly.
Egg Yolks: 4 large. These add richness and structure to the batter.
Lemon Zest: 1 tablespoon. Freshly grated from about half a lemon. This is non-negotiable for that bright, fresh flavor that cuts through the richness.
Vanilla Extract: 1 teaspoon. Use a good quality one for the best aroma and taste.
For the Meringue:
Egg Whites: 4 large. Make sure they are at room temperature. This helps them whip up to a better volume. And be super careful to get absolutely NO YOLK in the whites – even a tiny bit can prevent them from whipping properly.
Granulated Sugar: 1/2 cup (100g). This is what we’ll use to create that lovely, stable meringue.
Cream of Tartar: 1/4 teaspoon. This is a stabilizer for the egg whites, helping them whip up fluffier and stay that way. If you don’t have it, a tiny squeeze of lemon juice or white vinegar can work in a pinch.
For the Water Bath:
Hot Water: Enough to fill about halfway up the sides of your cake pan. I usually use boiling water straight from the kettle for this.
For the Optional Glaze:
Apricot Jam: 2 tablespoons, warmed and strained. This gives a beautiful sheen and a subtle fruitiness. You can also use a simple powdered sugar glaze if you prefer.
Step-by-Step Instructions
Step 1: Preheat & Prep Pan
First things first, let’s get our oven and our pan ready. Preheat your oven to 325°F (160°C). Now, for the pan, you’ll need a 7 or 8-inch round cake pan. The trick to getting a beautiful, crack-free cheesecake is to use a water bath. So, what I do is wrap the outside of my cake pan tightly with a couple of layers of heavy-duty aluminum foil. This prevents any water from seeping into the cake while it bakes. Make sure it’s sealed really well! Then, lightly grease the inside of the pan and line the bottom with parchment paper. You can also line the sides if you want to be extra sure about easy removal.
Step 2: Mix Dry Ingredients
In a medium bowl, whisk together the sifted flour. That’s it for this step! It seems simple, but it’s important to have your dry ingredients measured and ready to go. Sifting the flour now ensures it’s light and airy before we even start combining things.
Step 3: Mix Wet Ingredients
In a separate, larger bowl (I usually use a double boiler or a heatproof bowl set over a saucepan of simmering water for this part, but you can also do it very gently on low heat directly in the saucepan), combine the softened Cream Cheese, milk, and butter. Whisk everything together until it’s smooth and creamy. You don’t want any lumps of cream cheese! Once smooth, stir in the egg yolks, lemon zest, and vanilla extract. Keep whisking until everything is beautifully incorporated and you have a smooth, luscious batter. It should smell absolutely heavenly already!
Step 4: Combine
Now, it’s time to bring our dry and wet ingredients together. Gradually add the sifted flour to the cream cheese mixture, whisking gently until just combined. The key here is *not* to overmix. Overmixing can develop the gluten in the flour, which can make your cheesecake tough. We want it tender! You should have a smooth, somewhat thick batter. If you see any small lumps of flour, just whisk a little more, but stop as soon as it’s smooth.
Step 5: Prepare Filling
This is where the magic really happens! In a clean, dry bowl (seriously, make sure it’s spotless and dry, or your meringue won’t whip!), beat the egg whites with an electric mixer on medium speed. Once they start to get foamy, add the cream of tartar. Continue beating until soft peaks form. Now, gradually add the granulated sugar, about a tablespoon at a time, while continuing to beat on medium-high speed. Keep beating until you have stiff, glossy peaks. When you lift the whisk, the peaks should stand straight up without curling over. This is your meringue – the secret to that cottony lightness!
Step 6: Layer & Swirl
Gently fold about a third of the meringue into your cream cheese batter. Use a spatula and a gentle folding motion – like you’re scooping from the bottom and folding over the top. Be careful not to deflate the meringue too much! Once that’s incorporated, fold in the remaining meringue in two more additions. The batter should be light and airy, with no streaks of egg white visible. Pour this glorious mixture into your prepared cake pan. If you’re feeling adventurous, you can give the pan a gentle tap on the counter to release any large air bubbles, but don’t overdo it. Some people like to swirl it a bit, but I usually leave it smooth for this recipe to maximize the fluffiness.
Step 7: Bake
Place your foil-wrapped cake pan into a larger roasting pan. Carefully pour the hot water into the roasting pan, making sure it comes about halfway up the sides of your cake pan. This is your water bath! Gently slide the whole setup into your preheated oven. Bake for about 55-70 minutes, or until the cheesecake is set and lightly golden brown on top. It should still have a slight jiggle in the center – that’s what we’re looking for! If the top starts browning too quickly, you can loosely tent it with foil.
Step 8: Cool & Glaze
Once baked, turn off the oven, crack the oven door open slightly, and let the cheesecake cool in the oven for about an hour. This gradual cooling helps prevent cracking. After an hour, remove it from the oven and the water bath, remove the foil, and let it cool completely on a wire rack. Once it’s completely cool, you can either serve it as is, or brush the top with warmed, strained apricot jam for a beautiful, glossy finish. I love this step for that extra touch of elegance!
Step 9: Slice & Serve
For the cleanest slices, I like to run a thin, sharp knife under hot water and wipe it dry before each cut. This helps get those beautiful, clean edges. Serve chilled or at room temperature. It’s absolutely delicious on its own, but a few fresh berries or a light dusting of powdered sugar never hurts!
What to Serve It With
This Japanese Cotton Cheesecake is so wonderfully versatile, it fits into almost any meal or occasion! For a simple and satisfying breakfast, I love pairing a slice with a steaming mug of black coffee. The subtle sweetness and tang are just the perfect wake-up call. If you’re planning a lovely brunch, this cheesecake is an absolute showstopper. Serve it on a beautiful platter with a side of fresh berries – strawberries, blueberries, raspberries – and maybe a sprig of mint for a pop of color. A light, bubbly mimosa or a refreshing iced tea would be perfect alongside it. When it’s time for dessert after a special meal, it’s elegant enough to impress. I sometimes serve it with a very light fruit coulis, like a raspberry or passionfruit sauce, to add another layer of flavor. And for those quiet, cozy snacks when you just need something comforting? It’s perfect on its own, perhaps with a warm cup of herbal tea. My kids always ask for this when they have friends over, and it’s always a huge hit. It’s genuinely a crowd-pleaser, no matter how you serve it!
Top Tips for Perfecting Your Japanese Cotton Cheesecake
Over the years, I’ve learned a few tricks that have really helped me nail this Japanese Cotton Cheesecake every single time. Firstly, when it comes to the cream cheese, make absolutely sure it’s at room temperature. I can’t stress this enough! Cold cream cheese equals lumpy cheesecake, and nobody wants that. Softened cream cheese melts into a smooth, luscious base so much easier. For the meringue, cleanliness is key! Any trace of grease or yolk in your egg whites will prevent them from whipping up properly. I always wipe down my bowl and whisk with a bit of lemon juice and dry it thoroughly. And speaking of whipping, don’t overbeat the egg whites once the sugar is added. Stop as soon as you reach those stiff, glossy peaks. Overbeating can make them dry and difficult to fold in. When you’re combining the meringue with the batter, use a light hand and a gentle folding motion. It’s like you’re trying to keep all that precious air in. Think of it as ‘lifting and folding,’ not ‘stirring.’ For baking, the water bath is non-negotiable. It creates a moist environment that bakes the cheesecake gently and evenly, preventing it from cracking and giving it that signature jiggly, tender texture. If you ever worry about the foil seal on your pan, you can use a disposable aluminum pan inside a slightly larger pan, then fill that outer pan with water. For the glaze, less is more! I like to warm up my apricot jam just enough to make it brushable. Too much heat and it can melt the cheesecake surface. Straining it ensures a super smooth finish. If you want to swap out the lemon zest, orange zest works beautifully too, or even a touch of almond extract for a different flavor profile. And a little lesson I learned the hard way: don’t be tempted to overbake it! A slight jiggle in the center is exactly what you want. It will continue to set as it cools. Trust me on this one!
Storing and Reheating Tips
Keeping this Japanese Cotton Cheesecake fresh and delicious is pretty straightforward, and I’ve got a few methods that work like a charm. If you plan on serving it within a day or two, room temperature storage is perfectly fine. Just make sure it’s completely cooled, then cover it loosely with plastic wrap or place it in an airtight container. It usually stays lovely for about 2 days this way, though I find it’s best eaten the day it’s made for peak fluffiness! For longer storage, the refrigerator is your best friend. Once the cheesecake is fully cooled, wrap it tightly in plastic wrap, then in a layer of aluminum foil, or place it in an airtight container. It will keep well in the fridge for up to 4-5 days. I notice the texture might firm up a tiny bit in the fridge, but it’s still absolutely delicious. If you want to freeze it, this cheesecake freezes surprisingly well! The key is to wrap it very, very well to prevent freezer burn. First, let it cool completely. Then, wrap it tightly in plastic wrap, followed by a good layer of aluminum foil. You can also place the wrapped cheesecake in a freezer-safe bag or container. It should stay good in the freezer for about 1-2 months. To thaw, transfer it to the refrigerator overnight. If you’ve added a glaze, I usually wait to add that until *after* it has been refrigerated or thawed, unless it’s a very light, thin glaze. For a jam glaze, it’s best applied when the cake is already chilled and ready to serve.
Frequently Asked Questions
Final Thoughts
So there you have it – my absolute favorite Japanese Cotton Cheesecake recipe! I really hope you give this one a try. It’s one of those recipes that feels like a little bit of sunshine in dessert form, and it’s so incredibly rewarding to pull that perfectly fluffy, delicate cheesecake out of the oven. It’s proof that you don’t need complicated techniques to achieve something truly spectacular. Whether you’re baking it for a special occasion or just because you’re craving something light and delicious, I promise it won’t disappoint. If you’re a fan of lighter desserts and are looking for something new, you might also enjoy my Classic Vanilla Bean Panna Cotta or my Lemon Lavender Scones – they both have that same delicate, refined quality. I can’t wait to hear what you think of this cheesecake! Please let me know in the comments below how yours turned out, or if you have any fun variations. Happy baking, my friends!

Japanese Cotton Cheesecake
Ingredients
Main Ingredients
- 8 oz Cream Cheese, softened
- 0.75 cup Granulated Sugar
- 6 large Eggs, separated
- 0.25 cup Milk
- 0.25 cup Unsalted Butter melted
- 1 tsp Vanilla Extract
- 0.25 cup All-Purpose Flour
- 0.25 cup Cornstarch
- 0.25 tsp Cream of Tartar
Instructions
Preparation Steps
- Preheat oven to 320°F (160°C). Grease and line a 9-inch round cake pan with parchment paper, extending the paper above the edges.
- In a double boiler or heatproof bowl set over simmering water, combine cream cheese and sugar. Stir until smooth and creamy.
- Remove from heat and whisk in egg yolks one at a time, then stir in milk, melted butter, and vanilla extract.
- Sift in flour and cornstarch, and whisk until just combined.
- In a separate clean bowl, beat egg whites and cream of tartar until stiff peaks form.
- Gently fold the egg whites into the cream cheese mixture in three additions, being careful not to deflate the egg whites.
- Pour batter into the prepared pan. Place the cake pan in a larger pan and add hot water to the larger pan to create a water bath (about 1 inch deep).
- Bake for 50-60 minutes, or until the top is golden brown and the cheesecake is set but still slightly wobbly.
- Turn off the oven and let the cheesecake cool in the oven with the door ajar for 1 hour.
- Remove from the oven and water bath, and let cool completely on a wire rack. Refrigerate for at least 4 hours before serving.