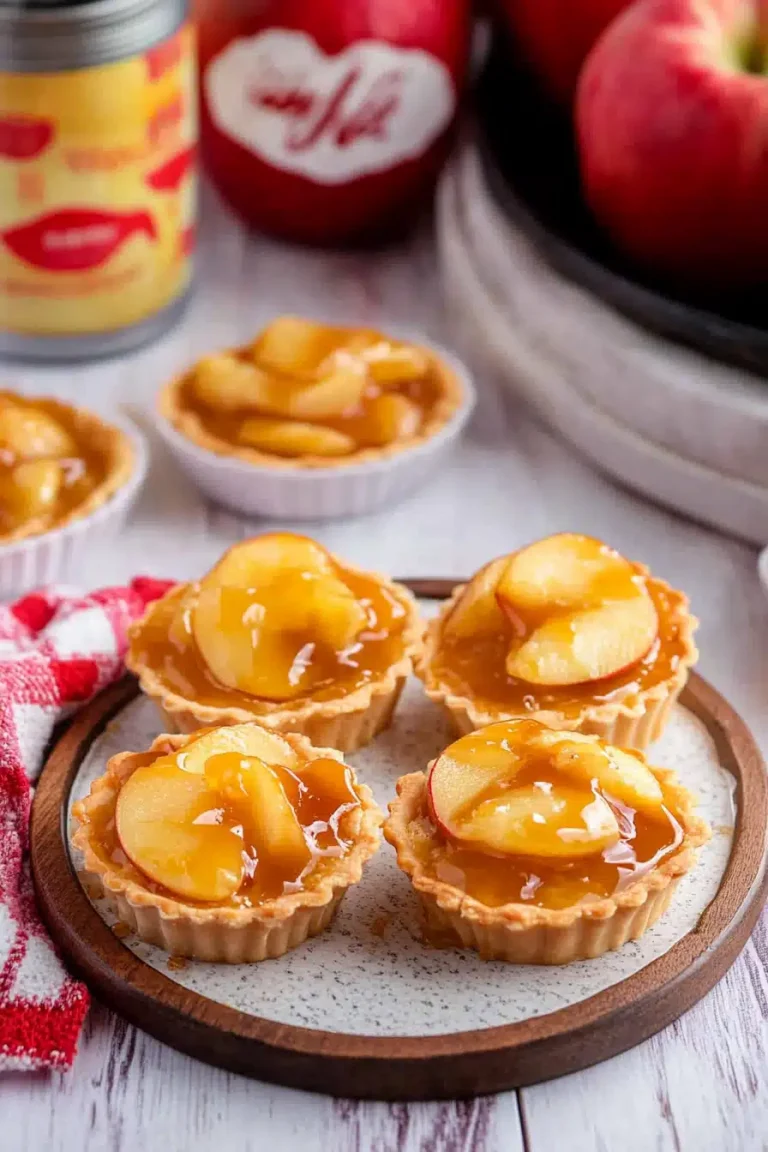
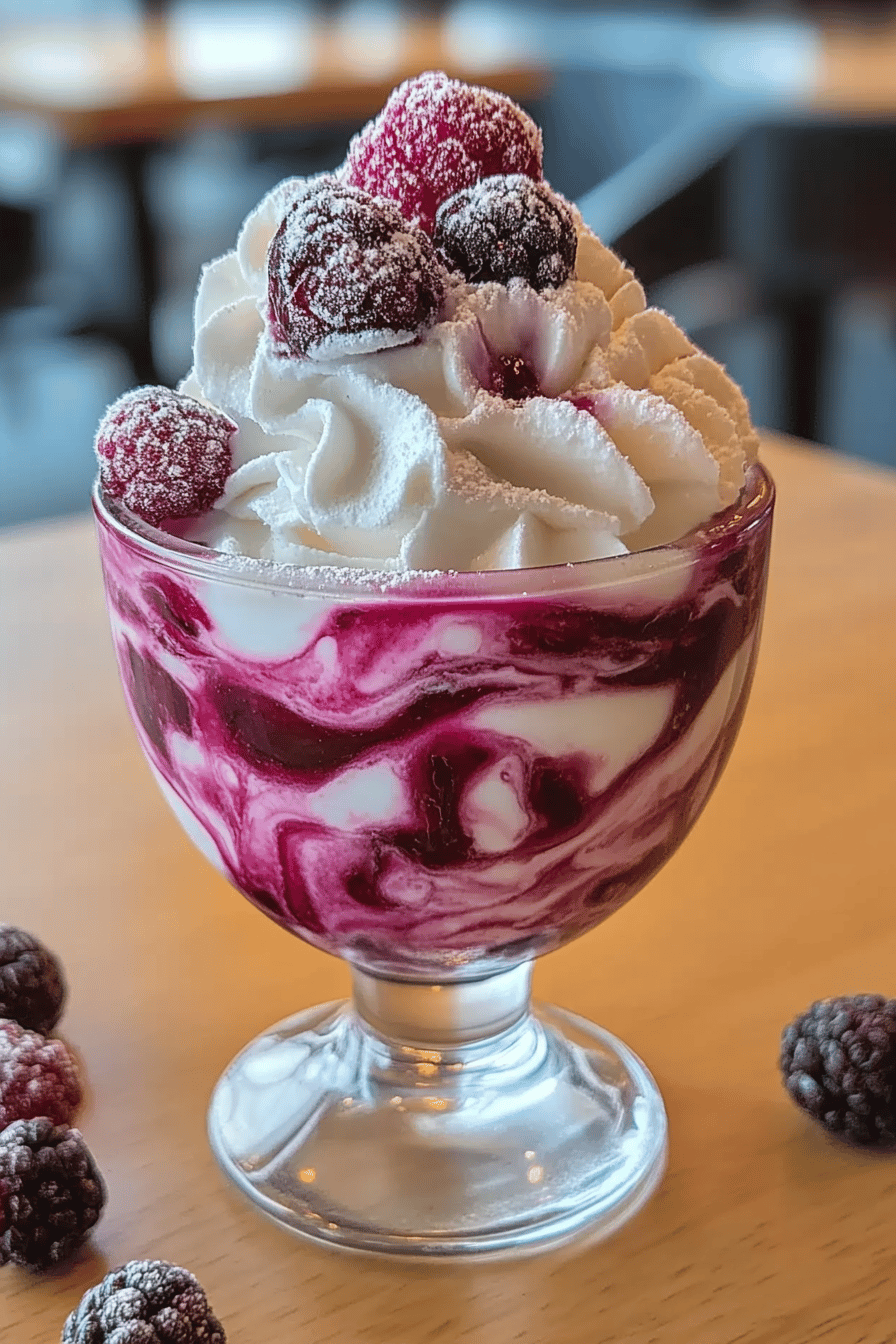
Oh, where do I even begin with this Winterberry Vanilla Swirl? It feels like a warm hug on a chilly afternoon, a little bit of magic that just brightens everything up. You know those recipes that just feel like *you*? This is one of those for me. I remember the first time I made it, a frantic attempt to use up some berries that were looking a little sad in the fridge, and a sudden craving for something comforting. It wasn’t just good, it was… soul-satisfying. It’s kind of like a really fancy coffee cake, but so much more forgiving and downright delightful. If you’ve ever loved a classic marble cake or a streusel-topped coffee cake, you’re going to fall head over heels for this. The combination of the slightly tart winterberries and the sweet, creamy vanilla is just *chef’s kiss*. It’s become my go-to for everything from unexpected guests to just needing a little pick-me-up after a long day. This Winterberry Vanilla Swirl is truly something special, and I’m so excited to share it with you.
What is Winterberry Vanilla Swirl?
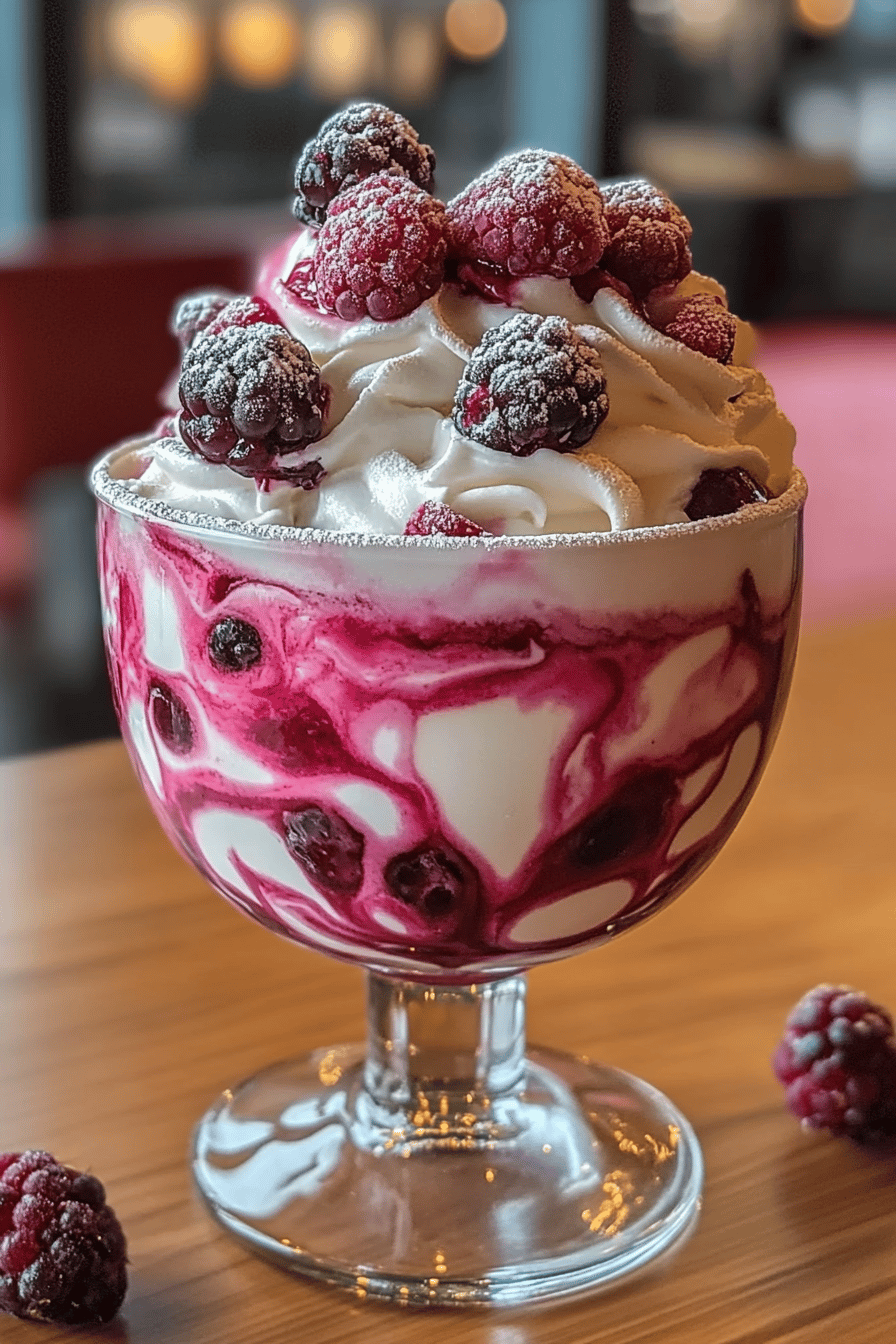
So, what exactly *is* this Winterberry Vanilla Swirl? Think of it as a wonderfully moist, tender cake that’s been kissed with both the vibrant tang of winterberries and the comforting sweetness of vanilla. It’s not just a simple mix of flavors; it’s the beautiful dance between them that makes it so addictive. The “swirl” part comes from how we layer and gently marble the berry mixture into the vanilla batter, creating these gorgeous, marbled patterns that look so impressive but are surprisingly easy to achieve. It’s not a fussy dessert. It’s essentially a humble cake elevated by these stunning flavor profiles. The name itself just rolls off the tongue, doesn’t it? Winterberry Vanilla Swirl. It conjures up images of cozy kitchens and happy faces, which is exactly what this cake brings to my home. It’s a bit like a Pound Cake in its denseness and richness, but with a much lighter, more nuanced flavor. It’s the kind of treat that makes you feel like you’ve accomplished something wonderful, even if you only spent an hour in the kitchen.
Why you’ll love this recipe?
There are so many reasons why this Winterberry Vanilla Swirl has become a staple in my recipe collection, and I just know you’ll feel the same way. First off, the flavor is out of this world. You get that lovely tartness from the berries, which cuts through the sweetness perfectly. It’s not cloying at all, which is something I really appreciate. The vanilla base is just so creamy and comforting – it’s like a warm blanket for your taste buds. And don’t even get me started on the texture! It’s incredibly moist and tender, never dry or crumbly, which is a big win in my book.
What I really love, though, is how surprisingly simple it is. Honestly, the “swirling” might sound intimidating, but it’s really just a few gentle stirs. Anyone can do it! You don’t need any fancy equipment or a culinary degree. It’s truly an approachable bake for even novice bakers. Plus, it’s incredibly cost-effective. The ingredients are pretty standard pantry staples, making it an affordable treat.
And the versatility! Oh my goodness, this cake is a chameleon. It’s fantastic on its own, of course, but it’s also wonderful served warm with a scoop of vanilla Ice Cream, or even as a base for a more elaborate dessert. I’ve also found that it’s quite forgiving with ingredient swaps, which I’ll get into later. Compared to some other berry cakes or coffee cakes I’ve tried, this one just hits all the right notes. It’s that perfect balance of impressive and easy, delicious and comforting. It’s the kind of recipe you’ll find yourself making again and again because it consistently delivers that “wow” factor without the stress.
How do I make Winterberry Vanilla Swirl?
Quick Overview
Making this Winterberry Vanilla Swirl is a delightful journey from simple batter to a stunning marbled masterpiece. You’ll mix up a light, fluffy vanilla base, prepare a vibrant berry swirl, and then gently combine them in your baking pan for that signature marbling effect. It’s a straightforward process of combining wet and dry ingredients, then a bit of artistic swirling before baking to perfection. The beauty is in its simplicity; you get a showstopper dessert with minimal fuss. Trust me, the aroma filling your kitchen as it bakes is pure bliss, and the final result is always worth it.
Ingredients
For the Main Batter:
Let’s start with the heart of our cake – that luscious vanilla batter. I always opt for good quality unsalted butter; it really makes a difference in flavor and texture. Make sure it’s softened to room temperature – this is key for a smooth, creamy batter. For the sugar, I use a mix of granulated and a touch of brown sugar for a little extra moisture and depth of flavor. My absolute favorite flour for this is all-purpose, but I’ve tested it with a good quality gluten-free blend, and it worked beautifully, though the texture is slightly different. For the eggs, always use large ones and make sure they’re also at room temperature. This helps them emulsify better with the butter and sugar, creating a lighter cake. And of course, vanilla extract! Don’t skimp here; a good pure vanilla extract makes all the difference. I also add a bit of baking powder and baking soda for that perfect lift, and a pinch of salt to balance the sweetness. And a secret weapon for extra moisture? A bit of sour cream or plain Greek Yogurt. It makes the cake incredibly tender.
For the Filling:
This is where our winterberry magic happens! I love using a mix of berries, but frozen mixed berries work like a dream here. They release their juices beautifully as they bake, creating those gorgeous streaks of color and flavor. If you’re using fresh, just make sure they’re ripe and juicy. You’ll want to toss them with a bit of sugar to help them break down and sweeten, a little cornstarch to thicken their juices (so your cake isn’t soggy!), and a squeeze of lemon juice to really make those berry flavors pop. Some people like to add a pinch of cinnamon or nutmeg to their berry filling, which is lovely too, but I prefer to let the pure berry flavor shine through here.
For the Glaze:
This glaze is super simple and adds that perfect finishing touch. It’s just powdered sugar whisked with a bit of milk or cream. I like to add a touch more vanilla extract to it, to echo the flavors in the cake. You can adjust the consistency by adding more or less liquid. For a thinner glaze that drizzles beautifully, add more liquid. For a thicker, more opaque glaze, use less. If you’re feeling adventurous, you can even add a tiny drop of red food coloring to enhance the berry theme, or a touch of almond extract for a different flavor profile.
Step-by-Step Instructions
Step 1: Preheat & Prep Pan
First things first, get that oven preheating to 350°F (175°C). This ensures your oven is nice and hot when the batter is ready, which is crucial for even baking. I usually bake this in a 9×13 inch baking pan. You want to grease it really well with butter or baking spray, and then I like to give it a light dusting of flour. Tap out any excess flour – you just want a thin coating. This prevents sticking and ensures your beautiful Winterberry Vanilla Swirl comes out in one glorious piece.
Step 2: Mix Dry Ingredients
In a medium bowl, whisk together your all-purpose flour, baking powder, baking soda, and salt. Whisking them thoroughly ensures everything is evenly distributed, which means you won’t have pockets of leavening agents or salt. It’s a small step, but it makes a difference in the final texture of the cake. I usually give it a good whisk for about 30 seconds.
Step 3: Mix Wet Ingredients
In a large bowl, cream together your softened butter and sugars until light and fluffy. This is where an electric mixer really helps, but you can absolutely do it by hand if you’re feeling energetic! Beat in the room temperature eggs one at a time, making sure each one is fully incorporated before adding the next. Then, stir in your vanilla extract and sour cream (or Greek yogurt). This mixture should be smooth and creamy.
Step 4: Combine
Now, it’s time to bring the wet and dry ingredients together. Gradually add the dry ingredients to the wet ingredients, mixing on low speed (or gently by hand) until just combined. Be careful not to overmix here! Overmixing develops the gluten in the flour too much, which can lead to a tough cake. A few streaks of flour are okay; they’ll disappear as you swirl in the berries.
Step 5: Prepare Filling
While your batter is resting, quickly prepare your berry filling. In a separate bowl, toss your winterberries (fresh or frozen) with sugar, cornstarch, and lemon juice. Stir gently to coat. If you’re using frozen berries, they might start to thaw a bit, which is perfectly fine. This mixture will become syrupy and delicious as it bakes.
Step 6: Layer & Swirl
Pour about two-thirds of the vanilla batter into your prepared baking pan and spread it out evenly. Dollop spoonfuls of the berry filling over the batter. Then, pour the remaining vanilla batter over the berries. Now for the fun part: the swirl! Take a knife or a skewer and gently swirl the batter and berry filling together. Don’t over-swirl; you want distinct ribbons of berry, not a uniform pink batter. A few gentle figure-eights or zigzags will do the trick.
Step 7: Bake
Pop the pan into your preheated oven. Bake for about 35-45 minutes, or until a toothpick inserted into the center comes out clean or with just a few moist crumbs attached. The edges should be golden brown and starting to pull away slightly from the sides of the pan. Baking times can vary depending on your oven, so keep an eye on it!
Step 8: Cool & Glaze
Once baked, let the Winterberry Vanilla Swirl cool in the pan on a wire rack for about 15-20 minutes. This allows it to set up properly. While it’s cooling, whisk together your powdered sugar, milk/cream, and vanilla extract for the glaze until smooth. Drizzle the glaze over the slightly warm cake. The warmth of the cake will help the glaze melt and spread beautifully.
Step 9: Slice & Serve
Let the cake cool a bit more before slicing. I find it’s best when it’s still slightly warm, but not hot. Slice into squares and enjoy! The visual appeal of those swirls is just as delightful as the taste.
What to Serve It With
This Winterberry Vanilla Swirl is so versatile, it truly fits in anywhere! For a cozy breakfast, I love it toasted just a little, perhaps with a smear of butter or a dollop of cream cheese. A steaming mug of coffee or a fragrant cup of herbal tea is the perfect accompaniment. It makes those early mornings feel a little more special, you know?
At brunch, it’s a showstopper. I usually arrange slices on a pretty platter, maybe garnished with a few fresh berries or a dusting of powdered sugar. It pairs beautifully with mimosas or a light, crisp sparkling cider. It’s elegant enough for company but still feels wonderfully homey.
As a dessert, it’s absolutely divine. Serving it warm with a scoop of good quality vanilla bean ice cream is my absolute favorite. The contrast of the warm cake and cold ice cream is pure heaven. A drizzle of raspberry sauce or a dollop of whipped cream also takes it to another level. It’s perfect after a hearty meal.
And for those quiet, cozy snack moments? This cake is pure comfort. I love just cutting a small square and enjoying it with a glass of milk or a warm chai latte. It’s my little indulgence when I need a moment of peace. My family often requests this for “movie night treats,” and it always disappears way too quickly!
Top Tips for Perfecting Your Winterberry Vanilla Swirl
I’ve made this Winterberry Vanilla Swirl more times than I can count, and through trial and error (and a few happy accidents!), I’ve picked up some tricks that I think will really help you achieve baking perfection. Let’s dive in!
Zucchini Prep: You know, sometimes I like to add a little finely grated zucchini to the batter. It sounds weird, I know! But trust me, it adds incredible moisture without any noticeable zucchini flavor. If you do this, make sure to squeeze out any excess moisture from the grated zucchini before adding it to the batter. You can do this by wrapping it in a clean kitchen towel and squeezing, or by pressing it through a fine-mesh sieve. This step is crucial so you don’t end up with a soggy cake.
Mixing Advice: The biggest enemy of a tender cake is overmixing. Once you add the dry ingredients to the wet, mix only until *just* combined. It’s okay if there are a few tiny streaks of flour remaining. Overmixing develops the gluten in the flour, leading to a tough, chewy texture, and we definitely don’t want that! I usually finish incorporating the last bits of flour by hand with a spatula.
Swirl Customization: Don’t be afraid to get a little artistic with your swirl! You can create beautiful patterns by dragging a knife or skewer through the batter in figure-eights or zigzags. The goal is to create distinct ribbons of berry throughout the vanilla cake, not to completely blend them. For a more dramatic swirl, try layering the batter and berry filling in sections rather than just dolloping everything on top. For a different look, you can even pipe the berry mixture in thin lines over the batter before swirling.
Ingredient Swaps: If you don’t have winterberries, feel free to use raspberries, blueberries, or even chopped strawberries. Frozen berries are often best as they release more juice, creating that lovely marbled effect. For the sour cream or Greek yogurt, buttermilk also works wonderfully, adding a pleasant tang and tenderness. If you’re out of eggs, I’ve successfully made a vegan version using flax eggs, but the texture is a bit denser.
Baking Tips: Always preheat your oven properly. An oven thermometer is a baker’s best friend to ensure accurate temperatures. I usually bake this on the middle rack of my oven. To test for doneness, insert a toothpick into the center of the cake; it should come out clean or with a few moist crumbs attached. If the top is browning too quickly before the inside is cooked, you can loosely tent it with aluminum foil.
Glaze Variations: For a lighter touch, skip the glaze entirely and just dust the cooled cake with powdered sugar. If you want a different flavor, try adding a hint of orange zest to the glaze, or a splash of berry juice for a pink hue. You can also add a tablespoon of lemon juice to the glaze for a brighter, tangier finish.
Storing and Reheating Tips
This Winterberry Vanilla Swirl is so forgiving, and thankfully, it stores beautifully, meaning you can enjoy its deliciousness for days! For keeping it at room temperature, I find it stays wonderfully fresh for about 2-3 days. I always make sure to cover it well. You can use plastic wrap, but I personally prefer an airtight container or a cake dome. This prevents it from drying out and keeps it tasting just-baked.
If you know you won’t get through it in a couple of days, or if your kitchen is particularly warm, the refrigerator is your best bet. Store it in an airtight container in the fridge for up to a week. I’ve found that the texture remains excellent, and the flavors even meld a bit more. When you’re ready to eat a slice that’s been chilled, I highly recommend letting it come back to room temperature for about 15-20 minutes before slicing. It just tastes so much better that way!
Now, for the freezer. This cake freezes like a dream! I usually let it cool completely, then wrap it tightly in a couple of layers of plastic wrap, followed by a layer of aluminum foil or a freezer-safe bag. It will keep well in the freezer for up to 2-3 months. To thaw, simply remove it from the freezer and let it thaw completely on the counter, still wrapped. It’s a lifesaver for last-minute dessert emergencies!
Glaze Timing Advice: This is an important one! I always glaze the cake *after* it has cooled for at least 15-20 minutes but is still slightly warm. This allows the glaze to set nicely without becoming too hard or too runny. If you’re planning to freeze the cake *with* the glaze, I would recommend glazing it *after* it has been thawed. Glazing a frozen cake can sometimes result in an uneven texture or the glaze cracking.
Frequently Asked Questions
Final Thoughts
So there you have it – my beloved Winterberry Vanilla Swirl! I really hope you feel inspired to give this a try. It’s more than just a recipe; it’s about creating those little moments of joy and comfort in your own kitchen. It’s proof that you don’t need to be a master baker to create something truly special and delicious. The combination of the tangy berries and the sweet, comforting vanilla is just magical, and the way it looks with those beautiful swirls makes it perfect for sharing.
If you love this recipe, you might also enjoy my tried-and-true Lemon Poppy Seed Loaf for a bright, citrusy treat, or my decadent Chocolate Raspberry Swirl Cake for another delightful swirled creation. Both are packed with flavor and are sure to become favorites!
I truly can’t wait to hear how your Winterberry Vanilla Swirl turns out! Please, if you make it, leave a comment below and tell me all about it – did your kids love it? What did you serve it with? Any fun variations you tried? Your feedback means the world to me and helps other home bakers on their culinary adventures. Happy baking, my friends!
Winterberry Vanilla Swirl
Ingredients
Dough Ingredients
- 3 cups All-purpose flour
- 0.25 cup Granulated sugar
- 1 teaspoon Salt
- 1 packet Active dry yeast
- 1 cup Warm milk
- 0.25 cup Unsalted butter, melted
- 1 teaspoon Vanilla extract
Filling Ingredients
- 0.75 cup Winterberry jam
- 0.5 cup Brown sugar
- 1 tablespoon Cinnamon
- 2 tablespoons Unsalted butter, softened
Glaze Ingredients
- 1.5 cups Powdered sugar
- 0.25 cup Milk
- 1 teaspoon Vanilla extract
Instructions
Preparation Steps
- In a large bowl, combine flour, sugar, and salt. Add yeast. In a separate bowl, combine warm milk, melted butter, and vanilla. Pour wet ingredients into dry ingredients.
- Knead the dough for 5-7 minutes until smooth. Let rise in a warm place for 1 hour.
- Preheat oven to 350°F (175°C). Roll out dough and spread with winterberry jam, sprinkle with brown sugar and cinnamon, and dot with butter.
- Roll up the dough tightly and cut into 1-inch slices. Place in a greased baking dish.
- Bake for 30-35 minutes. While baking, whisk together powdered sugar, milk, and vanilla for the glaze. Drizzle over warm rolls.