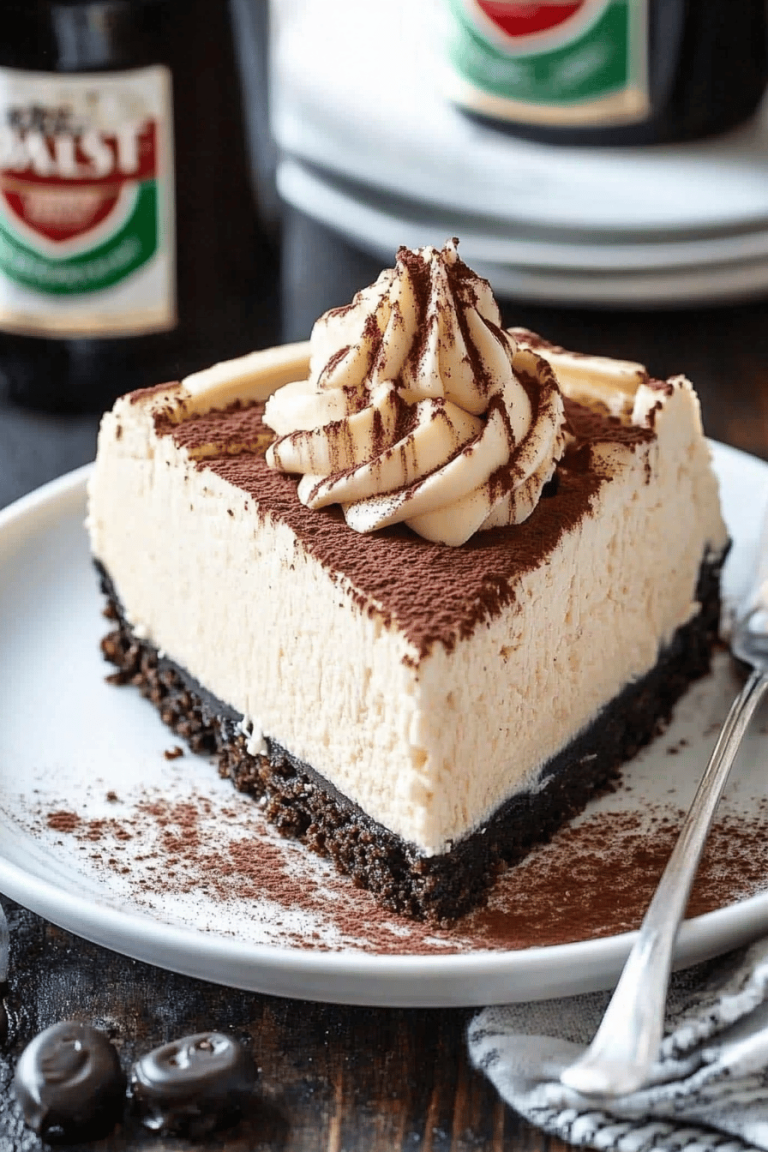
There are some recipes that just… stick with you. They become your go-to, your reliable friend in the kitchen, the one you can whip up even when you’re half asleep. This easy chocolate recipe is exactly that for me. It’s more than just a dessert; it’s a memory maker. I remember the first time I made this, it was a chaotic Tuesday evening, homework was piling up, and I just needed a little something sweet to pull us all through. My daughter, Lily, who was about seven at the time, came running into the kitchen, drawn by the irresistible aroma of chocolate wafting through the air. Her eyes lit up when she saw what I was making, and by the time it cooled enough to slice, she declared it the “best Chocolate Cake ever.” Now, that’s high praise from a kid who can be a tough critic! It’s not overly fussy, doesn’t require a million fancy ingredients, and the result is just… pure chocolatey bliss. It’s honestly one of those simple pleasures that makes everyday life feel a little bit more special. If you’re anything like me and constantly on the hunt for a foolproof, crowd-pleasing easy chocolate recipe, you’ve just found your new best friend. It’s like a warm hug in edible form.
What is my magic chocolate loaf?
So, what exactly *is* this “magic” chocolate loaf? Well, it’s not exactly a cake, and it’s not quite a brownie, though it has elements of both. Think of it as the perfect bridge between a dense, Fudgy Brownie and a light, moist chocolate cake. It bakes up in a loaf pan, which is a lifesaver because it means no fiddling with springforms or worrying about even layers. The name “magic” really comes from how simple it is to bring together. You basically dump most of the ingredients into one bowl, give it a stir, pour it into the pan, and bake. Seriously, it’s that straightforward. The magic also lies in its texture: it’s wonderfully moist, thanks to a secret ingredient I’ll share soon, and has this incredible depth of chocolate flavor without being overly sweet. It’s the kind of treat that’s comforting and decadent all at once. It’s my go-to when I want a serious chocolate fix but don’t have the time or energy for a multi-step cake or pie. It’s essentially a hug in loaf form.
Why you’ll love this recipe?
What are some of the best ways to make this Easy Chocolate recipe?flavor is just incredible. It’s a deep, rich chocolate that satisfies even the most intense chocolate cravings. It’s not that artificial, overly sweet chocolate flavor; this tastes like the real deal. Then there’s the simplicity. I mean, we’re talking dump-and-stir simple. Even if you’re a total beginner in the kitchen, you can nail this. It’s perfect for those nights when you’re rushing after work or when the kids suddenly announce they need a dessert for a school bake sale *tomorrow*. It’s also surprisingly cost-efficient. Most of the ingredients are pantry staples that you probably already have on hand. No need to trek to a specialty store for obscure items!versatility? Oh, you’re going to love this. It’s fantastic on its own, but I’ll tell you later about all the ways you can dress it up or down. It’s also a recipe that’s very forgiving. I’ve accidentally added a little too much of something here or forgotten a tiny step there, and it *still* turns out beautifully. Compared to some other elaborate chocolate cakes or tortes I’ve tried over the years, this one just delivers consistently, with a fraction of the effort. What I love most about this is that it feels like a special treat, but it’s truly one of the easiest things I know how to bake. It’s the best of both worlds!
How to Make My “Magic” Chocolate Loaf
Quick Overview
Get ready for simplicity! You’ll whisk together your dry ingredients, then mix in your wet ingredients. The batter comes together in minutes. Pour it into a prepared loaf pan, bake until a tester comes out clean, and let it cool. A simple glaze finishes it off perfectly. The whole active prep time is less than 15 minutes, making it ideal for busy days or spontaneous sweet cravings. You truly can’t mess this up!
Ingredients
For the Main Batter:
All-purpose flour: About 1 and 3/4 cups. I usually just scoop from the bag, but if you want to be precise, spoon it into your measuring cup and level it off. This is your structure!
Granulated sugar: 1 and 1/2 cups. You can dial this back slightly if you prefer things less sweet, but it adds to the tenderness.
Unsweetened cocoa powder: 3/4 cup. Use a good quality one, like Dutch-processed, for the deepest flavor. This is where the magic truly starts!
Baking soda: 1 and 1/2 teaspoons. This is what gives it that lovely lift and tender crumb.
Baking powder: 1 teaspoon. Works with the baking soda to ensure a nice, even rise.
Salt: 1 teaspoon. Don’t skip this! It balances the sweetness and enhances all those lovely chocolate notes.
Eggs: 2 large. Make sure they’re at room temperature – it helps everything emulsify beautifully.
Vegetable oil: 1/2 cup. This is my secret to its incredible moistness! You can use canola or another neutral oil.
Buttermilk: 1 cup. Oh yes, buttermilk! It adds a tangy richness and unbelievable tenderness. If you don’t have any, a simple DIY trick is to stir a tablespoon of white vinegar or lemon juice into a cup of regular milk and let it sit for 5 minutes – it works like a charm!
Vanilla extract: 2 teaspoons. Pure vanilla extract is best for that warm, comforting aroma.
Hot coffee or hot water: 1 cup. This is another key to its fudgy texture and deep flavor. It blooms the cocoa powder and makes everything super moist. I usually use coffee because it intensifies the chocolate flavor even more without making it taste like coffee.
For the Glaze:
Powdered sugar: 1 cup. Sifted is best for a smooth glaze, but if you’re in a rush, a quick whisk can often do the trick.
Unsweetened cocoa powder: 1/4 cup. For that extra punch of chocolate!
Milk or heavy cream: 2-3 tablespoons. Start with 2 and add more until you reach your desired drizzling consistency.
Vanilla extract: 1/2 teaspoon. Just a hint to round out the flavor.
Step-by-Step Instructions
Step 1: Preheat & Prep Pan
First things first, let’s get the oven going. Preheat it to 350°F (175°C). Grab a standard 9×5 inch loaf pan. Grease it really well with butter or cooking spray, and then dust it lightly with flour or cocoa powder. For extra insurance against sticking, I like to line the bottom and sides with parchment paper, leaving a little overhang so you can easily lift it out later. This step is crucial for easy removal!
Step 2: Mix Dry Ingredients
In a large mixing bowl, whisk together the flour, sugar, cocoa powder, baking soda, baking powder, and salt. Whisking is important here because it helps to aerate the ingredients and get rid of any lumps, especially in the cocoa powder. You want everything evenly distributed before we add the wet stuff. It should look like a nice, uniform brown powder.
Step 3: Mix Wet Ingredients
In a separate medium bowl, whisk together the eggs, vegetable oil, buttermilk, and vanilla extract until they’re well combined. This mixture should be smooth and slightly emulsified. Make sure your buttermilk is at room temperature if possible; it helps create a better batter.
Step 4: Combine
Pour the wet ingredients into the bowl with the dry ingredients. Mix with a spatula or a whisk until just combined. Don’t overmix! Overmixing develops the gluten in the flour, which can lead to a tougher loaf. You’ll still see a few streaks of flour, and that’s okay. Now, carefully pour in the hot coffee (or hot water). The batter will become quite thin – don’t panic! This is exactly what you want. Stir gently until the batter is smooth and there are no large lumps of dry ingredients remaining. The hot liquid helps to bloom the cocoa and create that super moist, almost fudgy texture.
Step 5: Prepare Filling
Wait, filling? For a loaf? Nope, not for this one! This loaf is all about the batter itself. The “filling” aspect is really achieved through the texture created by the hot coffee and buttermilk. So, no separate filling to worry about here – more magic in its simplicity!
Step 6: Layer & Swirl
Since there’s no separate filling, there’s no layering or swirling needed for this particular recipe. You’ll simply pour the entire, glorious thin batter into your prepared loaf pan. The magic happens within the bake itself, creating a consistent, moist texture throughout the entire loaf. It’s wonderfully straightforward!
Step 7: Bake
Pour the batter evenly into the prepared loaf pan. Bake for 50-65 minutes, or until a wooden skewer or toothpick inserted into the center comes out clean. Ovens can be a bit finicky, so start checking around the 50-minute mark. If the top is browning too quickly before the inside is cooked, you can loosely tent it with aluminum foil. Let it cool in the pan for about 10-15 minutes before attempting to remove it.
Step 8: Cool & Glaze
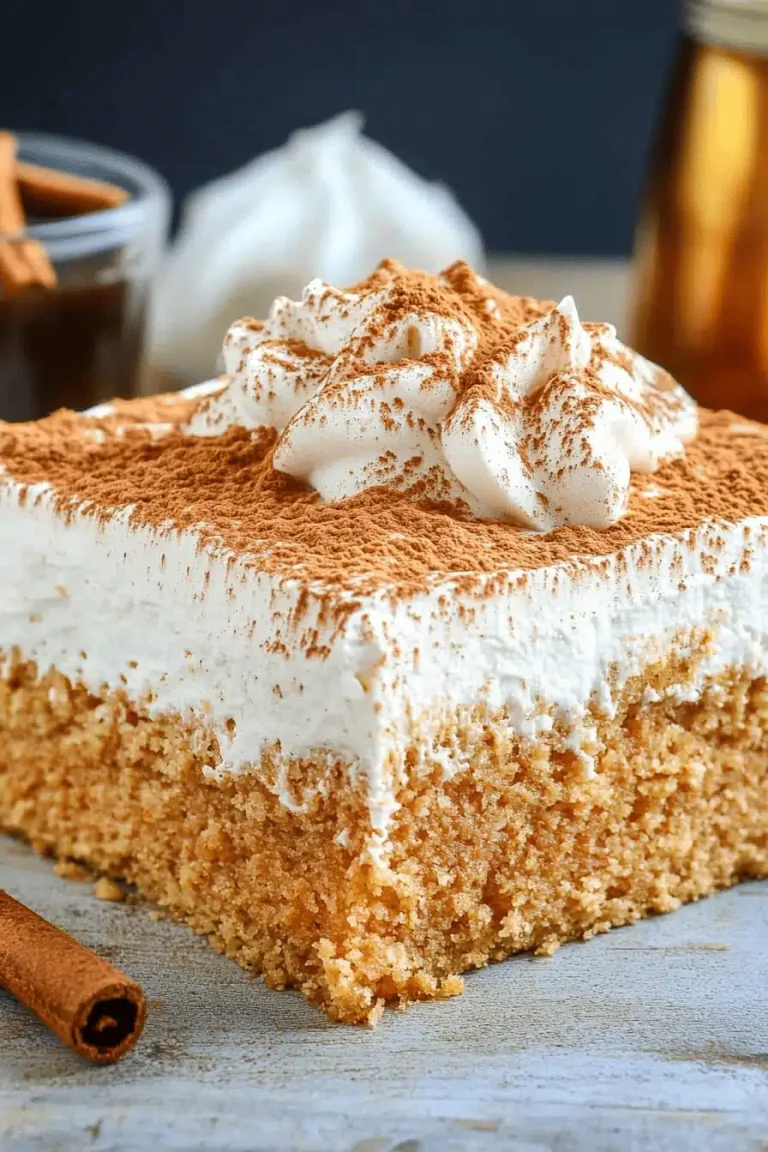
Once the loaf has cooled in the pan for 10-15 minutes, carefully invert it onto a wire rack. If you used parchment paper, you can gently lift it out. Let the loaf cool completely on the wire rack. This is important! If you try to glaze it while it’s warm, the glaze will melt right off and make a mess. While it’s cooling, whisk together the powdered sugar, cocoa powder, milk (start with 2 tablespoons), and vanilla extract in a small bowl until smooth. Add more milk, a teaspoon at a time, if you want a thinner, more drizzly glaze. Once the loaf is completely cool, pour or drizzle the glaze over the top, letting it drip down the sides. It’s so pretty!
Step 9: Slice & Serve
Once the glaze has set slightly, you can slice your beautiful chocolate loaf. I find a serrated knife works best for clean cuts. Serve at room temperature for the best texture and flavor. It’s wonderful on its own, but I’ll give you some ideas for serving it up later!
What to Serve It With
This chocolate loaf is a chameleon when it comes to serving, which is part of why I love it so much. It’s fantastic dressed up or down!
For Breakfast: Yep, you heard me! A thin slice of this can be a delightful morning treat, especially with a strong cup of coffee. It’s not overly sweet at breakfast time, especially if you go easy on the glaze. I sometimes just dust it with a little powdered sugar or enjoy it plain. It feels like a weekend treat without the effort.
For Brunch: This is where it really shines. Serve it with a generous drizzle of the chocolate glaze and maybe a few fresh raspberries on top for a pop of color and tartness. It looks so elegant on a brunch spread, and people will be amazed you made it so easily. Pair it with mimosas or a creamy latte.
As Dessert: This is its natural habitat, right? For a more decadent dessert, serve a warm slice (just pop it in the microwave for 10-15 seconds) with a scoop of vanilla bean Ice Cream or a dollop of whipped cream. A side of fresh berries or a raspberry coulis is also divine. It’s perfect for book club meetings or when you have friends over for a casual get-together.
For Cozy Snacks: Sometimes, you just need chocolate, right? This loaf is my go-to for those 10 pm cravings. It’s comforting and deeply satisfying. I’ll grab a slice, a glass of cold milk, and curl up with a good book. It’s simple, but it’s pure happiness. My family also loves it just as is, maybe with a second mug of Hot Chocolate for the kids. It’s become a staple for our movie nights too!
Top Tips for Perfecting Your “Magic” Chocolate Loaf
I’ve made this easy chocolate recipe more times than I can count, and over the years, I’ve picked up a few tricks that I think really make a difference.
Zucchini Prep: Wait, zucchini? I didn’t include zucchini in this specific recipe, but you might be thinking of a zucchini bread! My apologies if I confused you. For this chocolate loaf, there’s no zucchini involved, which makes it even simpler! Just follow the ingredient list precisely, and you’re golden. The moisture comes from the liquids and the blooming of the cocoa.
Mixing Advice: The key here is “just combined.” Seriously, don’t go crazy whisking after you add the wet to the dry ingredients. A few streaks of flour are fine because they’ll disappear when you add the hot liquid. Overmixing develops the gluten and can make your loaf tough instead of tender and moist. I usually switch from a whisk to a spatula for the final additions to help control the mixing.
Swirl Customization: Since this loaf doesn’t have a separate swirl component, the “customization” really comes in with the glaze. You can make it thick and rich, or thin and drippy. For a more artistic look, you can use a fork to create little zigzags or swirls as you pour it on, or even drizzle a contrasting white chocolate glaze (melted white chocolate) over the chocolate glaze for a marble effect. Just make sure the loaf is completely cool before you start decorating!
Ingredient Swaps: The buttermilk is pretty key for tenderness, but if you’re in a pinch, that milk + vinegar/lemon juice trick is a lifesaver. For the oil, any neutral vegetable oil works. You could *try* melted butter, but I find oil gives it a superior moistness that lasts longer. Using coffee instead of hot water is my personal preference because it deepens the chocolate flavor, but hot water works perfectly fine if you don’t want any coffee notes at all.
Baking Tips: Every oven is a little different, so trust your senses! The skewer test is your best friend. If the top is browning too fast, tenting with foil is your secret weapon. I usually bake mine on the middle rack to ensure even cooking. And resist the urge to open the oven door too early, as this can cause the loaf to sink.
Glaze Variations: The glaze is super simple, but you can play with it. For a richer glaze, use heavy cream instead of milk. For a tangier kick, add a tiny bit of lemon juice. If you want a less sweet glaze, use a bit more cocoa powder and slightly less powdered sugar. You can also add a splash of liqueur like Kahlua or a coffee liqueur to the glaze for an adult twist!
Storing and Reheating Tips
This easy chocolate recipe is pretty resilient, but proper storage ensures it stays delicious for days.
Room Temperature: Once the glaze is set, I store the loaf in an airtight container or tightly wrapped in plastic wrap at room temperature for up to 3 days. It stays wonderfully moist because of the oil and buttermilk. If your kitchen is very warm, you might want to keep it in a slightly cooler spot.
Refrigerator Storage: If you live in a very warm climate, or if you just want to make sure it lasts a bit longer (up to a week), you can refrigerate it. Wrap it well in plastic wrap, then place it in an airtight container. The texture might become a little firmer when cold, but it reheats beautifully. Just bring a slice to room temperature for about 20-30 minutes before serving, or gently warm it.
Freezer Instructions: Yes, you can freeze this! It freezes exceptionally well, which is great for those times you want a stash of chocolatey goodness. Let the loaf cool completely and the glaze to set. Wrap the entire loaf tightly in a couple of layers of plastic wrap, then in a layer of aluminum foil or pop it into a freezer-safe bag. It should stay good in the freezer for up to 2-3 months. To thaw, unwrap it and let it come to room temperature on a wire rack, or thaw it overnight in the refrigerator.
Glaze Timing Advice: It’s best to glaze the loaf only *after* it has cooled completely and you’re ready to serve or store it at room temperature or in the fridge. If you freeze it with the glaze on, the glaze might become a bit brittle or crack when frozen and thawed. For freezing, I often recommend glazing *after* thawing, or just dusting with powdered sugar for simplicity before freezing.
Frequently Asked Questions
Final Thoughts
There you have it – my absolute favorite, ridiculously easy chocolate recipe! It’s proof that you don’t need to spend hours in the kitchen or use fancy ingredients to create something truly special and utterly delicious. This chocolate loaf is consistently moist, deeply chocolatey, and just so darn comforting. It’s the kind of recipe that makes people think you’re a baking whiz, even if you spent less than 20 minutes actively making it. I hope this recipe brings as much joy to your kitchen as it does to mine. If you’re looking for more simple yet satisfying sweet treats, you might also enjoy my easy banana bread or my no-bake cookies – they’re all in the same spirit of deliciousness without fuss! I can’t wait to hear how your Magic Chocolate Loaf turns out. Don’t be shy, leave a comment below with your thoughts, ratings, or any fun twists you try! Happy baking!
Easy Chocolate Pudding Dessert
Ingredients
Crust
- 1 cup all-purpose flour
- 1 cup pecans chopped
- 0.5 cup unsalted butter room temperature
Cheesecake Layer
- 8 ounces cream cheese room temperature
- 1 cup powdered sugar
- 1 teaspoon almond extract
- 16 ounces Cool Whip divided
Chocolate Pudding Layer
- 4 cups milk
- 7.8 ounces chocolate pudding mix 2 (3.9 oz) boxes
Topping
- 1 cup chocolate shavings
Instructions
Preparation Steps
- Preheat oven to 350°F and grease a 9x13 pan with nonstick spray.
- In a large mixing bowl, combine the flour, pecans, and butter until a crust forms. Press the mixture into the prepared pan in an even layer.
- Bake for 20 minutes until the crust has set. Allow the crust to cool completely.
- In a large mixing bowl, beat the cream cheese, powdered sugar, and almond extract together until light and fluffy. Gently fold in 1 tub of Cool Whip. Spread the cream cheese mixture onto the pecan crust.
- Mix the milk and chocolate pudding in a large mixing bowl. Pour the mixture over the cream cheese layer and spread evenly.
- Place your chocolate delight into the refrigerator for 20 minutes to allow the layers to set up.
- Spread the remaining tub of Cool Whip over the top of the chocolate layer and sprinkle your chocolate shavings over the Cool Whip layer.
- Place the chocolate delight back into the refrigerator for at least 6 hours, but it’s best to leave it overnight.