There’s something so comforting about biting into a chicken sandwich that’s crispy on the outside, juicy on the inside, and kissed with just the right amount of zingy sauce. I remember making versions of this when my kids were little—and honestly, it would disappear in minutes every single time. It’s different from those plain old deli sandwiches or a typical grilled chicken breast tossed on bread. This sandwich grabs your attention with a crunch that feels almost like a warm hug, and the layers of flavor just keep you coming back for more. If you’re a fan of comfort food with a little bit of a twist, this chicken sandwich might just become your new go-to. Trust me, once you master this, you’ll find it hard to reach for store-bought versions again.
What is chicken sandwich?
Think of the chicken sandwich as the perfect balance between comfort food and a quick, satisfying meal. Essentially, it’s a juicy, tender chicken breast or thigh that’s been breaded and fried (or baked) to crispy, golden perfection, then served on a soft bun loaded with classic toppings. The idea isn’t new—this kind of sandwich has been around for ages in various forms—but the magic lies in how simple ingredients come together to create something utterly delicious. You might see it called a “fried chicken sandwich” or just “crispy chicken” in some spots, but for me, it’s about that blend of textures and flavors that remind me of Sunday dinners and late-afternoon cravings. It’s approachable and adaptable for any home cook, whether you’re a newbie or a seasoned sandwich slinger.
Why you’ll love this recipe?
What I love most about this chicken sandwich is how it nails the craving for something crispy and juicy without being a fuss to make at home. First off, the flavor combo is absolutely spot-on—crispy, well-seasoned chicken paired with a creamy, tangy sauce that adds a little kick without overpowering the bird. The bun soaks up just enough moisture so it’s neither soggy nor dry. If you’re short on time, this recipe moves fast thanks to simple pantry staples and a streamlined frying method that doesn’t involve hours of marinating or complicated steps.
Then there’s the cost factor—chicken, basic pantry spices, bread, and a few fresh toppings won’t break the bank, which is a game-changer compared to buying pre-made sandwiches or eating out. Plus, it’s super versatile: swap the toppings, try different sauces, or use grilled chicken if you want a lighter version. I’ve even doubled the recipe to turn it into a party spread—everyone’s eyes light up when they see it. And if you love the flavors here, you might want to check out my recipes for crispy fish sandwiches or spicy pulled chicken sliders—comfort food with flair!
How do I make a chicken sandwich?
Quick Overview
Making this chicken sandwich is straightforward but incredibly rewarding. The chicken gets coated in a lightly seasoned flour mix, dipped in buttermilk for that tenderizing magic, then dredged in the flour again before frying to crispy goodness. It’s key to keep everything simple and not rush the frying step—medium heat gives you that perfect crunch without burning. Slap on a soft, slightly toasted bun with your favorite greens, pickles, and sauce, and you’re good to go. It’s easy, pretty quick, and always impresses.
Ingredients
For the Chicken:
- 2 large boneless, skinless chicken breasts (or thighs for a juicier bite)
- 1 cup buttermilk (or milk with a squeeze of lemon as a quick substitute)
- 1 1/2 cups all-purpose flour
- 1 teaspoon smoked paprika for that subtle earthy warmth
- 1 teaspoon garlic powder
- 1 teaspoon salt
- 1/2 teaspoon black pepper freshly ground, if you can
- Vegetable oil or peanut oil for frying (go for a neutral oil with a high smoke point)
For the Sandwich:
- Soft brioche buns or potato rolls (toasted just right)
- Leafy green lettuce or crisp romaine
- Thinly sliced pickles (homemade or store-bought work great!)
- Tomato slices (optional, but I love the freshness)
For the Sauce:
- 1/2 cup mayonnaise (feel free to swap with Greek yogurt for a lighter twist)
- 1 tablespoon hot sauce (adjust to heat preference)
- 1 teaspoon honey or maple syrup for that sweet balance
- 1 teaspoon Dijon mustard for tang
- Salt and pepper to taste
Step-by-Step Instructions
Step 1: Preheat & Prep Pan
Start by heating about 1 inch of oil in a deep skillet over medium heat. You want it hot enough to sizzle but not smoke—a candy or deep-fry thermometer reading between 350°F and 365°F is ideal if you have one. While it’s warming, get your buns ready by slicing and lightly toasting them in a dry pan or the oven for a couple of minutes. This keeps them from getting soggy once the sandwich is assembled—a small step that makes a big difference.
Step 2: Mix Dry Ingredients
In a shallow dish, whisk together the flour, smoked paprika, garlic powder, salt, and pepper. This blend gives the chicken that little extra kick and depth beyond plain flour. Take your time to mix well so the seasoning is evenly spread—that way, every bite is flavor-packed.
Step 3: Mix Wet Ingredients
Pour the buttermilk (or your milk-lemon mix) into another shallow dish. This tenderizes the chicken while adding moisture, which is key to that juicy inside we all crave. If your buttermilk’s a bit cold, don’t sweat it—that slight chill can actually help the coating stick better.
Step 4: Combine
Dip each chicken piece in the buttermilk, letting the excess drip off, then dredge it in the flour mixture. For extra crunch, repeat the dip-and-dredge once more. This double coating is my little secret for that irresistible crunch without it feeling heavy or greasy. If the flour mix feels clumpy, give it a quick sift—you want a fine dusting coating the chicken.
Step 5: Prepare Filling
While the oil heats, rinse and pat dry your lettuce and tomato slices. Slice those pickles thinly if you’re using whole dill—and if you want, whip up the sauce by stirring together mayo, hot sauce, honey, and Dijon. Give it a taste and adjust—sometimes I add a touch more honey if it’s too spicy.
Step 6: Fry the Chicken
Carefully lower the coated chicken pieces into the hot oil—don’t overcrowd the pan or the temperature will drop, and that means less crunch. Fry for about 4-5 minutes per side, flipping once, until the coating turns a gorgeous golden brown and an instant-read thermometer hits 165°F. I’ve learned it’s better to keep the heat moderate—high heat burns the crust before the inside is cooked through, and low heat yields a greasy mess.
Step 7: Drain & Rest
Transfer the chicken to a paper towel–lined plate to drain excess oil—don’t skip this, or you’ll risk a soggy bun. Just a couple of minutes here will help the crust stay crisp and the chicken juicy.
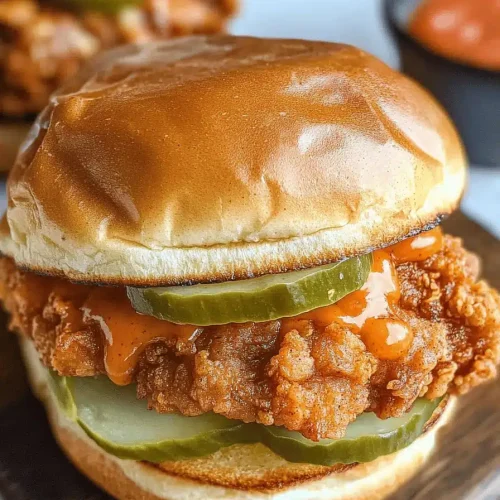
Step 8: Assemble the Sandwich
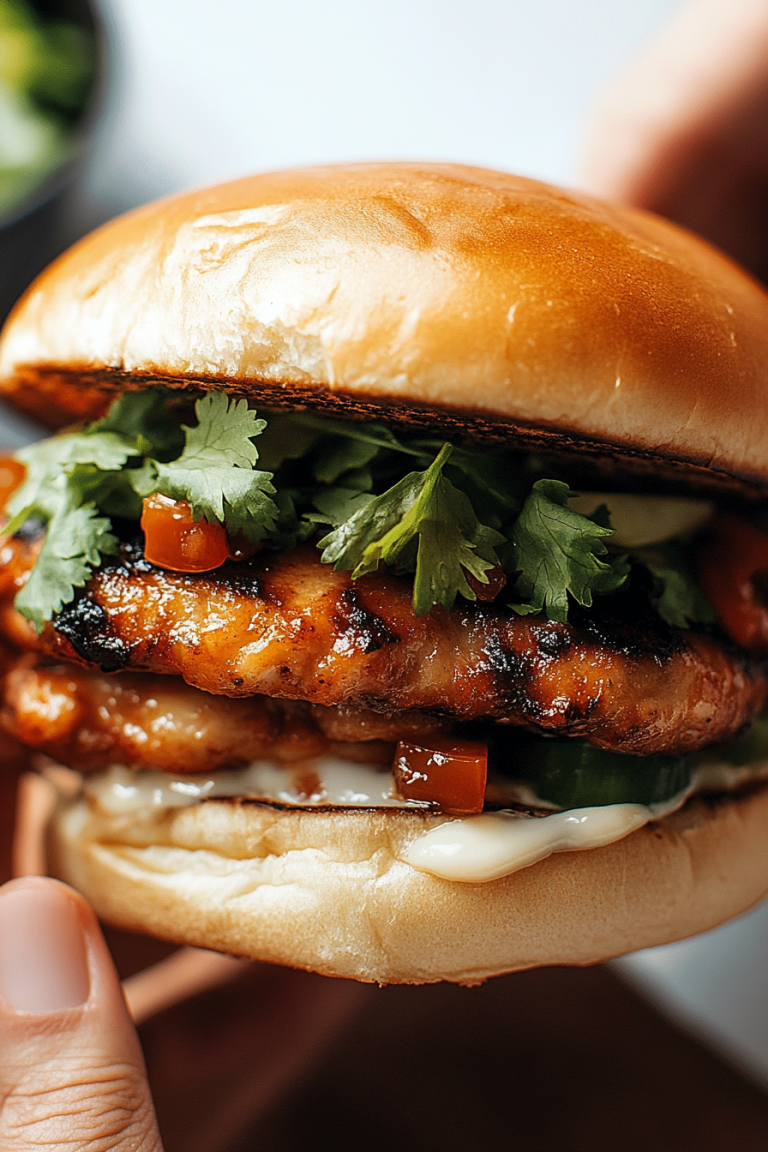
Spread a generous layer of the sauce on the bottom bun, layer on lettuce, then the piping-hot chicken, a few pickle slices, tomato if you’re using it, and finish with the top bun. The warmth from the chicken slightly softens the sauce, making each bite a playful mix of textures and flavors. The first time you try this, I swear you’ll smile at just how right it tastes.
Step 9: Enjoy!
Cut the sandwich in half for easier handling or eat it whole if you’re feeling bold. It’s messy, it’s flavorful, and it smells amazing—the kind of meal that gets everyone talking at the dinner table.
What to Serve It With
For Breakfast: I love pairing this with a strong, black coffee and a side of crispy hash browns. The sandwich is hearty enough to replace your usual eggs and toast, and the contrast of hot coffee with the crunchy chicken? Bliss.
For Brunch: Serve it alongside a fresh, bright salad with citrus vinaigrette and maybe some bubbly mimosas. It dresses up the humble sandwich without taking away its casual charm.
As Dinner: Go bold with sweet potato fries or coleslaw for a classic combo that feels like a casual night out—even if you’re just lounging at home. My family swears by a cold glass of soda or iced tea with this pairing.
For Cozy Snacks: Cut into smaller sliders and serve with dipping sauces like ranch, honey mustard, or spicy aioli. This is a lifesaver during game nights or when friends pop by unexpectedly.
I have this mental image of certain lazy Sunday afternoons when the smell of frying chicken drifts through the house, and everyone just knows it’s sandwich time. It’s those little traditions that make it feel extra special.
Top Tips for Perfecting Your Chicken Sandwich
Choosing the Right Cut: I personally prefer boneless thighs for their added juiciness and forgiving nature during cooking, but breasts work beautifully if kept moist.
Maintaining the Crunch: Don’t hurriedly flip the chicken while frying. Let it form a solid crust before nudging it—this helps it release easily without sticking.
Double Dredging Magic: That extra dip in buttermilk and flour not only ups the crunch, but also creates a barrier locking in moisture. This tip took me a while to learn, but it’s a game-changer.
Oil Temperature Control: Keeping it steady around 350°F is crucial. I’ve had batches come out soggy because I let the oil cool down too much after adding cold chicken. A thermometer is worth the investment, trust me.
Customize Your Sauce: Play with ratios of hot sauce and honey to nail your perfect balance. I’ve even thrown in a little smoked paprika to tie it back with the chicken seasoning.
Bun Selection: Brioche buns have a subtle sweetness that complements the savory chicken well, but a sturdy potato roll or even a sandwich bun with a slight crust does the trick if you’re in a pinch.
Don’t Skip the Rest Time: Letting the fried chicken rest briefly on paper towels locks in juiciness and keeps the crust crisp instead of soggy.
One time I tried almond milk instead of buttermilk—totally unexpected, but it actually made the coating a bit creamier. It’s fun to experiment if you like! Just remember some substitutions could alter texture or flavor slightly, so keep notes. I learned patience and attention to oil temperature can’t be rushed either—rushing leads to greasy sandwiches, and no one wants that.
Storing and Reheating Tips
Room Temperature: If you’re lucky, leftovers won’t last long, but if they do, keep the sandwich covered loosely on the counter for up to 2 hours. Beyond that, the crust starts softening.
Refrigerator Storage: Wrap the sandwich tightly in foil or plastic wrap and store in an airtight container for up to 2 days. The chicken will keep its juiciness best this way, but the crust will soften—still tasty, just not as crackly.
Freezer Instructions: You can freeze cooked chicken breasts wrapped tightly in plastic wrap then foil or in a vacuum-sealed bag for up to 3 months. Freeze the buns separately. Thaw in the fridge overnight and reheat the chicken in a hot skillet or oven to recapture some crunch.
Glaze/Sauce Timing Advice: I usually add the sauce right before serving to keep the bun from getting soggy. If prepping ahead, pack the sauce separately and spread just before eating. I’ve found that freezing a saucy sandwich is tricky—you lose that fresh zing.
One trick I’ve learned: to reheat leftovers, gently air-fry or bake them uncovered to help revive the crust instead of microwaving, which makes them rubbery.
Frequently Asked Questions
Final Thoughts
This chicken sandwich is one of those recipes that feel like a warm welcome every time. It’s got that crispy, juicy soul food vibe that makes it a crowd-pleaser at home or a quick fix for when the day’s been a little hectic. Making it yourself means you control the flavors, the crunch, and the freshness in a way store-bought versions just can’t match. Whether you’re feeding a hungry family, whipping up a casual dinner, or craving a little comfort, I’m confident this will become a favorite in your recipe box like it is in mine. Give it a try, and don’t be shy—tell me how yours turns out in the comments or share your own twists! Happy cooking and even happier eating!
chicken sandwich
Ingredients
Main Ingredients
- 4 each boneless skinless chicken breasts
- 1 cup buttermilk for marinade
- 1 tablespoon Cajun seasoning or seasoned salt
- 2 tablespoons black pepper
- 2 teaspoons garlic powder
- 2 teaspoons onion powder
- 2 teaspoons granulated sugar
- 2.5 cups all-purpose flour
- 4 cups vegetable oil for frying
- 4 each brioche buns toasted
- to taste mayonnaise and pickles optional
Instructions
Preparation Steps
- Pound the chicken breasts lightly to even thickness and trim any extra fat.
- In a small bowl, mix the Cajun seasoning, black pepper, garlic powder, onion powder, and granulated sugar.
- Add 1 tablespoon of the seasoning mix to the buttermilk and stir. Pour this mixture over the chicken and marinate for at least 1 hour or overnight.
- Combine the remaining seasoning mix with the all-purpose flour and whisk together.
- Add 3 to 4 tablespoons of the buttermilk marinade to the flour mixture and stir, keeping some chunks for crispiness.
- Dredge each chicken breast in the flour mix, dip back into the buttermilk marinade, and then dredge once again in the flour mixture, pressing the flour onto the chicken.
- Heat vegetable oil in a large heavy pot or deep pan to medium-high heat, until a little flour sizzles when dropped in the oil.
- Fry 2 pieces of chicken at a time for 5 to 6 minutes per side until golden brown and cooked to an internal temperature of 165°F (74°C).
- Place cooked chicken on a cooling rack and repeat for remaining pieces.
- Assemble the sandwich by placing the fried chicken on toasted brioche buns and spreading with mayonnaise and pickles if desired.