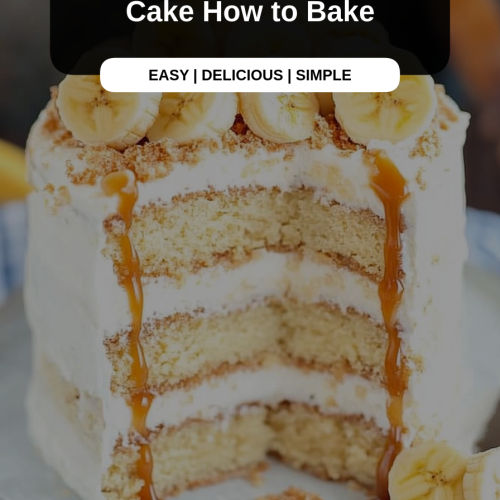
There’s something about the smell of bananas ripening on the counter that instantly takes me back to my childhood kitchen. I remember sneaking in to grab a slice of this banana cake my mom would bake on weekends — warm, soft, bursting with that cozy sweetness that feels like a hug. This banana cake isn’t just another sweet treat; it’s the kind of recipe that’s somehow both incredibly simple and utterly satisfying. Unlike a more delicate sponge or a rich chocolate cake, this one has that perfect balance of moistness from the bananas and a subtle caramelized sugar crust that my family absolutely adores. Honestly, the kids ask for it over and over, and I don’t argue — who can resist a dessert that vanishes in minutes?
What is banana cake?
Think of banana cake as the friendliest cake in the baking realm. It’s essentially a moist, tender cake made by folding ripe bananas into a straightforward batter, giving it a naturally sweet, fruity backbone. The recipe is super approachable — you don’t need any fancy tools or ingredients, just a bowl, some mashed bananas, and a few staples. The humble banana, when mashed and baked, turns buttery and rich, lending this cake a luscious crumb that even people who don’t usually like bananas tend to love. Originating from comforting home kitchens everywhere, banana cake is a cozy way to use up those overripe bananas that might otherwise go to waste. It’s like banana bread’s soft, lofty cousin — if banana bread is casual and rustic, banana cake feels a little more dressy but just as inviting.
Why you’ll love this recipe?
What I love most about this banana cake is how it hits every note without any fuss. First, the flavor is quietly spectacular — those ripe bananas meld with a touch of vanilla and a hint of cinnamon to create something that tastes both nostalgic and fresh. It’s the kind of sweetness that’s natural and comforting, not overpowering, which means you don’t feel weighed down after indulging.
And let me tell you, the simplicity really sealed the deal for me. This is one of those recipes where you don’t even need to grab out a mixer if you don’t want to — just mash, stir, and toss it in the oven. I’ve made this on lazy Sundays and hectic school nights with equal success. The ingredients are basics — bananas, flour, sugar, eggs — all things almost everyone has on hand. That makes it wonderfully budget-friendly, especially when you realize you’re turning bananas that were headed for the compost bin into a cake so tasty people think you went out of your way to grab fancy ingredients.
Versatility-wise, this cake is like a blank canvas. You can dress it up with walnuts, fold in some chocolate chips, or top it with a simple glaze or cream cheese frosting depending on your mood. It works beautifully for breakfast, brunch, dessert, or even as a cozy snack while curled up with a good book. I often swap in almond milk, which made the crumb even creamier, or add a splash of lemon zest for a subtle zing. If you’re a fan of banana bread, this cake will feel like a warm blanket — familiar but just different enough to make it exciting.
How do you make banana cake?
Quick Overview
Making this banana cake is basically about mixing the wet ingredients, especially those beautifully ripe bananas, with your dry ingredients, then baking until golden and fragrant. The magic is in the layering of flavors and textures, with the bananas providing both moisture and sweetness. What’s great is that the process is forgiving — if you mix a little longer or shorter, or your bananas look extra ripe (which is actually a bonus here), it still comes out wonderfully. No pressure, just comfort in a pan.
Ingredients
For the Main Batter:
– 2 to 3 ripe bananas (the riper, the better — I always use ones with lots of brown spots for that extra sweetness and depth)
– 1 ¾ cups all-purpose flour (I like to sift it first for a lighter cake)
– 1 teaspoon baking soda (helps with that classic tender crumb)
– ½ teaspoon salt
– ¾ cup granulated sugar (you can reduce to 2/3 cup if you want a less sweet result)
– ⅓ cup melted unsalted butter (adds richness — I’ve swapped in olive oil, but butter wins every time)
– 2 large eggs (room temperature is best for a smooth mix)
– 1 teaspoon vanilla extract (this really lifts the flavor beautifully)
– ½ cup milk (can sub almond or oat milk if you prefer; makes the cake extra moist)
For the Filling:
– ½ cup chopped walnuts or pecans (optional, for a nice crunch)
– ¼ cup brown sugar (adds a caramelized layer inside if sprinkled over the batter)
– 1 teaspoon cinnamon (to sprinkle over nuts for that warm spice kick)
For the Glaze:
– 1 cup powdered sugar
– 2 tablespoons milk or cream (use less or more to get the perfect drizzly texture)
– ½ teaspoon vanilla extract or a squeeze of fresh lemon juice (for a little brightness)
– Optional: a pinch of cinnamon or finely chopped nuts for garnish
Step-by-Step Instructions
Step 1: Preheat & Prep Pan
Start by heating your oven to 350°F (175°C). Grease an 8-inch round cake pan or line it with parchment paper — this little step always saves the cake from sticking and keeps your edges beautifully soft. I like to butter the pan and then lightly dust with flour for the perfect release.
Step 2: Mix Dry Ingredients
In a medium bowl, whisk together the flour, baking soda, and salt. This helps the leavening get evenly distributed, so your cake rises nicely without any weird lumps. Set this aside while you work on the wet mixture.
Step 3: Mix Wet Ingredients
Grab a large bowl and mash your ripe bananas with a fork until almost smooth but with a little texture. Stir in the sugar, melted butter, eggs, vanilla, and milk until well combined and looking glossy. If the mixture seems a little lumpy, don’t worry — that’s just your bananas doing their thing.
Step 4: Combine
Slowly add the dry ingredients to the wet, folding gently with a spatula or wooden spoon. This part is key: you want the flour just incorporated — a few streaks don’t hurt. Overmixing is a classic mistake I made when I started baking this; it makes the cake dense. So, be gentle and patient!
Step 5: Prepare Filling
In a small bowl, mix the brown sugar, cinnamon, and nuts. This sprinkle inside creates a little sweet swirl that adds texture and flavor. You can skip this if you’re short on time, but trust me, it’s worth the extra minute.
Step 6: Layer & Swirl
Pour half of your batter into the pan, then sprinkle the filling evenly over the top. Add the remaining batter. Using a butter knife or skewer, gently swirl through the batter to create a marbled effect. This is when you’ll see the cake come alive with texture and a little artistry.
Step 7: Bake
Bake for about 45-50 minutes. Check for doneness by inserting a toothpick in the center — it should come out clean or with just a few moist crumbs. If it’s still wet, give it another 5-10 minutes. Every oven is different, and I always keep an eye toward the end to avoid drying out the cake.
Step 8: Cool & Glaze
Let the cake cool in the pan for 10-15 minutes, then gently turn it out onto a wire rack to cool completely. Once cool, whisk together the glaze ingredients until smooth and pourable and drizzle over the top. If the glaze thickens too much, just add a tiny splash more milk — it should slowly drip rather than pool.
Step 9: Slice & Serve
Slice with a sharp serrated knife, wiping it clean between cuts for perfect, neat slices. This cake is fantastic served slightly warm or at room temperature, and it pairs wonderfully with a cup of coffee or a dollop of whipped cream on the side.
What to Serve It With
For Breakfast: I love pairing a warm slice with a strong, black coffee or a vanilla chai latte. The spice echoes the cinnamon in the cake and makes mornings feel a bit more special. Add fresh fruit or yogurt if you want to keep it light and balanced.
For Brunch: Serve banana cake alongside a colorful fruit salad or a creamy ricotta spread spread over the slices. A sparkling mimosa or freshly squeezed orange juice makes the whole thing feel festive and fresh.
As Dessert: Think vanilla ice cream, a drizzle of caramel sauce, or a dusting of cocoa powder. I sometimes toast a few coconut flakes to sprinkle on top for extra crunch and tropical flair — it’s a hit at family dinners.
For Cozy Snacks: When the afternoon slump hits, this banana cake with a cup of herbal tea or a glass of cold milk feels like the ultimate hug. I keep it nearby for those lazy reading afternoons or after-school treats that always disappear before bedtime.
Honestly, our family traditions often revolve around this cake. My siblings still mention it when we gather, recalling those sweet kitchen moments when baking felt like love served on a plate. It’s as much about the memories as the cake itself.
Top Tips for Perfecting Your Banana Cake
Banana Prep: Use bananas that are really ripe, the ones with lots of brown spots or even a little black at the tips. They mash easily and bring out a natural sweetness that’s unbeatable. If your bananas seem too watery, I like to mash them and then spread the mash on a paper towel for a minute or two to absorb excess moisture.
Mixing Advice: Don’t overdo it when combining wet and dry. The batter should look slightly lumpy, and that’s a good thing! Overmixing will make the cake tough and dense. I usually fold gently with a spatula and stop as soon as the flour disappears.
Swirl Customization: For an even prettier swirl, try adding peanut butter or melted chocolate for a fun twist. When swirling, think slow and steady — quick zigzags tend to blend too much and lose that beautiful marbled look.
Ingredient Swaps: I’ve tested this with whole wheat flour — it works beautifully but make sure to add an extra splash of milk because whole wheat tends to soak up more liquid. Also, you can replace butter with coconut oil, which gives a subtle tropical note that pairs so well with bananas.
Baking Tips: Bake on the middle rack for even heat circulation. If your oven tends to run hot, reduce the temp by 10°F and check a bit earlier. Always do the toothpick test instead of relying only on time — ovens vary wildly. Plus, avoid opening the oven door in the first 30 minutes to keep the rise steady.
Glaze Variations: If you want something lighter than a sugar glaze, try a dollop of mascarpone thinned with a little honey or lemon zest. For a richer finish, cream cheese frosting adds indulgence without being too sweet. I’ve found that adding a little cinnamon or nutmeg to the glaze makes it feel homemade and cozy.
Over the years, I’ve learned that patience during cooling is key — rush it, and your glaze can run all over the place. Also, if you’re storing it, fresh glaze is best applied just before serving to keep that perfect texture.
Storing and Reheating Tips
Room Temperature: Keep the banana cake covered with a cake dome or loosely wrapped in foil at room temperature for up to 2 days. This keeps the crumb moist without drying it out, which is crucial since bananas tend to draw moisture.
Refrigerator Storage: Wrap the cake tightly in plastic wrap or store in an airtight container to prevent it from absorbing fridge odors. It’ll stay fresh for about 4-5 days. I sometimes slice before refrigerating for grab-and-go snacks.
Freezer Instructions: Banana cake freezes beautifully. Wrap the whole cake or individual slices tightly in plastic wrap and then foil to prevent freezer burn. It can be kept frozen for up to 3 months. When ready to enjoy, thaw overnight in the fridge or warm gently in a microwave to revive that just-baked softness.
Glaze Timing Advice: If you plan to store the cake for more than a day, I recommend glazing just before serving. The sugar glaze can start to get a bit sticky or foggy when refrigerated, so fresh glaze keeps the cake looking and tasting its best.
Frequently Asked Questions
Final Thoughts
This banana cake holds a special place in my heart — it’s been a go-to for years, whether I’m rescuing overripe bananas or needing a quick, comforting dessert that everyone loves. It’s that rare recipe that feels like a warm, familiar friend and a little celebration all in one bite. If you’ve got a bunch of bananas staring you down and wondering what to do, this cake is your answer — easy, forgiving, and absolutely delicious.
Once you try it, I’m sure you’ll find yourself baking it again and again. Feel free to experiment with the glaze or mix-ins, and don’t forget to share your own twists with me — I can’t wait to hear how yours turns out! Happy baking and may your kitchen always smell like bananas and sweet nostalgia.
banana cake
Ingredients
Main Ingredients
- 15.25 ounces yellow cake mix
- 1 cup whole milk
- 0.5 cup mashed bananas about 1 small banana
- 0.5 cup vegetable oil
- 2 large eggs
- 0.75 cup light brown sugar
- 0.5 cup salted butter melted
- 2.5 bananas bananas sliced lengthwise
Instructions
Preparation Steps
- Preheat the oven to 350 degrees Fahrenheit and spray a 9-inch baking or springform pan with parchment paper or cooking spray.
- In a large bowl, stir together the yellow cake mix, whole milk, mashed bananas, vegetable oil, and eggs until completely combined. Set aside.
- Whisk the light brown sugar with the melted butter in a small bowl until combined.
- Pour the butter and sugar mixture into the bottom of the springform pan.
- Arrange the sliced bananas in one layer, flat side down, on top of the butter mixture, pressing lightly to place.
- Pour the prepared cake batter over the bananas in the springform pan.
- Bake the cake for 30-35 minutes or until a toothpick inserted in the center comes out clean.
- Remove the cake from the oven and run a knife around the edges of the pan to loosen.
- Allow the cake to cool for 10 minutes before carefully flipping it onto a serving plate so the bananas are on top.
- Remove the pan and slice the cake to serve warm or cooled.