There’s something about the smell of cinnamon, nutmeg, and buttery sugar wafting through the kitchen that instantly takes me back to my childhood holidays. Every year, my family gathered around the counter with eager anticipation as I pulled out the tray of Christmas cookie bars. They’re like the lovable cousin of traditional Christmas cookies—same festive flavors but way easier to make and share. Compared to the typical cut-out cookies that can eat up an entire afternoon with rolling and shaping, these bars come together fast, and the whole house smells like Christmas in a pan. If you want a holiday treat that feels like a big cozy hug but doesn’t require hours of fussing, these Christmas cookie bars will quickly become your go-to indulgence.
What is Christmas cookie bar?
Think of Christmas cookie bars as the best of all cookie worlds packed into one pan. Instead of making dozens of individual cookies, you bake a thick, chewy bar infused with all those classic holiday flavors—cinnamon, vanilla, little bursts of chocolate or nuts, and sometimes even a cream cheese swirl or glaze on top. It’s essentially a giant cookie slab you slice into squares. The “bars” part just makes them super easy to share or serve at parties without the mess of rolling dough or chilling. The name captures both the spirit of Christmas baking and the convenience of bar cookies, a style that’s popular for its simplicity and wow factor. Whether you’re baking for a crowd or just want a fast sweet fix, Christmas cookie bars are a friendly, approachable way to get festive in the kitchen.
Why you’ll love this recipe?
What I love most about this Christmas cookie bars recipe is how it hits every note at once. First of all, the flavor—imagine biting into a chewy, buttery base with hints of warm spices and just the right amount of sweetness. These bars are less fussy than cut-out cookies but every bit as flavorful, even more so if you swirl in a sweet cream cheese layer or sprinkle some toasted nuts on top. The layers of texture make every bite interesting and satisfying.
Secondly, the simplicity can’t be overstated. I tested this recipe numerous times on busy holiday evenings when I didn’t have a minute to waste. It comes together in less than 20 minutes, with no chilling time, and bakes up golden and tender without any guesswork. The ingredients are kitchen staples too—nothing exotic or pricey, which is a win when you’re already buying gifts and planning big meals.
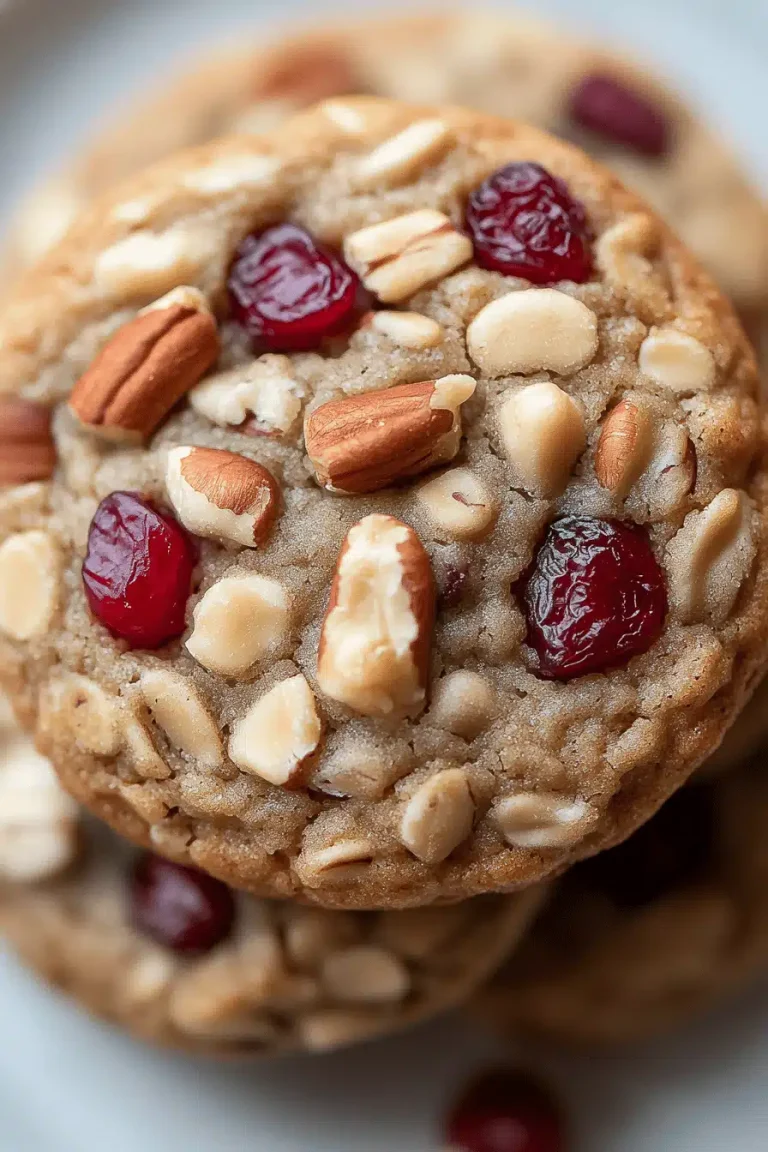
Versatility is the cherry on top. You can mix in chocolate chips, dried cranberries, or even a handful of chopped pecans. I’ve made it dairy-free by swapping almond milk and vegan butter, and honestly, that made it even creamier! Plus, the glaze adds a festive shimmer but can easily be swapped out for a dusting of powdered sugar or a drizzle of melted white chocolate.
If you enjoy other holiday treats like gingerbread or peppermint bark, this recipe fits right into your Christmas dessert lineup—just faster and somehow cozier. It’s the kind of recipe that my kids beg for year-round, not just December. Somehow, these bars disappear in minutes at my house whenever I bring them out, so trust me, you want this recipe in your arsenal.
How do I make Christmas cookie bars?
Quick Overview
At its heart, making Christmas cookie bars is like baking a thick cookie in a pan rather than shaping individual ones. You start by preheating the oven and prepping your pan, then mix your dry ingredients separately from your wet gingerbread-scented batter. Once those are combined, you spread half the batter in the pan, layer on a creamy filling if you want, swirl it together for that beautiful marbled effect, and pop it in the oven. The best part? It requires no special equipment and no chilling time, so you can make these cookie bars even on a busy morning or after work. I always say it’s foolproof, which means you can trust yourself in the kitchen—something we all need during holiday stress!
Ingredients
For the Main Batter:
- 2 cups all-purpose flour – I prefer unbleached for a slightly nutty taste
- 1 teaspoon baking powder – this gives just enough lift without turning cakey
- 1/2 teaspoon baking soda – balances the acidity of brown sugar perfectly
- 1 teaspoon ground cinnamon – use fresh if you can, it makes a big difference!
- 1/2 teaspoon ground nutmeg – warms every bite
- 1/4 teaspoon salt – enhances all the flavors
- 1 cup granulated sugar – you can reduce slightly if you prefer less sweet
- 1/2 cup brown sugar, packed – adds great moisture and depth
- 1 large egg – room temperature for best mixing
- 1½ teaspoons vanilla extract – pure vanilla is a must here
- 3/4 cup unsalted butter, melted and cooled – butter is the magic here, don’t skimp!
- 2 tablespoons milk (dairy or plant-based) – adds moisture and tenderness
For the Filling:
- 8 oz cream cheese, softened – I always let mine sit out for an hour to make spreading easy
- 1/4 cup granulated sugar – balances the tangy cream cheese
- 1 teaspoon vanilla extract – complements the cookie base perfectly
- Optional: ½ cup mini chocolate chips, chopped nuts, or dried cranberries to fold into the filling or sprinkle on top
For the Glaze:
- 1 cup powdered sugar – sifted to avoid lumps
- 2-3 tablespoons milk or lemon juice (for a tangy twist)
- 1/2 teaspoon vanilla extract (optional)
Step-by-Step Instructions
Step 1: Preheat & Prep Pan
Kick things off by heating your oven to 350°F (175°C). I like to line a 9×13-inch baking pan with parchment paper, leaving enough overhang on two sides so you can lift the bars out easily after they’re baked. Remember to grease the parchment lightly – it helps the bars release without a fight.
Step 2: Mix Dry Ingredients
In a large bowl, whisk together the flour, baking powder, baking soda, cinnamon, nutmeg, and salt until everything looks evenly combined. This step is crucial since those spices and leavening agents need to spread evenly through your batter for perfect flavor and texture.
Step 3: Mix Wet Ingredients
In a separate bowl, stir the granulated and brown sugars with your melted butter until smooth but not foamy. Then add the egg, vanilla, and milk, mixing until just combined. If your butter is too hot, this is where it could cook the egg, so be patient and let it cool down first—it makes a world of difference.
Step 4: Combine
Dump the dry ingredients into the wet and fold gently until just mixed. Overmixing here leads to tough bars, so stop as soon as no flour streaks remain. Your batter will be thick but soft—if it feels crumbly, a splash more milk can bring it back.
Step 5: Prepare Filling
Beat the cream cheese, sugar, and vanilla together until silky smooth and lump-free. This isn’t a frosting; it should be spreadable but quite firm so it holds when baked. If it’s too runny, a touch of powdered sugar can help thicken it up.
Step 6: Layer & Swirl
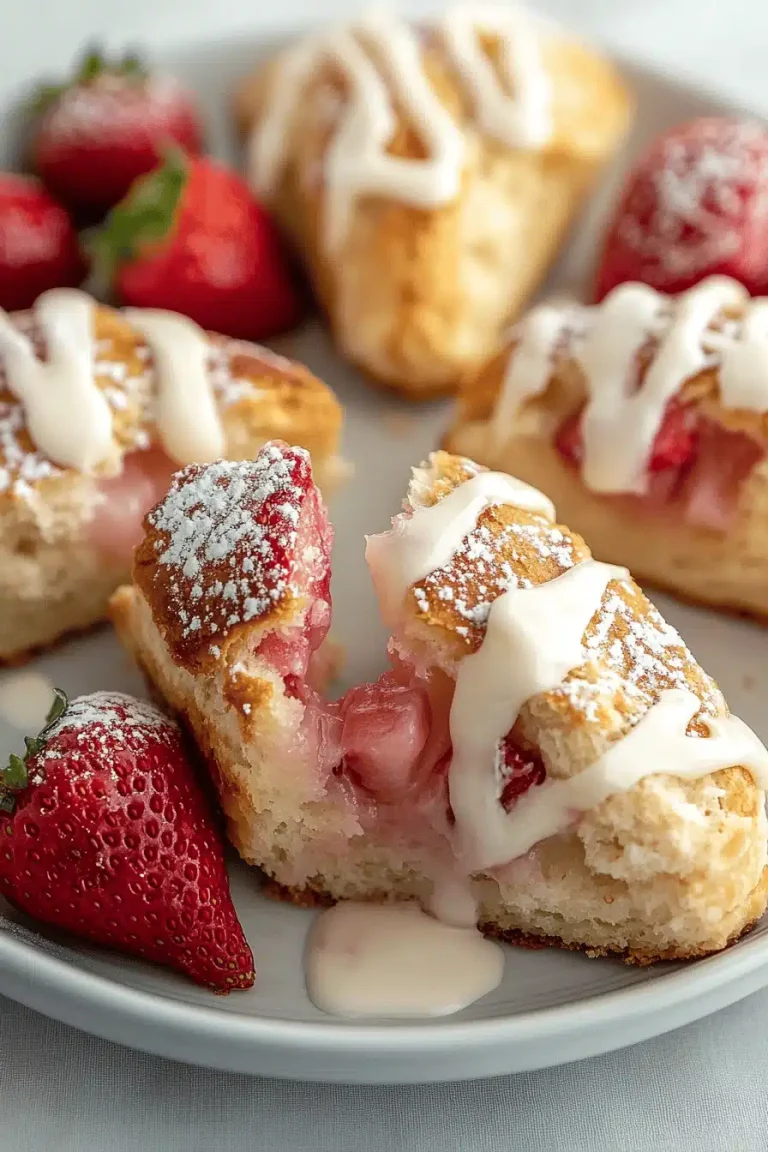
Spoon half the cookie batter evenly into your prepared pan and spread it gently with a spatula. Dollop the cream cheese mixture in spoonfuls over the top, then spread the remaining batter over it as best you can – it might look messy, but that’s okay. Use a butter knife or skewer to swirl the cream cheese into the cookie batter with slow figure-eight motions, creating those charming marbled ribbons. This swirl is what makes the bars look holiday-magical without any fancy decorating skills.
Step 7: Bake
Bake for about 30-35 minutes, checking at 30 with a toothpick. You want it to come out with just a few moist crumbs clinging, never wet batter. Oven temperatures vary, so mine tends to turn golden around 33 minutes, but watch the edges; if they’re darkening too fast, pop foil on the top loosely.
Step 8: Cool & Glaze
Once out of the oven, let the bars cool completely in the pan on a wire rack. Patience here pays off, as glazing warm bars may lead to a runny mess. When cool, whisk together the glaze ingredients until smooth and drizzle over the top in thin lines. For a festive touch, add some crushed peppermint or colored sugar sprinkles immediately after glazing.
Step 9: Slice & Serve
Use the parchment overhang to lift the entire slab from the pan and place on a cutting board. For clean cuts, I use a sharp knife dipped in warm water, wiping between slices. These bars taste incredible at room temperature, but a quick zap in the microwave makes them gooey and irresistible. Serve with hot cocoa or your favorite holiday tea, and watch the smiles appear.
What to Serve It With
For Breakfast: These cookie bars make a delightfully indulgent weekend breakfast treat. Pair with a strong dark roast coffee or a frothy chai latte — the spice notes in the bars really play well with these bold flavors. I sometimes add a dab of cream cheese or nut butter on the side just because.
For Brunch: Dress up a holiday brunch by slicing the bars into neat squares and plating alongside fresh fruit, a dollop of whipped cream, or spiced yogurt. They’re surprisingly elegant when paired with a mimosa or hot mulled cider and perfect for sharing with friends and family.
As Dessert: Warm these bars slightly and serve with a scoop of vanilla bean ice cream or a drizzle of rich caramel sauce. If you’re feeling particularly festive, a spoonful of cranberry sauce on the side adds a lovely tart contrast. This combo always surprises guests and makes for a memorable finale.
For Cozy Snacks: When the kids come home from playing in the snow, these bars are a dream grab-and-go snack with a glass of milk or a mug of hot chocolate. They’re the kind of treat that brings everyone to the kitchen, lingering over stories and laughter in the glow of twinkle lights.
Top Tips for Perfecting Your Christmas Cookie Bars
Dry Ingredient Prep: Always sift your flour and spices if you can—it really helps to keep the texture light and the spice flavors bright. Also, make sure your baking soda and powder are fresh; old leaveners can make your bars dense.
Mixing Advice: Resist the urge to overmix once you combine your wet and dry ingredients. I’ve learned the hard way that overworked batter can lead to tough, leathery bars instead of tender, melt-in-your-mouth ones. A few small lumps are fine!
Swirl Customization: You can get creative with your swirls. Try gentle figure eights for a natural look or more deliberate zigzags for a graphic effect. Don’t worry about perfect marbling; imperfect swirls look homemade and inviting.
Ingredient Swaps: Don’t have cream cheese? Greek yogurt or mascarpone can be good substitutes in the filling, though mascarpone will be richer and softer. If you want to cut down on sugar, swap half the granulated sugar with coconut sugar or maple syrup but note the flavors and textures will shift slightly.
Baking Tips: Keep the bars in the center rack of the oven to ensure even cooking. If your oven tends to run hot, tent loosely with foil halfway through baking. Check with a toothpick early to avoid overbaking—that chewiness is key!
Glaze Variations: I often swap milk for lemon juice in the glaze to add a bright zing that cuts the richness. For a chocolate twist, melt some white chocolate and drizzle alongside the glaze. It’s these little tweaks that keep me coming back to this recipe year after year.
Storing and Reheating Tips
Room Temperature: Store your bars in an airtight container on the counter for up to three days. I find covering them with a clean tea towel or parchment paper helps keep them soft but prevents the glaze from smudging.
Refrigerator Storage: If you want to keep them longer (up to a week), refrigeration works well. Use a container with a tight lid, but bring bars to room temperature before serving because the texture firms up quite a bit when cold.
Freezer Instructions: These bars freeze beautifully for up to three months. Wrap tightly in plastic wrap, then place in a freezer-safe zip bag or container. Thaw overnight in the fridge or at room temperature, then refresh with a few seconds in the microwave for that just-baked softness.
Glaze Timing Advice: If you plan to freeze, I recommend glazing after thawing so it stays fresh and shiny. For refrigerator or room temp storage, feel free to glaze right after cooling for immediate presentation.
Frequently Asked Questions
Final Thoughts
To me, these Christmas cookie bars are the sweet heart of holiday baking—easy enough for any weeknight but special enough to bring out when company comes or when you want that golden glow of festive spirit in your kitchen. Each slice is packed with cozy spice, creaminess, and buttery goodness that never fails to get my family asking for seconds (and sometimes thirds!). If you love the idea of classic Christmas cookies but don’t want to spend hours rolling dough, this is the recipe to try next. And if you make any fun twists or discoveries, I’d love to hear about them in the comments! Happy baking, and may your kitchen always smell like Christmas magic.

Christmas cookie bars
Ingredients
Main Ingredients
- 0.5 cup unsalted butter
- 2 cups packed brown sugar
- 2 large eggs
- 1 teaspoon vanilla extract
- 0.5 teaspoon salt
- 1 teaspoon baking powder
- 2 cups all-purpose flour
- 1 cup Christmas M&Ms or your favorite color
- 0.5 cup Christmas sprinkles use jimmies for best results
Instructions
Preparation Steps
- Preheat oven to 350°F. Line a 9x13 inch metal pan with foil and spray well with cooking spray. Do not use a glass pan.
- Mix butter and brown sugar with a stand or hand mixer until crumbly. Mix in eggs and vanilla until smooth. Add salt, baking powder, then flour. Stir in M&Ms and sprinkles.
- Spread the mixture in the prepared pan. Spray your hands with cooking spray and smooth the dough evenly. Top with remaining M&Ms and sprinkles.
- Bake for 22 to 25 minutes until edges are golden. Under bake slightly for a gooey center. Let cool, then slice into bars.
- Store in an airtight container for up to 4 days or freeze for up to a month.