
Turtle Ice Cream Sandwich Cake
There’s something magical about a dessert that tastes like summer, feels rich and indulgent, yet comes together in under an hour of prep time. That’s exactly what this Turtle Ice Cream Sandwich Cake delivers—a no-bake treat layered with creamy vanilla sandwiches, fluffy Cool Whip, gooey caramel, glossy chocolate sauce, and crunchy pecans. It’s basically everything you love about those little candy turtles rolled into one dreamy, sliceable masterpiece. I first made this for a family picnic last July, and let me tell you—it vanished before the sun even set. Seriously, people kept asking, “Is this store-bought?” Nope. Just me, a 9×13 pan, and a whole lot of love.
What Is Turtle Ice Cream Sandwich Cake?
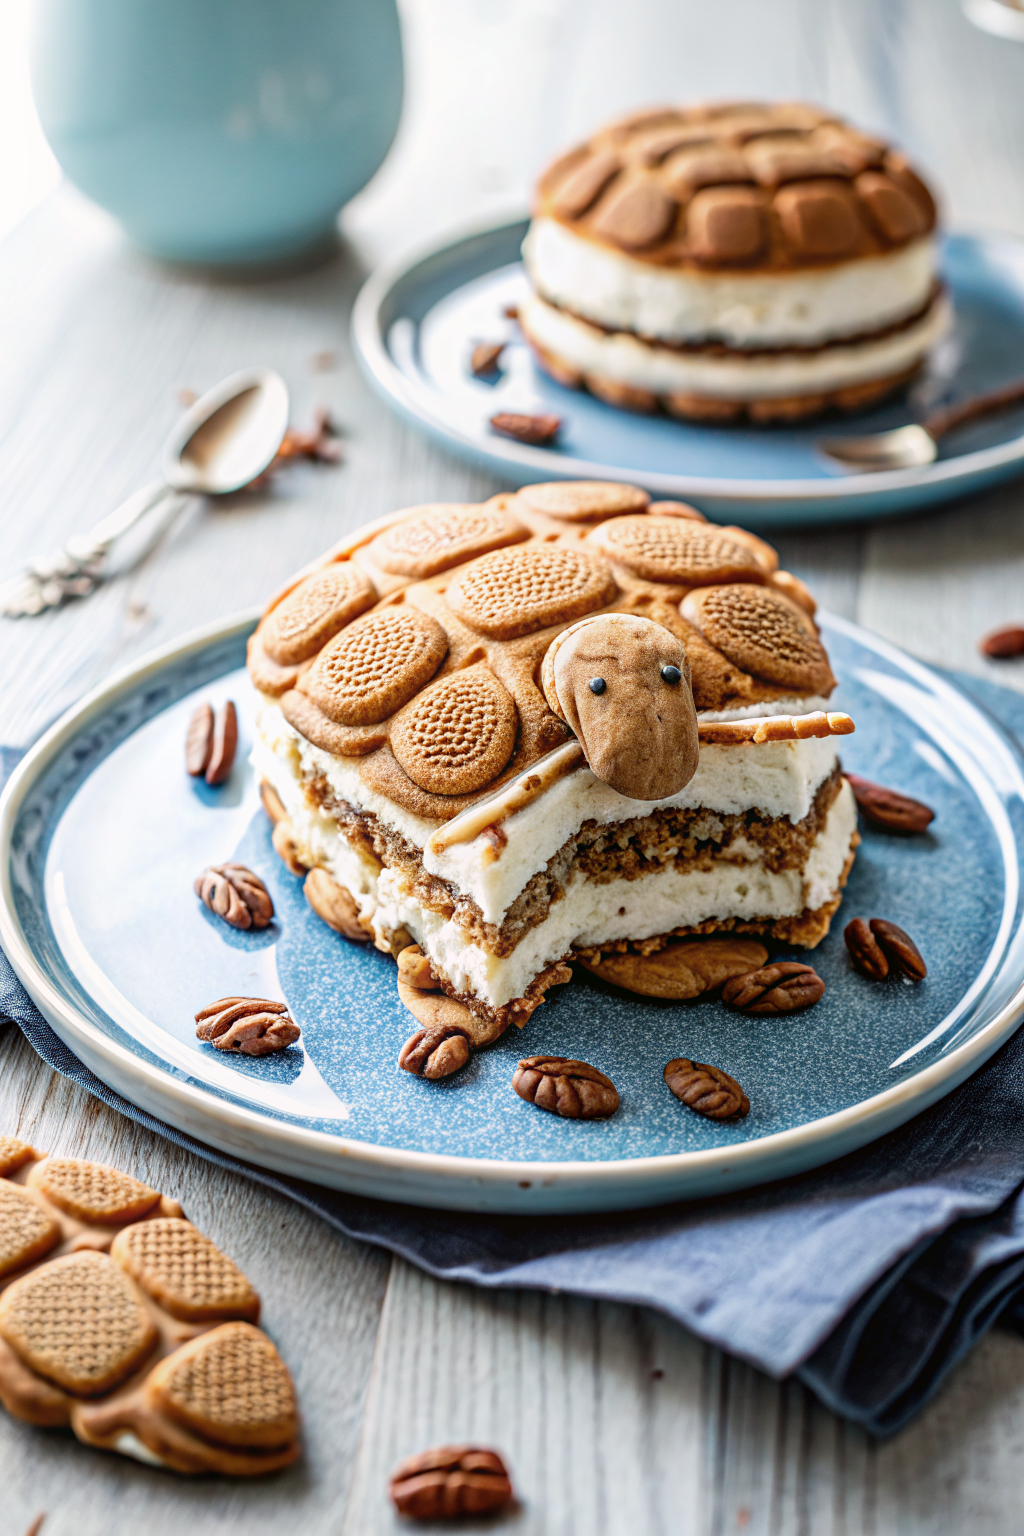
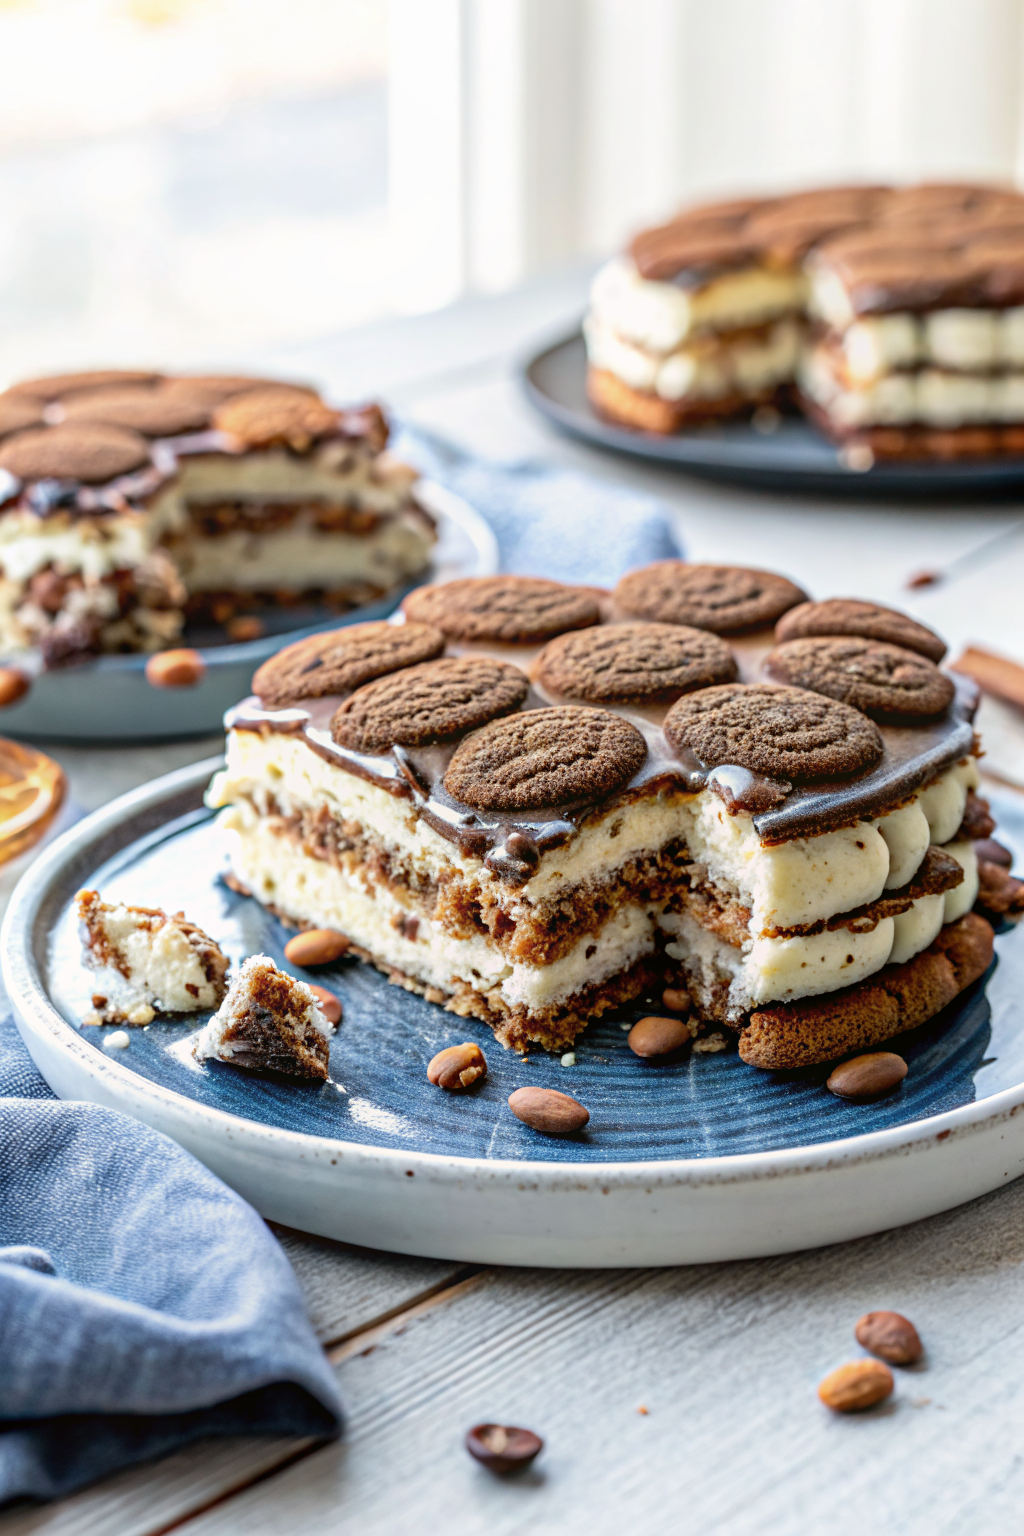
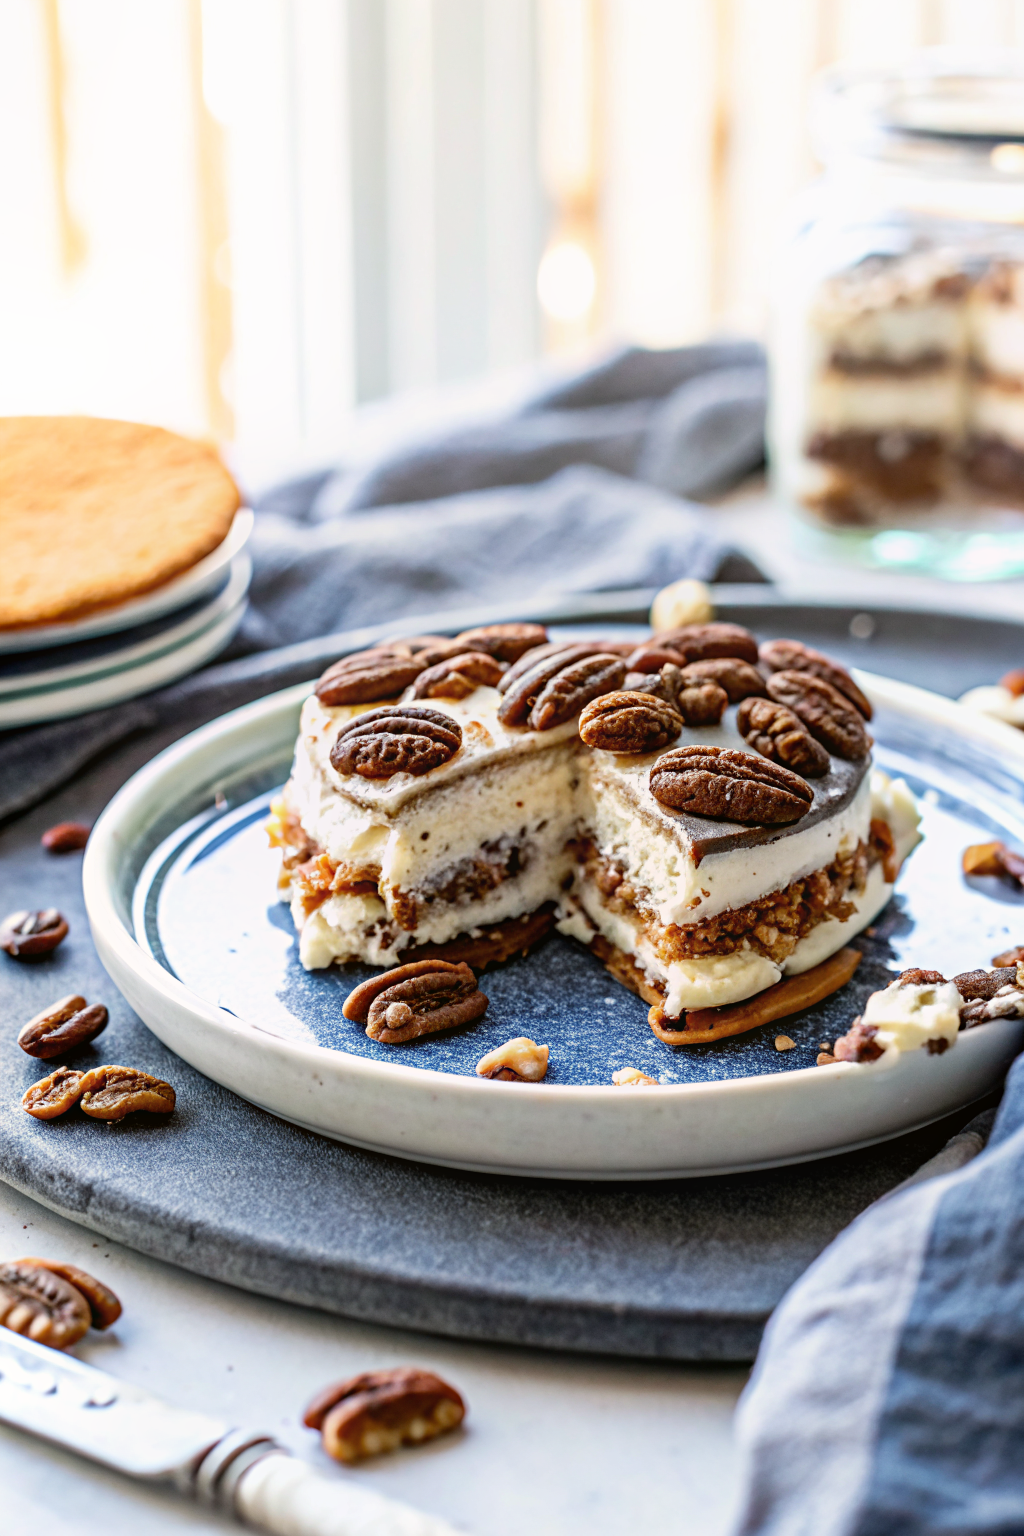
This isn’t just another frozen dessert—it’s a celebration in a pan. Think of it as a grown-up ice cream sandwich bar elevated to cake status. The base is made by lining a dish with vanilla ice cream sandwiches (you might need to trim a few to fit), then building upward with dollops of thawed Cool Whip, drizzles of warm chocolate and caramel sauces, and scattered pecans and mini chocolate chips. After freezing overnight or at least four hours, you get perfectly set layers that hold their shape when sliced. It’s cool, it’s cold, it’s sweet… and honestly? It’s one of those recipes you’ll want to make again and again.
Why You’ll Love This Recipe
If you’re short on time but still crave something impressive, this is your answer. With just five core ingredients—vanilla ice cream sandwiches, Cool Whip, chocolate sauce, caramel sauce, and pecans—you can pull this together in minutes. No oven? No problem. No complicated techniques? Check. And because it freezes so well, you can prep it the night before and wake up to dessert ready to serve. My kids actually helped layer it last time, and they were so proud of their “professional baker” job. Plus, every bite hits all the right notes: creamy, nutty, fudgy, and oh-so-satisfying. Whether you’re hosting a crowd or treating yourself after a long day, this cake brings joy without the stress.
It also travels beautifully—perfect for potlucks, picnics, or holiday spreads. And if you’ve got picky eaters? Swap the pecans for pretzels or skip them entirely. Want more chocolate? Add extra fudge swirls. The beauty of this recipe is its flexibility. Oh, and did I mention it serves up to 24? Yes, really. One pan = happy guests = instant hostess hero status.
How to Make Turtle Ice Cream Sandwich Cake
Quick Overview
This no-bake dessert builds in just five simple steps: arrange the ice cream sandwiches, layer with Cool Whip and sauces, sprinkle nuts and chips, repeat, then freeze until firm. Total active time is about 15 minutes; the rest is chilling time (which is totally worth it). You’ll end up with a stunning, restaurant-worthy cake that looks like you spent hours on it—but didn’t.
Ingredients
- 24 vanilla ice cream sandwiches (store-brand or premium—your call!)
- 16 oz Cool Whip (thawed until smooth)
- ½ cup chocolate sauce (warm or room temp)
- ½ cup caramel sauce (same note)
- ½ cup pecans, chopped
- ⅓ cup mini chocolate chips
Step-by-Step Instructions
- Arrange the base: Line the bottom of a 9×13-inch baking dish with 12 ice cream sandwiches. If they’re too big, trim the edges slightly to fit. Press down gently so they stick together.
- First Cool Whip layer: Spread half of the thawed Cool Whip evenly over the sandwiches.
- Add sauces & toppings: Drizzle ¼ cup chocolate sauce over the Cool Whip, then ¼ cup caramel on top. Sprinkle half the pecans and half the chocolate chips.
- Repeat layers: Top with the remaining ice cream sandwiches (trim if needed), spread the rest of the Cool Whip, add more sauces, and finish with pecans and chips.
- Freeze: Cover loosely with aluminum foil and freeze for 3–4 hours until solid. Slice into squares and enjoy!
What to Serve It With
Serve this turtle cake alongside classics like fresh berries, whipped cream, or a scoop of vanilla ice cream on the side for extra decadence. It pairs wonderfully with chocolate cake or cookies—especially Oreos or brownie bites. For a full dessert spread, consider adding a glass of milk or a sparkling lemonade to cut through the sweetness. And if you’re feeling fancy? A dusting of powdered sugar or a drizzle of extra caramel before serving makes it look even more special.
Top Tips for Perfecting Your Turtle Ice Cream Sandwich Cake
Here are my tried-and-true hacks to keep this cake looking and tasting perfect every time:
Thaw the Cool Whip properly: Never use frozen Cool Whip—it won’t spread smoothly and will create icy chunks.
Trim as needed: Don’t force oversized sandwiches into the pan; trim edges cleanly for neat layers.
Use warm sauces: Slightly warmed chocolate and caramel flow better and blend into the layers instead of sitting on top.
Slice with hot knives: Run a sharp knife under hot water, wipe it dry, and make clean cuts between slices.
Prep ahead: Make it the night before—it sets beautifully in the freezer and tastes even richer after resting.
Storing and Reheating Tips
Leftovers? Keep them tightly wrapped in plastic wrap or stored in an airtight container in the freezer for up to one week. When ready to serve, let individual slices sit at room temperature for 5–10 minutes to soften slightly—but don’t leave it out too long, or the ice cream will melt.
Note: This dessert is best served cold—no reheating needed!
Frequently Asked Questions
Final Thoughts
This Turtle Ice Cream Sandwich Cake has become a staple in our house—not just because it’s easy, but because it brings people together. Every time I slice into it, I’m reminded how simple ingredients can create magic when layered with care. Whether you’re whipping it up for a birthday party, a backyard BBQ, or just because you deserve something sweet, this cake delivers pure happiness in every bite. So grab your favorite sauces, line up those sandwiches, and freeze yourself into dessert heaven.

Turtle Ice Cream Sandwich Cake
Ingredients
Main Ingredients
- 24 pieces ice cream sandwiches
- 16 oz Cool Whip (thawed)
- 0.5 cup chocolate sauce
- 0.5 cup caramel sauce
- 0.5 cup pecans (chopped)
- 0.33333333333333 cup mini chocolate chips
Instructions
Preparation Steps
- Line the bottom of a 9x13 inch pan with 12 ice cream sandwiches. You may need to slice one or two sandwiches to fit all into the pan.
- Spread half of the Cool Whip over the ice cream sandwich layer.
- Drizzle about 0.25 cup of the chocolate sauce over top of the Cool Whip followed by 0.25 cup of the caramel sauce. Sprinkle half of the pecans and half the chocolate chips over the top.
- Repeat the same steps with the remaining ingredients.
- Cover the baking dish loosely with aluminum foil and place in the freeze for 3 to 4 hours before serving. Slice into squares and enjoy.


