You know those days when you’re just craving a little bit of cozy, a hint of nostalgia, and that unmistakable smell of autumn baking, but the thought of rolling out pie crust and waiting an hour for a pie to bake feels like too much? Yeah, me too. That’s exactly why I dreamed up this Apple Pie Jam. Honestly, it’s one of those recipes that I make purely for my own sanity on a busy Tuesday. The other day, I had a hankering for something sweet, and instead of reaching for a store-bought cookie, I whipped up a batch of this jam. Within about 30 minutes, my kitchen smelled like an apple orchard in peak season, and I had a jar of pure, concentrated apple pie happiness ready to go. It’s like magic, but even better because it’s edible! Forget spending all afternoon on a traditional apple pie; this jam gives you all those incredible warm, spiced apple flavors in a ridiculously easy-to-make spread. If you love the idea of apple pie but need it in a more accessible, pantry-friendly form, then you are going to be obsessed with this Apple Pie Jam.
What is Apple Pie Jam?
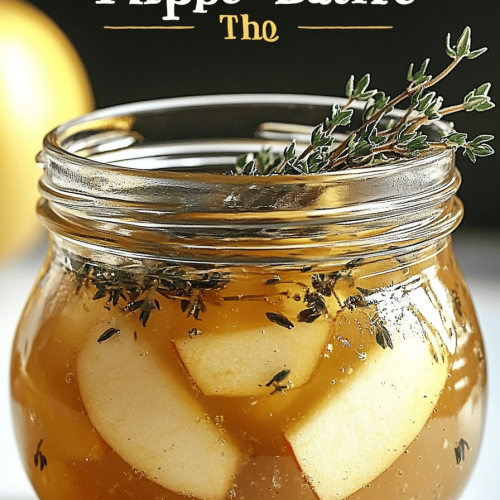
So, what exactly is this magical concoction I’m calling Apple Pie Jam? Think of it as the essence of a warm, freshly baked apple pie, distilled into a luscious, spreadable jam. It’s not just apples cooked down with sugar; oh no, this is so much more! We’re talking about those classic apple pie spices – cinnamon, nutmeg, maybe a whisper of clove – all mingling with tender, sweet apples to create a flavor profile that instantly transports you to a crisp fall afternoon. It’s essentially a super-concentrated, spreadable version of your favorite pie filling, without all the fuss. It’s a bit like a chunky Apple Butter, but with a brighter, more distinct apple flavor and that signature pie spice blend. The beauty of Apple Pie Jam is that it captures the comforting, familiar taste of apple pie but in a form that’s incredibly versatile. It’s easy enough for a weeknight treat but special enough to impress guests. It’s a taste of home, bottled up and ready to be enjoyed on toast, scones, yogurt, or straight from the jar (no judgment here!).
Why you’ll love this recipe?
What are some of the best reasons to make Apple Pie Jam?flavor. Oh. My. Goodness. It’s like biting into a warm slice of apple pie, but in jam form. The apples are tender and sweet, the spices are perfectly balanced – not too much, not too little – and it just tastes like pure comfort. It’s the kind of flavor that makes you close your eyes and smile. Then there’s the simplicity. Seriously, if you can chop an apple and stir a pot, you can make this jam. There’s no fancy equipment, no complicated techniques, just straightforward goodness. I’ve even made it with my kids helping, and they absolutely loved it. It’s such a lifesaver on busy weeknights when everyone’s asking “What’s for dessert?” or “Can I have a snack?” This is my go-to. It’s also incredibly cost-efficient. Apples are usually quite affordable, especially when they’re in season, and the other ingredients are pantry staples. You get so much deliciousness for a fraction of the cost of buying specialty jams or making a whole pie. And the versatility! This is where the real magic happens. I use this Apple Pie Jam on everything. It’s fantastic on my morning toast, piled high on warm scones, swirled into plain yogurt for a special breakfast treat, or even dolloped on top of vanilla Ice Cream for an easy dessert. It’s a little bit of autumn sunshine you can enjoy any time of year. Honestly, what I love most about this jam is that it delivers that deeply satisfying apple pie experience without the commitment of baking a whole pie. It’s my secret weapon for instant comfort and deliciousness.
How do I make Apple Pie Jam?
Quick Overview
Making this apple pie Jam is surprisingly straightforward. We’ll start by prepping our apples and then simmering them with sugar and spices until they’re perfectly tender and the mixture has thickened beautifully. The key is to get that lovely jammy consistency that’s still spoonable. You’ll essentially cook down chopped apples with sugar, lemon juice (for brightness and pectin activation), and those essential apple pie spices until everything is soft and cohesive. The whole process takes less than an hour, and most of that is just hands-off simmering time. It’s a fantastic way to use up a bounty of apples or just to have a jar of pure joy on hand.
Ingredients
For the Main Jam:
5-6 medium apples (about 2 lbs), any variety you like, peeled, cored, and chopped into ½-inch pieces. I like using a mix of tart and sweet apples, like Honeycrisp and Granny Smith, for the best flavor balance. If you only have one kind, that’s perfectly fine too! Just aim for apples that hold their shape well when cooked. Don’t stress too much about perfect uniformity in chopping; they’ll soften up. Make sure they are washed and dried before you start chopping.
1 ½ cups granulated sugar. This might seem like a lot, but it’s necessary for preservation and achieving that classic jammy texture. You can slightly reduce it if you prefer a less sweet jam, but be aware it might affect the set.
¼ cup fresh lemon juice. This is super important! It brightens the apple flavor and helps the jam to set properly by activating the natural pectin in the apples. Don’t skip this.
1 teaspoon ground cinnamon. The star of our apple pie spice blend.
½ teaspoon ground nutmeg. Adds warmth and that quintessential cozy flavor.
¼ teaspoon ground allspice (optional, but recommended!). Just a little bit adds a lovely depth.
⅛ teaspoon ground cloves (optional, use sparingly!). This packs a punch, so a tiny bit goes a long way to enhance the other spices.
Pinch of salt. A little salt actually enhances the sweetness and other flavors, making them pop!
For Optional Swirl (If you want an extra treat):
2 tablespoons unsalted butter, softened.
2 tablespoons Brown Sugar.
½ teaspoon ground cinnamon.
Step-by-Step Instructions
Step 1: Preheat & Prep Pan
Grab a large, heavy-bottomed pot or Dutch oven. A heavy bottom is key here to prevent scorching, especially as the jam thickens. Give it a quick rinse and make sure it’s clean. You don’t need to preheat the pot itself, but have all your ingredients measured and ready to go. This makes the cooking process much smoother. Apples are ready to go as soon as they’re peeled, cored, and chopped.
Step 2: Mix Dry Ingredients
In a small bowl, whisk together the granulated sugar, cinnamon, nutmeg, allspice (if using), cloves (if using), and the pinch of salt. Make sure there are no clumps of spice or sugar. This ensures even distribution of flavor throughout the jam. It’s a simple step, but it really helps guarantee that every bite is perfectly spiced. Don’t skimp on this little mixing step!
Step 3: Mix Wet Ingredients
Add your chopped apples directly into the large pot. Pour in the fresh lemon juice over the apples. The lemon juice will help keep the apples from browning too much while you get everything else ready. Give them a gentle stir to coat the apples evenly with the lemon juice. This is where our apple base starts to come together. You’ll notice the apples might look a little bright and glossy from the lemon juice.
Step 4: Combine
Pour the sugar and spice mixture over the apples and lemon juice in the pot. Give everything a really good stir to make sure the sugar and spices are evenly distributed among the apple pieces. You want to make sure every apple chunk gets coated in that delicious spice blend. It’s starting to smell amazing already, isn’t it?
Step 5: Prepare Filling (Optional Swirl)
If you’re going for the optional swirl, this is the time to make it. In a small bowl, mash together the softened butter, brown sugar, and cinnamon until it forms a paste. It should be relatively smooth and well combined. This little addition will give you pockets of extra caramelly, spiced goodness within the jam. It’s completely optional, but oh-so-worth-it if you have a few extra minutes.
Step 6: Layer & Swirl (Optional)
If you made the swirl mixture, spoon it over the apple mixture in the pot. You don’t need to stir it in thoroughly at this point. We want it to melt and swirl naturally as it cooks. You can just drop spoonfuls here and there. If you’re not doing the swirl, just proceed to the next step with your basic apple mixture.
Step 7: Bake (Simmer)**
Place the pot over medium heat. Bring the mixture to a gentle simmer, stirring occasionally. Once it’s simmering, reduce the heat to low, cover the pot loosely (leaving a small gap for steam to escape), and let it cook for about 30-45 minutes, or until the apples are very tender and the liquid has thickened considerably. Stir every 10-15 minutes to prevent sticking and ensure even cooking. You can mash some of the apple pieces against the side of the pot with your spoon as they soften to help create a smoother texture, or leave them chunkier if you prefer. The jam is ready when it coats the back of a spoon and holds its shape for a few seconds before sliding off. If you added the swirl, you’ll see it melting and weaving through the apples.
Step 8: Cool & Glaze
Once the jam has reached your desired consistency, remove the pot from the heat. Let the Apple Pie Jam cool in the pot for about 10-15 minutes. This allows it to thicken up even more as it cools. If you plan to add a glaze (which I often do for extra sweetness and shine!), prepare it now. For a simple glaze, whisk together about ½ cup powdered sugar with 1-2 tablespoons of milk or apple juice until smooth and pourable. Drizzle this over the slightly cooled jam in the pot, or drizzle it over individual servings.
Step 9: Slice & Serve
Transfer the Apple Pie Jam to clean jars. Make sure the jars are sterilized if you plan to store it for a long time. Let it cool completely before covering. Once cooled, it will be thick and spreadable. If you’re serving it right away, spoon it warm over toast, pancakes, or yogurt. For the best texture and flavor development, I usually let it sit for at least a few hours, or even overnight, before digging in. It’s truly irresistible!
What to Serve It With
This Apple Pie Jam is a total chameleon! It’s not just for toast, though it’s absolutely divine on a thick slice of toasted sourdough or a fluffy English muffin. For breakfast, I love swirling a generous spoonful into my morning oatmeal or Greek yogurt. It adds a burst of flavor and makes a simple breakfast feel like a real treat. You can even mix a little into pancake batter for apple pie pancakes! When it comes to brunch, this jam really shines. It’s perfect alongside a cheese board – the sweet and spiced apples are a wonderful contrast to sharp cheddar or creamy brie. It’s also fantastic dolloped on top of a mini quiche or served with a side of fluffy buttermilk biscuits. For a simple yet elegant dessert, a warm scoop of vanilla bean ice cream with a generous spoonful of Apple Pie Jam is pure heaven. You can also use it as a filling for quick thumbprint cookies or as a topping for a simple pound cake. And for those moments when you just need a little cozy snack, it’s amazing on graham crackers or even mixed into a small bowl of cottage cheese. My kids also adore it stirred into hot apple cider for an extra layer of flavor. Honestly, the possibilities are endless, and every combination is delicious!
Top Tips for Perfecting Your Apple Pie Jam
I’ve made this Apple Pie Jam more times than I can count, and over the years, I’ve picked up a few tricks that make it even better. First, when it comes to the apples, prep is key. Make sure you peel them properly and remove all the core and any tough bits. Chopping them into roughly ½-inch pieces ensures they cook down evenly without turning into complete mush, unless you want a smoother jam, then you can chop them smaller or mash them more as they cook. If your apples seem particularly watery, you can squeeze out some of the excess juice after chopping, but I usually find the sugar and cooking process takes care of most of that. For the mixing advice, the biggest pitfall is overcooking or undercooking. You want the apples to be tender but still have a little bit of texture. If you cook it too long, it can become too stiff. If you don’t cook it long enough, it will be too runny. The spoon test is your best friend here! When you pull a spoonful out, it should be thick and hold its shape on the spoon for a few seconds. For swirl customization, don’t be afraid to play with the amount of swirl mixture you add. You can create more intricate patterns by dropping small dollops and then using a toothpick to gently swirl them through. For ingredient swaps, if you don’t have lemon juice, lime juice works too, though it will lend a slightly different citrus note. You can also experiment with different apple varieties for subtle flavor changes. For the spices, feel free to adjust them to your personal preference – more cinnamon, less clove, whatever makes your heart sing! Regarding baking tips (or simmering, as it were), make sure you’re using a pot large enough to accommodate the bubbling jam. It will expand as it cooks. Stirring frequently, especially towards the end, is crucial to prevent sticking and burning on the bottom. If you find your jam is too thin after cooking, you can always simmer it uncovered for a little longer to evaporate more liquid. If it’s too thick, you can stir in a tablespoon or two of water or apple juice to loosen it up. Finally, for glaze variations, if you’re not a fan of powdered sugar, a drizzle of honey or maple syrup can also be lovely, or simply skip the glaze altogether for a more rustic finish. You can also add a tiny bit of vanilla extract to your glaze for extra flavor!
Storing and Reheating Tips
Proper storage is crucial for keeping your delicious Apple Pie Jam fresh and safe to eat. If you’ve processed it properly in sterilized jars, it can last for months in the pantry. For room temperature storage, make sure the jars are sealed tightly. Once opened, it’s best to refrigerate the jam. Typically, unopened jars can be stored in a cool, dark pantry for up to a year. Once opened, it should be kept in the refrigerator and will remain good for about 3-4 weeks, as long as you use a clean spoon to serve it each time. For refrigerator storage, I usually keep my opened jars in the door of my fridge, as it’s usually a bit warmer there, which makes it easier to spread. Make sure the lid is screwed on tightly to prevent mold or spoilage. If you notice any signs of mold or an off smell, it’s best to discard it. For freezer instructions, if you have a lot of jam and can’t get through it quickly, freezing is a great option. Ladle the jam into freezer-safe containers or bags, leaving about ½ inch of headspace for expansion. It can be stored in the freezer for up to 6 months. To thaw, transfer the jam to the refrigerator overnight. The consistency might change slightly after freezing and thawing, but the flavor will still be wonderful. For glaze timing advice, if you’re planning to store your jam for an extended period, it’s often best to add the glaze *after* you thaw and are ready to serve it, as glazes can sometimes soften or become sticky over time, especially with moisture. If you’re refrigerating it for immediate use, glazing right before serving or once it has cooled is perfectly fine.
Frequently Asked Questions
Final Thoughts
I truly hope you give this Apple Pie Jam a try. It’s one of those recipes that brings so much joy with so little effort, and that’s the kind of cooking I absolutely live for. It’s the perfect way to capture those warm, comforting apple pie flavors in a jar, ready whenever you need a little taste of home. Whether you spread it on your morning toast, use it to elevate your yogurt, or swirl it into a dessert, I promise it will become a favorite. It’s a simple reminder that delicious things don’t always have to be complicated. If you enjoy this recipe, you might also love my spiced pear butter or my easy baked apple crumble. They all have that same cozy, autumnal vibe! I can’t wait to hear what you think and how you decide to enjoy your Apple Pie Jam. Please leave a comment below and let me know how yours turned out, or share any special variations you tried! Happy jamming!
Apple Pie Jam
Ingredients
Main Ingredients
- 8 cups Apples, peeled, cored, and diced
- 4 cups Granulated Sugar
- 0.25 cup Apple Cider Vinegar
- 0.5 teaspoon Ground Cinnamon
- 0.25 teaspoon Ground Nutmeg
- 0.125 teaspoon Ground Cloves
- 0.25 teaspoon Salt
- 2 tablespoons Butter
Instructions
Preparation Steps
- In a large, heavy-bottomed pot, combine the diced apples, sugar, apple cider vinegar, cinnamon, nutmeg, cloves, and salt.
- Cook over medium heat, stirring frequently, until the apples soften and release their juices, about 15-20 minutes. The mixture will start to thicken.
- Reduce the heat to low and continue to simmer, stirring occasionally, for another 20-25 minutes, or until the jam reaches your desired consistency. To test, place a small amount on a chilled plate; it should wrinkle when you push it with your finger.
- Remove from heat and stir in the butter until melted and combined.
- Ladle the hot jam into sterilized jars, leaving 1/4-inch headspace. Wipe the rims, place lids and rings on the jars, and process in a boiling water bath for 10 minutes.