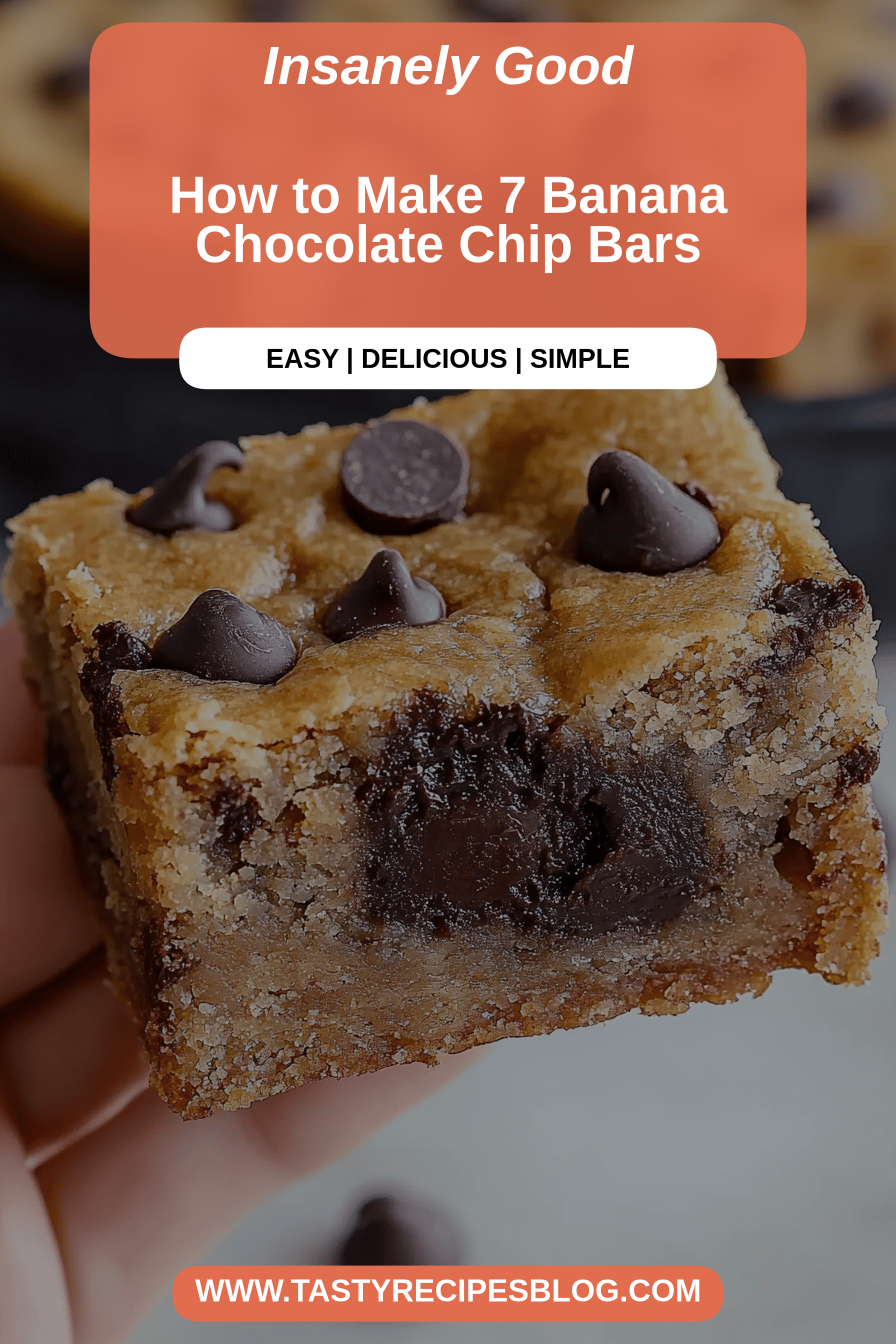
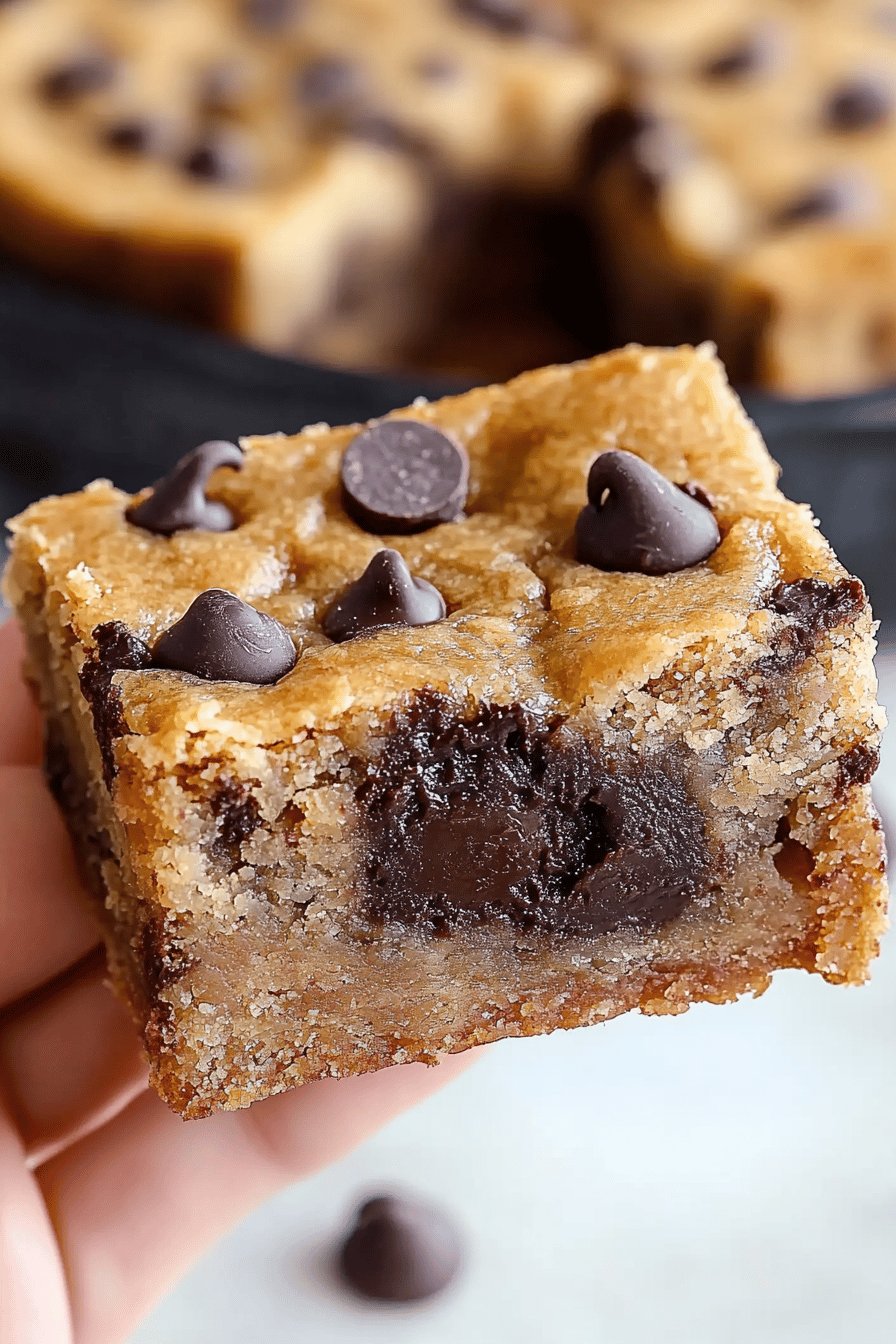
You know those days? The ones where you need a little something sweet, something comforting, but you *really* don’t have the energy to whip up a whole cake or a batch of fussy cookies? Yeah, I live for those days, and this recipe, my friends, is my absolute secret weapon. These aren’t just any Banana Chocolate Chip Bars; they’re like a warm hug in edible form. Imagine the softest, most wonderfully moist banana bread you’ve ever had, but elevated with pockets of gooey melted chocolate and a hint of something special that makes them just… perfect. They’re way easier than making a full loaf of banana bread, and honestly, the texture you get from baking them in bars is just unbeatable. It’s like a richer, more decadent cousin to your standard banana muffin, but without all the individual paper liners. If you’ve ever loved a blondie or a really good brownie, you’re going to fall head over heels for these banana chocolate chip bars.
What are banana chocolate chip bars?
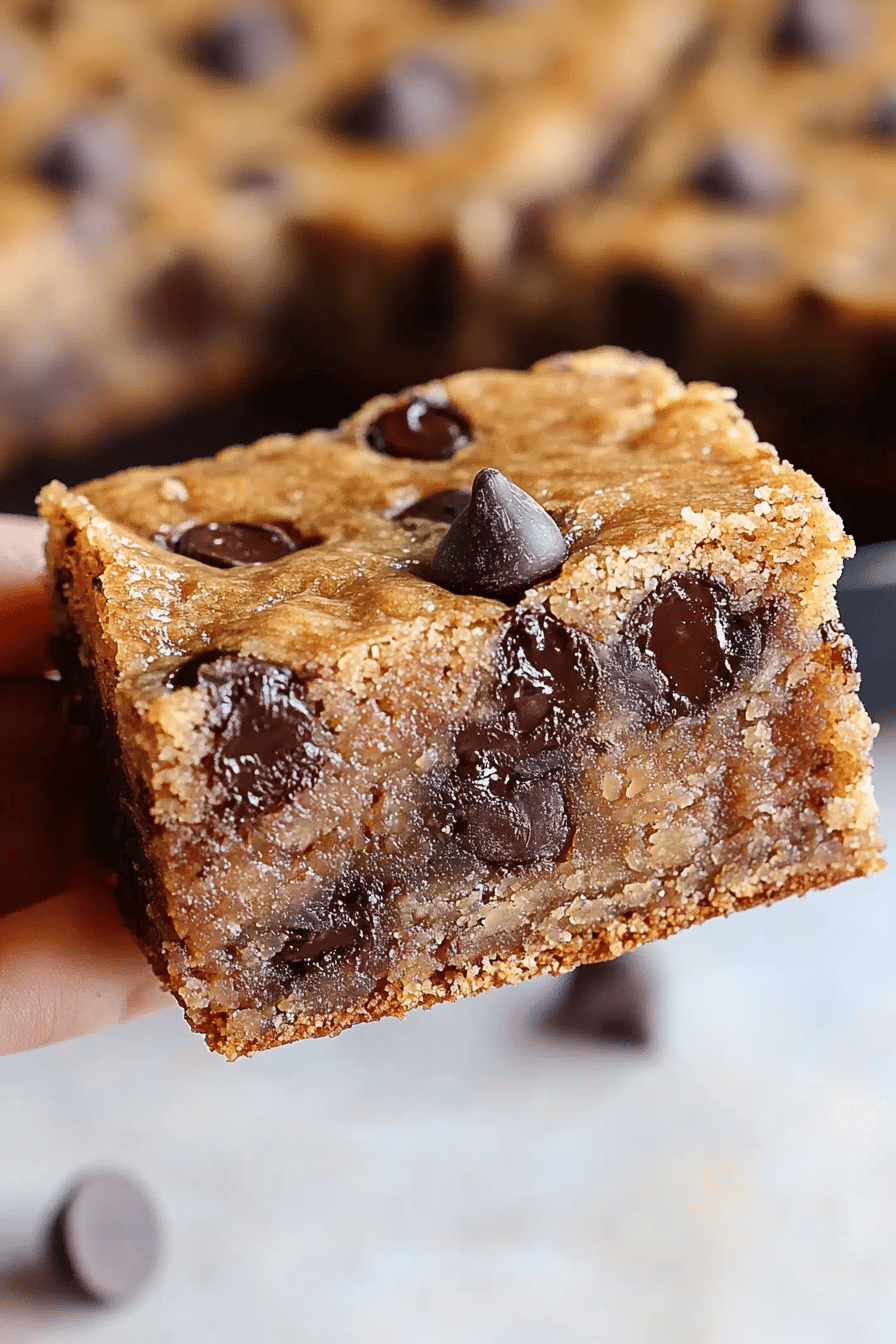
So, what exactly are these magical little squares we’re talking about? Think of them as the ultimate hybrid of moist banana bread and a wonderfully Chewy Chocolate Chip Cookie, all baked into convenient, sliceable bars. It’s essentially a cake-like batter, bursting with ripe banana flavor and studded with generous amounts of chocolate chips, baked in a pan so you get that perfect edge-to-center texture. They’re not quite a cookie, not quite a cake, and definitely not a muffin – they exist in their own delicious category. They’re the kind of treat that makes your kitchen smell incredible while they’re baking, a warm, sweet aroma that’s pure comfort. The name itself, banana chocolate chip bars, pretty much tells the whole story, but trust me, the experience of eating them is so much more than the sum of its parts.
Why you’ll love this recipe?
There are so many reasons why these banana chocolate chip bars have earned a permanent spot in my recipe rotation, and I’m willing to bet they’ll become a favorite for you too. First off, let’s talk about the flavor. It’s that classic, comforting taste of ripe bananas, mellow and sweet, perfectly complemented by the melty, decadent goodness of chocolate chips. It’s a flavor combination that never gets old. But it’s not just about the taste; it’s about how incredibly *easy* these are. Seriously, you can whip these up on a weeknight without breaking a sweat. Most of the ingredients are pantry staples, and the process is so straightforward – no fancy techniques required. I’ve tested this recipe countless times, and it always comes out beautifully, which is a huge win in my book. Plus, they are surprisingly cost-effective, especially if you tend to have ripe bananas sitting around! They’re also wonderfully versatile. Have them for breakfast with a cup of coffee, as a delightful afternoon pick-me-up, or even as a simple dessert. Compared to making a whole batch of cookies where you have to worry about scooping and spacing, these bars are a breeze. What I love most about this recipe is that it feels both indulgent and wholesome at the same time, which is a pretty sweet spot to hit.
How do you make banana chocolate chip bars?
Quick Overview
This recipe is all about simplicity and deliciousness. You’ll whisk together your wet and dry ingredients, fold in those glorious chocolate chips, and bake it all up in One Pan. The result? Perfectly moist, incredibly flavorful banana chocolate chip bars that are ready in under an hour from start to finish. It’s a one-bowl wonder for the batter, making cleanup a breeze, and the baking time is just right to fill your home with an irresistible aroma. It’s the kind of recipe that makes you feel like a baking superstar without any of the stress.
Ingredients
For the Main Batter:
2 cups all-purpose flour: I always use unbleached all-purpose flour for the best texture. If you’re feeling adventurous, I’ve had success using half whole wheat, but it can make them a tad denser.
1 teaspoon baking soda: This is crucial for that lovely lift and tender crumb.
1/2 teaspoon baking powder: Just a little extra boost to ensure they’re light and airy.
1/2 teaspoon salt: Balances out the sweetness and enhances all the flavors.
1 teaspoon ground cinnamon: This is my little secret for adding warmth and depth. Don’t skip it!
1/4 teaspoon ground nutmeg: Another touch of spice that pairs beautifully with banana.
1/2 cup unsalted butter, melted: Make sure it’s cooled slightly so it doesn’t cook the eggs.
3/4 cup granulated sugar: You can reduce this slightly if your bananas are super ripe and sweet, but this is the sweet spot for me.
2 large eggs: Room temperature eggs incorporate better into the batter.
1 teaspoon vanilla extract: Pure vanilla extract makes a big difference!
3 ripe to overripe bananas, mashed: The riper, the better! This is where all that gorgeous banana flavor comes from.
For the Chocolate Chips:
1 cup semi-sweet chocolate chips: Or a mix of semi-sweet and dark, your preference! Mini chips also work wonderfully here.
For the Optional Glaze:
1/2 cup powdered sugar: Sifted, to avoid lumps.
1-2 tablespoons milk (or almond milk): Start with 1 tablespoon and add more until you reach your desired drizzling consistency.
1/4 teaspoon vanilla extract: Just a touch to enhance the glaze flavor.
Step-by-Step Instructions
Step 1: Preheat & Prep Pan
First things first, let’s get our oven ready to bake these beauties. Preheat your oven to 350°F (175°C). Now, grab a 9×13 inch baking pan. I like to line mine with parchment paper, leaving a little overhang on the sides. This makes lifting the bars out super easy and cleanup a dream. You can also just grease and flour the pan really well if you don’t have parchment paper. Make sure the entire surface is coated so nothing sticks!
Step 2: Mix Dry Ingredients
In a large bowl, whisk together the flour, baking soda, baking powder, salt, cinnamon, and nutmeg. Give it a good whisk to make sure all the spices and leaveners are evenly distributed. This ensures every bite has that perfect balance of flavor and texture. Don’t skip this step, it’s important for an even bake.
Step 3: Mix Wet Ingredients
In a separate medium bowl, whisk together the melted butter and granulated sugar until well combined. Then, beat in the eggs one at a time, mixing well after each addition. Stir in the vanilla extract and the mashed bananas. The mixture might look a little lumpy or separated, that’s perfectly okay with mashed bananas!
Step 4: Combine
Pour the wet ingredients into the bowl with the dry ingredients. Now, here’s the key: mix *just until combined*. Overmixing can lead to tough bars, and nobody wants that! You should still see a few streaks of flour; that’s fine. Gently fold in the chocolate chips. I like to reserve a handful for sprinkling on top before baking.
Step 5: Prepare Filling
This recipe doesn’t have a separate “filling” in the traditional sense, as the chocolate chips are mixed directly into the batter. However, if you wanted to get fancy, you could absolutely swirl in some cream cheese or a Dulce De Leche. For this recipe, the “filling” is simply those glorious chocolate chips that will melt into gooey pockets. Make sure your chocolate chips are evenly distributed throughout the batter for maximum enjoyment in every bite!
Step 6: Layer & Swirl
Spread the batter evenly into your prepared baking pan. If you reserved some chocolate chips, sprinkle them over the top. You can gently press them in a little. For a little extra visual appeal, you could even add a few extra chocolate chips on top after baking, right before the glaze goes on, if you’re not using a glaze.
Step 7: Bake
Bake for 25-30 minutes, or until a toothpick inserted into the center comes out clean or with a few moist crumbs attached (but no wet batter!). The edges should be golden brown. Ovens can be a little quirky, so start checking around the 25-minute mark. Don’t overbake, or they’ll lose that wonderful moistness.
Step 8: Cool & Glaze
Let the bars cool in the pan on a wire rack for at least 20-30 minutes. This is really important for them to set up properly. While they’re cooling, you can prepare the glaze. Whisk together the powdered sugar, 1 tablespoon of milk, and vanilla extract. Add more milk, a teaspoon at a time, until it’s a smooth, drizzly consistency. Once the bars are mostly cooled, drizzle the glaze evenly over the top. If you prefer, you can skip the glaze entirely – they’re delicious either way!
Step 9: Slice & Serve
Once the glaze has set a bit (or if you skipped it), lift the bars out of the pan using the parchment paper overhang. Place them on a cutting board and slice into squares or rectangles. I usually cut mine into about 12-16 bars, depending on how big I want them. Serve them warm or at room temperature. They are absolutely divine!
What to Serve It With
These banana chocolate chip bars are so versatile, they truly fit into any occasion. For breakfast, I love pairing them with a strong cup of black coffee or a creamy latte. They’re hearty enough to keep you full but light enough that they don’t feel heavy first thing in the morning. Imagine a weekend brunch where you’ve got a platter of these alongside some fresh fruit salad and perhaps some scrambled eggs – a perfect balance of sweet and savory. For dessert, they’re wonderful on their own, but if you’re feeling fancy, a scoop of vanilla bean ice cream or a dollop of whipped cream takes them to another level. And for those cozy snack moments, maybe a glass of cold milk? My kids absolutely adore them with a glass of milk after school; it’s their favorite treat. I’ve also served these at parties as part of a dessert bar, and they’re always a hit. They’re the kind of simple, crowd-pleasing treat that makes everyone happy.
Top Tips for Perfecting Your Banana Chocolate Chip Bars
I’ve made these banana chocolate chip bars more times than I can count, and over the years, I’ve picked up a few tricks that I think really make a difference. First, when it comes to the bananas, don’t shy away from using ones that are very speckled or even have black peels. Those are the sweetest and easiest to mash, giving you the most intense banana flavor. I always mash mine with a fork right in the bowl; I like a few small lumps for texture, but you can mash them smoother if you prefer. For the flour, make sure you measure it accurately by spooning it into your measuring cup and leveling it off, rather than scooping directly from the bag. This prevents you from adding too much flour, which is a common culprit for dry baked goods. When you’re combining the wet and dry ingredients, seriously, *do not overmix*. I know I’ve said it before, but it’s worth repeating! Mix just until you don’t see any dry flour streaks. A few lumps are better than a tough bar. For the chocolate chips, I’ve found that using a mix of semi-sweet and dark chocolate chips adds a nice complexity, but any kind you love will work. If you find your chocolate chips tend to sink, tossing them in a tablespoon of the flour mixture before adding them to the batter can help suspend them. For the glaze, consistency is key. Start with less liquid than you think you need and add more slowly until you get that perfect drizzly texture that coats the bars without being too runny. If you accidentally make it too thin, just whisk in a little more powdered sugar. And finally, the cooling time is crucial! Letting them cool properly in the pan allows them to set up, making them much easier to slice cleanly.
Storing and Reheating Tips
These banana chocolate chip bars are fantastic for making ahead, which is a lifesaver for busy weeks! If you’re planning to eat them within a day or two, you can store them right in the baking pan, covered tightly with plastic wrap, at room temperature. They usually stay wonderfully moist for about 2-3 days. If you need them to last longer, your refrigerator is your best bet. Store them in an airtight container, and they should stay fresh for up to a week. I find that the texture is still really good even after several days in the fridge. Now, if you’re like me and sometimes bake a double batch (because, why not?), freezing is the way to go. Once the bars are completely cooled, I like to cut them into individual portions and wrap each one tightly in plastic wrap, then place them in a freezer-safe bag or container. They’ll keep beautifully in the freezer for up to 2-3 months. When you’re ready to enjoy a frozen bar, just unwrap it and let it thaw on the counter for about 30-60 minutes, or warm it up gently in the microwave for about 15-20 seconds. If you’ve glazed your bars, they’re best stored at room temperature for a day or two, or refrigerated. The glaze might become a little sticky in the fridge, but it’s still delicious!
Frequently Asked Questions
Final Thoughts
Honestly, if you’re looking for a simple, utterly satisfying treat that brings a smile to everyone’s face, these banana chocolate chip bars are it. They’re the perfect blend of comfort, convenience, and deliciousness. They’re the kind of recipe that makes you feel good about baking, knowing you’re creating something special with minimal fuss. I hope you give them a try and love them as much as my family and I do. They’re a testament to how simple ingredients can come together to create something truly memorable. If you try these, please let me know how they turn out in the comments below! I’d love to hear about any variations you try or your favorite way to enjoy them. Happy baking, and may your kitchen always smell this wonderful!