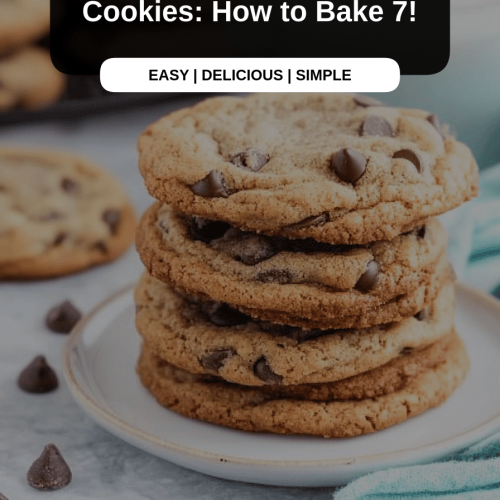
There’s something magical about a warm, gooey chocolate chip cookie fresh from the oven. For me, it’s pure comfort. It transports me right back to my grandmother’s kitchen, the air thick with the scent of melting chocolate and butter, her flour-dusted apron a constant in my childhood memories. These aren’t just any Chocolate Chip Cookies; they’re the ones I’ve tweaked and perfected over years, the ones my family requests non-stop, and frankly, the ones that have saved me on countless busy weeknights when only a sweet treat would do. Forget those fancy, complicated desserts; this is my go-to, my happy place, and I’m so thrilled to share it with you. If you’re looking for that perfect balance of crispy edges and a chewy center, packed with melty chocolate goodness, you’ve come to the right place.
What are chocolate chip cookies?
Think of these as your new best friends in cookie form. They’re essentially the quintessential chocolate chip cookie recipe, but with a few little touches that make them, in my humble opinion, absolutely spectacular. The name itself, “My Absolutely Irresistible Chocolate Chip Cookies,” says it all, right? It’s a classic for a reason, but I like to think of it as an elevated version of the cookie you remember from childhood. It’s that perfect blend of buttery sweetness, rich chocolate, and a hint of salt that just makes you close your eyes and savor every bite. There’s no fancy jargon here, no exotic ingredients; it’s just pure, unadulterated cookie joy, made with love and a few secrets I’ve picked up along the way.
Why you’ll love this recipe?
Honestly, what’s not to love about a truly fantastic chocolate chip cookie? This recipe hits all the right notes. First off, the flavor is just divine. You get that deep, buttery richness that melts in your mouth, perfectly balanced by the sweetness of the sugar and the semi-sweet chocolate chips. The edges are just slightly crisp, giving way to a wonderfully soft, chewy center that’s utterly addictive. And the smell? Oh my goodness, the smell that fills your house while these are baking is pure bliss – it’s like a warm hug for your senses! Beyond the taste, the simplicity is a huge win. I’ve made this countless times, even when I’m exhausted, and it always comes together so easily. No complicated techniques, no obscure ingredients you have to hunt down. Plus, it’s incredibly cost-efficient. You likely have most of the ingredients in your pantry right now. What I love most, though, is its versatility. These cookies are perfect for a school bake sale, an after-dinner treat, or just a midday pick-me-up. They’re so much better than store-bought, and the satisfaction of pulling a fresh batch from your own oven is unbeatable. If you’ve tried my What are some classic sugar cookies?Is there any chocolate chip magic?
How to Make My Absolutely Irresistible Chocolate Chip Cookies
Quick Overview
In a nutshell, we’re creaming butter and sugar, adding eggs and vanilla, then gently combining it with our dry ingredients until just mixed. We then fold in those glorious chocolate chips and bake them until they’re golden brown and irresistible. It’s a straightforward process that yields maximum deliciousness with minimal fuss. Trust me, even if you’re new to baking, you’ll nail this!
Ingredients
For the Main Batter:
Here’s what you’ll need to get started. For the best results, make sure your butter is softened, not melted – this is key for that perfect texture! I always use unsalted butter so I can control the saltiness myself. For the flour, all-purpose is your best bet. And vanilla extract? Use the good stuff if you can; it really makes a difference!
- 1 cup (2 sticks) unsalted butter, softened
- ¾ cup granulated sugar
- ¾ cup packed light brown sugar
- 2 large eggs
- 1 teaspoon pure vanilla extract
- 2 ¼ cups all-purpose flour
- 1 teaspoon baking soda
- ½ teaspoon salt
- 2 cups (12 ounces) semi-sweet chocolate chips (or a mix of your favorites!)
For the Filling:
There isn’t really a separate “filling” for these classic Chocolate Chip Cookies, but if you wanted to get fancy, you could add some extra chocolate chunks or even a swirl of caramel sauce into the dough before baking. For this recipe, the “filling” is that wonderful distribution of chocolate chips!
For the Glaze:
While I don’t typically glaze these classic chocolate chip cookies, if you’re feeling adventurous and want a touch more sweetness or a decorative element, a simple vanilla glaze or a light chocolate drizzle works wonders. For a simple vanilla glaze, whisk together 1 cup powdered sugar with 2-3 tablespoons of milk or water until smooth and pourable. You can also add a drop of vanilla extract for extra flavor.
Step-by-Step Instructions
Step 1: Preheat & Prep Pan
First things first, get that oven preheated to 375°F (190°C). I always like to line my baking sheets with parchment paper. It makes cleanup an absolute breeze and ensures the cookies don’t stick. You’ll want to have two baking sheets ready to go because these are so good, you’ll want to bake them in batches.
Step 2: Mix Dry Ingredients
In a medium bowl, whisk together the flour, baking soda, and salt. Whisking them together at this stage ensures that the baking soda and salt are evenly distributed throughout the flour, which is super important for consistent baking. It’s a small step, but it really helps!
Step 3: Mix Wet Ingredients
In a large bowl, using an electric mixer (or a sturdy whisk and some elbow grease!), cream together the softened butter, granulated sugar, and Brown Sugar until light and fluffy. This usually takes about 2-3 minutes. It should look pale and airy. Then, beat in the eggs one at a time, followed by the vanilla extract. Make sure each egg is fully incorporated before adding the next.
Step 4: Combine
Gradually add the dry ingredients to the wet ingredients, mixing on low speed (or stirring with a wooden spoon) until just combined. Be careful not to overmix here! Overmixing can lead to tough cookies. You want to see just a few streaks of flour remaining, and then it’s time for the best part.
Step 5: Prepare Filling
Now, for the star of the show: the chocolate chips! Gently fold in the chocolate chips with a spatula or wooden spoon until they are evenly distributed throughout the dough. I like to use a mix of semi-sweet and milk chocolate chips sometimes for extra depth, but feel free to use whatever you love most!
Step 6: Layer & Swirl
This step is more about portioning the dough. Drop rounded tablespoons of dough onto the prepared baking sheets, spacing them about 2 inches apart. I like to use a cookie scoop for uniformity, but two spoons work just fine. If you want perfectly round cookies, you can gently roll the dough balls between your hands, but I actually prefer the rustic look they get on their own.
Step 7: Bake
Bake for 9 to 11 minutes, or until the edges are golden brown and the centers still look slightly soft. Don’t overbake them! The cookies will continue to set up as they cool on the baking sheet. Oven temperatures can vary, so keep an eye on them. My oven runs a little hot, so I usually pull mine out around the 9-minute mark.
Step 8: Cool & Glaze
Let the cookies cool on the baking sheets for about 5 minutes before transferring them to a wire rack to cool completely. This is crucial for them to firm up. If you’re adding a glaze, this is the time to do it once the cookies have cooled slightly but are still a bit warm, or once they’ve cooled completely. Drizzle or spread it on for an extra touch of sweetness.
Step 9: Slice & Serve
Once cooled (or just slightly warm if you can’t resist!), these chocolate chip cookies are ready to be devoured. Serve them as is, or with a big glass of milk – the classic pairing for a reason!
What to Serve It With
These chocolate chip cookies are pretty much perfect on their own, but they can definitely elevate a few other moments too! For breakfast, I love pairing a warm cookie with a strong cup of coffee. It’s a little indulgence that makes waking up so much better. On weekend mornings, especially during brunch, I’ll often arrange a few cookies on a platter alongside some fresh fruit and maybe a mini quiche. They add a lovely sweet counterpoint. As a dessert, well, they shine! They’re fantastic on their own, but also make a great accompaniment to a scoop of vanilla ice cream for an instant ice cream sandwich, or served alongside a rich chocolate lava cake for serious chocoholics. And for those cozy snack times? They’re the ultimate comfort food, best enjoyed while curled up on the sofa with a good book and a mug of hot chocolate. My kids also love them with a glass of cold milk after school – it’s their favorite reward!
Top Tips for Perfecting Your Chocolate Chip Cookies
I’ve learned a few things over the years that make a big difference in achieving that perfect chocolate chip cookie. Here are my absolute must-knows:
Butter Temperature is Key: Seriously, don’t skip this. Softened butter, not melted. You want it to be pliable, like soft playdough. If it’s too cold, it won’t cream properly, and if it’s melted, your cookies will spread too much and become flat and greasy. I usually leave my butter out on the counter for about an hour before I plan to bake.
Don’t Overmix the Flour: Once you add the flour, mix until *just* combined. A few streaks of flour are perfectly fine. Overmixing develops the gluten in the flour, which leads to tough, dense cookies. A light hand is your friend here!
Chill the Dough (Optional but Recommended): If you have the time, chilling the cookie dough for at least 30 minutes (or even overnight) can work wonders. It allows the flavors to meld and the dough to firm up, which prevents excessive spreading and results in a chewier cookie. I’ve found this makes a noticeable difference, especially in warmer kitchens.
Chocolate Chip Quality Matters: While any chocolate chips will do, using good quality ones makes a difference. I love a good quality semi-sweet, but sometimes I’ll toss in some dark chocolate chunks or even some milk chocolate chips for variety. For extra richness, you can even chop up a chocolate bar!
Bake Time is Crucial: Keep a close eye on your cookies during the last few minutes of baking. They should look slightly underbaked in the center when you pull them out. They’ll continue to bake on the hot baking sheet, giving you that perfect soft and chewy texture. If you bake them until they look completely done, they’ll be dry and crisp.
Salt: Don’t be tempted to skip the salt. It might seem counterintuitive in a sweet treat, but it actually enhances the other flavors, especially the chocolate, and balances the sweetness beautifully. A sprinkle of flaky sea salt on top before baking is also a divine touch!
Ingredient Swaps: If you’re out of eggs, you can try a flax egg (1 tablespoon flaxseed meal mixed with 3 tablespoons water, let sit for 5 minutes) for a vegan option, though the texture might be slightly different. You can also swap out some of the semi-sweet chips for white chocolate, butterscotch, or even nuts if you like. Just stick to roughly the same total amount of add-ins.
Storing and Reheating Tips
These chocolate chip cookies are honestly best enjoyed fresh, but they do store beautifully. Here’s how I keep them tasting great:
Room Temperature: Once completely cooled, store the cookies in an airtight container at room temperature. They’ll stay fresh and delicious for about 3-4 days. If you want to keep them extra soft, you can pop a slice of bread in the container with them – the cookie will absorb a little moisture from the bread, keeping them wonderfully chewy.
Refrigerator Storage: If your kitchen is particularly warm or humid, or if you want them to last a bit longer, you can store them in the refrigerator. Again, make sure they’re in an airtight container. They should remain good for about a week, though they might firm up a bit. To bring them back to their soft glory, just warm them gently in the microwave for 10-15 seconds.
Freezer Instructions: For longer storage, these cookies freeze exceptionally well. You can freeze baked cookies or even balls of unbaked dough. For baked cookies, wrap them individually in plastic wrap, then place them in a freezer-safe bag or container. They’ll keep for up to 3 months. For unbaked dough, scoop them onto a parchment-lined baking sheet, freeze until solid, then transfer to a freezer bag. You can bake them directly from frozen, just add a few extra minutes to the baking time.
Glaze Timing Advice: If you’ve glazed your cookies, it’s best to store them at room temperature in a single layer in an airtight container, ideally with a day or two between parchment paper layers if stacking them, to prevent the glaze from sticking too much. Glazed cookies don’t typically do as well in the fridge or freezer as the glaze can become sticky or uneven.
Frequently Asked Questions
Final Thoughts
There you have it – my absolute go-to recipe for the most incredible chocolate chip cookies. I truly hope you give these a try! They’re a testament to the fact that sometimes, the simplest recipes are the most rewarding. They embody that perfect balance of texture and flavor, and the joy they bring, both in the making and the eating, is just immeasurable. If you’re a fan of classic comfort baking, you might also adore my recipe for Soft and Chewy Oatmeal Raisin Cookies – another family favorite! Making these cookies is more than just baking; it’s about creating moments, memories, and sharing a little bit of happiness. I can’t wait to hear how yours turn out, and what your family thinks! Please leave a comment below with your thoughts, any variations you tried, or even just to say hello!
Chocolate Chip Cookies
Ingredients
Main Ingredients
- 2.25 cup All-purpose flour
- 1 teaspoon Baking soda
- 1 teaspoon Salt
- 1 cup Unsalted butter softened
- 0.75 cup Granulated sugar
- 0.75 cup Packed brown sugar
- 1 Large egg
- 1 teaspoon Vanilla extract
- 2 cup Chocolate chips
Instructions
Preparation Steps
- Preheat oven to 375°F (190°C).
- Whisk together flour, baking soda, and salt.
- Cream together butter, granulated sugar, and brown sugar.
- Beat in egg and vanilla.
- Gradually add dry ingredients and mix until just combined.
- Stir in chocolate chips.
- Drop by rounded tablespoons onto ungreased baking sheets.
- Bake for 9-11 minutes, or until golden brown.
- Let cool on baking sheets for a few minutes before transferring to a wire rack.