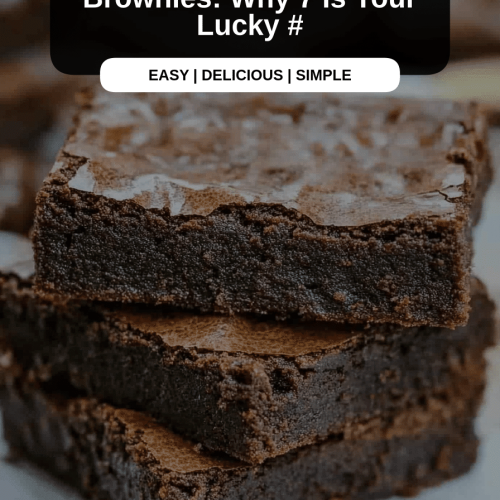
There’s something truly magical about a perfectly fudgy brownie, isn’t there? The kind that has that slight crackle on top, a rich, deep chocolate flavor that just melts in your mouth, and a chewy-yet-tender interior. For years, I’ve been on a quest for *that* brownie. You know, the one that brings you right back to childhood, a little bit of pure, unadulterated joy in every bite. Well, friends, I’m so incredibly excited to share that I think I’ve finally cracked the code. Forget those boxed mixes; this recipe for homemade cosmic brownies is the real deal. It’s surprisingly simple, uses pantry staples, and the result? Pure bliss. They’re so good, in fact, that they give my classic Chocolate Chip Cookies a serious run for their money, and that’s saying a lot in my house!
What are some of the best home made cosmic brownies?
So, what exactly are these “cosmic brownies” I’m raving about? Think of them as the ultimate upgrade to your standard Fudgy Brownie. The “cosmic” part usually refers to the fun, colorful candy-coated chocolate chips or sprinkles that are often swirled into or sprinkled on top, reminiscent of a starry night sky. But at their heart, they’re intensely chocolatey, dense, and incredibly satisfying brownies. This recipe focuses on achieving that perfect, gooey texture that’s not too cakey and not too greasy, with a deep chocolate flavor that makes you close your eyes and savor it. It’s essentially a deeply personal expression of chocolatey perfection, a treat that feels both nostalgic and utterly decadent.
Why you’ll love this recipe?
Honestly, I could write a novel about why this recipe is a kitchen lifesaver, but I’ll try to keep it concise! Firstly, the flavor is out of this world. We’re talking rich, Dark Chocolate goodness that doesn’t rely on fancy, expensive ingredients. It’s the kind of chocolate flavor that lingers pleasantly, making you want just one more bite (and then maybe another!). Secondly, and this is a huge one for me, they are surprisingly simple to whip up. Even on a busy weeknight, I can have these mixed and in the oven within 15 minutes. No creaming butter and sugar for ages, no complicated steps. It’s truly a one-bowl wonder for the batter part, which, as any busy parent knows, is a godsend for cleanup. Thirdly, they are incredibly budget-friendly. Most of the ingredients are likely already in your pantry. Flour, sugar, cocoa powder, eggs – simple, affordable staples that come together to create something truly special. Finally, their versatility is amazing. While the cosmic candy pieces are fun and classic, you can customize them endlessly. I’ve added chopped nuts, a swirl of caramel, or even a sprinkle of sea salt on top. They’re perfect for a quick afternoon pick-me-up, an impressive dessert for guests, or just a way to make any ordinary day feel a little more celebratory. What I love most about this is that it delivers that “wow” factor without any fuss.
How do I make homemade cosmic brownies?
Quick Overview
This recipe is all about simplicity and achieving that signature chewy, fudgy texture. We’ll start by melting some butter and chocolate together, then whisking in sugar, eggs, and vanilla. The dry ingredients are folded in gently, and then the magic happens with a quick swirl of extra chocolate or your chosen “cosmic” elements. The key is not to overmix, ensuring a tender crumb and that irresistible gooeyness. It’s a straightforward process that guarantees delicious results, even for beginner bakers!
Ingredients
For the Main Batter:
* 1 cup (2 sticks) unsalted butter, melted: Using good quality butter really does make a difference here. It adds richness and helps create that lovely fudgy texture.
* 1 cup granulated sugar: This provides sweetness and contributes to the chewy texture.
* 1 cup packed light Brown Sugar: The brown sugar adds moisture and a slight caramel note that complements the chocolate beautifully.
* 4 large eggs, at room temperature: Room temperature eggs emulsify better, creating a smoother batter and a more tender brownie.
* 2 teaspoons pure vanilla extract: Don’t skimp on good vanilla; it enhances all the chocolate flavors.
* 1 ½ cups all-purpose flour: This is our base. Make sure to spoon and level it rather than scooping directly from the bag to avoid too much flour.
* ¾ cup unsweetened natural cocoa powder: I prefer natural cocoa powder for its distinct chocolate flavor. Dutch-process can work, but it might alter the color and acidity slightly. Use the best quality you can find!
* ½ teaspoon baking powder: Just a touch to give them a little lift without making them cakey.
* ½ teaspoon salt: Balances the sweetness and brings out the chocolate flavor.
* 1 cup chocolate chips (semi-sweet or dark), divided: You’ll use some in the batter and some for the swirl, or save them for topping. I love using good quality chips.
For the Filling (Optional Swirl):
* ½ cup chocolate chips (semi-sweet or dark): These will be melted down for a gooey swirl. You can also use chocolate frosting or ganache if you’re feeling fancy!
* 1 tablespoon vegetable oil or melted butter: This helps the melted chocolate stay smooth and pourable.
For the Glaze (Optional, but highly recommended!):
* 1 cup powdered sugar, sifted: Sifting prevents lumps for a super smooth glaze.
* 2-3 tablespoons milk or half-and-half: Start with 2 tablespoons and add more until you reach your desired drizzling consistency.
* 1 tablespoon unsweetened cocoa powder: For a chocolate glaze, of course!
* ½ teaspoon vanilla extract: Adds a nice flavor note.
Step-by-Step Instructions
Step 1: Preheat & Prep Pan
First things first, get your oven preheated to 350°F (175°C). This is a crucial step for even baking. Next, prepare your baking pan. I usually use an 8×8 inch or 9×9 inch square pan. You can line it with parchment paper, leaving an overhang on two sides – this makes lifting the brownies out a breeze! If you prefer, you can grease and flour the pan well. I find the parchment paper method is a lifesaver for cleanup, especially when I’m in a rush.
Step 2: Mix Dry Ingredients
In a medium bowl, whisk together your flour, unsweetened cocoa powder, baking powder, and salt. Whisking them together now ensures that the baking powder and salt are evenly distributed, which is super important for consistent baking. You don’t want any pockets of salt or leavening! Give it a good whisk until everything is well combined and there are no visible streaks of cocoa. This simple step really sets you up for success.
Step 3: Mix Wet Ingredients
Now, let’s get to the good stuff! In a large bowl, combine your melted butter with both the granulated and packed brown sugars. Whisk them together until they’re well combined. Then, crack in your four large eggs one at a time, whisking well after each addition. Don’t worry if the mixture looks a little glossy or separated at this point; that’s totally normal. Stir in the pure vanilla extract. Make sure your eggs are at room temperature; it really helps create a smoother, more cohesive batter.
Step 4: Combine
Add about half of your dry ingredients to the wet ingredients. Gently fold them in using a spatula until just combined. Then, add the remaining dry ingredients and the 1 cup of chocolate chips (the ones for the batter). Continue to fold gently until you no longer see streaks of dry flour. Be careful not to overmix here! Overmixing develops the gluten in the flour, which can lead to tough brownies. We’re aiming for a thick, fudgy batter. It should be rich and glossy.
Step 5: Prepare Filling
If you’re doing the swirl, now’s the time to prepare it. In a small microwave-safe bowl, combine the ½ cup of chocolate chips for the swirl with the tablespoon of vegetable oil or melted butter. Microwave in 30-second intervals, stirring in between, until the chocolate is melted and smooth. Stir it well to get a nice, pourable consistency. This extra layer of chocolate is what really elevates these brownies.
Step 6: Layer & Swirl
Pour about half of your Brownie Batter into your prepared pan and spread it evenly. Drizzle about half of your melted chocolate swirl mixture over the top. Then, carefully spoon the remaining brownie batter over the chocolate swirl, spreading it gently to cover. Drizzle the rest of the melted chocolate over the top layer of batter. Now, for the fun part: take a knife or a skewer and gently swirl the melted chocolate into the batter. Don’t over-swirl; you just want pretty ribbons of chocolate, not a completely mixed mess. Aim for elegant patterns!
Step 7: Bake
Pop that pan into your preheated oven. Bake for about 25-35 minutes. The exact time will depend on your oven and the pan size. You’re looking for the edges to be set and slightly pulled away from the sides of the pan, and the center to be mostly set but still a little gooey. A toothpick inserted into the center should come out with moist crumbs attached, not wet batter. If it comes out perfectly clean, they might be a little overbaked. I usually test mine around the 25-minute mark and go from there. Remember, they’ll continue to bake a little as they cool.
Step 8: Cool & Glaze
This is perhaps the hardest part: waiting! Let the brownies cool completely in the pan on a wire rack. I know, I know, the smell is intoxicating, but slicing them while they’re hot will result in a melty mess. Once they’re completely cool, you can prepare the glaze. In a small bowl, whisk together the sifted powdered sugar, cocoa powder, and vanilla extract. Gradually add the milk or half-and-half, a tablespoon at a time, whisking until you have a smooth, drizzle-able consistency. If it’s too thick, add a tiny bit more milk; if it’s too thin, add a little more powdered sugar. Drizzle this over the cooled brownies. If you’re adding candy-coated chocolates or sprinkles, now is the time to scatter them over the wet glaze!
Step 9: Slice & Serve
Once the glaze has set (or mostly set, I’m usually too impatient!), use the parchment paper overhang to lift the entire slab of brownies out of the pan. Place it on a cutting board and slice them into squares using a sharp knife. For super clean cuts, you can wipe the knife clean between each cut. Serve them at room temperature for the best fudgy texture. These are truly divine on their own, but they’re also amazing with a scoop of vanilla ice cream or a glass of cold milk.
What to Serve It With
These homemade cosmic brownies are pretty much a star on their own, but if you’re looking to create a little something extra, I’ve got you covered! For a simple breakfast treat alongside a cup of coffee, I love a small square. The rich chocolate is surprisingly comforting with a dark roast. If you’re hosting a brunch, these can be a fun, less formal dessert option alongside fruit salad or pastries. I sometimes cut them into smaller, bite-sized pieces and arrange them on a platter with some fresh berries – the contrast of the sweet brownie and tart berries is fantastic. As a dessert, they are a classic for a reason. A dusting of powdered sugar or a dollop of whipped cream works wonders. And for those cozy snack moments, when you just need something sweet and comforting, these are perfect with a glass of cold milk. My kids absolutely love them this way after school. My absolute favorite family tradition is to serve them warm (just slightly heated in the microwave for 10-15 seconds after glazing) with a scoop of good quality vanilla bean ice cream. The contrast of the warm brownie and cold ice cream is just heavenly, and the melted chocolate swirl becomes even more decadent.
Top Tips for Perfecting Your Homemade Cosmic Brownies
I’ve made these brownies more times than I can count, and through trial and error (and a few very enthusiastic taste-testers!), I’ve picked up a few tricks that I think make all the difference. When it comes to the cocoa powder, don’t be afraid to use a good quality one. It really impacts the depth of flavor. If you find your cocoa powder is a bit clumpy, whisking it thoroughly with the flour is crucial to avoid any bitter pockets. For the eggs, I always make sure mine are at room temperature. I used to forget this step, and my batter would sometimes look a little… well, not quite right. Bringing them to room temp ensures they emulsify beautifully with the butter and sugar mixture, creating that smooth, rich base we’re after. Don’t overmix the batter once you add the flour! This is probably the most important tip for achieving that chewy, fudgy texture. Overmixing develops gluten, leading to tough brownies, which is the opposite of what we want. Fold just until the streaks of flour disappear. For the swirl, remember that less is often more. You want beautiful ribbons of chocolate, not a muddy mess. A few gentle swirls with a knife or skewer are perfect. If you want to get fancy, you can use different kinds of chocolate for the swirl, like milk chocolate or even a white chocolate. I’ve even tried adding a swirl of peanut butter, which was an instant hit! When it comes to baking, ovens can be so finicky, can’t they? My advice is to start checking for doneness a few minutes before the recipe suggests. A toothpick with moist crumbs is the sweet spot – too clean means overbaked, too wet means underbaked. They’ll continue to set up as they cool, so it’s better to err on the slightly underbaked side for maximum fudginess. And finally, for the glaze, consistency is key. If it seems too thick, add milk just a teaspoon at a time. If it’s too thin, whisk in a little more sifted powdered sugar. A slightly thicker glaze will give you those nice, defined drizzles, while a thinner one will spread more. These little adjustments make a big difference!
Storing and Reheating Tips
One of the best things about these brownies (besides being delicious, obviously!) is how well they keep. If you happen to have any leftovers, which is rare in my house, I’ve found that storing them at room temperature in an airtight container is perfect for up to 3-4 days. They actually tend to get even fudgier as they sit. If you live in a particularly warm climate or want them to last a little longer, you can store them in the refrigerator. Place them in an airtight container, and they should stay fresh for about a week. Just be aware that refrigeration can firm them up a bit, so you might want to let them come to room temperature for about 15-20 minutes before serving, or give them a quick 10-second zap in the microwave. For longer storage, freezing is definitely an option! I like to wrap individual brownie squares tightly in plastic wrap, then place them in a freezer-safe bag or container. They’ll last for up to 3 months this way. To thaw, simply remove them from the freezer and let them come to room temperature. If you’ve glazed your brownies, I usually recommend glazing them *after* they’ve thawed, especially if freezing for an extended period. This prevents the glaze from becoming sticky or cracking. If you do freeze them with glaze, just be prepared that the texture might be slightly different upon thawing. My kids love to reheat a frozen brownie square for about 15-20 seconds in the microwave – it’s like a warm, gooey brownie lava cake!
Frequently Asked Questions
Final Thoughts
There you have it – the ultimate guide to creating those deeply satisfying, fudgy homemade cosmic brownies that are sure to become a family favorite. I truly believe that this recipe strikes the perfect balance between rich chocolate flavor, irresistible texture, and satisfying simplicity. It’s the kind of recipe that brings a little bit of joy and comfort into your kitchen, and the delicious results are always worth the effort. If you love these, you might also enjoy my recipe for ridiculously fudgy lava cakes or my no-bake chocolate peanut butter bars. Give this recipe a try, and I promise, you won’t be disappointed! I can’t wait to hear what you think, and I’d absolutely love to see your creations! Don’t forget to leave a comment below with your thoughts or any fun variations you try. Happy baking!
Homemade Cosmic Brownies
Ingredients
Brownies
- 0.75 cup unsalted butter, melted
- 2 large eggs
- 1 cup granulated sugar
- 0.66 cup light brown sugar, packed
- 2 tablespoons coffee or water coffee leftover from the morning brew is fine
- 2 teaspoons vanilla extract
- 0.75 cup unsweetened natural cocoa powder or dark cocoa powder Hershey’s Special Dark recommended
- 1 teaspoon instant espresso granules optional but recommended, ensure it's instant
- 0.75 cup all-purpose flour
Chocolate Ganache
- 1.5 cups semi-sweet chocolate chips
- 0.5 cup half-and-half or cream
Topping
- 1 cup M&M minis or regular size M&Ms
Instructions
Preparation Steps
- Preheat oven to 350°F (175°C). Line a 9-by-9-inch baking pan with aluminum foil and spray with cooking spray; set aside.
- In a large, microwave-safe bowl, melt the butter on high power for about 90 seconds.
- Add the eggs, granulated sugar, light brown sugar, coffee (or water), and vanilla extract to the melted butter. Whisk to combine.
- Add the cocoa powder and instant espresso granules to the wet ingredients. Whisk until incorporated, smooth, and free from lumps. This may take a few minutes if your cocoa powder is lumpy.
- Add the all-purpose flour and stir until it's just incorporated. Do not overmix.
- Turn the batter out into the prepared pan, smoothing the top lightly with a spatula. Bake for 25 to 29 minutes, or until the top has just set, isn't jiggly in the center, and a toothpick inserted into the center comes out clean or with a few fudgy, moist crumbs (but no wet batter).
- Allow the brownies to cool completely in the pan.
- While the brownies cool, prepare the ganache. Add the semi-sweet chocolate chips to a medium, microwave-safe bowl and heat on high power for 1 minute to soften the chips. They will not be fully melted at this point; this is okay. Do not stir.
- Heat the half-and-half or cream in a glass measuring cup or microwave-safe bowl until it begins to bubble and shows signs of just beginning to boil, about 1 minute on high power.
- Pour the hot cream over the softened chocolate chips and let stand for 5 to 10 minutes.
- With a whisk, beat the chocolate and cream mixture until it is silky, smooth, and combined. If the mixture isn't smoothing out, heat it in 15-second bursts in the microwave until it can be stirred smooth.
- Pour the ganache over the mostly cooled brownies (about 30 minutes of cooling is fine; they don't need to be completely cool). Smooth the ganache lightly with a spatula or offset knife.
- Evenly sprinkle the M&Ms over the ganache.
- Cover the pan with a sheet of foil to prevent fridge smells, and place the pan in the refrigerator until the ganache has set up, at least 2 hours. Do not slice the brownies until the ganache has set. These can be made in advance and stored in the fridge; they get better with time.