The first time I smelled chocolate drifting through our kitchen, it wasn’t a fancy dessert at all, it was a quiet moment with my grandma, who taught me to bake with a giggle and a little flour on the nose. The moment those chocolate crinkle cookies came out of the oven, the whole house seemed to exhale—crackled sugar on the outside, fudgy centers that stayed soft long after cooling. There’s something magical about the crackly look and that deep, cocoa-rich scent that fills the room. These chocolate crinkle cookies aren’t just cookies; they’re a memory you can hold in your hand. They’re surprisingly easy, which is why I always pull this recipe out on busy weeknights or when friends drop by unannounced—you can have a tray hot from the oven in under an hour. If you’re used to traditional Chocolate Chip Cookies, you’ll notice these are a touch more indulgent, with a brownie-like vibe that somehow stays light enough to disappear in minutes. I’m delighted to share them with you, because I know you’ll love the way the sugar snow coats the dough and cracks open when they bake. It’s a little celebration in every bite, and my kitchen lights up with memories every time I bake a batch of chocolate crinkle cookies.
What is chocolate crinkle cookies?
Think of chocolate Crinkle Cookies as a lovechild of a brownie and a cookie, rolled in powdered sugar before they hit the heat. It’s essentially a fudgy batter that’s chilled, rolled into rounds, and baked until the tops crack into those gorgeous fissures you see in photos. The name comes from that telltale crackle—the molten interior peeks through a snowy surface, like tiny snowy mountain peaks on a winter cookie. The flavor is pure cocoa, with a chewy center, a slight crackle on the outside, and a sweetness that doesn’t overwhelm. My grandma always called them “little chocolate clouds with a crunchy shell,” which is precisely how they feel when you bite into them. They’re not fussy—just a simple blend of pantry staples you probably have on hand, which is why they’ve earned a forever spot in my dessert rotation. If you’ve ever tried a batch that was too dry or too cakey, you know there’s a balance here: the dough should stay soft in the center while the outer edge crisps ever so slightly as it cools. This contrast is what makes chocolate crinkle cookies feel special without requiring heroic effort.
Why you’ll love this recipe?
What I love most about this chocolate Crinkle Cookies is how dependable they are. They’re the kind of dessert you can count on to bring smiles and a little nostalgia with every bite. Here are the truths that keep me coming back to this recipe again and again:
- Flavor: The cocoa is deep, not muddy, with a hint of vanilla that lifts the richness. The powdered sugar crust gives a bright, crisp bite that gives way to a fudgy, almost brownie-like center. It’s a flavor profile that feels luxurious without requiring a long list of fancy ingredients.
- Simplicity: This dough comes together quickly, and you don’t need to be a pastry chef to nail the texture. I’ve made these with a busy schedule, and they still come out perfect with minimal fuss. That’s a big deal when you’re juggling work, kids, and life—these cookies don’t demand your full attention for hours.
- Cost-efficiency: What is the best way to measure cost-efficiency? The ingredients are pantry staples and inexpensive cocoa powder, so you can bake a tray for less than you’d expect. No need for specialty flours or rare spices—just honest, comforting flavors that feel like a hug from your kitchen.
- Versatility: You can tailor these cookies to your mood. Add espresso powder for a mocha kick, swap half the butter for olive oil for a different texture, or drizzle a glossy chocolate glaze for an extra finish. They also freeze beautifully, so you can have a stash ready for last-minute dessert needs.
What I’ve learned through countless batches is that the texture is everything. If the dough is too wet, the cookies spread too thin and lose their signature crackle; if it’s too dry, they’re dense and dull. I’ve found that chilling the dough for at least 30 minutes gives me the best balance—easy to roll, and the cracks appear just right as the cookies bake. My kids always ask for these when they’re craving something sweet after dinner, and I love that this recipe makes about two dozen cookies, which is enough to share without feeling like I’m overindulging. It’s a family favorite that travels well, too—great for a cookie plate at gatherings or as a thoughtful gift in a jar tied with a ribbon.
How do I make chocolate crinkle cookies?
Quick Overview
Here’s the quick gist: whisk the dry ingredients, whisk the wet ingredients, combine until just moistened, chill the dough, roll in powdered sugar, and bake until the tops crack into those distinctive lines. The result is a batch of cookies with a fudgy center, a delicate crust, and a beautiful, Instagram-worthy crackle. The beauty is that you can dial in your flavor with a few easy tweaks, and you’ll still get that classic chocolate-crinkle look. If you’re new to this style, think of it as decorating with cocoa powder and sugar instead of frosting—simple, and incredibly satisfying.
Ingredients
For the Main Batter:
- 1 3/4 cups (220 g) all-purpose flour
- 1/4 cup (25 g) unsweetened cocoa powder
- 1 teaspoon baking powder
- 1/2 teaspoon salt
- 1/2 cup (100 g) granulated sugar
- 1/2 cup (100 g) light Brown Sugar, packed
- 2 large eggs
- 1/2 cup (120 ml) vegetable oil (or melted butter for a richer flavor)
- 1 teaspoon vanilla extract
For the Filling (optional):
- 2 oz (60 g) Dark Chocolate, chopped for ganache or chips
- 2 tablespoons heavy cream
For the Glaze (optional):
- 1/2 cup powdered sugar, plus extra for dusting
- 2 tablespoons milk or cream (to loosen as needed)
- 1/4 teaspoon vanilla extract
- Optional: a pinch of cayenne or espresso powder for a little kick
Step-by-Step Instructions
Step 1: Preheat & Prep Pan
Preheat your oven to 350°F (177°C). Line two baking sheets with parchment paper or silicone mats. If you’re using a chilled dough, this is a good moment to pull it from the fridge and let it sit for a few minutes to take the chill off so the rolling isn’t a workout.
Step 2: Mix Dry Ingredients
In a medium bowl, whisk together flour, cocoa powder, baking powder, and salt. Sifting helps break up any lumps and ensures the cocoa distributes evenly. This is the moment where the kitchen fills with that rich chocolatey smell, and you know you’re on the right track.
Step 3: Mix Wet Ingredients
In a separate large bowl, whisk together granulated sugar, brown sugar, eggs, oil (or melted butter), and vanilla until everything is smooth and glossy. The mixture should look a little lighter than you expect; that’s your cue that you’ve emulsified the fats and sugar properly, which helps keep the cookies tender.
Step 4: Combine
Pour the dry ingredients into the wet ingredients and mix just until you don’t see flour streaks. Avoid overmixing—you want a soft, cohesive dough, not a tight, tough one. If the dough feels a little gooey, don’t panic; it firms up a touch after chilling.
Step 5: Prepare Filling
If you’re going the filling route, melt the chocolate with the cream to make a glossy ganache and let it cool to a spreadable consistency. This can be rolled into small centers or used as a swirl if you’re feeling creative. For standard cookies, you can leave this step out and simply proceed with the dough as-is.
Step 6: Layer & Swirl
Cover the dough and chill for at least 30 minutes. When you’re ready, scoop rounded tablespoons of dough, roll them into balls, and if you’re using filling, flatten slightly, add a small amount of ganache in the center, and pinch the dough shut around it. For a classic, skip the filling and roll each ball directly in a generous coating of powdered sugar on all sides. The sugar will form your snowy crust as the cookies bake and crack.
Step 7: Bake
Place the sugar-coated dough balls on the prepared sheets, spacing them about 2 inches apart. Bake for 10–12 minutes, until the tops look set but the centers remain slightly soft. They’ll firm up as they cool. If your oven runs hot, you may need 9–11 minutes; if it’s cooler, 12 minutes might be perfect. The edges should be just a touch crisp while the centers stay fudgy.
Step 8: Cool & Glaze
Let the cookies rest on the baking sheet for 5 minutes before transferring to a wire rack to cool completely. If you’re glazing, whisk the glaze ingredients until smooth and drizzle lightly over cooled cookies. A little drizzle goes a long way—you don’t want to overpower the chocolate flavor. If you prefer a snowier finish, dust with a bit more powdered sugar once cooled. The contrast in texture is part of the magic of these cookies.
Step 9: Slice & Serve
Once cooled, slice a cookie in half if you want to admire that fudgy interior, or simply plate the whole rounds and let everyone break into them with a napkin and a smile. These are best enjoyed with a glass of cold milk, a hot cup of coffee, or a cozy mug of tea. They look fancy on a platter, but you’ll find they disappear as fast as you can blink—trust me, I’ve watched this happen more times than I care to admit. My favorite way to serve them is still warm, with a little kiss of glaze or a dusting of powdered sugar, and the inside is everything you hope for: a tender, slightly sticky chocolate center that contrasts perfectly with the crisp outer crust.
What to Serve It With
These cookies shine in several moments, so I like to offer a few serving ideas that fit different occasions and moods. Nothing loud or complicated—just a few thoughtful touches that make the moment feel special.
For Breakfast: A small plate of warm chocolate crinkle cookies paired with strong coffee or a latte. The cocoa moderates the bitterness of the coffee, and the sugar dusting adds a little morning sparkle. If you’re in a rush, you can crumble one over a bowl of yogurt with berry compote for a quick, decadent parfait. My family loves this with a mug of steaming milk as the sun comes up, a simple reminder that mornings can be comforting too.
For Brunch: Bake a larger batch and present them on a prettily arranged platter with fresh berries and a ramekin of vanilla bean yogurt dip. The contrast between the fudgy interior and the tangy dip makes each bite feel elegant. It’s a laid-back, homey touch that says you cared enough to bring a little extra sweetness to the table.
As Dessert: Serve warm with a scoop of vanilla ice cream or a pour of thick chocolate sauce. If you have any reason to celebrate, a few toasted almond slivers or a pinch of flaky sea salt can elevate the plate and turn a simple dessert into something memorable.
For Cozy Snacks: A mug of tea, a blanket, and a plate of these cookies make movie night feel like a little party. They’re the sort of treat you can curl up with, while chatting about your day and savoring the moment. My kids ask for seconds, and I’m always happy to oblige, because this recipe is one of the few that makes a house feel instantly warmer.
Top Tips for Perfecting Your Chocolate Crinkle Cookies
Here are a few hard-earned tips that have saved many batches and kept my kitchen calm when the oven timer starts singing. These tips are organized to help you refine technique and adjust to your pantry and oven quirks.
Flour & Cocoa Prep: Use good-quality cocoa powder and measure by weight if you can. Cocoa is a flavor booster here, and you don’t want it to taste flat. If your cocoa is old, your cookies will feel dull. Sift or whisk the dry mix well to keep the batter uniform and to ensure the crackle forms cleanly on the surface.
Mixing & Texture: Don’t overmix the dough after adding the dry ingredients. You want a soft, slightly tacky dough that holds its shape. Overmixing makes the cookies tough and dulls the fudgy interior. If the dough seems very sticky, refrigerate it for 20–30 minutes before rolling in sugar.
Swirl & Pattern: The beauty of these cookies is the crackled surface. If you’re adding a swirl or a tiny center filling, be mindful not to compress too much, or you’ll lose the crackle entirely. A light dusting of powdered sugar helps define the lines and enhances the contrast after baking.
Ingredient Swaps: You can substitute half the oil with melted butter for a deeper flavor and a slightly crisper edge. If you want to cut the richness a touch, use half butter and half applesauce. If you’re after a vegan option, try coconut oil, but note it may alter the texture slightly. For a more intense chocolate flavor, add 1–2 teaspoons of espresso powder to the dry mix—trust me, this tiny upgrade makes a big difference.
Baking Tips: Oven temperatures vary, so start with 10 minutes and watch for subtle gloss on the tops with a gentle spring back when touched. If you’re baking on a dark sheet, check a minute earlier; lighter pans may need a touch longer. Rotate the trays halfway through to ensure even baking.
Glaze Variations: If you want a glossy finish, whisk a simple chocolate glaze with 2 tablespoons of cream and a teaspoon of butter. Drizzle lightly and let it set. For a lighter finish, dust with powdered sugar or finish with a tiny pinch of flaky salt to balance the sweetness. If you’re making these ahead of time, omit the glaze and store as-is; the cookies stay wonderfully soft for days when kept in an airtight container.
These tips have turned many experimental batches into crowd-pleasers. The more you bake them, the more you’ll find your own little tweaks that suit your kitchen best. I’ve learned that patience with the chilling step pays off—when the dough stays firm enough to hold its shape, the crackle looks like a fireworks display across the top. If you’re ever tempted to skip it, don’t—that chilling step is the secret ingredient that makes all the difference.
Storing and Reheating Tips
Storage and reheating are where this recipe truly shines, because you can prepare a batch ahead and enjoy them all week. Here’s how I do it and what to expect:
Room Temperature: Cookies stay best in an airtight container at room temperature for up to 5 days. They’ll still be soft and fudgy after the first day, but the outer crust will continue to crackle beautifully as they sit. If you’re not closing the container tightly, they’ll dry out faster, so give them a proper seal.
Refrigerator Storage: If you want to bake later, you can refrigerate the dough for up to 3 days. The dough might firm up a bit more, which makes it easier to roll in sugar right before baking. You’ll notice the crackle becomes more pronounced after chilling, which is a nice bonus.
Freezer Instructions: The dough freezes wonderfully. Scoop and roll the dough into balls, roll in sugar, and freeze on a sheet tray. Once firm, transfer to a freezer bag. They’ll keep for up to 3 months. Thaw briefly before baking and proceed as usual. If you’ve added filling, freeze the dough with the filling inside; it may require a minute longer in the oven, but you’ll still get the same fudgy center.
Glaze Timing Advice: If you plan to glaze, glaze the cookies after they have cooled completely, unless you’re doing a glaze that sets quickly. If you’re freezing, you can glaze on the day you plan to serve, or dust with powdered sugar for a no-fuss finish later.
Over the years, I’ve found that these cookies taste just as wonderful straight from the fridge as they do warm from the oven. The flavors intensify a touch after resting, and the texture remains satisfying—the exterior stays crisp, the interior remains soft. It’s a small miracle that can turn a plain night into something comforting and joyful.
Frequently Asked Questions
Final Thoughts
This recipe is more than a batch of cookies. It’s a little ritual that reminds me of warm kitchens, shared stories, and the way the house feels when something chocolatey is in the air. The crackled sugar, the fudgy center, the way they disappear in minutes at my house—these are the things that keep me coming back to this one, again and again. If you’ve never baked chocolate crinkle cookies before, you’re in for a treat that’s equal parts nostalgia and indulgence. And if you have a favorite variation, I’d love to hear about it in the comments. Did you add a pinch of espresso, or did you swap oil for melted butter for a richer bite? Maybe you used a ganache center and perfected your swirl. Leave a note, rate the recipe, and share your own twist. Happy baking! And as always, I can’t wait to hear how yours turn out.
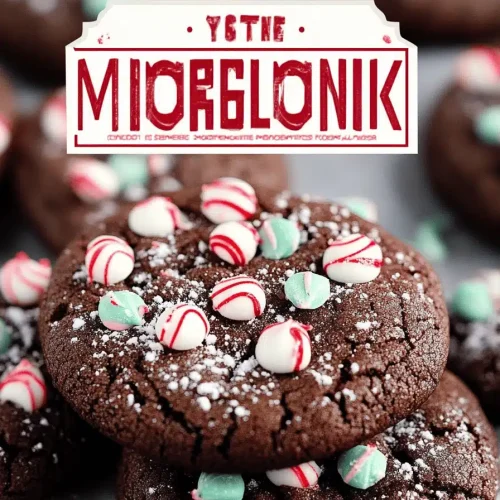
Peppermint Chocolate Crinkle Cookies
Ingredients
Main Ingredients
- 1 cup unsweetened cocoa powder
- 0.5 cup vegetable oil
- 1.5 cup granulated sugar
- 2 count eggs
- 2 teaspoons vanilla extract
- 2 cups all-purpose flour
- 2 teaspoons baking powder
- 0.25 teaspoon salt
- 1 cup powdered sugar
Instructions
Preparation Steps
- In a large bowl, whisk together cocoa powder, flour, sugar, baking powder, and salt.
- Stir in vegetable oil, eggs, and vanilla until a thick batter forms.
- Cover and chill the dough for at least 2 hours or overnight.
- Preheat oven to 350°F (175°C). Line a baking sheet with parchment.
- Roll dough into 1-inch balls and coat generously with powdered sugar.
- Bake 10-12 minutes until cookies crack on top. Cool on a wire rack.