Oh, the holidays! They just wouldn’t be the same without that extra bit of sparkle, would they? I remember years ago, when my little ones were just tiny tots, we were decorating our Christmas Tree. They were so excited to hang the shiny baubles, but their eyes kept wandering to the bowl of colorful sprinkles I had out for decorating cookies. It hit me then – why couldn’t we combine that sheer joy of sprinkles with the magic of tree decorations? That’s how these DIY Sprinkles Ornaments were born, a project that’s become an absolute staple in our family traditions. Forget those store-bought, often boring ornaments; these edible wonders are so much more personal, so much more *us*. They’re not just decorations; they’re little bursts of happiness that smell heavenly and taste even better. If you’re anything like me and adore a project that’s both creative and delicious, and you’re looking for a way to make your festive season truly shine, then you’re in for a treat. These DIY Sprinkles Ornaments are like edible confetti for your tree, and honestly, they’re way more fun than just plain old ornaments.
What are some of the best DIY sprinkles?
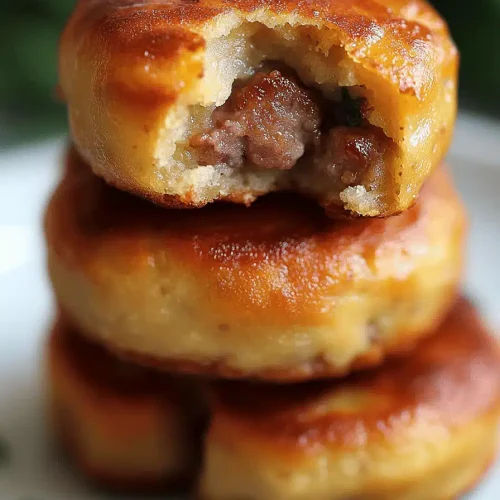
So, what exactly are these magical little things? Think of them as miniature, edible works of art that you can actually hang on your Christmas tree. They’re essentially small, decorative cookies or candies that are completely covered in vibrant sprinkles, giving them a dazzling, festive appearance. The beauty of these DIY Sprinkles Ornaments is their incredible customizability. You can shape them into anything – stars, trees, gingerbread men, simple circles, or even little hearts. Once baked and cooled, they’re then generously coated in a sweet glaze and practically drowned in a sea of sprinkles. It’s like creating your own personal glitter bomb, but the good kind that you can eat! The idea is to create ornaments that are not only visually stunning but also deliciously snackable, making them a delightful alternative to traditional, non-edible decorations. They’re the perfect blend of craft and culinary fun, bringing a unique charm to any holiday setting.
Why you’ll love this recipe?
Honestly, there are so many reasons why I keep coming back to this project year after year, and why I think you’ll fall head over heels for it too. First and foremost, the sheer *joy* it brings. Seeing the kids’ faces light up as they press sprinkles into the dough or marvel at the finished, sparkling creations is priceless. It’s a tangible way to create memories. Then there’s the flavor – oh, the flavor! These aren’t just pretty faces. The base cookie or dough is usually a simple, buttery shortbread or a Sugar Cookie, which is the perfect canvas for the sweet glaze and all those colorful sprinkles. The combination is just heavenly. And let’s talk simplicity. While they look intricate, the process is surprisingly straightforward. It’s a project that’s perfectly suited for little hands (with a bit of supervision, of course!) and busy parents alike. You don’t need any fancy equipment, just a few basic baking supplies. Plus, they’re incredibly cost-effective! A bag of sprinkles and some pantry staples can transform into a dozen or more stunning ornaments. And the versatility? You can change the shapes, the sprinkle colors, even the glaze flavor to match your theme or personal taste. They make for fantastic edible gifts, too. I’ve even found that a batch of these DIY Sprinkles Ornaments is the perfect way to use up any leftover sprinkles from cookie decorating binges!
How do I make DIY sprinkles?
Quick Overview
Making these DIY Sprinkles Ornaments is a delightful, multi-step process that’s more fun than fussy. You’ll start by preparing a simple, sturdy Cookie Dough or a basic shortbread that holds its shape well. After cutting out your desired shapes, you’ll bake them until golden. Once completely cool, the magic happens: a sweet, pourable glaze coats each ornament, followed by an enthusiastic shower of colorful sprinkles. The key is patience – letting them dry properly ensures a beautiful, durable finish, ready to adorn your tree or be devoured with delight. It’s a project that truly brings the sparkle!
Ingredients
For the Sturdy Cookie Base: For the Sturdy Cookie Base: For the Sturdy Cookie Base: For the Stur
2 ½ cups all-purpose flour
1 teaspoon baking powder
½ teaspoon salt
1 cup (2 sticks) unsalted butter, softened
1 cup granulated sugar
2 large eggs
1 teaspoon vanilla extract
For the Simple Glaze:
2 cups powdered sugar, sifted
¼ cup milk (or water for a thinner glaze)
½ teaspoon vanilla extract
Assorted sprinkles (jimmies, nonpareils, sanding sugar – get creative!)
Step-by-Step Instructions
Step 1: Preheat & Prep Pan
First things first, let’s get our oven ready. Preheat it to 350°F (175°C). While that’s warming up, grab a couple of baking sheets and line them with parchment paper. This is super important because it stops your beautiful cookies from sticking and makes cleanup a breeze. You’ll want your baking sheets ready to go before you even start mixing the dough. Trust me, when that dough is ready, you want to get it onto those prepared sheets quickly!
Step 2: Mix Dry Ingredients
In a medium bowl, whisk together the all-purpose flour, baking powder, and salt. Just a good whisk to make sure everything is evenly distributed. This ensures your cookies have a nice, consistent texture. It’s a simple step, but it makes a difference!
Step 3: Mix Wet Ingredients
Now, in a larger bowl, cream together the softened unsalted butter and granulated sugar until it’s light and fluffy. This usually takes a few minutes with an electric mixer. Then, beat in the eggs one at a time, making sure each is well incorporated before adding the next. Finally, stir in the vanilla extract. This is where that lovely aroma starts to fill your kitchen – my favorite part!
Step 4: Combine
Gradually add the dry ingredients to the wet ingredients, mixing on low speed (or by hand with a sturdy spoon) until just combined. Be careful not to overmix here! Overmixing can make your cookies tough, and we want them to be delightfully tender. You’re looking for a soft dough that pulls away from the sides of the bowl.
Step 5: Prepare Filling
This step is actually for later when we decorate, but it’s good to think ahead! The “filling” for our ornaments is the glorious glaze and the cascade of sprinkles. For the glaze, sift your powdered sugar into a bowl. Add the milk (start with a little less and add more if needed to reach the right consistency) and vanilla extract. Whisk until smooth and lump-free. You want it thick enough to coat but thin enough to pour easily. Have your sprinkles ready in shallow bowls – you’ll need a lot!
Step 6: Layer & Swirl
Turn the dough out onto a lightly floured surface. Divide it in half, then flatten each half into a disk. Wrap them in plastic wrap and chill for at least 30 minutes. This makes the dough much easier to roll out. Once chilled, roll out one disk to about ¼-inch thickness. Use cookie cutters to create your desired shapes. For hanging, use a straw or skewer to make a small hole near the top of each ornament *before* baking. Transfer the cut-outs to your prepared baking sheets, leaving a little space between them. I always leave a small pile of dough scraps to re-roll later – don’t let any of that goodness go to waste!
Step 7: Bake
Bake for 8-10 minutes, or until the edges are lightly golden. Keep an eye on them, as they can go from perfectly baked to browned quickly. You want them to be set and just starting to color. Let them cool on the baking sheet for a few minutes before transferring them carefully to a wire rack to cool completely. This is crucial – you cannot glaze warm cookies, or the glaze will just melt off!
Step 8: Cool & Glaze
Once your cookies are completely cool, it’s time for the fun part! Place your wire rack over a baking sheet or some parchment paper to catch the drips. Pour your prepared glaze over each cookie, letting the excess drip off. Work one or two cookies at a time. As soon as a cookie is glazed, generously cover it with your chosen sprinkles. Press them gently to help them stick. Don’t be shy – the more sprinkles, the merrier!
Step 9: Slice & Serve
Let the glazed and sprinkled ornaments dry completely on the wire rack. This can take a few hours, or even overnight for a really firm finish. Once dry, thread a ribbon or some festive twine through the hole you made earlier. Now they’re ready to be hung on the tree or enjoyed! I usually save a few for immediate snacking, because, well, they’re delicious!
What to Serve It With
These DIY Sprinkles Ornaments are so versatile, they can truly fit into any holiday celebration. For a sweet start to your Christmas morning, they’re perfect alongside a steaming mug of coffee or a glass of cold milk. The buttery cookie base and sweet glaze are just the pick-me-up you need. At a festive brunch, they add a touch of whimsical elegance to any spread. Imagine them nestled amongst fruit salads and other pastries – they’re instant conversation starters! As a delightful dessert option, they’re wonderful served alongside a scoop of vanilla ice cream or even as a charming topping for a more elaborate cake or trifle. And for those cozy, quiet evenings when you just need a little treat, they’re the ultimate comfort snack. I love to pair them with a warm cup of Peppermint Hot Chocolate for a truly festive experience. My family has a tradition of having a “decorate and eat” session where we make a big batch, hang some, and then have a little feast of the imperfectly perfect ones right after they’ve set a bit!
Top Tips for Perfecting Your DIY Sprinkles Ornaments
Over the years, I’ve picked up a few tricks that really make these DIY Sprinkles Ornaments shine. First, for the cookie dough, don’t skip the chilling step! A cold dough is a happy dough when it comes to rolling and cutting. It prevents spreading in the oven and keeps those sharp edges crisp. When you’re rolling, try to do it evenly; thick spots and thin spots will bake differently. If you’re using a lot of different sprinkle shapes, like jimmies and nonpareils, adding them while the glaze is still wet is key. Sometimes, if the glaze starts to set too quickly, a tiny splash more milk can revive it. For the glaze consistency, it’s better to start thicker and thin it down than the other way around. If it’s too thin, your sprinkles might all sink to the bottom or it’ll be hard to get that nice, opaque coating. For really intricate cookie cutters, a small offset spatula can be a lifesaver for lifting them from the counter to the baking sheet without distorting the shape. And if you’re making a lot, consider using a few baking sheets and rotating them in the oven to ensure even baking. I’ve found that using a combination of different sprinkle types – like fine sanding sugar for a base layer and then chunky jimmies for texture – adds so much visual interest. Don’t be afraid to experiment with color palettes too; you can go classic Christmas red and green, icy blues and silvers, or even vibrant rainbow!
Storing and Reheating Tips
These beauties can last quite a while if stored properly, which is great because sometimes we make more than we can eat in one sitting! For short-term storage, keep your dried DIY Sprinkles Ornaments in an airtight container at room temperature. They’ll stay fresh and delicious for about 3-5 days. Just make sure they’re completely dry before sealing the container, otherwise, you might end up with unwanted moisture. If you need them to last longer, you can pop them in the refrigerator. An airtight container is still your best friend here, and they should hold up well for about a week. When you take them out of the fridge, let them come to room temperature before serving so the cookie isn’t cold and hard. I’ve even successfully frozen these! Wrap them individually in plastic wrap, then place them in a freezer-safe bag or container. They can stay frozen for up to 2 months. When you’re ready to enjoy them, thaw them overnight in the refrigerator, then let them sit at room temperature for about an hour. The glaze and sprinkles hold up surprisingly well! For the glaze timing, it’s always best to glaze and decorate right before you plan to store or serve them for the freshest taste and appearance.
Frequently Asked Questions
Final Thoughts
Making these DIY Sprinkles Ornaments is more than just a baking project; it’s about creating little pieces of edible magic that bring so much joy and sparkle to the holidays. They’re a reminder that the most special traditions are often the simplest ones, born from a little imagination and a lot of love. They’re a fantastic way to involve the whole family in the festive spirit, and the edible outcome is just the cherry on top! If you loved this recipe and are looking for more ways to add homemade charm to your celebrations, you might also enjoy my recipe for Spiced Gingerbread Houses or my guide to Handmade Christmas Gift Ideas. I truly hope you give these DIY Sprinkles Ornaments a try this year. They’re a guaranteed hit, and I can’t wait to hear about all the dazzling creations you come up with and how much your loved ones enjoy them. Happy baking and happy holidays!
DIY Sprinkles Ornaments
Ingredients
Main Ingredients
- 1 cup Clear plastic ornaments
- 0.5 cup Sprinkles various colors
- 1 tablespoon Clear glue
- 1 tablespoon Glitter optional
- 1 inch Ribbon or twine for hanging
Instructions
Preparation Steps
- Remove the top from the clear ornament. If using glitter, add a small amount to the inside of the ornament.
- Pour in a generous amount of sprinkles. Swirl the ornament to coat the inside.
- Add a small amount of glue to the ornament if needed to help the sprinkles stick to the sides.
- Replace the top and shake gently. Wipe off any excess glue or sprinkles.
- Attach ribbon or twine for hanging.


