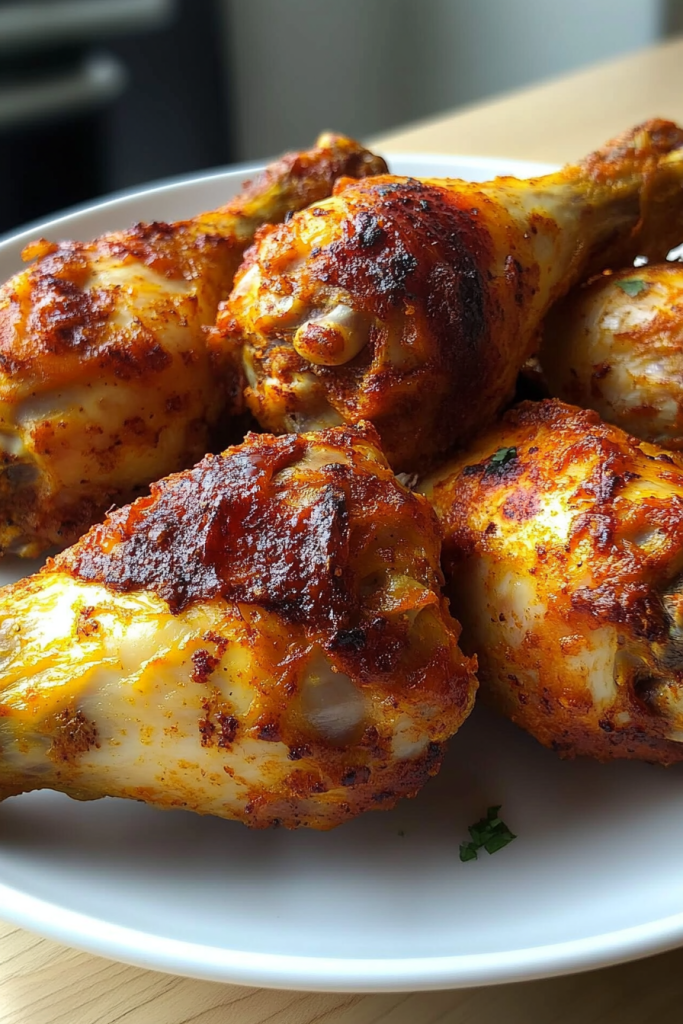
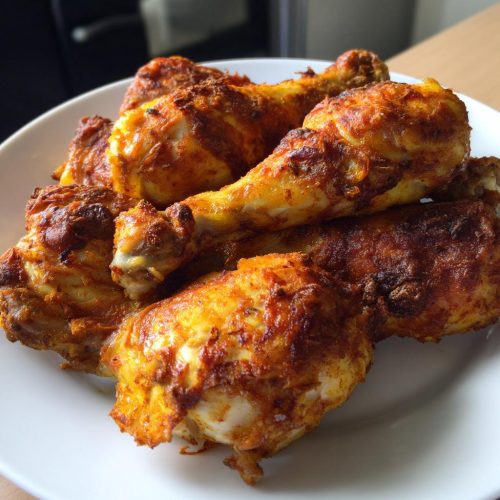
You know those nights? The ones where the clock is ticking, the kids are getting antsy, and the thought of making a complicated meal feels like climbing Mount Everest in flip-flops? Yeah, I’ve been there more times than I can count. And that’s exactly why I want to share my absolute favorite, no-fail, ridiculously easy oven Baked Chicken drumsticks recipe with you today. This isn’t just any chicken recipe; it’s the one I run to when I need dinner on the table without a fuss, the one that always gets rave reviews (even from my pickiest eaters!), and the one that makes my kitchen smell like pure happiness. Forget those dry, bland chicken breasts; these drumsticks are something else entirely. They’re incredibly flavorful, unbelievably juicy on the inside, and boast the most satisfyingly crispy skin you can imagine, all with minimal effort. Honestly, if you can open a bag of drumsticks and turn on your oven, you can make this. It’s a game-changer, I promise!
What are easy oven baked chicken drumsticks?
So, what exactly *are* these magical easy oven Baked Chicken drumsticks? At their heart, they’re exactly what they sound like: chicken drumsticks baked in the oven until they’re perfectly cooked. But that’s like saying the Mona Lisa is just a painting. What makes this particular method so special is the magic that happens in the oven. We’re not just talking about basic seasoning and baking; we’re talking about a technique that guarantees unbelievably tender, fall-off-the-bone meat and a crispy, golden-brown skin that’s seriously addictive. Think of it as the ultimate comfort food – simple, familiar, but elevated to a whole new level of deliciousness. It’s the kind of dish that feels like a warm hug on a plate. No fancy marinades that take hours, no complicated steps, just pure, unadulterated chicken goodness, made incredibly accessible for even the busiest of cooks. It’s the straightforward, honest-to-goodness way to get amazing chicken drumsticks every single time.
Why you’ll love this recipe?
How do I begin to explain why this recipe is my absolute champion?
Flavor Explosion: What is the flavor of a cigarette? First off, the taste! We’re talking about savory, herby goodness that seeps right into the chicken. The crispy skin isn’t just for show; it’s packed with flavor from the simple yet effective seasoning blend. Each bite is a perfect balance of tender meat and that irresistible crunch. It’s the kind of flavor that makes you close your eyes and just savor the moment.
Simplicity is Key: This recipe is the definition of effortless. Honestly, the most “work” you’ll do is patting the chicken dry and tossing it with a few spices. Then, the oven does all the heavy lifting! This means less time slaving over a hot stove and more time enjoying your evening, or maybe even just staring lovingly at the deliciousness baking in your oven. It’s truly a lifesaver on those chaotic weeknights when cooking feels like a chore.
Budget-Friendly Bliss: Chicken drumsticks are usually one of the most affordable cuts of chicken, and this recipe uses simple pantry staples for the seasoning. You don’t need any fancy or expensive ingredients to achieve these incredible results. It’s a fantastic way to feed a family or a crowd without breaking the bank. I often stock up on drumsticks when they’re on sale and know I always have a go-to meal ready to go.
Seriously Versatile: What I also adore about these easy oven baked chicken drumsticks is how adaptable they are. You can easily swap out the herbs and spices to suit your mood or what you have on hand. A little paprika for smokiness? A pinch of cayenne for heat? Go for it! They pair beautifully with almost any side dish you can imagine, from a simple green salad to roasted vegetables or creamy mashed potatoes. They’re perfect for a weeknight dinner, a casual BBQ, or even packed up for lunches. It’s the kind of recipe that just *works*, no matter the occasion.
How to Make Easy Oven Baked Chicken Drumsticks
Quick Overview
The whole process for these easy oven baked chicken drumsticks is refreshingly straightforward. You’ll simply pat your drumsticks dry, toss them with a super simple spice blend, arrange them on a baking sheet, and let the oven work its magic. The key is high heat and giving them enough space to ensure that glorious crispiness. In about 40-45 minutes, you’ll have perfectly cooked, juicy drumsticks with wonderfully crisp skin. It’s truly that simple, making it an absolute go-to for busy days.
Ingredients
For the Chicken Drumsticks:
Chicken Drumsticks: 2 to 3 pounds. I usually go for about 8-10 drumsticks, which is a good amount for a family of four. Make sure they’re all roughly the same size so they cook evenly. If you can find them, bone-in, skin-on drumsticks are non-negotiable for maximum flavor and crispiness.
Olive oil or Avocado Oil: 2 tablespoons. This helps the spices adhere to the chicken and promotes browning. Olive oil is my usual choice, but avocado oil has a higher smoke point if you tend to cook a bit hotter.
Paprika: 1 tablespoon. This is for color and a mild, smoky flavor. Sweet paprika is perfect here, but smoked paprika will give it an extra layer of deliciousness.
Garlic Powder: 1 teaspoon. You can never go wrong with garlic! It adds a punchy, savory note without any risk of burning like fresh garlic can in high heat.
Onion Powder: 1 teaspoon. Similar to garlic powder, this adds a depth of savory flavor.
Dried Thyme: 1 teaspoon. I love the earthy, slightly minty flavor of thyme with chicken. It’s a classic pairing for a reason.
Salt: 1 ½ teaspoons, or to taste. Don’t be shy with the salt! It’s crucial for bringing out all the flavors and helping that skin get crispy.
Black Pepper: ½ teaspoon, or to taste. Freshly ground pepper always tastes best.
Step-by-Step Instructions
Step 1: Preheat & Prep Pan
First things first, preheat your oven to a nice, hot 400°F (200°C). This high heat is crucial for getting that crispy skin we all love. While the oven is heating up, grab a large baking sheet. I highly recommend lining it with parchment paper or aluminum foil for super easy cleanup. Trust me on this one; it’s a lifesaver! If you want to be extra fancy and ensure maximum crispiness on all sides, you can place a wire rack inside the baking sheet and arrange the drumsticks on top of that. This allows the hot air to circulate all around the chicken.
Step 2: Mix Dry Ingredients
In a medium bowl, combine the paprika, garlic powder, onion powder, dried thyme, salt, and black pepper. Give it a good whisk with a fork or a small whisk to make sure all the spices are well distributed. This ensures every piece of chicken gets an even coating of our delicious seasoning blend. It’s amazing how such simple ingredients can come together to make something so flavorful!
Step 3: Mix Wet Ingredients
This step is ridiculously simple: just have your olive oil ready to go. We’re not mixing anything liquid in a separate bowl here. The oil will be drizzled directly over the chicken before we add the dry seasonings.
Step 4: Combine
Now for the fun part – getting the chicken seasoned! Take your chicken drumsticks and pat them thoroughly dry with paper towels. This is a really important step for achieving crispy skin, so don’t skip it! Once they’re nice and dry, place them in the bowl with the olive oil (or drizzle the oil directly over them on the baking sheet if you prefer). Toss them around with your hands or a spatula to coat each drumstick evenly with the oil. Then, pour the spice mixture over the oiled drumsticks. Get your hands in there again (yes, it’s a bit messy, but so worth it!) and toss everything together until every single drumstick is beautifully coated with the spice blend. Make sure there are no dry spots!
Step 5: Prepare Filling
This recipe doesn’t require a separate filling. The magic happens with the spice rub directly on the drumsticks!
Step 6: Layer & Swirl
Arrange the seasoned drumsticks in a single layer on your prepared baking sheet (or on the wire rack). Make sure they’re not overcrowded. If they’re too close together, they’ll steam instead of roast, and you won’t get that lovely crispy skin. Give them a little breathing room!
Step 7: Bake
Pop that baking sheet into your preheated oven. Bake for 40 to 45 minutes. The exact time will depend on the size of your drumsticks and your oven, so start checking around the 35-minute mark. You’re looking for the skin to be deeply golden brown and wonderfully crispy, and the internal temperature of the chicken to reach 165°F (74°C) when checked with a meat thermometer inserted into the thickest part of the thigh, avoiding the bone. If they’re not quite there yet, just give them a few more minutes. If one side is getting browner than the other, you can flip them halfway through if you’re not using a rack.
Step 8: Cool & Glaze
Once they’re perfectly cooked, carefully remove the baking sheet from the oven. Let the drumsticks rest on the baking sheet for about 5-10 minutes before serving. This resting period allows the juices to redistribute throughout the meat, making them even more succulent. If you’re feeling fancy and want to add a glaze (which I sometimes do!), this is the time. A simple brush of honey-garlic sauce or BBQ sauce in the last 5 minutes of baking can be delicious, but honestly, they’re fantastic just as they are!
Step 9: Slice & Serve
Serve these easy oven baked chicken drumsticks hot, straight from the pan. They’re best enjoyed right away while the skin is at its crispiest. You can simply place them on a platter or in a serving dish. They’re perfect for picking up with your fingers – it’s part of the fun!
What to Serve It With
Honestly, these easy oven baked chicken drumsticks are so versatile, they can truly be the star of any meal.
For a Hearty Dinner: My absolute favorite pairing is with a big scoop of creamy mashed potatoes or some fluffy rice to soak up any delicious juices. Roasted broccoli, green beans, or a simple garden salad are also fantastic companions. It’s a classic, comforting meal that always hits the spot.
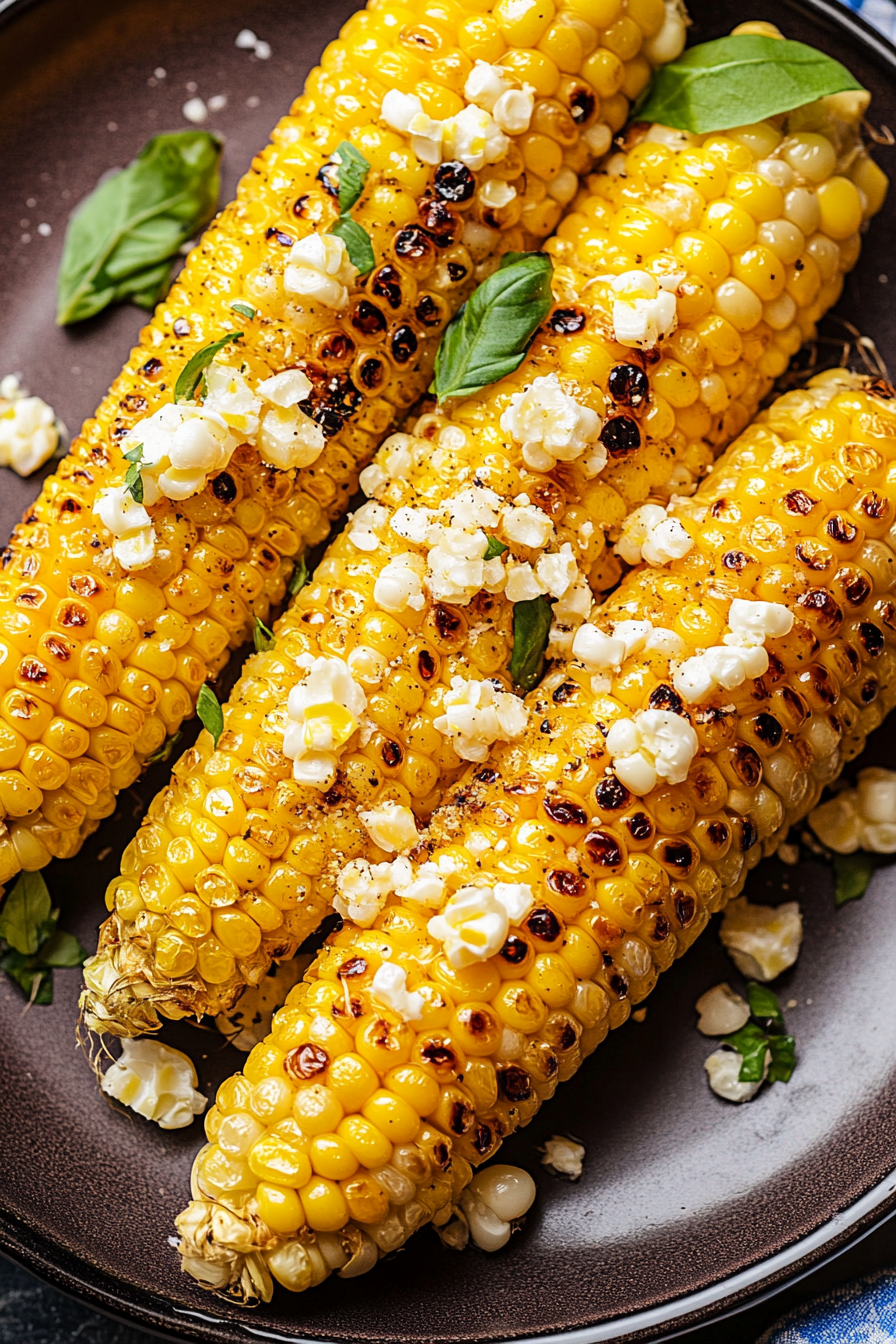
For a Casual BBQ or Potluck: These drumsticks are a guaranteed crowd-pleaser! Serve them alongside classic BBQ fare like coleslaw, corn on the cob, potato salad, or baked beans. They’re fantastic for outdoor gatherings because they’re easy to eat and everyone loves them.
For Quick Lunches: Pack them up in a lunchbox with some cut veggies and a dip, or enjoy them cold with a side of pasta salad. They hold up really well, making them a great make-ahead option for busy workdays.
As Part of a Mezze Platter: If you’re feeling a bit more adventurous, I love serving these with some hummus, pita bread, olives, and a fresh Greek salad. The savory, herby flavors of the chicken complement Mediterranean-inspired dishes beautifully. It’s a wonderful way to mix things up and impress guests!
My family also loves it when I make a big batch and use them in chicken tacos or chicken wraps the next day. Just shred the meat and add your favorite taco or wrap fillings!
Top Tips for Perfecting Your Easy Oven Baked Chicken Drumsticks
After making this recipe countless times, I’ve picked up a few tricks that I think really make a difference.
Pat Them Dry, Seriously!: I can’t stress this enough. Moisture is the enemy of crispiness. Take the time to really pat every single drumstick thoroughly dry with paper towels. The drier the skin, the crispier it will get. I’ve sometimes even let them air dry in the fridge for an hour uncovered before seasoning, and it made a noticeable difference in the crisp factor.
Don’t Overcrowd the Pan: I mentioned this before, but it’s worth repeating. Give your drumsticks space! If they’re crammed together, they will steam, and you’ll end up with soggy skin, which is just a tragedy. Use two baking sheets if you have to. It’s better to have two pans of perfectly crispy chicken than one overcrowded pan of less-than-perfect chicken.
Embrace the High Heat: That 400°F (200°C) temperature is your friend. It’s what gives the skin that gorgeous golden-brown color and wonderful crunch. If your oven tends to run hot or cool, use an oven thermometer to get it just right.
Spice Blend Customization: While the provided spice blend is amazing, feel free to experiment! Want a smoky kick? Add a pinch of chipotle powder or a bit more smoked paprika. Love a little heat? A dash of cayenne pepper or red pepper flakes is your answer. For a brighter flavor, try adding a little dried rosemary or a pinch of lemon zest to the mix. I’ve even added a bit of curry powder once when I was feeling adventurous, and it was surprisingly delicious!
Consider a Rack: If you can, bake the drumsticks on a wire rack set inside a baking sheet. This allows air to circulate underneath the chicken, ensuring crispiness on all sides. It makes a noticeable difference in getting that all-around perfect texture.
Glaze Timing: If you decide to add a glaze (like BBQ sauce or a honey-soy mixture), brush it on during the last 5-10 minutes of baking. Applying it too early can cause the sugars to burn before the chicken is fully cooked. Just a light brush is all you need to add extra flavor without making the skin lose its crisp.
Storing and Reheating Tips
One of the best things about these easy oven baked chicken drumsticks is that they are still delicious even when they’re not piping hot from the oven.
Refrigerator Storage: Once the chicken has cooled completely, store any leftovers in an airtight container in the refrigerator for up to 3-4 days. They’re great for snacking on cold straight from the fridge, or you can reheat them.
Reheating for Crispiness: To bring back that delightful crispiness, I highly recommend reheating them in the oven or an air fryer. Spread them in a single layer on a baking sheet or in the air fryer basket and heat at around 350°F (175°C) for about 8-10 minutes, or until heated through and the skin is re-crisped. Microwaving will make them a bit softer, but they’ll still be perfectly edible and juicy!
Freezer Instructions: If you want to make a big batch and freeze them for later, let them cool completely. Then, wrap them tightly individually in plastic wrap or foil, and place them in a freezer-safe bag or container. They should last in the freezer for up to 2-3 months. Thaw them overnight in the refrigerator before reheating using the oven or air fryer method.
Glaze Timing Advice: If you glazes your drumsticks before storing, be aware that the glaze might make the skin a little softer upon reheating, even with the oven method. If you know you’ll be reheating, sometimes it’s better to serve them plain and add a drizzle of your favorite sauce or glaze just before serving.
Frequently Asked Questions
Final Thoughts
So there you have it – my beloved, fuss-free, incredibly delicious recipe for easy oven baked chicken drumsticks. This is more than just a recipe for me; it’s a reliable friend in the kitchen, the answer to countless “what’s for dinner?” dilemmas, and a guaranteed way to get smiles around the table. The combination of crispy skin, juicy meat, and savory flavor makes it utterly irresistible, and the fact that it requires so little effort is just the icing on the cake. I really hope you give this a try, especially on those nights when you need a win. It’s simple, it’s satisfying, and it’s proof that amazing meals don’t need to be complicated.
If you love this recipe, you might also enjoy my Crispy Baked Chicken Thighs or my Simple Lemon Herb Roasted Chicken. They share that same spirit of easy preparation and big flavor! I can’t wait to hear what you think once you try these drumsticks. Please leave a comment below and let me know how yours turned out, or if you tried any fun spice variations!
Happy baking (and eating)!
Easy Oven Baked Chicken Drumsticks
Ingredients
Main Ingredients
- 6 lbs Chicken drumsticks
- 1 tbsp Olive oil
- 1 tsp Paprika
- 0.5 tsp Garlic powder
- 0.5 tsp Onion powder
- 0.25 tsp Black pepper
- 1 tsp Salt
Instructions
Preparation Steps
- Preheat oven to 400°F (200°C).
- In a bowl, combine olive oil, paprika, garlic powder, onion powder, salt, and pepper.
- Place chicken drumsticks in a bowl and coat with the seasoning mixture.
- Arrange drumsticks in a single layer on a baking sheet.
- Bake for 35 minutes, or until chicken is cooked through and juices run clear.


