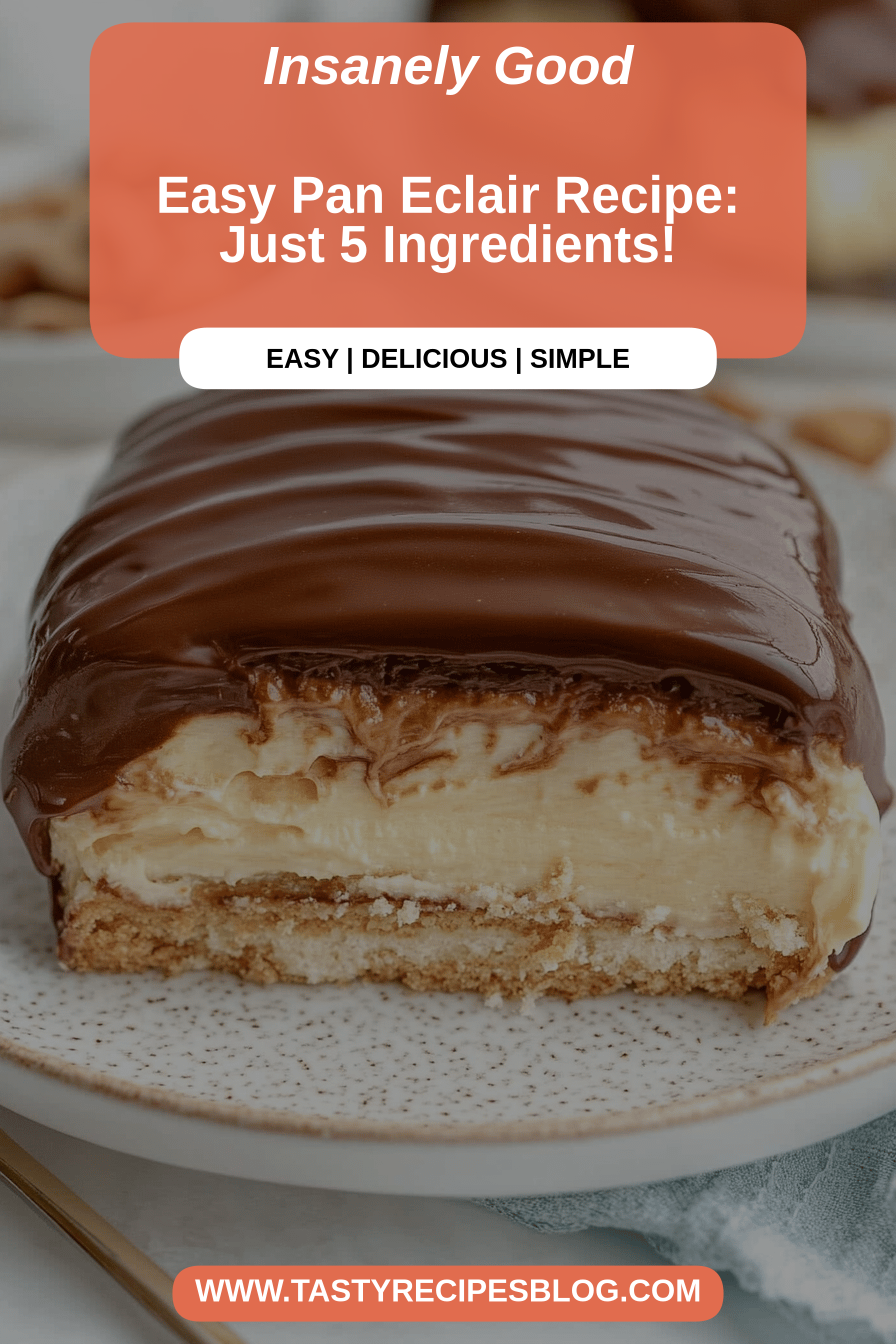
There are some recipes that just have a special place in your heart, and this eclair recipe is absolutely one of them for me. Growing up, éclairs were always a treat, something Mom only made for special occasions, and honestly, I always thought they were impossibly fancy and difficult. Fast forward a few decades, and I’ve finally cracked the code to making absolutely gorgeous, incredibly delicious éclairs right in my own kitchen, and guess what? They’re not scary at all! This is my go-to eclair recipe when I want to impress without the stress. If you’ve ever felt intimidated by choux pastry or delicate fillings, stick with me. This version is surprisingly straightforward, yielding that perfect crisp shell and luscious cream filling that dreams are made of. It’s like the humble cookie’s sophisticated cousin, but with all the comfort and joy.
What is an eclair?
So, what exactly *is* an eclair? At its heart, it’s a delightful little pastry made from choux dough – that’s a magical mixture of butter, water, flour, and eggs that puffs up dramatically in the oven. Think of it like a light, airy bread pocket that’s baked until golden and slightly crisp. We then slice these golden beauties in half horizontally and fill them generously with a silky, rich pastry cream. The final touch, and arguably the most decadent part, is a smooth, glossy chocolate glaze that coats the top. The name “éclair” actually comes from the French word for “lightning,” which I always thought was so fitting because they tend to disappear from the plate as quickly as lightning strikes! It’s essentially a sophisticated little dessert package, but don’t let that fancy name fool you; it’s remarkably approachable.
Why you’ll love this recipe?
What are some of the reasons why I love this eclair recipe?flavor is just out of this world. You get that slight crispness from the baked choux, the cool, creamy sweetness of the pastry cream, and then that rich, decadent chocolate glaze. It’s a symphony of textures and tastes that just works so perfectly together. But beyond the incredible taste, I have to rave about the simplicity. I know, I know, choux pastry sounds intimidating, but this recipe breaks it down into super manageable steps. I’ve tried so many variations over the years, and this one consistently gives me fantastic results with minimal fuss. Plus, it’s surprisingly cost-efficientWhat I love about this dessert is that you probably already have most of the ingredients in your pantry, making it a budget-friendly way to createversatility. While the classic chocolate is divine, you can totally play around with the filling and glaze flavors. Think lemon curd, raspberry, or even a coffee-flavored cream. It’s perfect for elegant dinner parties, but also totally acceptable for a spontaneous Tuesday night treat when you just need something special. It’s a little bit of magic, made easy.
How to Make This Eclair Recipe
Quick Overview
The process for making these éclairs is actually quite streamlined. We’ll start by making a simple choux pastry dough on the stovetop, which is surprisingly quick. Then, we pipe or spoon that dough onto baking sheets and bake them until they’re puffed and golden. While they bake, we whip up a luscious pastry cream filling. Once the shells are cooled, we fill them generously and finish them off with a glossy chocolate glaze. It’s a few distinct stages, but each one is straightforward and builds towards that glorious final éclair. Trust me, you’ll be amazed at how quickly these come together once you get the hang of it.
Ingredients
For the Main Batter (Choux Pastry):
1 cup water (this is the base, don’t skimp on the water!)
½ cup unsalted butter, cut into cubes (good quality butter makes a difference here, you can taste it!)
¼ teaspoon salt (balances the sweetness)
1 cup all-purpose flour (sifted, for a lighter texture)
4 large eggs (at room temperature, makes them easier to incorporate)
For the Filling (Vanilla Pastry Cream):
2 cups whole milk (full-fat gives the richest flavor)
½ cup granulated sugar (adjust slightly if you prefer it less sweet)
¼ cup cornstarch (this is our thickening agent, don’t skip it!)
4 large egg yolks (reserve the whites for another use!)
2 tablespoons unsalted butter (for richness)
1 teaspoon vanilla extract (use a good quality one!)
For the Glaze:
6 ounces semi-sweet chocolate chips (or a finely chopped good quality chocolate bar)
2 tablespoons unsalted butter (for shine and smoothness)
2 tablespoons light corn syrup (optional, but gives a beautiful gloss)
Step-by-Step Instructions
Step 1: Preheat & Prep Pan
First things first, get your oven preheated to 400°F (200°C). Line two large baking sheets with parchment paper. This is important because it prevents sticking and helps the éclairs bake evenly. If you’re feeling fancy and want perfectly uniform shapes, you can draw oval outlines (about 4 inches long and 1.5 inches wide) on the parchment paper using a pencil, then flip the paper over so the pencil marks are on the underside. This gives you a great guide for piping.
Step 2: Mix Dry Ingredients
In a medium bowl, whisk together the all-purpose flour and salt. Sifting the flour beforehand isn’t strictly necessary, but I find it helps ensure there are no lumps, leading to a smoother batter. Just a quick whisk to combine is perfect.
Step 3: Mix Wet Ingredients
In a medium saucepan, combine the water and the cubed unsalted butter. Place the saucepan over medium heat and bring it to a rolling boil, stirring occasionally to ensure the butter is fully melted. Once it’s boiling and the butter is melted, immediately remove the pan from the heat.
Step 4: Combine
Add all of the flour mixture to the hot liquid all at once. Stir vigorously with a wooden spoon or a sturdy spatula until a thick dough forms and it pulls away from the sides of the pan. This is called a panade. Continue to cook, stirring constantly, over low heat for about 1 to 2 minutes. This step is crucial for drying out the dough a bit, which helps the éclairs puff up properly. You’ll notice a slight film forming on the bottom of the pan – that’s what you’re looking for. Transfer this dough to the bowl of a stand mixer fitted with the paddle attachment (or use a hand mixer and a large bowl). Let it cool for about 5 minutes, stirring occasionally, to prevent the eggs from scrambling when you add them. Now, add the eggs, one at a time, beating well after each addition until fully incorporated. The dough might look a little curdled at first, but keep beating, and it will come together into a smooth, thick, glossy paste. It should be thick enough to hold its shape but still fall from the spoon in a ‘V’ shape. If it seems too stiff, you can whisk a tiny bit more egg yolk and add it in. This is where a lot of people worry, but just go slowly and trust the process!
Step 5: Prepare Filling
While the dough is cooling slightly, let’s get our pastry cream ready. In a medium bowl, whisk together the sugar, cornstarch, and egg yolks until well combined and pale yellow. In a separate saucepan, heat the milk over medium heat until it’s just simmering (don’t let it boil over!). Gradually ladle about half of the hot milk into the egg yolk mixture, whisking constantly to temper the yolks. This prevents them from cooking too quickly. Pour the tempered egg mixture back into the saucepan with the remaining milk. Cook over medium heat, whisking constantly, until the pastry cream thickens considerably and comes to a gentle boil. Let it boil for about 1 minute, still whisking, to ensure the cornstarch is fully cooked. Remove from heat, stir in the butter and vanilla extract until the butter is melted and the cream is smooth and luscious. Pour the pastry cream into a clean bowl, press plastic wrap directly onto the surface to prevent a skin from forming, and refrigerate until completely chilled, at least 2-3 hours, or preferably overnight. This chilling time is non-negotiable for the best texture.
Step 6: Layer & Swirl
Once your choux pastry dough is ready and slightly cooled, transfer it to a piping bag fitted with a large star or plain round tip (or just use two spoons if you don’t have a piping bag). Pipe about 4-inch long mounds onto your prepared baking sheets, leaving about 2 inches between them. If you used the pencil guide, fill in the ovals. If you’re using spoons, just scoop and shape them into ovals. Once piped or spooned, you can gently smooth out any sharp peaks by dipping your finger in a little water and gently patting them down. This prevents them from burning. Some people like to make a little swirl pattern, but I usually just smooth them out for a cleaner look.
Step 7: Bake
Bake the éclairs in the preheated 400°F (200°C) oven for 15 minutes. Then, reduce the oven temperature to 350°F (175°C) and continue baking for another 20-25 minutes, or until they are golden brown, puffed up, and feel firm and dry to the touch. It’s super important not to open the oven door during the first 15-20 minutes of baking, as this can cause them to collapse. Once they’re done, I like to poke a small hole in the side of each one with a skewer or knife to allow steam to escape – this helps prevent them from becoming soggy as they cool. Let them cool completely on a wire rack.
Step 8: Cool & Glaze
Once your éclair shells are completely cool, it’s time for the glaze! In a heatproof bowl set over a saucepan of simmering water (or in the microwave in 30-second intervals, stirring in between), melt the chocolate chips and butter together. Stir until smooth and glossy. If using, stir in the corn syrup for extra shine. If the glaze seems too thick, you can add a tiny bit more butter or a teaspoon of milk. Once the éclair shells are cool, you can either dip the tops directly into the glaze, or spread it on with a knife or spoon. I usually just dip the tops for that classic look. Let the glaze set slightly before serving.
Step 9: Slice & Serve
To fill, carefully slice each cooled éclair shell in half horizontally with a serrated knife. Spoon or pipe your chilled pastry cream generously into the bottom half. Then, place the top half back on. For the easiest serving, you can also just slice them lengthwise and fill the bottom half, then drizzle a bit more glaze on top. For a truly beautiful presentation, serve them on a nice platter. They are best enjoyed within a few hours of filling, but they’re still delicious the next day!
What to Serve It With
These beautiful éclairs are so versatile, they can honestly fit into any meal or occasion! For a truly indulgent breakfast, pair them with a strong, freshly brewed coffee. The richness of the éclair is the perfect counterpoint to a robust brew. Imagine a leisurely weekend morning, a good book, and a warm éclair – perfection! For brunch, they truly shine. Arrange them artfully on a tiered stand with other pastries and fruits. A sparkling mimosa or a refreshing glass of iced tea would be the ideal beverage accompaniment. They add such an elegant touch without being overly fussy. As a decadent dessert, they are, of course, a showstopper. Serve them after a nice meal with a small glass of dessert wine or a rich espresso. They’re also wonderful alongside a fresh berry salad to cut through the richness. And for those moments when you just need a little pick-me-up, they make the most divine cozy snack. I love having one with a glass of milk in the afternoon or even a sneaky one late at night when the craving strikes! My family tradition is to always have them with a mug of Hot Chocolate, especially during the colder months. It’s pure comfort.
Top Tips for Perfecting Your Eclair Recipe
After making this éclair recipe more times than I can count, I’ve picked up a few tricks that I think really help ensure success. First, regarding the choux pastry, don’t be afraid of that stovetop cooking step. Stirring that dough for a couple of minutes after adding the flour is essential for creating that hollow puff. It really dries out the dough, which is key. Also, when adding the eggs, make sure the dough has cooled down a bit. If it’s too hot, you’ll end up with Scrambled Eggs, and nobody wants that! For the pastry cream, the absolute most important thing is constant whisking once you add the tempered eggs back to the saucepan. And let it come to a boil for that full minute. That ensures the cornstarch is activated and you get that wonderfully thick, luscious texture. Don’t rush the chilling process either; a well-chilled pastry cream is crucial. When it comes to baking, resist the urge to open the oven door too early! I know it’s tempting to peek, but it can really deflate your beautiful puffed shells. If they look done but feel a little soft, try leaving the oven door slightly ajar for the last 5-10 minutes of baking; this helps them dry out even more. For glaze variations, while chocolate is classic, don’t be afraid to experiment! A white chocolate glaze with some raspberry swirl, or even a simple dusting of powdered sugar, can be lovely. If your glaze seems too thick, a tiny splash of milk or cream can thin it out perfectly. And for ingredient swaps, I’ve found that while whole milk is best for richness in the pastry cream, you *can* get away with 2% in a pinch, it just might be slightly less creamy. For the butter in the choux, good quality unsalted butter is best, but if you only have salted, just reduce the salt in the recipe slightly.
Storing and Reheating Tips
Proper storage is key to keeping these éclairs tasting their best. If you have any leftovers (which is rare in my house!), I recommend storing them in an airtight container. At room temperature, they’re best enjoyed the same day you make them, as the pastry cream can start to make the shells soft after about 6-8 hours, especially in warmer weather. If you need to store them longer, definitely opt for the refrigerator. In an airtight container in the fridge, they’ll stay good for up to 2 days. However, be aware that the shells will soften considerably over time. They won’t be as crisp as when they’re fresh, but they’ll still be delicious. If you want to make them ahead, I highly recommend storing the cooled éclair shells and the pastry cream separately. Then, fill and glaze them just before serving. For freezer instructions, you can freeze the baked and cooled éclair shells for up to a month. Wrap them tightly in plastic wrap, then place them in a freezer-safe bag or container. Thaw them at room temperature before filling and glazing. Do NOT freeze filled éclairs, as the texture of the cream and shell won’t hold up well. For the glaze timing advice, it’s always best to apply the glaze to fully cooled shells. If you’re storing filled éclairs in the fridge, the glaze will set up nicely, but it won’t be as shiny as it is when freshly applied.
Frequently Asked Questions
Final Thoughts
Honestly, making this eclair recipe has brought so much joy into my kitchen, and I truly hope it does for you too. It’s a testament to how impressive desserts don’t always have to be complicated. The combination of that light, airy choux shell and the rich, creamy filling is just pure bliss. It’s that perfect balance of textures and flavors that makes you close your eyes with the first bite. If you loved making (and eating!) these, you might also enjoy my recipe for [Link to a related recipe, e.g., Profiteroles] or my [Link to another related recipe, e.g., Cream Puffs]. They share some of the same magic! Don’t be afraid to experiment with different fillings and glazes; the possibilities are endless. I can’t wait to hear how your éclairs turn out, so please leave a comment below and tell me all about your creations! Happy baking!
Eclair Recipe
Ingredients
Pate a Choux
- 1 cup Water
- 0.5 cup Unsalted Butter Cut into pieces
- 0.25 teaspoon Salt
- 1 cup All-Purpose Flour
- 4 Large Eggs
Pastry Cream
- 2 cups Whole Milk
- 0.5 cup Granulated Sugar
- 0.25 cup Cornstarch
- 0.25 teaspoon Salt
- 4 Large Egg Yolks
- 2 teaspoons Vanilla Extract
- 2 tablespoons Unsalted Butter
Chocolate Glaze
- 4 ounces Semi-Sweet Chocolate Chopped
- 0.5 cup Heavy Cream
- 1 tablespoon Unsalted Butter
Instructions
Pate a Choux
- Preheat oven to 400°F (200°C). In a saucepan, combine water, butter, and salt. Bring to a boil over medium heat.
- Remove from heat and add flour all at once. Stir vigorously with a wooden spoon until a smooth dough forms and pulls away from the sides of the pan.
- Transfer dough to a bowl and let cool slightly. Add eggs one at a time, mixing well after each addition until the dough is smooth and glossy.
- Transfer dough to a piping bag fitted with a large round tip. Pipe 4-inch long eclairs onto a baking sheet lined with parchment paper.
- Bake for 25-30 minutes, or until golden brown and puffed up. Let cool completely on a wire rack.
Pastry Cream
- In a saucepan, combine milk, sugar, cornstarch, and salt. Whisk until smooth.
- Heat over medium heat, whisking constantly, until the mixture thickens and boils. Boil for 1 minute.
- Remove from heat and whisk in egg yolks until smooth. Stir in vanilla extract and butter.
- Transfer to a bowl, cover with plastic wrap (pressing it directly onto the surface to prevent a skin from forming), and refrigerate for at least 2 hours.
Chocolate Glaze
- In a heatproof bowl set over a simmering pot of water (or in the microwave in 30-second intervals, stirring in between), melt the chocolate and butter together until smooth.
- Stir in the heavy cream until well combined.
Assembly
- Using a knife or piping bag, poke a hole in the bottom of each eclair. Fill each eclair with pastry cream.
- Dip the tops of the eclairs in the chocolate glaze.
- Let the glaze set before serving.