You know those holidays that just *feel* special? Easter is definitely one of them for me. It’s that time when the world starts to wake up, the air gets a little sweeter, and all you want to do is gather around the table with the people you love. And what’s a celebration without something truly delicious to share? For years, I’ve been searching for that perfect Easter treat – something that’s festive, incredibly tasty, and doesn’t require a degree in pastry to make. Last year, I finally landed on *the one*. These Easter cookie bars are it, folks. They’re bright, they’re cheerful, and they taste like pure sunshine. If you’ve ever loved a classic sugar cookie but wished it was a bit more… well, substantial and easier to share, then you are going to adore these. They’re like the humble, hardworking cousin to a fancy layered cake, but honestly, sometimes those are the best kind, aren’t they? They’ve quickly become a family favorite, right up there with my grandma’s famous chocolate chip cookies, but with a distinctly spring-time vibe that’s just perfect for Easter.
What are Easter cookie bars?
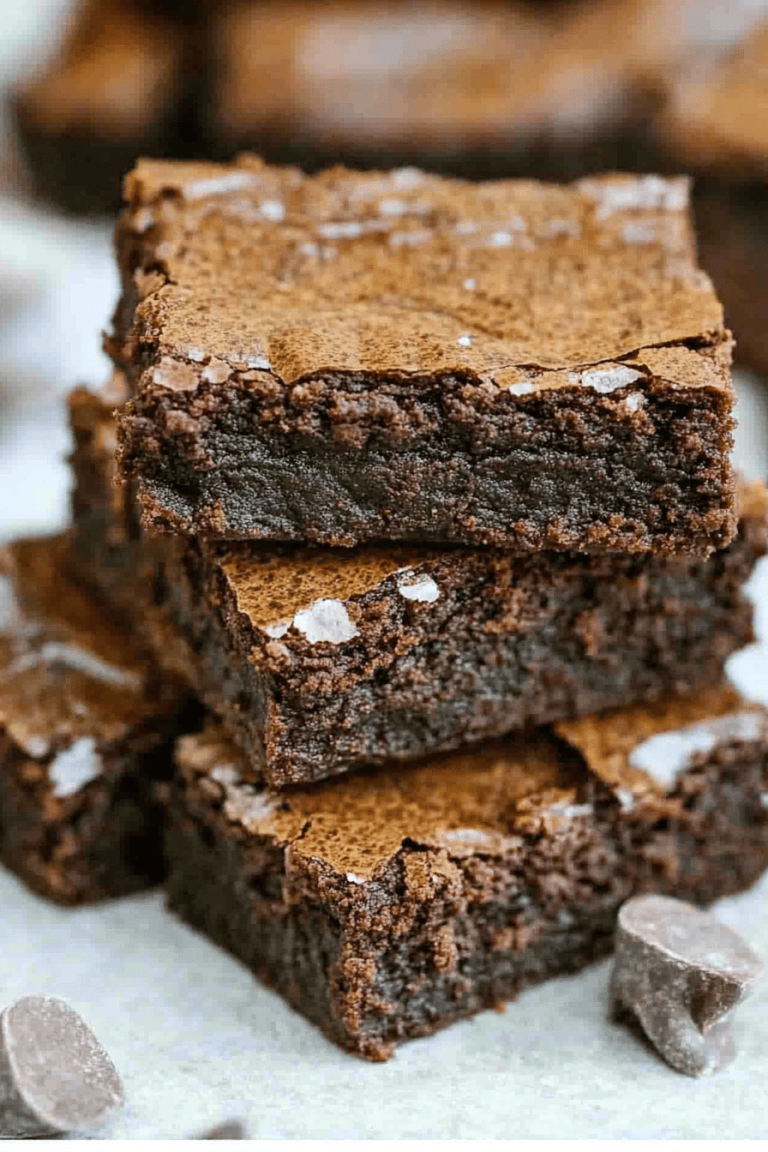
So, what exactly are these magical Easter cookie bars? Think of them as a soft, chewy sugar cookie base baked into a sheet pan, then topped with a delightful frosting or glaze and sprinkles. The magic really lies in their simplicity and their adaptability. They’re not fussy like decorated cutout cookies, but they still deliver that unmistakable cookie flavor we all crave. The “bar” format means they’re super easy to slice and serve, making them an absolute lifesaver when you’re hosting or bringing a dish to a potluck. You get that satisfying chew and buttery sweetness in every single bite, and because they’re in bar form, they’re naturally portioned out, which is always a bonus when you’re trying to keep everyone happy. It’s essentially all the joy of homemade cookies, without the fuss of rolling, cutting, and individual decorating. Pure, unadulterated cookie goodness in a convenient, crowd-pleasing package.
Why you’ll love this recipe?
Honestly, there are so many reasons why I keep coming back to these Easter cookie bars, and I just know you will too. First off, the flavor is just *chef’s kiss*. It’s that perfect balance of sweet and buttery, with a hint of vanilla that just sings. It’s not too overpowering, so the sprinkles and frosting really get to shine. And speaking of shining, the way they look! With a few strategically placed pastel sprinkles, they scream “Easter” without being overly complicated. What I truly adore, though, is the simplicity. I can whip these up after the kids are in bed and have a beautiful dessert ready for the next day. It’s incredibly cost-efficient too; most of the ingredients are pantry staples. Plus, they’re so versatile! You can easily swap out the sprinkles for any holiday or occasion. If you’re a fan of my Lemon Raspberry Scones: What are some good lemon raspberry scones?I love the bright flavor of these cookies. They’re just as easy to make as my famous ones.One-Bowl Brownies, but they feel so much more celebratory. What I love most about these is that they bring a sense of nostalgic comfort, but in a fresh, new way. They’re the kind of treat that makes everyone smile, no matter their age.
How to Make Easter Cookie Bars
Quick Overview
This recipe is all about creating a soft, chewy sugar cookie base, baking it flat in a pan, and then dressing it up for spring. We’ll mix up a simple batter, press it into a baking sheet, bake it until golden, and then top it with a quick, dreamy glaze and plenty of colorful sprinkles. It’s a straightforward process that guarantees delicious results, even if you’re not a seasoned baker. The beauty is in its simplicity, allowing you to focus on the fun part: decorating!
Ingredients
For the Main Batter:
We start with the classics that make any cookie great. Make sure your butter and eggs are at room temperature – this is my secret weapon for a perfectly tender cookie. Using unsalted butter lets you control the saltiness, and good quality vanilla extract makes a world of difference in flavor. All-purpose flour is standard, and a touch of cornstarch gives these bars that extra soft, chewy texture I’m obsessed with. Don’t skip the baking soda and baking powder; they work together to give us that lovely lift and spread. And of course, sugar! Granulated sugar for structure and a little brown sugar for that irresistible chew and depth of flavor. I always use a light brown sugar for this, but dark brown works too if you don’t mind a slightly richer taste.
For the Filling:
This part is honestly optional but highly recommended! A simple layer of cream cheese mixed with a little powdered sugar and vanilla adds a delightful tanginess that cuts through the sweetness of the cookie and glaze. It’s like a mini cheesecake layer in every bite! If you’re not a cream cheese fan, you can totally skip this, or try a thin layer of fruit preserves like raspberry or strawberry for a fruity pop.
For the Glaze:
This is where the real Easter magic happens! We’ll whisk together powdered sugar, a splash of milk (or cream for extra richness!), and a bit of vanilla extract. The key here is to get the consistency just right – thick enough to coat, but thin enough to spread easily. You can play with the amount of liquid to achieve your desired thickness. For color, a drop or two of food coloring in pastel shades like pink, yellow, or blue makes these instantly festive. And the sprinkles? Go wild! I love a mix of pastel nonpareils and maybe some fun Easter-themed shapes.
Step-by-Step Instructions
Step 1: Preheat & Prep Pan
First things first, get that oven preheating to 350°F (175°C). While it’s warming up, grab a 9×13 inch baking pan. You’ll want to line it with parchment paper, leaving an overhang on two opposite sides. This makes lifting the baked bars out SO much easier. Trust me, this little step saves so much hassle later! Lightly grease the parchment and the exposed sides of the pan before you start.
Step 2: Mix Dry Ingredients
In a medium bowl, whisk together your all-purpose flour, cornstarch, baking soda, baking powder, and salt. Give it a good stir with a whisk to make sure everything is evenly distributed. This ensures your leavening agents and salt are spread throughout the batter, leading to a consistent rise and flavor. I always do this step first so I know all my dry components are ready to go when I need them.
Step 3: Mix Wet Ingredients
In a large bowl (or the bowl of your stand mixer fitted with the paddle attachment), cream together your softened butter with the granulated sugar and brown sugar until light and fluffy. This usually takes a few minutes. Beat in the eggs one at a time, making sure each is fully incorporated before adding the next. Then, stir in the vanilla extract. Your mixture should look smooth and creamy.
Step 4: Combine
Gradually add the dry ingredients to the wet ingredients, mixing on low speed (or stirring by hand) until just combined. Be careful not to overmix! Overmixing develops the gluten too much, which can lead to tough bars. We want tender, chewy goodness, so stop mixing as soon as you don’t see any more streaks of flour. It’s okay if the dough looks a little soft.
Step 5: Prepare Filling (Optional)
If you’re adding the cream cheese layer, whip together the softened cream cheese with a tablespoon or two of powdered sugar and a tiny splash of vanilla until smooth. It should be spreadable but not too runny. If you’re using jam, have it ready to go.
Step 6: Layer & Swirl
Press about two-thirds of the cookie dough evenly into the bottom of your prepared baking pan. It might be a little sticky, so I find wetting my hands slightly or using the bottom of a measuring cup helps. If you’re using the cream cheese filling, spread it evenly over the dough layer. Dollop the remaining cookie dough over the cream cheese (or directly onto the first layer if skipping the filling) and gently spread it to cover as much as possible. If you’re feeling artistic, you can swirl the cream cheese and cookie dough together with a knife for a marbled effect. For a simple jam layer, spread the jam over the base and then crumble the remaining dough on top.
Step 7: Bake
Bake in the preheated oven for 25-35 minutes, or until the edges are lightly golden brown and the center is set. The exact time will depend on your oven, so keep an eye on it. You want it cooked through but still soft and chewy. A toothpick inserted into the center should come out with moist crumbs, not wet batter.
Step 8: Cool & Glaze
Let the bars cool in the pan on a wire rack for at least 20-30 minutes before attempting to remove them. This is crucial for them to firm up. Once slightly cooled, use the parchment paper overhangs to lift the entire sheet out of the pan and onto the wire rack to cool completely. While they’re cooling, whisk together your glaze ingredients until smooth. Once the bars are fully cooled, drizzle or spread the glaze over the top. Immediately add your festive Easter sprinkles before the glaze sets!
Step 9: Slice & Serve
Once the glaze is set, lift the bars from the parchment paper and place them on a cutting board. Use a sharp knife to slice them into squares or rectangles. For clean cuts, you can wipe your knife between slices. Serve them at room temperature. They’re perfect on their own or with a cold glass of milk!
What to Serve It With
These Easter cookie bars are so incredibly versatile, they fit into almost any part of your holiday spread. For breakfast or brunch, they’re a delightful sweet treat alongside a steaming mug of coffee or a tall glass of orange juice. Imagine these as a little something extra when you’re serving Fluffy Blueberry Pancakes or a savory quiche. They add a touch of sweetness without being overwhelming. As a dessert, they are an absolute winner. They’re a lighter option than a heavy cake, perfect for finishing off a big Easter meal. I love pairing them with fresh fruit salad or a scoop of vanilla bean ice cream. And for those cozy afternoon moments, or when the kids are begging for something sweet after school, they’re just perfect. They pair beautifully with a simple glass of milk, or even a warm cup of chamomile tea. My family tradition is to always have a batch ready for Easter Sunday after the egg hunt – it’s the perfect reward for all that searching!
Top Tips for Perfecting Your Easter Cookie Bars
Over the years, I’ve picked up a few tricks that make these Easter cookie bars consistently amazing. First, for the dough, make sure your butter and eggs are truly at room temperature. This is non-negotiable for that perfectly soft texture. If your butter is too cold, it won’t cream properly, and if it’s too melted, your bars can spread too much. When you’re mixing the wet and dry ingredients, resist the urge to overmix. Seriously, just mix until the flour disappears. A few little streaks are better than a tough cookie bar! For the cream cheese filling (if you’re using it), make sure the cream cheese is softened. Cold cream cheese is impossible to spread smoothly. When it comes to baking, ovens can be finicky. Start checking for doneness around the 25-minute mark. They should be lightly golden around the edges and set in the middle. If you poke the center and it feels gooey, give it a few more minutes. The cooling process is just as important as the baking. Let them cool significantly in the pan before you try to move them – this helps them set up and prevents them from breaking. If you want to get fancy with the glaze, you can divide it into bowls and tint each with a different pastel color, then drizzle them artfully. Or, for a more marbleized effect, swirl two colors together with a toothpick. And for sprinkles, don’t be shy! They add that essential pop of color and fun.
Storing and Reheating Tips
These Easter cookie bars are pretty forgiving when it comes to storage. If you’ve glazed them and the glaze has fully set, you can keep them at room temperature for up to 2-3 days. Just make sure to cover them loosely with plastic wrap or foil, or store them in an airtight container. They tend to stay softest when not completely sealed, which allows a little air circulation. If it’s warm where you are, or if you want them to last a bit longer (up to a week), popping them in the refrigerator is a good idea. They’ll be firmer when cold, but they still taste great. Just let them come back to room temperature for about 20-30 minutes before serving for the best texture. If you’ve made a big batch and want to freeze some for later, that’s totally doable! Once the bars are fully cooled and the glaze is set, cut them into individual squares. Wrap each square tightly in plastic wrap, then place them in a freezer-safe bag or container. They should stay good in the freezer for up to 2-3 months. To thaw, unwrap them and let them come to room temperature on a plate. If you frosted them before freezing, the glaze might get a little sticky as it thaws, but they’ll still taste delicious. For bars that were not glazed before freezing, you can always add a fresh glaze or a dusting of powdered sugar once they’re thawed and ready to be enjoyed.
Frequently Asked Questions
Final Thoughts
I really hope you give these Easter cookie bars a try! They’re such a joy to make and even more of a joy to eat. They capture that festive Easter spirit in a way that’s approachable and incredibly delicious. Whether you’re looking for a simple dessert for your family gathering or a crowd-pleasing treat to share, these bars are always a winner. They’re a testament to how sometimes, the simplest recipes can bring the most happiness. If you’re looking for more spring-inspired baking, you might also enjoy my Lemon Ricotta Cookies for a bright citrus flavor or my Carrot Cake Muffins which are a classic for a reason! I can’t wait to hear how yours turn out, so please leave a comment below and let me know your thoughts, or share your own sprinkle creations! Happy baking, and Happy Easter!

Easter cookie bars
Ingredients
Main Ingredients
- 0.5 cup unsalted butter
- 2 cups packed brown sugar
- 2 large eggs
- 1 teaspoon vanilla extract
- 0.5 teaspoon salt
- 1 teaspoon baking powder
- 2 cups all-purpose flour
- 1 cup Easter M&Ms or your favorite color
- 0.5 cup Easter sprinkles use jimmies for best results
Instructions
Preparation Steps
- Preheat oven to 350°F. Line a metal 9x13 inch pan with foil and spray well with cooking spray.
- Mix butter and brown sugar with a stand or hand mixer until crumbly. Mix in eggs and vanilla until smooth. Mix in salt, baking powder, then flour. Stir in M&Ms and sprinkles.
- Spread mixture in prepared pan. The dough is wet, so spray your hands with cooking spray and smooth the dough with your hands to get an even layer. Top with remaining mix-ins.
- Bake for about 22 to 25 minutes until edges start to turn golden. Err on the side of underbaking. Bars will finish baking as they cool. Slice into bars.
- Store in an airtight container for up to 4 days or freeze for up to a month.