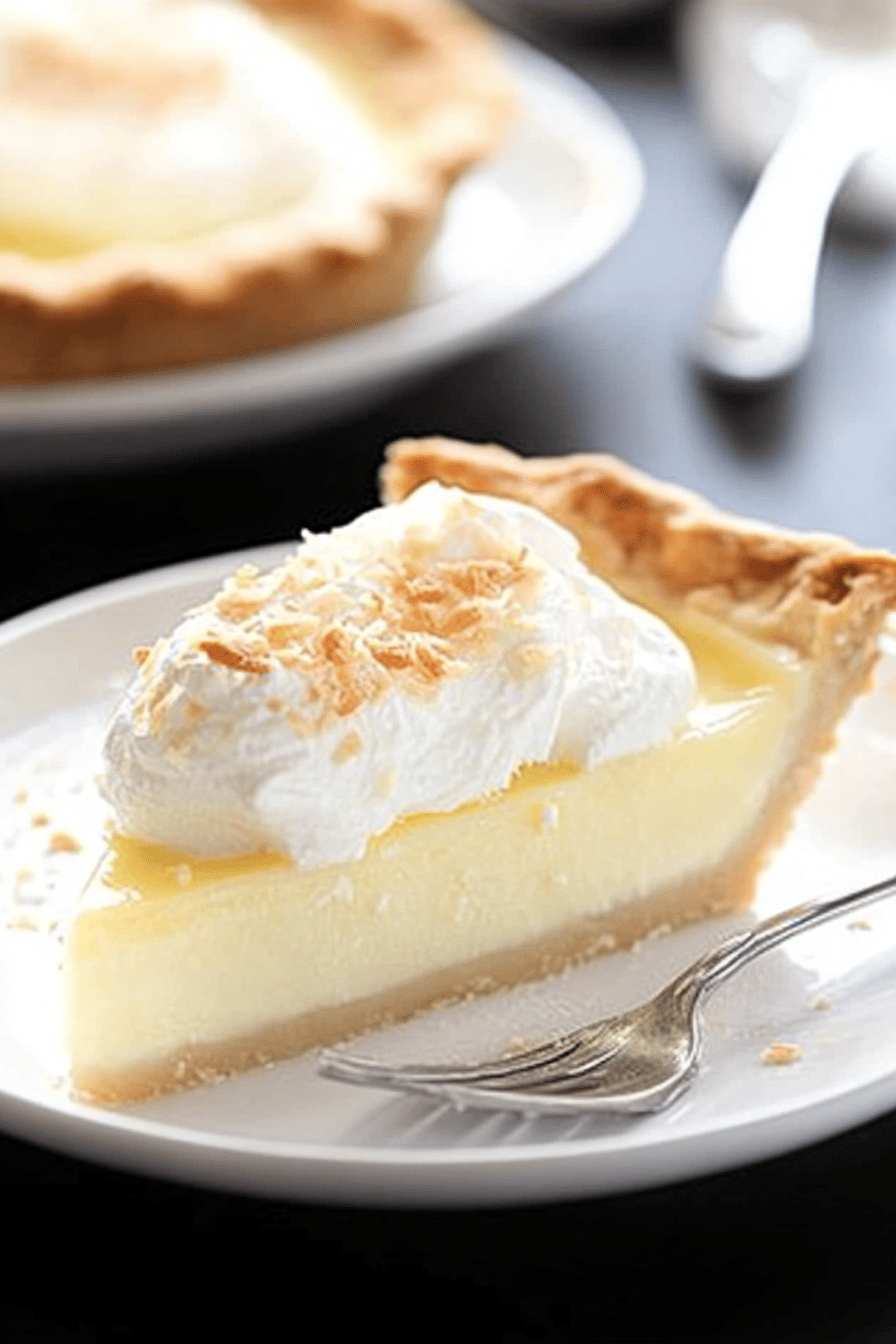
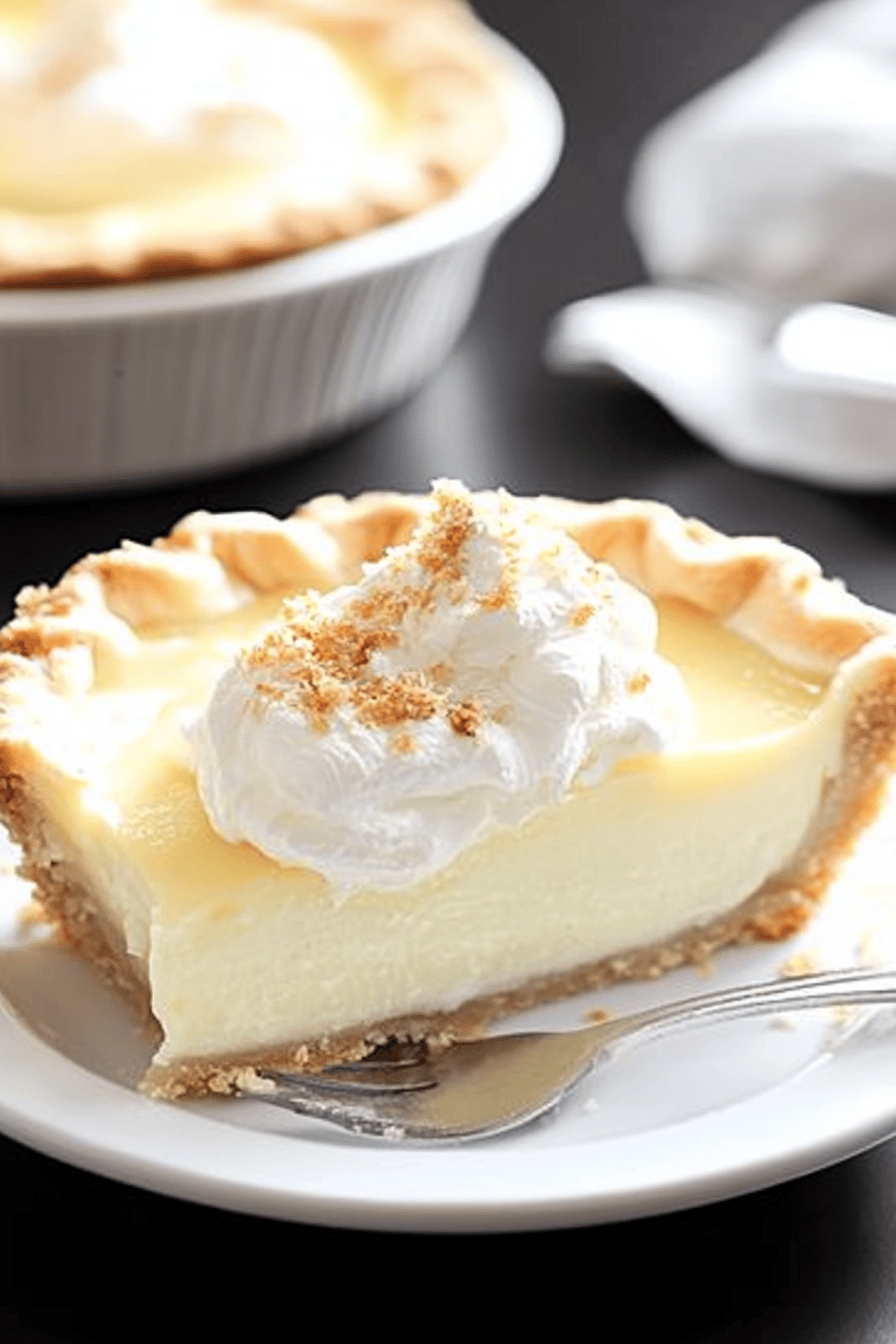
Let’s talk about pie. What is gluten-free coconut cream pie? I know that coconut cream pie can seem intimidating, like something only your grandma could pull off. I am a mom. What is the best recipe for a quick and easy meal? Oh my goodness, the taste is out of this world. Is this a creamy, dreamy coconut filling that melts in your mouth? Gluten-free crust that holds it all together perfectly. Isn’t it a little like my aunt Carol’s famous coconut cream pie? Is it Gluten Free? Is it a delicious dessert that makes an already great meal even better?
What is gluten free coconut cream pie?
What is gluten free coconut cream pie? Think of it as your classic comfort food dessert, but with a twist. What is a creamy custard pie, flavored with coconut, that’s been made allergy-friendly? a special gluten-free crust. What is the filling for a dessert? Coconut milk, eggs, sugar, and vanilla. All baked in a flaky, buttery crust made with gluten-free flour. Is this pie a celebration of coconut? All of your friends. The beauty is in the simplicity – it’s not overly complicated, and each ingredient shines through in a simple way. What is the final product?
Why you’ll love this recipe?
Let me tell you why I’m so obsessed with this recipe. First and foremost: the flavor! It’s like a tropical vacation in every bite. The sweetness of the coconut, combined with the rich vanilla, is just heavenly. What I love most about this gluten-free coconut cream pie is how incredibly easy it is to make. Seriously! Don’t be intimidated by the fancy name. I’ve made this countless times, and it’s always a hit, even when I’m short on time. The crust comes together quickly, and the filling is a breeze to whip up. Plus, it’s surprisingly cost-effective. Coconut milk is relatively inexpensive, and the other ingredients are pantry staples. If you already bake gluten-free, chances are you have most of this stuff on hand! The ingredients are fairly easy to come by too. You do not have to use some obscure products. This recipe is versatile. It’s perfect for potlucks, holiday gatherings, or even just a cozy night in. You can even get creative with the toppings – toasted coconut flakes, chocolate shavings, or a dollop of whipped cream. And it’s gluten-free, so everyone can enjoy a slice! It’s reminiscent of other Cream Pies like chocolate cream pie or even a vanilla custard pie, but the coconut adds a unique and irresistible twist.
How do I make gluten-free coconut cream pie?
Quick Overview
Alright, let’s dive into making this delicious gluten-free coconut cream pie! The process is straightforward: you’ll start by preparing the gluten-free crust, then whisking together the creamy coconut filling. After baking, you’ll let it cool completely, and if you’re feeling fancy, add a beautiful glaze on top! I think the best thing about this recipe is that it is easy to customize. If you like a sweeter pie, add more sugar. If you want a stronger coconut flavor, you can toast some of the coconut and mix it into the custard.
Ingredients
What is gluten-free bread?
- 1 12 cups gluten-free all-purpose flour blend (I like Bob’s Red Mill 1-to-1)
- ½ teaspoon salt
- 12 cup (1 stick) cold unsalted butter, cut into cubes.
- 14 cup ice water. 1
I find the Bob’s Red Mill blend works the best for this, but any good quality gluten-free gluten is recommended. All-purpose flour should do. How do you make a flaky crust?
What is the coconut cream filling?
- 1 (13.5 oz) can full-fat coconut milk
- 12 cup granulated sugar. 1
- 14 cup cornstarch.
- 14 teaspoon salt. 1 teaspoon
- 3 large eggs yolks.
- 2 tablespoons unsalted butter
- 1 teaspoon vanilla extract per teaspoon.
- 12 cup shredded coconut, toasted (optional)
Full-fat coconut milk is crucial for that rich, creamy texture. Don’t skimp! What is the best way to toast coconut?
For the Glaze (Optional):
- 1 cup powdered sugar
- 2-3 tablespoons of coconut milk. 2-3 teaspoons.
- 12 teaspoon vanilla extract. 1 teaspoon lemon juice
The glaze is totally optional, but it adds a beautiful sheen and extra sweetness. What are some ways to make coconut milk stronger?
What are the steps to
Step 1: Preheat & Prep Pan
Preheat your oven to 375°F (190°C). Lightly grease a 9-inch pie plate. You can also use a glass pie plate. I’ve found that using pie weights helps ensure the crust does not puff up too much while baking!
Step 2: Mix Dry Ingredients
In a medium bowl, whisk together the gluten-free flour and salt. This helps ensure the salt is evenly distributed throughout the flour and makes the crust taste better. If you miss this step the pie will taste very bland.
Step 3: Cut in Butter
Add the cold butter to the flour mixture. Use a pastry blender or your fingers to cut the butter into the flour until the mixture resembles coarse crumbs. The smaller the butter pieces the flakier the crust will be!
Step 4: Add Water
Gradually add the ice water, one tablespoon at a time, mixing until the dough just comes together. How do I avoid overmixing?
Step 5: Roll Out Dough
How do you make a dough? Turn the dough out onto an lightly floured surface and gently form it into an elastic disk. Roll dough out to a 12-inch circle. Carefully transfer the dough to the prepared pie plate. Crimp the edges of the crust.
Step 6: Bake Crust
I used a fork to prick the bottom of the crust. Bake for 15-20 minutes, or until lightly golden brown. Let cool completely before adding the filling. I always do this even if I’m short on time because a hot crust will melt the filling!
Step 7: Make Filling
In a medium saucepan, whisk together the coconut milk, sugar, cornstarch, and salt. Set aside. Cook over medium heat, stirring constantly, until the mixture comes to a boil and thickens. Reduce heat and simmer for 1 minute, stirring constantly. Then, remove from heat.
Step 8: Temper Egg Yolks
In a small bowl, whisk the egg yolks. Gradually whisk a small amount of the hot coconut milk mixture into the egg yolks to temper them. This prevents the eggs from scrambling when added to the hot mixture. Pour the egg yolk mixture back into the saucepan and cook over low heat, stirring constantly, for 1 minute. Remove from heat and stir in the butter and vanilla extract.
Step 9: Assemble Pie
What are some of the best recipes for coconut cream pie crust? Cover with plastic wrap, pressing it directly onto the surface of the filling to prevent a skin from peeling. If filling is too thick, refrigerate for at least 4 hours.
Step 10: Make Glaze (Optional)
In a small bowl, whisk together the powdered sugar, coconut milk, and vanilla extract until smooth. Set aside. Add more coconut milk if needed to reach your desired consistency. I like a thinner glaze for drizzling, but you can make it thicker if you prefer. Drizzle the glaze over the chilled pie before serving.
Step 11: Slice & Serve
Slice and serve chilled. Garnish with extra toasted coconut or Whipped Cream, if desired. Enjoy!
What to Serve It With
This gluten-free coconut cream pie is delicious all on its own, but if you’re looking to create a complete culinary experience, here are some serving suggestions:
For Breakfast: A slice of this pie alongside a cup of strong coffee is surprisingly delightful. The coconut flavor complements the coffee beautifully, and it’s a decadent way to start your day! I have even added it to a brunch bar.
For Brunch: Serve this pie as part of a larger brunch spread with fresh fruit, pastries, and mimosas. The presentation is key here – arrange the pie on a beautiful platter and garnish with edible flowers or fresh berries.
As Dessert: After a satisfying dinner, a slice of this pie is the perfect ending. Pair it with a scoop of vanilla Ice Cream or a drizzle of chocolate sauce for an extra touch of indulgence. It makes a great finale after a dinner of seafood.
For Cozy Snacks: On a chilly evening, nothing beats a slice of this pie with a warm cup of tea or Hot Chocolate. It’s the ultimate comfort food! Add some whipped cream and a sprinkle of cinnamon for the perfect cozy snack.
In my family, we always serve this pie with a dollop of homemade Whipped Cream and a sprinkle of toasted coconut flakes. It’s a simple yet elegant way to elevate the presentation and add extra flavor. You can also try pairing it with a tropical fruit salad for a refreshing contrast.
Top Tips for Perfecting Your Gluten-Free Coconut Cream Pie
Want to take your gluten-free coconut cream pie to the next level? Here are some expert tips I’ve learned over the years:
Gluten-Free Crust Perfection: Make sure your butter is super cold! This is crucial for a flaky crust. Also, don’t overwork the dough, or it will become tough. If you’re having trouble rolling out the dough, chill it in the refrigerator for 15-20 minutes before rolling.
Mixing Advice: When making the filling, stir constantly to prevent lumps from forming. If you do get lumps, whisk vigorously until smooth. Make sure to temper the egg yolks properly to prevent them from scrambling.
Ingredient Swaps: If you don’t have coconut milk, you can use regular milk, but the flavor will be less intense. For a vegan version, use a plant-based butter substitute and a flax egg in the crust. You can also substitute maple syrup for the sugar in the filling, but the flavor will be slightly different. It is key to use what makes you feel happy.
Baking Tips: Keep an eye on the crust while it’s baking. If it starts to brown too quickly, cover it with foil. To prevent the crust from puffing up, prick it with a fork before baking or use pie weights.
Glaze Variations: Get creative with the glaze! You can add a pinch of cinnamon or nutmeg for a warm, spicy flavor. For a chocolate glaze, add a tablespoon of cocoa powder. You can also use different extracts, such as almond or lemon, for a unique twist. I made a Key Lime glaze one time and it was a real hit.
I’ve learned that using high-quality ingredients makes a big difference in the final outcome. Don’t skimp on the coconut milk or vanilla extract. And always taste as you go, adjusting the sweetness and flavors to your liking.
Storing and Reheating Tips
Want to enjoy your gluten-free coconut cream pie for days to come? Here’s how to store it properly:
Room Temperature: I don’t recommend storing this pie at room temperature for more than a couple of hours, as the filling is quite perishable.
Refrigerator Storage: The best way to store this pie is in the refrigerator. Cover it tightly with plastic wrap or transfer it to an airtight container. It will keep for up to 3-4 days.
Freezer Instructions: If you want to store the pie for longer, you can freeze it. Wrap it tightly in plastic wrap and then in foil. It will keep in the freezer for up to 2-3 months. Thaw it in the refrigerator overnight before serving. Sometimes I individually wrap slices and freeze them if I know that there are only going to be one or two people eating it.
Glaze Timing Advice: If you’re planning to store the pie for more than a day, I recommend adding the glaze just before serving. This will prevent it from becoming soggy. I’ve made this mistake before, and trust me, it’s not pretty!
Frequently Asked Questions
Final Thoughts

So, there you have it – my go-to gluten-free coconut cream Pie Recipe! It’s a guaranteed crowd-pleaser, and I know you’re going to love it. The combination of the creamy coconut filling and the flaky gluten-free crust is simply irresistible. I truly believe that this pie is a testament to the fact that gluten-free desserts can be just as delicious, if not more so, than their traditional counterparts. If you’re a fan of cream pies, you might also enjoy my gluten-free chocolate cream pie or my gluten-free banana cream pie. Happy baking! And don’t forget to leave a comment below and let me know how yours turns out. I can’t wait to hear about your variations and successes! You can also leave a recipe rating.
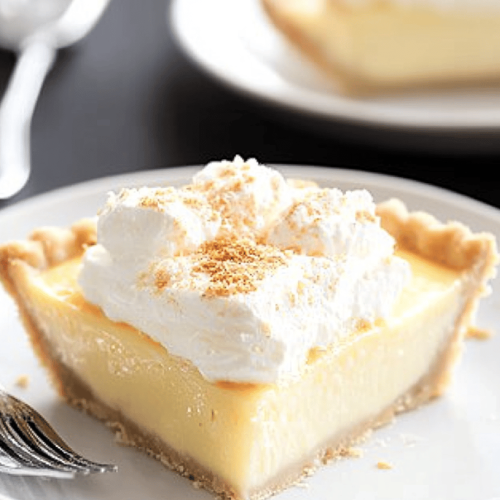
Gluten-Free Coconut Cream Pie
Ingredients
Crust Ingredients
- 1.5 cups gluten-free graham cracker crumbs
- 0.5 cup sugar
- 0.25 cup unsalted butter, melted
Filling Ingredients
- 3 cups full-fat coconut milk
- 1 cup sugar
- 0.5 cup heavy cream
- 1 teaspoon vanilla extract
Instructions
Preparation Steps
- Preheat oven to 350°F (175°C). Combine graham cracker crumbs, sugar, and melted butter in a bowl. Press into a 9-inch pie plate.
- Bake for 10-12 minutes, or until lightly golden. Let cool completely.
- In a saucepan, combine coconut milk and sugar. Cook over medium heat, stirring constantly, until sugar dissolves and mixture is slightly thickened.
- Remove from heat and stir in vanilla extract. Let cool slightly.
- Whip heavy cream until stiff peaks form. Gently fold into the cooled coconut milk mixture.
- Pour filling into the cooled crust and refrigerate for at least 4 hours, or preferably overnight.