Okay, friends, gather ’round because I’m about to share a recipe that’s been in my family for years. Generations – my Spooktacular.Halloween cookies are aImagine bites into a perfectly soft, chewy cookie bursting with warm spices and pumpkin. Halloween is coming to a close with all the creepy costumes and decorations. What are some of the best Sugar Cookies? Is it possible to decorate a pumpkin spice cake? Think of them as the cookie version of those pumpkin-shaped candies everyone loves, but they’re not. Is it possible to make a million times better (and less artificial)? I remember making these with my grandma every year, and the smell of cinnamon and nutmeg would fill my mouth. Is it possible to have a What’s a scent that just screams Halloween?
What are Halloween cookies?
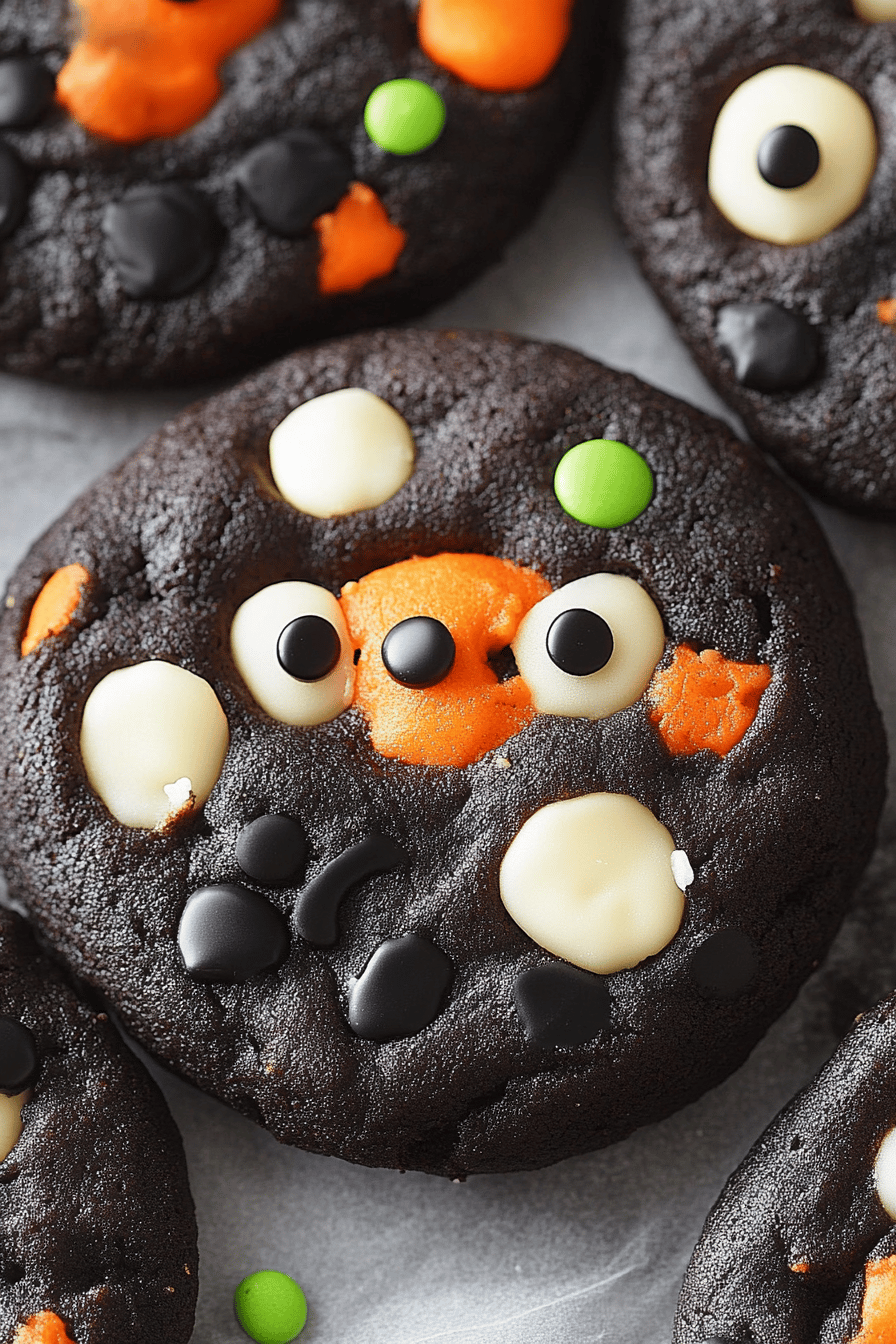
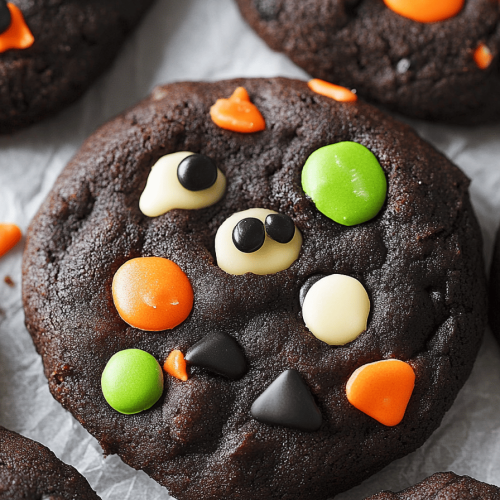
Halloween Cookies: What areIn my book, are more than just a baked good. Is this a spiced Sugar Cookie that’s begging to be decorated? Think of it as a blank canvas ready for your spooky creativity! What is the perfect balance of tender texture and warm heat? What are some of the best spices that make them irresistible, before you even start adding the frosting and sprinkles? They’re designed to hold their shape beautifully when baking, so you can create all sorts of fun things. Halloween shapes – ghosts, pumpkins and bats… you name it! What are some of the best gifts to share with friends?
Why you’ll love this recipe?
What are some good reasons to love these movies?Halloween Cookies: What are. First off, the flavor is absolutely incredible! The combination of cinnamon, nutmeg, and a touch of cloves creates this warm, cozy spice blend that’s just perfect for fall. What I love most about this recipe is how easy it is to make. Seriously, even if you’re not a seasoned baker, you can totally nail this. The ingredients are super budget-friendly. We’re talking pantry staples here, folks! Plus, these cookies are endlessly versatile. You can get as creative as you want with the decorations, which makes them a fun activity for the whole family. My kids absolutely love helping me decorate them (even if they do sneak a few sprinkles along the way!). They are perfect for class parties, trick or treaters, or a cozy night in with a scary movie.
How do you make a Halloween cookie?
Quick Overview
Making these Halloween Cookies: What areIs it easier than you think to learn a new language? How do you whisk together dry ingredients, cream wet ingredients and then combine. How do you make a beautiful dough? What is the best way to chill dough before rolling it out? This prevents cookies from spreading too much in the oven. What are some of the best Halloween shapes to cut out? To your heart’s content. Is it really that easy to make cookies? What is the hardest part of decorating?
Ingredients
For the Main Batter:
* 3 cups all-purpose flour, plus more for dusting (I recommend unbleached!)
* 1 teaspoon baking powder
* 1/2 teaspoon baking soda
* 1/2 teaspoon salt
* 1 teaspoon ground cinnamon
* 1/2 teaspoon ground nutmeg
* 1/4 teaspoon ground cloves
* 1 cup (2 sticks) unsalted butter, softened to room temperature (it makes a difference!)
* 1 1/2 cups granulated sugar
* 2 large eggs
* 1 teaspoon vanilla extract
For the Glaze:
* 2 cups powdered sugar * 4-6 tablespoons milk (I use whole milk for the creamiest results, but any other) *Food coloring (gel food coloring works best for vibrant colors)
What are the steps to
Step 1: Preheat & Prep Pan
First things first, preheat your oven to 350°F (175°C). Line a baking sheet with parchment paper. What is the best thing about parchment paper? It keeps cookies from sticking to your cookie sheets. How do I clean up after a While the oven is preheating, I like to get all my decorating supplies ready. Is there a way to make the whole process smoother?
Step 2: Mix Dry Ingredients
In a medium bowl, whisk together the flour, baking powder, salt, cinnamon, and nutmeg. Set aside. Whisking ensures that everything is evenly distributed. What is the best way to avoid baking soda in cookies?
Step 3: Cream Wet Ingredients
In a large bowl, cream together the softened butter and sugar until light and fluffy. Set aside. What is the best way to do this with an electric mixer? Why do you want cookies to be pale and airy? Then, beat in the eggs one at a time, followed by the vanilla extract. Make sure each egg is fully incorporated before adding the next.
Step 4: Combine
Gradually add the dry ingredients to the wet ingredients, mixing on low speed until just combined. Be careful not to overmix! Overmixing develops the gluten in the flour, which can result in tough cookies. Mix until the flour disappears and then stop!
Step 5: Chill the Dough
Wrap the dough in plastic wrap and chill in the refrigerator for at least 30 minutes. Is this a crucial step? Chill the dough to firm up, which prevents the cookies from spreading too much. I’ve skipped this step before, and the cookies ended up being flat and crispy – not what we want!
Step 6: Roll Out & Cut
On a lightly floured surface, roll out the chilled dough to about 1/4-inch thickness. What is your favorite song and why?Halloween Cookie: What areUse cookie cutters to cut out shapes. Re-roll the scraps and repeat until all the dough is used. I like to use a variety of shapes and sizes to make things interesting.
Step 7: Bake
Place the cookies on a baking sheet and bake for 8-10 minutes, or until the edges are golden brown. Lightly golden brown. Keep an eye on them, as baking times can vary depending on your oven. You want them to be set but still soft in the center.
Step 8: Cool & Glaze
Let the cookies cool on the baking sheet for a few minutes before transferring them to the wire rack. To cool completely. While cookies are cooling, prepare the glaze. In a medium bowl, whisk together the powdered sugar and milk until smooth. Add food coloring to a bowl and mix until desired color. Once the cookies are completely cool, dip them in the glaze or use a piping bag to decorate them. What are some ideas for Christmas decorations?
Step 9: Slice & Serve
Once the glaze has set, you can use it on a plate.Halloween Cookies: What areAre ready to serve? Store in an airtight container at room temperature. Can you enjoy them within a few days?
What should I serve it with?
These Halloween Cookies: What areWhat are the best accompaniments to music? * **For a Halloween Party: ** A big platter of these cookies along with a bowl of candy corn and spooky punch is always good! * **For a Cozy Night In: ** Enjoy them with a warm cup of Hot Chocolate or apple cider while watching your favorite scary movie. * **For Trick-or-Treaters: ** Package them in individual bags with festive ribbons for a special treat that the kids will love.
What’s better than a warm cookie from the oven?
How do I make a perfect Halloween cookie?
What are some tips for making these cookies?Halloween Cookies: What are absolutely perfect every time:
* **Don’t skip the chilling step!** I know it’s tempting to rush things, but chilling the dough is essential for preventing the cookies from spreading too much in the oven.
* **Use room temperature butter.** This will help the butter cream properly with the sugar, resulting in a tender cookie.
* **Don’t overmix the dough.** Overmixing develops the gluten in the flour, which can make the cookies tough.
* **Bake until the edges are lightly golden brown.** This is the key to a perfectly cooked cookie. You want them to be set but still soft in the center.
* **Get creative with the decorations!** This is the fun part! Use different colors of glaze, sprinkles, candies, or anything else you like to create your own unique Halloween Cookies.
* **If your dough is too sticky,** add a little more flour, one tablespoon at a time, until it’s easier to handle.
* **If your glaze is too thick,** add a little more milk, one teaspoon at a time, until it reaches your desired consistency.
* **If your glaze is too thin,** add a little more powdered sugar, one tablespoon at a time, until it thickens up.
What are some Storing and Reheating Tips?
These Halloween cookies are great for can be stored in an airtight container at room temperature for up to 3 days. For longer storage, you can freeze them for up to 2 months.
* **Room Temperature:** Store in an airtight container at room temperature for up to 3 days.
* **Refrigerator Storage:** Store in an airtight container in the refrigerator for up to 1 week.
* **Freezer Instructions:** Wrap the cookies individually in plastic wrap and then place them in a freezer-safe bag or container. Freeze for up to 2 months.
* **Glaze Timing Advice:** If you’re planning to freeze the cookies, it’s best to freeze them without the glaze. You can add the glaze after they’ve thawed.
Frequently Asked Questions
Final Thoughts
So there you have it – my family’s secret recipe for the most spooktacular Halloween Cookies ever! I hope you’ll give them a try and create some delicious memories with your loved ones. If you love this recipe, be sure to check out my other cookie recipes for more sweet inspiration. Happy baking, and have a safe and happy Halloween! Let me know in the comments if you tried these and tag me in your photos so I can see your creations!
Halloween Cookies
Ingredients
Main Ingredients
- 1 cup Unsalted Butter Softened
- 1 cup Granulated Sugar
- 2 Large Eggs
- 1 tsp Vanilla Extract
- 3 cups All-Purpose Flour
- 1 tsp Baking Powder
- 0.5 tsp Salt
Frosting Ingredients
- 4 cups Powdered Sugar
- 0.5 cup Unsalted Butter Softened
- 0.25 cup Milk
- 1 tsp Vanilla Extract
- Food Coloring Orange, Black, Purple
Instructions
Preparation Steps
- Preheat oven to 350°F (175°C). Line baking sheets with parchment paper.
- In a large bowl, cream together the butter and sugar until light and fluffy.
- Beat in the eggs one at a time, then stir in the vanilla.
- In a separate bowl, whisk together the flour, baking powder, and salt. Gradually add the dry ingredients to the wet ingredients, mixing until just combined.
- Roll out the dough on a lightly floured surface to about 1/4 inch thickness. Cut out cookies with Halloween-themed cookie cutters.
- Place cookies on the prepared baking sheets and bake for 8-10 minutes, or until the edges are lightly golden.
- Let cool on baking sheets for a few minutes before transferring to a wire rack to cool completely.
- While cookies are cooling, prepare the frosting. In a large bowl, beat together the powdered sugar, butter, milk, and vanilla extract until smooth and creamy. Divide the frosting into separate bowls and tint each bowl with different food colorings.
- Once the cookies are completely cool, decorate with the frosting and sprinkles.