There are certain smells that just instantly transport you back to childhood, right? For me, it’s the warm, sweet aroma of something baking, usually accompanied by my grandma humming in the kitchen. And today, I’m going to share with you one of my absolute favorite recipes that brings me right back to those happy days: my Homemade Danish. Forget those sad, dry bakery versions; this is the real deal. It’s flaky, it’s tender, it’s bursting with a creamy, slightly tart filling, and topped with a glaze that just sings. Seriously, if you’ve ever wanted to impress yourself (or anyone else!) with a truly spectacular treat that tastes like it came from a high-end patisserie, but is surprisingly doable at home, then you’re in the right place. I used to think making Danish pastries was this incredibly daunting task, reserved for professional bakers with years of experience and fancy equipment. But this recipe? It’s been my secret weapon for years, a lifesaver on busy mornings and a guaranteed crowd-pleaser for any occasion. It’s more accessible than you think, and the payoff in taste and texture is just… chef’s kiss. It’s definitely a step up from your average muffin or cookie, and honestly, it rivals any store-bought Danish I’ve ever tried.
What is homemade Danish?
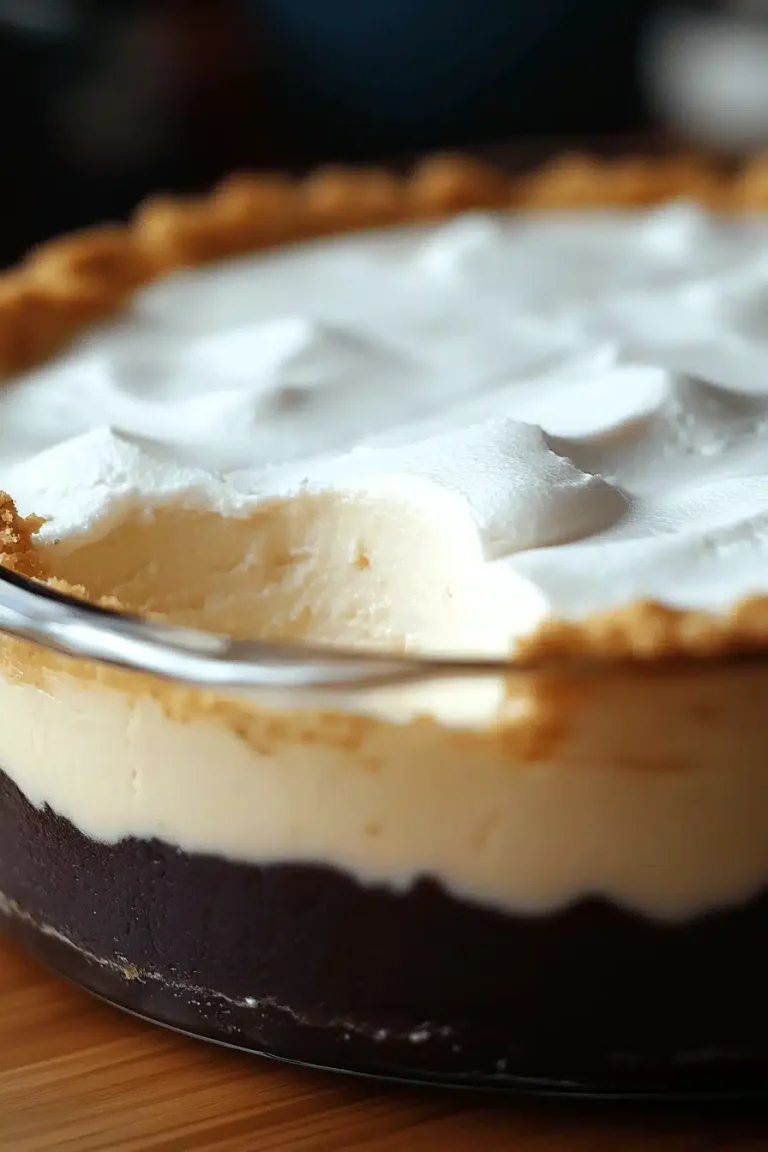
So, what exactly makes a Danish a Danish? At its heart, a classic Danish pastry is a sweet, laminated viennoiserie pastry. That fancy word, “laminated,” just means we’re layering butter and dough, over and over again, to create those incredible flaky layers. Think of it like Puff Pastry, but with a slightly richer, more tender crumb. The dough itself is usually enriched with eggs, milk, and a touch of sugar, giving it a delightful chewiness that balances out the crispiness. Then comes the best part: the filling! While there are countless variations, a traditional Danish often features a cream cheese-based filling, sometimes with fruit or nuts, that’s both sweet and a little tangy. My version leans into that creamy, slightly tart profile, making sure every bite is just perfect. It’s essentially a sweet, buttery, flaky masterpiece that’s designed to make you close your eyes and savor the moment. It’s less about being a quick grab-and-go item and more about a delightful experience, a little moment of indulgence you can create yourself.
Why you’ll love this recipe?
Oh, where do I even begin with why this Homemade Danish recipe is pure magic? Let me count the ways! First and foremost, the FLAVOR. It’s an explosion of sweet, buttery goodness. The dough is subtly sweet on its own, which is crucial because you don’t want it to overpower the filling or the glaze. The filling, oh the filling! It’s a creamy dream, rich with cream cheese, a hint of vanilla, and just enough sugar to make it decadent without being cloying. It has this lovely tang that cuts through the richness of the pastry beautifully. And when it all bakes together? The aroma that fills your kitchen is just heavenly. It’s that kind of scent that makes your neighbors wonder what delicious secret you’re hiding!
Then there’s the SIMPLICITY. Now, I know “laminated dough” can sound intimidating, but I’ve really honed this recipe over the years to make it as straightforward as possible for home bakers. It’s not a rushed process, but each step is very manageable. You won’t need any special tools beyond what most kitchens already have. I promise, you can do this! It might take a bit of time, but the active work is surprisingly minimal.
Let’s talk COST-EFFICIENCY. When you buy Danish pastries from a good bakery, they can be quite pricey, right? Especially if you’re buying a few for the family or a special occasion. Making these at home, using good quality but everyday ingredients, is so much more budget-friendly. You get that gourmet taste and feel without the gourmet price tag. It’s a real win-win!
And VERISTATILITY! This recipe is fantastic on its own, but you can totally play around with it. While my go-to is the classic Cream Cheese Filling, you could easily add some berries, a touch of lemon zest, or even a swirl of jam. The glaze is also super adaptable. You can make it thicker or thinner, add a drop of almond extract, or even a sprinkle of colored sugar for a festive touch. It’s perfect for a weekend brunch where you want to feel fancy, a lovely afternoon pick-me-up with a cup of tea, or even as a special breakfast treat to make a regular day feel extraordinary. What I love most about this recipe, beyond the taste, is the sheer satisfaction of creating something so beautiful and delicious from scratch. It’s a recipe that shows you care, whether you’re making it for yourself, your family, or friends.
How do I make Danish Danish?
Quick Overview
This recipe involves creating a slightly enriched dough, chilling it to make it manageable, and then laminating it with butter. We’ll then shape it, fill it with a simple yet delicious Cream Cheese mixture, and bake until golden and flaky. Finally, a sweet glaze finishes it off perfectly. It’s a process that requires a little patience, particularly with chilling times, but the active steps are surprisingly straightforward. You’ll be rewarded with golden, flaky pastries that taste like pure bliss. The key is to keep everything cool, which makes the dough easier to handle and ensures those distinct layers.
Ingredients
For the Main Batter:
3 cups all-purpose flour, plus more for dusting: I always use unbleached all-purpose flour for the best texture. Make sure to measure it correctly by spooning it into your cup and leveling it off, rather than scooping directly from the bag, which can pack it too densely.
1/4 cup granulated sugar: Just enough to give the dough a subtle sweetness and help with browning.
1 teaspoon salt: Enhances all the flavors and balances the sweetness.
1/2 cup (1 stick) unsalted butter, very cold and cut into small cubes: This is crucial for the lamination. It needs to be cold so it creates those distinct layers of butter and dough.
1 cup milk, lukewarm: Whole milk gives the best richness, but you can use 2% in a pinch. Lukewarm helps the yeast activate properly.
2 1/4 teaspoons active dry yeast: Make sure your yeast is fresh! If it’s old, it might not bloom properly, and your dough won’t rise.
1 large egg, lightly beaten: Adds richness and helps bind the dough.
1 teaspoon vanilla extract: For a little hint of warmth and flavor.
For the Filling:
8 ounces Cream Cheese, softened: Make sure it’s truly softened so it’s easy to whip up smooth. I like to leave mine out on the counter for about an hour.
1/4 cup granulated sugar: Adjust to your sweetness preference.
1 large egg yolk: Adds richness and helps the filling set nicely.
1 teaspoon vanilla extract: To complement the cream cheese.
1 tablespoon lemon juice (optional): For a touch of brightness and tang that cuts through the richness. I sometimes skip this if I’m using a particularly tart filling.
For the Glaze:
1 cup powdered sugar: Sifted, if you want an extra-smooth glaze.
2-3 tablespoons milk or cream: Start with 2 tablespoons and add more a teaspoon at a time until you reach your desired drizzling consistency.
1/2 teaspoon vanilla extract: For that classic sweet glaze flavor.
Step-by-Step Instructions
Step 1: Preheat & Prep Pan
We’ll start by getting our yeast mixture going. In a small bowl, combine the lukewarm milk, granulated sugar, and active dry yeast. Give it a gentle stir and let it sit for about 5-10 minutes until it gets foamy and bubbly. This is called “blooming” the yeast, and it tells us our yeast is alive and ready to work its magic! If it doesn’t foam, your yeast might be old, and you’ll need to start with fresh yeast.
Step 2: Mix Dry Ingredients
While the yeast is blooming, grab a large mixing bowl. Add the all-purpose flour and salt. Whisk them together just to combine. Now, cut in the very cold, cubed butter. You can do this with a pastry blender, two knives, or even your fingertips. You want to work quickly so the butter stays cold, and aim for a coarse, meal-like texture with some pea-sized pieces of butter still visible. These butter pieces are what will create those glorious flaky layers during baking.
Step 3: Mix Wet Ingredients
Once the yeast has bloomed, pour it into the bowl with the dry ingredients. Add the lightly beaten egg and vanilla extract. Mix everything together with a wooden spoon or a spatula until a shaggy dough forms. Don’t overmix here; we’re not trying to develop gluten like we would for bread. Just get it combined.
Step 4: Combine
Turn the dough out onto a lightly floured surface. Knead it gently for just a minute or two until it just comes together. It will be a bit sticky, and that’s okay. We don’t want to overwork it. Shape it into a rough rectangle, wrap it tightly in plastic wrap, and refrigerate for at least 1 hour, or until firm. This chilling period is super important; it makes the dough easier to handle for the lamination process and keeps the butter from melting into the dough.
Step 5: Prepare Filling
While the dough is chilling, let’s whip up that dreamy filling. In a medium bowl, beat the softened Cream Cheese and granulated sugar together until smooth and creamy. You can use a hand mixer or a whisk. Then, beat in the egg yolk, vanilla extract, and lemon juice (if using) until well combined and smooth. Taste it and adjust sugar if needed. Cover and set aside.
Step 6: Layer & Swirl
Once the dough is well-chilled, unwrap it and place it on a lightly floured surface. Roll it out into a large rectangle, about 12×18 inches. Don’t worry if it’s not perfectly uniform. Now, spread the cream cheese filling evenly over the dough, leaving a small border (about 1/2 inch) along the edges. Gently fold the dough over the filling. You can fold it like a book, bringing the top third down and then the bottom third up, or just fold it in half. The goal is to enclose the filling within layers of dough. Then, gently press the edges to seal. At this point, you can either cut the dough into individual pastries or gently swirl them. For individual pastries, I like to cut them into squares or rectangles. If you’re going for a more classic Danish look, you can cut long strips and then twist them or fold them into interesting shapes. My favorite is a simple square with a little slit in the middle, then folding the corners in to create a pinwheel effect.
Step 7: Bake
Preheat your oven to 375°F (190°C). Line a baking sheet with parchment paper. Carefully place the shaped Danish onto the prepared baking sheet, leaving a little space between them. Bake for 18-22 minutes, or until the pastries are golden brown and puffed up. The exact time will depend on your oven and the size of your Danish. Keep an eye on them! You want them to be beautifully golden, not pale and not burnt.
Step 8: Cool & Glaze
Once they’re baked to perfection, carefully remove them from the baking sheet and place them on a wire rack to cool for at least 15-20 minutes. While they’re cooling, whisk together the powdered sugar, vanilla extract, and 2 tablespoons of milk or cream for the glaze. Add more milk a teaspoon at a time until you have a smooth, drizzly consistency. Once the Danish have cooled slightly (they should still be warm, not hot), drizzle the glaze over the tops. It will set up a bit as it cools, creating a lovely finish.
Step 9: Slice & Serve
The hardest part is waiting for them to cool enough to eat! These are best served slightly warm, when the pastry is still a bit tender and the glaze is just starting to set. Slice them carefully with a serrated knife. They are absolutely divine enjoyed on their own with a cup of coffee or tea. The smell alone will draw everyone to the kitchen!
What to Serve It With
These Homemade Danish are so versatile, you can enjoy them any time of day and they feel special. For a leisurely BREAKFAST, I love serving them alongside a perfectly brewed cup of coffee. The richness of the Danish pairs so well with the bitterness of a good dark roast. I’ll often put them on a simple white plate to let their golden beauty shine. When it comes to BRUNCH, they really step it up. Imagine a spread with some fresh fruit salad, maybe some crispy bacon or sausage, and these glorious Danish pastries as the sweet centerpiece. They look incredibly elegant on a tiered stand or a beautiful platter. A mimosa or a sparkling rosé would be the perfect beverage pairing here. For DESSERT, these are surprisingly delightful. After a lighter meal, a single Danish with a dollop of fresh whipped cream or a scoop of vanilla bean ice cream is pure indulgence. You can even serve them with a drizzle of raspberry coulis for an extra pop of flavor. And for those COZY SNACKS, when you just need a little something sweet to brighten your afternoon, these are ideal. They’re perfect with a warm cup of herbal tea or even a glass of cold milk. My kids absolutely love them after school, and honestly, so do I! We often have them with a side of fresh berries when they’re in season, which adds a lovely freshness to the sweetness.
Top Tips for Perfecting Your Homemade Danish
I’ve made this recipe more times than I can count, and over the years, I’ve picked up a few tricks that really help elevate them from good to absolutely spectacular. So, let’s dive into some of my best tips! First, when it comes to the dough, keeping everything COLD is your best friend. If your kitchen is warm, the butter can melt into the dough instead of staying in distinct layers. If you feel the dough getting too soft or sticky while you’re rolling, don’t hesitate to pop it back in the fridge for 15-20 minutes. It’s worth the extra wait! For the butter layer itself, I always make sure to cut it into uniform, small cubes and ensure it’s ice cold before adding it.
Regarding MIXING ADVICE, remember that we’re not making bread. You don’t need to develop a lot of gluten. Just mix until the dough *just* comes together. Overmixing can lead to tough pastries, and we want ours to be tender and flaky. So, be gentle! When you’re rolling out the dough for lamination, try to maintain a fairly even thickness. This helps ensure that all the layers bake up consistently. If one spot is much thinner than another, that’s where you might get uneven browning or burnt edges.
For SWIRL CUSTOMIZATION, feel free to get creative! While I often go for the classic cream cheese, you can absolutely add things to it. A swirl of good quality raspberry or apricot jam before folding the dough adds a wonderful fruity tang. You could even fold in some finely chopped nuts or a sprinkle of cinnamon sugar. If you’re feeling really adventurous, a little bit of finely grated orange zest in the filling is divine! When it comes to the final shape, don’t stress about perfection. The rustic look is part of its charm.
When it comes to INGREDIENT SWAPS, I’ve experimented quite a bit. For the milk, if you’re out of whole milk, 2% works fine, or even a good quality unsweetened almond milk can work, though it might make the dough slightly less rich. I haven’t tested it with gluten-free flours extensively, but I imagine a good 1:1 gluten-free baking blend might work, though you might need to adjust the liquid slightly. For the cream cheese, you can use a light cream cheese to reduce fat, but full-fat really gives the best flavor and texture.
And finally, BAKING TIPS! Ovens can be so finicky, can’t they? My oven tends to run a bit hot, so I often find myself reducing the temperature by about 10-15 degrees Fahrenheit from the recipe to prevent over-browning. Conversely, if your oven runs cooler, you might need to bake them a few minutes longer. The best indicator that they’re done is that beautiful golden-brown color all over and that they’ve puffed up nicely. They should feel light when you lift them. For the GLAZE VARIATIONS, if you want a thinner glaze for more of a delicate drizzle, use a bit more milk. If you want a thicker, more opaque glaze, use less milk or add a bit more powdered sugar. You can also add a drop of almond extract to the glaze for a different flavor profile that pairs beautifully with the pastry.
Storing and Reheating Tips
The best way to enjoy these Homemade Danish is, of course, fresh out of the oven. But knowing how to store them properly means you can savor that deliciousness for a few days. If you have any leftovers, STORE THEM AT ROOM TEMPERATURE in an airtight container for up to 2 days. The key here is “airtight” to prevent them from drying out. If your kitchen is particularly warm and humid, you might want to refrigerate them sooner. For REFRIGERATOR STORAGE, they’ll keep well for up to 4-5 days. Again, an airtight container is your best bet. I find that sometimes the glaze can get a little sticky in the fridge, so you might want to place a piece of parchment paper between layers if you’re stacking them. They’re still delicious cold, but if you prefer them warm, you can REHEAT THEM IN THE OVEN. Just pop them on a baking sheet at around 300°F (150°C) for about 5-7 minutes, or until they’re warmed through and the pastry is crisp again. You don’t want to microwave them, as that can make them tough. If you plan on FREEZING them, it’s best to do it *before* glazing. Wrap them tightly in plastic wrap, then in foil, and they can be kept in the freezer for up to 2-3 months. To thaw, let them sit at room temperature for a few hours, then you can gently reheat them in the oven as described above. If you froze them unglazed, you can make a fresh batch of glaze to add once they’re reheated and cooled slightly. For the GLACE TIMING ADVICE, I always recommend glazing *after* they’ve cooled down a bit from the oven. If you glaze them while they’re piping hot, the glaze will melt and just drip off. Letting them cool for at least 15-20 minutes before glazing allows the glaze to set nicely.
Frequently Asked Questions
Final Thoughts
So there you have it – my absolute favorite recipe for Homemade Danish! I truly believe this is a recipe worth trying, not just because it tastes incredible (which it does!), but because of the joy it brings. From the intoxicating aroma that fills your home as it bakes to the pure satisfaction of slicing into those flaky layers, it’s an experience in itself. It’s proof that you don’t need to be a professional baker to create something truly magical in your own kitchen. It’s perfect for those moments when you want to treat yourself or someone special, a little bite of luxury that’s made with love. If you love this recipe, you might also enjoy my other pastry recipes, like my buttery croissants or my simple fruit tarts – they’re all about bringing a little bit of homemade joy to your table. Don’t be intimidated by the steps; just embrace the process and enjoy the delicious results. I can’t wait to hear how yours turn out! Please feel free to leave a comment below with your thoughts or any variations you tried. Happy baking, my friends!
Homemade Danish
Ingredients
Main Ingredients
- 2.5 cups All-purpose flour
- 0.5 cup Granulated sugar
- 1 teaspoon Salt
- 1 cup Cold unsalted butter Cut into cubes
- 0.75 cup Cold milk
- 8 ounces Cream cheese Softened
- 0.5 cup Powdered sugar
- 1 teaspoon Vanilla extract
- 1 large Egg for egg wash
Instructions
Preparation Steps
- In a large bowl, whisk together the flour, sugar, and salt.
- Cut in the cold butter using a pastry blender or your fingers until the mixture resembles coarse crumbs.
- Gradually add the milk, mixing until the dough just comes together. Do not overmix.
- Wrap the dough in plastic wrap and chill for at least 30 minutes.
- For the filling: In a bowl, beat together the cream cheese, powdered sugar, and vanilla extract until smooth.
- On a lightly floured surface, roll out the dough to a rectangle.
- Spread the cream cheese filling over the dough.
- Fold the dough in half or roll up and cut into individual pastries.
- Place the pastries on a baking sheet lined with parchment paper.
- Brush with egg wash.
- Bake in a preheated oven at 375°F (190°C) for 20-25 minutes, or until golden brown.