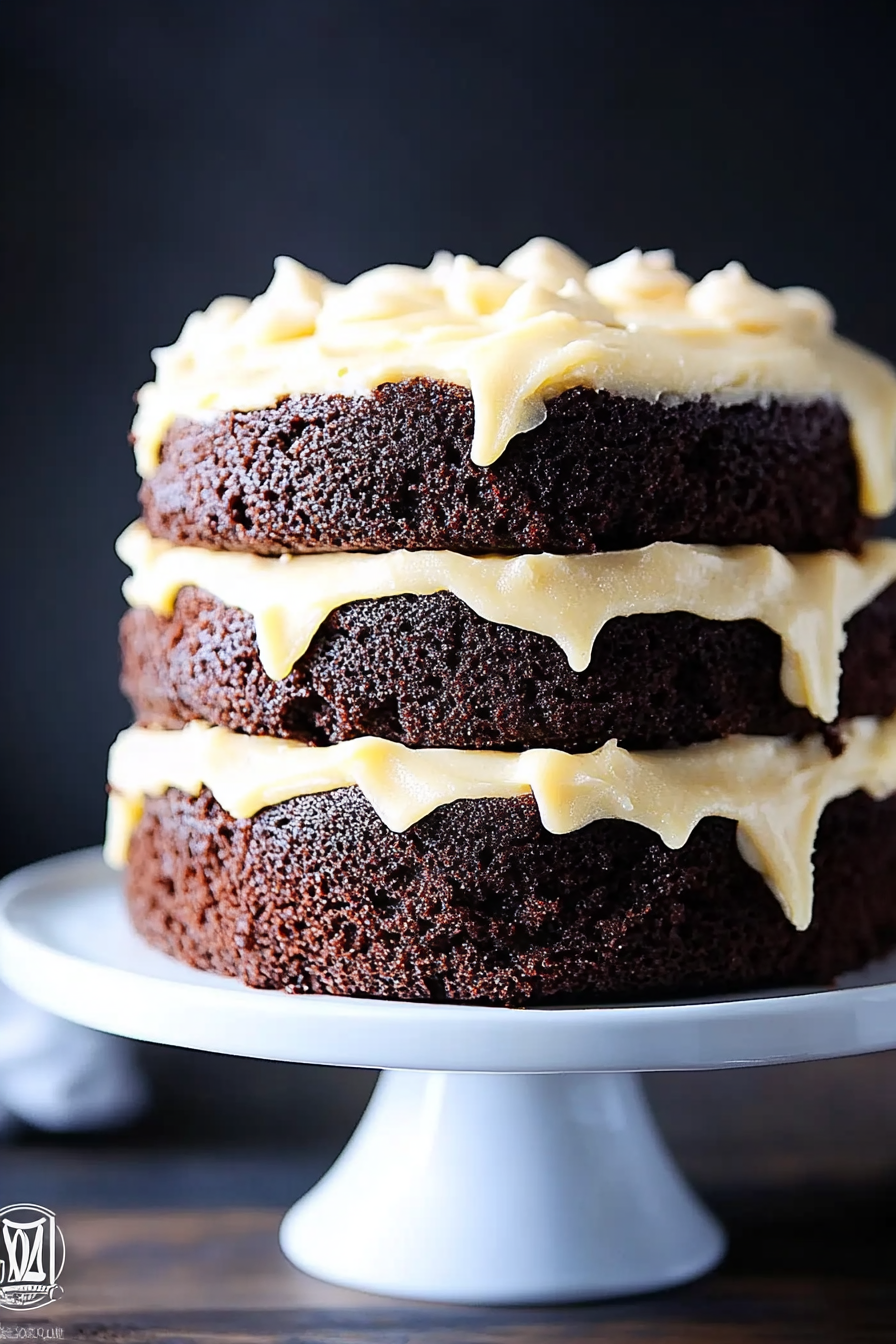
You know those recipes that just feel like a warm hug? The ones that instantly transport you back to your childhood kitchen, filled with the comforting scent of something baking? For me, that’s Moms Fudge. It’s not just a dessert; it’s a memory. It’s the ultimate crowd-pleaser, the reliable go-to when you need something sweet, simple, and utterly delicious. Forget those complicated dessert recipes that leave you stressed and with a sink full of dishes. Moms Fudge is the antidote to all that. It’s a bit like my grandmother’s famous Chocolate Chip Cookies, but in a dense, fudgy, melt-in-your-mouth form. If you’ve ever craved that perfect balance of rich chocolate and creamy sweetness without a whole lot of fuss, then you’re in the right place. This recipe is a lifesaver, I swear. It’s one of those gems that’s so good, so surprisingly easy to whip up, that you’ll wonder why you ever bothered with anything else when that chocolate craving hits.
What is Moms Fudge?
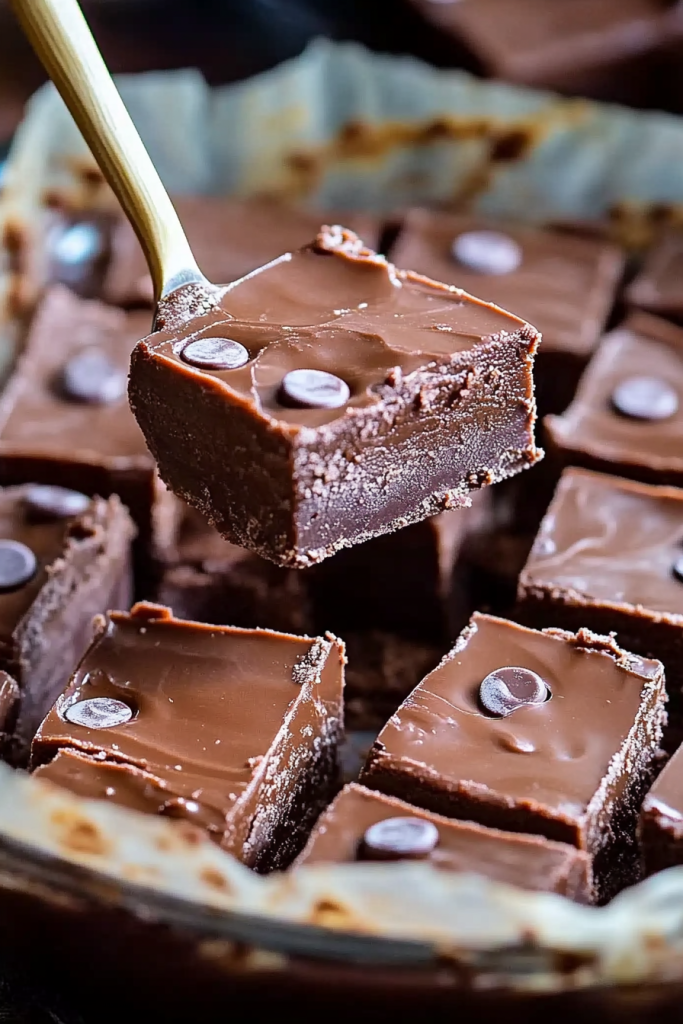
So, what exactly is this magical concoction we call Moms Fudge? Think of it as the ultimate chocolate indulgence, simplified. It’s a rich, intensely chocolatey, no-bake confection that sets up beautifully, offering that signature fudgy texture everyone adores. The name “Moms Fudge” isn’t just a cute moniker; it’s a testament to how this recipe is typically passed down through generations, usually from a mother to her child, becoming a staple in family recipe boxes. It’s essentially a love letter to chocolate, made with simple ingredients you likely already have in your pantry. It’s the kind of dessert that doesn’t require fancy equipment or a culinary degree. It’s the comfort food equivalent of a cozy blanket on a chilly evening, or a warm chat with your favorite person. It’s that dependable treat that always delivers, no matter the occasion, or even if there isn’t one!
Why you’ll love this recipe?
Honestly, where do I even begin with why this Moms Fudge is just the BEST? First off, the flavor. Oh, the flavor! It’s so deeply chocolatey, it’s almost sinful, but in the most delightful way. It’s not too sweet, which is something I really appreciate. It hits that perfect spot where you get the intense cocoa flavor without that cloying sweetness that can sometimes overwhelm other fudge recipes. And the texture? It’s pure bliss. It’s dense and chewy, but it melts in your mouth. It’s truly the epitome of chocolatey goodness.
Then there’s the sheer simplicity of it all. This is where Moms Fudge really shines. You don’t need to be a professional baker to nail this. It’s a no-bake wonder, which means no oven involved, no fiddly candy thermometer, just straightforward mixing and chilling. This is a lifesaver on busy days when you want to whip up something special without spending hours in the kitchen. I’ve made this countless times when I’ve had unexpected guests drop by, or when the kids have been begging for a treat, and it’s always a hit.
Let’s talk about cost-efficiency too. The ingredients are incredibly budget-friendly. We’re talking pantry staples like sugar, butter, cocoa powder, and milk. You don’t need to buy expensive specialty ingredients. This makes it a fantastic option for making a large batch for parties or holidays without breaking the bank. It’s also incredibly versatile. While the classic chocolate version is divine, you can easily add nuts, swirl in some Peanut Butter, or even add a touch of peppermint extract for a different flavor profile. It’s a recipe that grows with you and your family’s tastes. What I love most about this recipe is that it’s practically foolproof. Even if you’re a beginner cook, you can make this and feel like a kitchen wizard. It’s the kind of recipe that makes you feel proud, and the best part is, it’s always met with rave reviews!
How do I make my moms fudge?
Quick Overview
Making this Moms Fudge is surprisingly simple and incredibly rewarding. You’ll essentially be melting and mixing a few key ingredients together on the stovetop until they’re perfectly combined and smooth. Then, it’s just a matter of pouring it into a prepared pan, letting it chill until firm, and slicing it into perfect squares. The beauty of this method is that it’s all done without an oven, making it a fantastic option for any time of year, especially when you don’t want to heat up the kitchen. The result is a rich, decadent Chocolate Fudge that’s far better than anything you can buy in a store.
Ingredients
For the Main Batter:
You’ll need about 2 cups of granulated sugar – make sure it’s regular white sugar for the best texture. Then, grab about 1/2 cup of unsalted butter. Using unsalted butter gives you more control over the saltiness of your fudge. For that deep chocolatey flavor, you’ll want 3/4 cup of unsweetened cocoa powder. I always opt for a good quality Dutch-processed cocoa if I can find it, as it tends to give a richer, darker color and flavor. You’ll also need about 1/2 cup of milk; whole milk works best for richness, but I’ve tested this with almond milk and it actually made it even creamier! And don’t forget 1 teaspoon of vanilla extract – this really rounds out the chocolate flavor.
For the Filling:
This is where you can really have some fun! The base recipe doesn’t require a separate filling, but I often like to add about 1 cup of chopped nuts, like walnuts or pecans, for a little crunch. Make sure they are toasted for an even better flavor. Sometimes, I even swirl in some Peanut Butter or a dollop of marshmallow creme just before it sets. It’s completely optional, but it adds another dimension of deliciousness.
For the Glaze:
A glaze isn’t strictly necessary for this fudge, as it’s already incredibly decadent on its own. However, if you like a little extra sweetness and a glossy finish, you can whip up a simple glaze. It’s usually just powdered sugar mixed with a tiny bit of milk or water until you get a pourable consistency. You can also add a drop of vanilla or even some melted chocolate to the glaze for an extra boost of flavor.
Step-by-Step Instructions
Step 1: Preheat & Prep Pan
Alright, first things first, you’ll want to grab an 8×8 inch baking pan. Line it with parchment paper, leaving a little overhang on the sides. This makes it super easy to lift the fudge out later without any sticking. Lightly grease the parchment paper too, just for good measure. You don’t need to preheat your oven for this recipe, which is one of the best parts!
Step 2: Mix Dry Ingredients
In a medium saucepan (make sure it’s sturdy and not too thin), whisk together your granulated sugar and cocoa powder. Give it a good whisk until there are no lumps and everything is evenly combined. This step is important because it ensures your cocoa is distributed evenly throughout the fudge, avoiding any chalky bits.
Step 3: Mix Wet Ingredients
Now, add the butter and milk to the saucepan with the dry ingredients. Put the saucepan over medium heat. Stir constantly. You want everything to melt together smoothly. Keep stirring until the butter is completely melted and the sugar has dissolved. You’ll see the mixture start to bubble slightly.
Step 4: Combine
Once the mixture is smooth and has just started to boil gently, continue to cook and stir for about 5 minutes. Don’t walk away during this stage! You want to keep it moving to prevent scorching. This cooking process is what helps the fudge set up properly. After 5 minutes, remove the saucepan from the heat. Stir in your vanilla extract. If you’re adding nuts or any other mix-ins, now’s the time to stir them in too!
Step 5: Prepare Filling
If you’re planning to swirl in peanut butter or marshmallow creme, have that ready now. You’ll typically want about 1/2 cup of peanut butter or marshmallow creme. Make sure it’s at room temperature so it’s easily swirled.
Step 6: Layer & Swirl
Pour the hot fudge mixture into your prepared baking pan. If you’re adding a swirl, now is the time to dollop spoonfuls of peanut butter or marshmallow creme over the hot fudge. Then, use a knife or skewer to gently swirl it through the fudge. Don’t overmix, you just want pretty ribbons of flavor.
Step 7: Bake
This step is actually a “chill” step, not a bake step! Let the fudge cool slightly in the pan for about 15-20 minutes. This helps it thicken up just a bit before it goes into the fridge. Then, cover the pan loosely and place it in the refrigerator. You want it to chill for at least 2-3 hours, or until it’s firm to the touch. The longer it chills, the firmer it will get.
Step 8: Cool & Glaze
Once the fudge is firm, lift it out of the pan using the parchment paper overhang. If you’re adding a glaze, now is the time to make it. Whisk together 1 cup of powdered sugar with 1-2 tablespoons of milk or water until smooth and pourable. Drizzle it over the top of the fudge. Let the glaze set for about 15 minutes before slicing. If you’re not glazing, you can skip this wait and go straight to slicing!
Step 9: Slice & Serve
Using a sharp knife, cut the fudge into small, bite-sized squares. I usually aim for about 1-inch pieces, but you can cut them bigger if you’re feeling extra indulgent! Wipe your knife clean between cuts if needed for neater edges. This fudge is best served at room temperature or slightly chilled.
What to Serve It With
This Moms Fudge is so versatile, it really can go with anything! For a cozy breakfast, a small square alongside a steaming mug of coffee is pure bliss. It’s a little treat to start your day off right, a sweet whisper rather than a shout. On a leisurely brunch spread, it adds a touch of decadence without being too heavy. Imagine it alongside some fresh fruit salad and maybe some mini quiches – it’s the perfect sweet ending.
As a dessert, it’s a showstopper. It’s fantastic served on its own, maybe with a dusting of cocoa powder or a single fresh raspberry on top for a pop of color. I also love pairing it with a scoop of vanilla bean ice cream or a rich chocolate mousse. The contrast in textures is divine. And for those moments when you just need a comforting snack, cut it into smaller pieces and enjoy it with a glass of cold milk. It’s like a grown-up version of your childhood favorite. My family has a tradition of making a big batch of this around the holidays, and we always serve it with hot chocolate. The combination is just heavenly. I’ve also found it pairs surprisingly well with a strong cup of black tea, especially if you’ve added a hint of peppermint to the fudge itself. It’s all about creating those comforting, memorable moments, and this fudge is the perfect companion.
Top Tips for Perfecting Your Moms Fudge
Over the years, I’ve picked up a few tricks that make this Moms Fudge turn out absolutely perfect every single time. One of the biggest things is controlling the heat. When you’re cooking the sugar, butter, and cocoa mixture, make sure it’s on medium heat, not high. If it’s too hot, you risk scorching the bottom of the pan, which will give your fudge an unpleasant bitter taste. Stirring constantly is key here; think of it as giving the fudge your undivided attention for those few minutes.
When it comes to the cocoa powder, I’ve found that using a good quality unsweetened cocoa makes a huge difference in the depth of flavor. If your cocoa powder has clumps, whisk it thoroughly with the sugar before adding any liquid to ensure it all dissolves properly. Don’t skimp on the vanilla extract either! It might seem like a small amount, but it really enhances the chocolate flavor and adds a lovely warmth.
If you’re adding nuts or other mix-ins, toasting them beforehand really elevates their flavor and adds a delightful crunch. Just a quick toast in a dry skillet for a few minutes until fragrant will do the trick. And remember, the longer you cook the sugar mixture (within reason, don’t go overboard!), the firmer your fudge will be. I usually aim for about 5 minutes of boiling after the butter and sugar have melted.
For swirling in peanut butter or marshmallow creme, make sure it’s at room temperature. Cold additions can seize up and won’t swirl as easily. Also, don’t over-swirl! You want distinct ribbons, not a muddy mess. A few gentle passes with a knife is all you need.
If your fudge isn’t setting up properly, don’t panic! Sometimes, it’s just a matter of needing a bit more chilling time. If it’s still too soft after several hours in the fridge, you can try placing it in the freezer for about 30-45 minutes to firm it up before slicing. And a sharp knife is your best friend for clean cuts. I always wipe my knife clean with a damp cloth between slices for the neatest results. Lastly, experiment! Don’t be afraid to try different extracts like mint or orange, or even add a pinch of sea salt on top for a salty-sweet kick. That’s the beauty of this recipe – it’s a wonderful base for your own personal touch.
Storing and Reheating Tips
Proper storage is key to keeping your Moms Fudge tasting as fresh and delicious as the day you made it. For best results, I always recommend storing it at room temperature if you plan to eat it within a few days. Simply place the cut pieces in an airtight container. You can layer them between sheets of parchment paper to prevent them from sticking together. It will stay good like this for about 3-4 days, though it rarely lasts that long in my house! The texture is often best at room temperature anyway, as it becomes wonderfully soft and gooey.
If you know you won’t get through it all in a few days, or if your kitchen tends to be on the warmer side, your refrigerator is your next best bet. Store it in an airtight container, again layering with parchment paper if needed. In the fridge, it can last for up to a week, possibly even longer. Just be aware that chilling it can make it firmer, so you might want to let it sit out on the counter for about 15-20 minutes before serving to soften it up a bit.
And yes, you can absolutely freeze Moms Fudge! This is a fantastic way to have a treat on hand whenever a craving strikes. Wrap individual pieces or small stacks of fudge tightly in plastic wrap, then place them inside a heavy-duty freezer bag or an airtight container. It should keep well in the freezer for up to 3 months. When you’re ready to enjoy it, the best way to thaw it is to let it come to room temperature slowly in its packaging. This helps prevent condensation, which can make the fudge a bit soggy. Avoid microwaving it to thaw, as it can melt unevenly. If you’ve added a glaze, it might get a little softer or develop a slight sheen after thawing, but the flavor will still be wonderful.
Frequently Asked Questions
Final Thoughts
So there you have it – my cherished recipe for Moms Fudge. It’s more than just a treat; it’s a little piece of happiness, a guaranteed smile-maker, and a testament to how simple ingredients can create something truly extraordinary. I hope you’ll give this recipe a try and experience the same joy I do every time I make it. Whether you’re whipping it up for a special occasion, a weeknight craving, or just because, I’m confident it will become a beloved recipe in your own home. If you love this rich chocolatey goodness, you might also enjoy my recipe for No-Bake Chocolate Peanut Butter Bars or my Decadent Brownie Cookies – they’re also big hits in my kitchen! I can’t wait to hear what you think of this fudge. Please leave a comment below and let me know how yours turned out, or if you’ve discovered any fun variations. Happy baking (or rather, no-baking)!
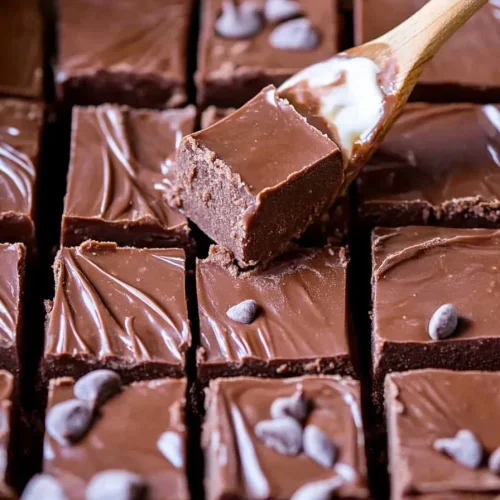
Moms Fudge
Ingredients
Main Ingredients
- 3 cups granulated sugar
- 0.5 cup unsweetened cocoa powder
- 0.5 cup milk
- 0.25 cup butter
- 1 teaspoon vanilla extract
- 0.25 teaspoon salt
Instructions
Preparation Steps
- In a medium saucepan, combine sugar, cocoa powder, milk, butter, and salt.
- Bring to a boil over medium heat, stirring constantly.
- Continue to boil for 2 minutes, stirring constantly.
- Remove from heat and stir in vanilla extract.
- Pour into a buttered 8x8 inch pan and let cool completely.
- Cut into squares and serve.


