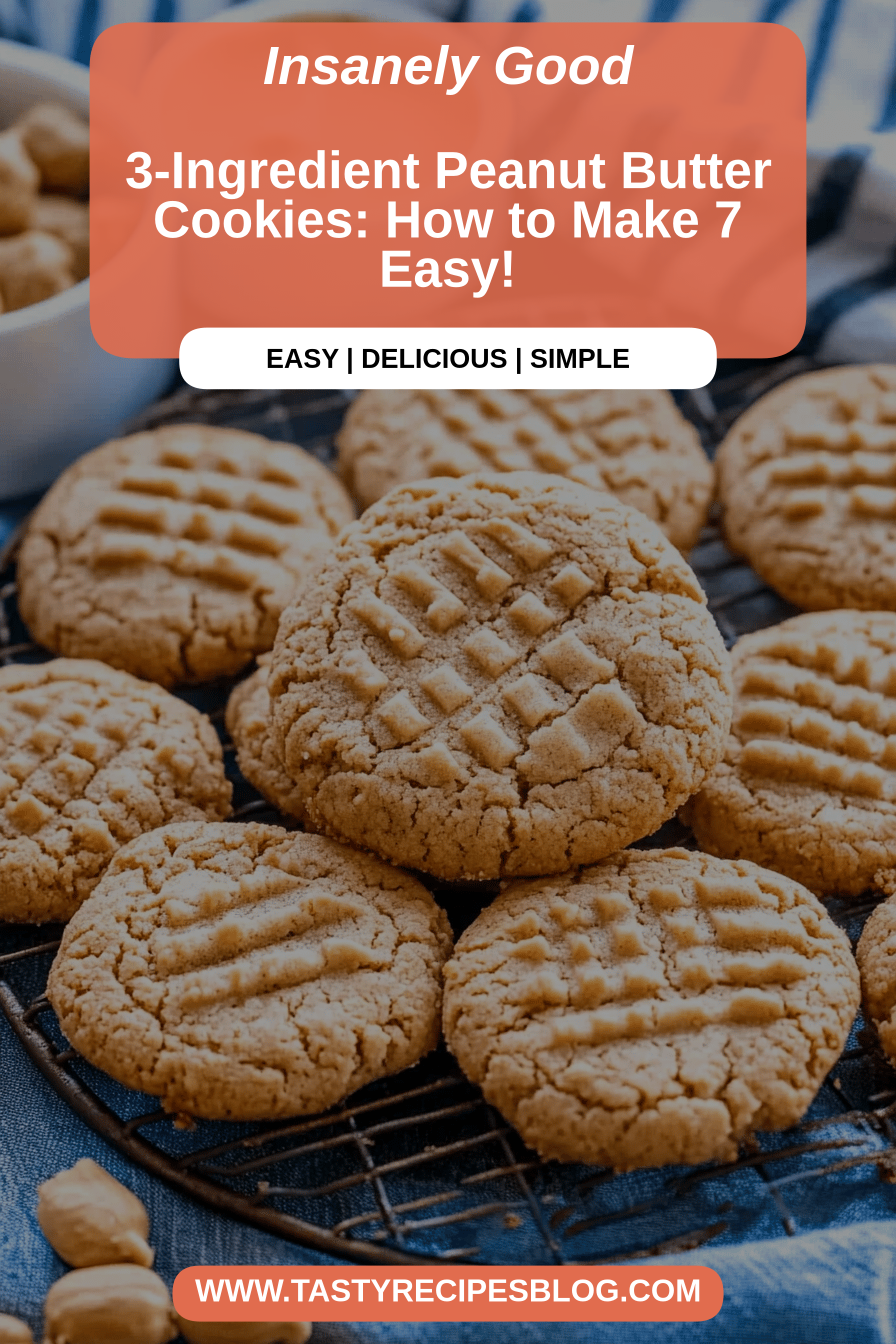
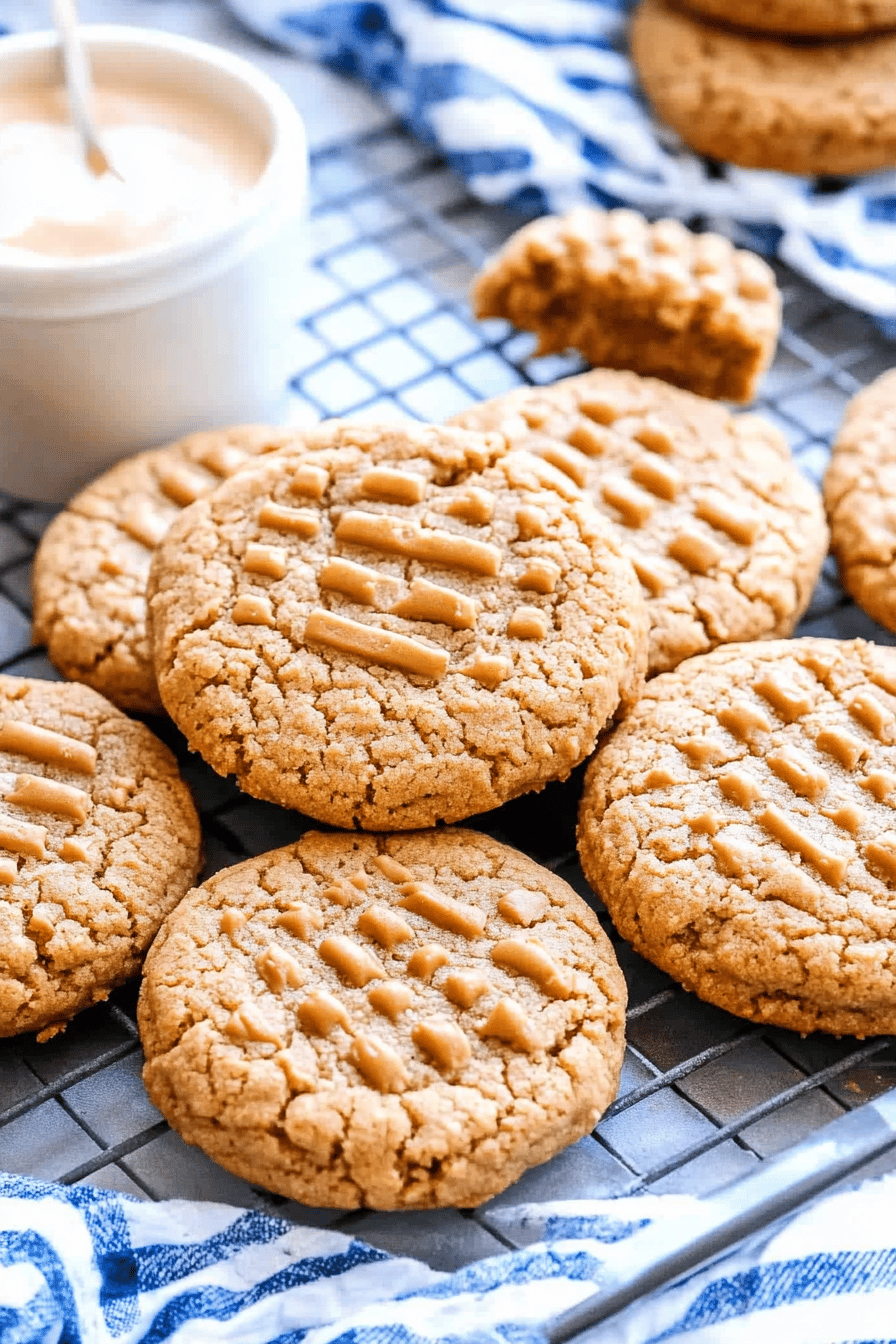
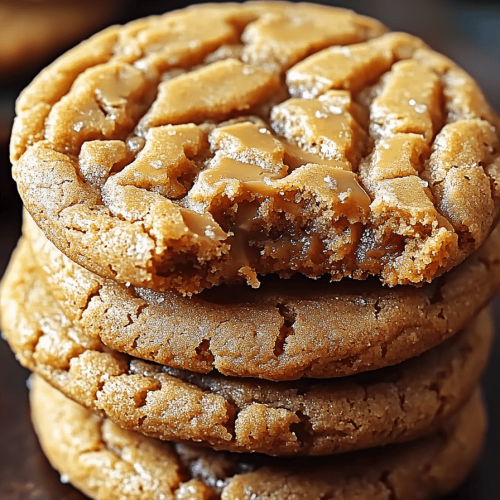
You know, there are some recipes that just *feel* like home. They’re the ones you return to again and again, the ones that fill your kitchen with an irresistible aroma and bring a smile to everyone’s face. For me, that recipe is hands down, the classic Peanut Butter Cookie. Not just any peanut butter cookie, mind you, but *these* peanut butter cookies. They’re soft, slightly chewy in the center, with those perfect little crinkles on top, and that deep, nutty flavor that just sings. Honestly, they’re worlds away from those dry, crumbly versions that can sometimes disappoint. If you’ve ever dreamt of a cookie that’s utterly comforting and surprisingly simple to whip up, then you’re in the right place. These are the cookies my family requests whenever there’s a celebration, a need for a pick-me-up, or just a Tuesday afternoon. I’ve tried so many variations over the years, but this one? This one’s a keeper. It’s the kind of cookie that makes people ask for the recipe immediately, and it never fails to impress.
What are Peanut Butter Cookies?
So, what exactly makes these Peanut Butter Cookies so special? Think of them as the ultimate hug in cookie form. They’re not overly fussy or complicated, but they deliver on pure, unadulterated peanut butter goodness. The “name” itself, just Peanut Butter Cookies, is a testament to their classic, no-nonsense appeal. They’re the quintessential version that most people picture when they hear those words – that familiar, comforting flavor and texture. It’s essentially a cookie that celebrates the star ingredient: peanut butter. We’re not trying to hide it or reinvent the wheel here. The magic comes from getting the balance just right, ensuring each bite is packed with that signature nutty taste that we all know and love. It’s the kind of dessert that transports you back to childhood, to grandma’s kitchen, or to lazy afternoons spent with a glass of milk. It’s comfort food at its finest, pure and simple.
Why you’ll love this recipe?
Why do I keep coming back to this Peanut Butter Cookie recipe?flavor. Oh, the flavor! It’s a deep, rich, roasted peanut butter taste that isn’t too sweet. It’s perfectly balanced, so the peanut butter really shines through. You get those lovely little cracks on top that hint at the soft, chewy interior. Then there’s the simplicity. Seriously, you probably have most of the ingredients in your pantry right now. It comes together so quickly – I can honestly make a batch on a weeknight without breaking a sweat. This is a lifesaver when unexpected guests pop by or when a sudden craving strikes. It’s also incredibly cost-effectiveUnlike some fancy desserts that require a laundry list of expensive ingredients, these cookies rely on pantry staples. You get so much deliciousnessversatility! While they’re perfect just as they are, you can easily add chocolate chips, swap out the peanut butter for almond butter, or even drizzle them with a little extra melted chocolate. I also love that these are a crowd-pleaser for all ages. My kids devour them, and they’re always the first thing to disappear at potlucks. What I love most about this is that it’s a recipe you can truly rely on. It’s my go-to when I need a guaranteed win, something that brings pure joy without any fuss. It’s the kind of recipe that builds confidence in the kitchen.
How to Make Peanut Butter Cookies
Quick Overview
Making these perfect Peanut Butter Cookies is a breeze. You’ll simply cream your butter and sugars, mix in the egg and vanilla, then gently combine the dry ingredients. From there, it’s just a matter of scooping, rolling, and baking. The key is not to overmix, ensuring those tender, chewy cookies we’re aiming for. It’s a straightforward process that requires minimal fuss but yields maximum flavor and texture. You’ll be amazed at how quickly these go from mixing bowl to cooling rack, and even more amazed at how fast they disappear once they’re ready to be devoured.
Ingredients
For the Main Batter:
All-Purpose Flour: 2 ¼ cups. Make sure it’s spooned and leveled, not scooped directly from the bag, to avoid dry cookies. I usually use a good quality unbleached all-purpose flour.
Baking Soda: 1 teaspoon. This is what gives our cookies that perfect lift and spread. Make sure it’s fresh!
Salt: ½ teaspoon. A little salt balances the sweetness and enhances the Peanut Butter flavor.
Unsalted Butter: 1 cup (2 sticks), softened. Make sure it’s truly softened – not melted! This is crucial for creaming properly.
Granulated Sugar: ¾ cup. For sweetness and structure.
Brown Sugar: ¾ cup, packed. The brown sugar adds moisture and a lovely caramel undertone. Light or dark both work.
Large Egg: 1, at room temperature. Room temperature eggs incorporate better.
Vanilla Extract: 1 teaspoon. Pure vanilla extract makes a big difference!
Peanut Butter: 1 ½ cups. Use creamy, commercial peanut butter (like Jif or Skippy). Natural peanut butters can be too oily and alter the texture.
For the Classic Fork Marks:
This isn’t really an ingredient, but a tool! A fork is all you need to create those iconic criss-cross patterns. If you want to be a bit fancy, you can skip this step or press a peanut or a chocolate kiss into the center.

Step-by-Step Instructions
Step 1: Preheat & Prep Pan
First things first, let’s get your oven ready. Preheat it to 375°F (190°C). Then, line a couple of baking sheets with parchment paper. This makes cleanup a breeze and prevents your cookies from sticking. I always have at least two baking sheets ready to go so I can pop a new batch in as soon as one comes out.
Step 2: Mix Dry Ingredients
In a medium bowl, whisk together the flour, baking soda, and salt. Give it a good whisking to make sure the baking soda and salt are evenly distributed. This ensures consistent leavening and flavor throughout your cookies. You want everything nicely combined, with no clumps.
Step 3: Mix Wet Ingredients
In a large bowl, cream together the softened butter, granulated sugar, and packed brown sugar using an electric mixer (or a sturdy whisk and some elbow grease!). Beat until the mixture is light and fluffy, about 2-3 minutes. Then, beat in the room temperature egg and the vanilla extract until just combined. Make sure to scrape down the sides of the bowl as needed.
Step 4: Combine
Now, gradually add the dry ingredients to the wet ingredients, mixing on low speed (or stirring gently) until just combined. Be careful not to overmix here! Overmixing can lead to tough cookies. You just want to see the last streaks of flour disappear. The dough will be thick and wonderfully fragrant.
Step 5: Prepare Filling
This step is more about incorporating the peanut butter into the dough. Make sure your peanut butter is creamy and at room temperature. Add the 1 ½ cups of creamy peanut butter to the creamed butter and sugar mixture. Beat on low speed until everything is well combined and you have a cohesive dough. It will be thick and somewhat sticky, but that’s exactly what you want!
Step 6: Layer & Swirl
This is where the magic happens! Scoop rounded tablespoons of dough onto your prepared baking sheets, leaving about 2 inches between cookies to allow for spreading. Now, for the iconic look: take a fork and gently press down on each cookie dough ball, first in one direction and then in the other, creating the classic criss-cross pattern. This not only makes them look beautiful but also helps them bake evenly.
Step 7: Bake
Bake for 9 to 12 minutes, or until the edges are lightly golden brown and the centers look set but still slightly soft. The exact time will depend on your oven and the size of your cookies. I usually start checking around 9 minutes. You want them to look done, but not overbaked, as they’ll continue to cook slightly on the hot baking sheet.
Step 8: Cool & Glaze
Let the cookies cool on the baking sheets for 2-3 minutes before transferring them to a wire rack to cool completely. This is really important! If you move them too soon, they might fall apart. Once they’re fully cooled, you can enjoy them just as they are. If you want to add a little extra something, you can drizzle them with a simple glaze made from powdered sugar and a tiny bit of milk or water, or even dip half of them in melted chocolate. But honestly, they’re perfect unadorned!
Step 9: Slice & Serve
Once completely cool, these Peanut Butter Cookies are ready to be enjoyed! Serve them with a tall glass of cold milk, a cup of coffee, or alongside your favorite ice cream. They’re wonderful just on their own as a sweet treat, or as part of a larger dessert spread. They look particularly lovely on a rustic wooden platter.
What to Serve It With
These Peanut Butter Cookies are so versatile, they fit into almost any occasion! For Breakfast, they’re a delightful treat alongside a strong cup of coffee or a creamy latte. They add a little something special to a slow weekend morning, and honestly, who doesn’t love a sweet start to the day? For Brunch, they’re a fantastic addition to a sweet platter. I love arranging them alongside fresh berries, mini muffins, and maybe some yogurt parfaits. They add that comforting, homemade touch that elevates any spread. As Dessert, they’re a no-brainer. They’re the perfect ending to a meal, especially when paired with a scoop of vanilla or chocolate ice cream. You can even serve them warm, with the ice cream melting into the cookie – pure bliss! They’re also wonderful alongside a fruit crumble or pie, offering a different texture and flavor profile. And for those simple Cozy Snacks, they’re an absolute champion. They’re the ideal companion for an afternoon cup of tea, a movie night, or just when you need a little something sweet to get you through the day. My family tradition is to have them with a glass of cold milk after school, and they’re always gone in a flash!
Top Tips for Perfecting Your Peanut Butter Cookies
I’ve made these Peanut Butter Cookies more times than I can count, and along the way, I’ve picked up a few little tricks that make a big difference. First, when it comes to the peanut butter, please, please use the creamy, commercial kind. Natural peanut butters separate and can make your cookies greasy and crumbly. Trust me, I’ve learned this the hard way! Also, make sure your butter is properly softened. It should give slightly when you press it, but not be melted. If it’s too cold, it won’t cream properly, and if it’s melted, your cookies will spread too much. For mixing, the golden rule is: don’t overmix the dough once you add the flour. Mix until just combined. A little overmixing is the enemy of tender cookies! When it comes to the classic fork marks, make sure your fork is clean and lightly floured if it starts sticking. This ensures those pretty patterns don’t get smudged. For baking, ovens can be tricky. Keep an eye on your cookies during the last few minutes. They should look set around the edges and just a little soft in the center. They’ll firm up as they cool. If your cookies tend to spread too much, try chilling the dough for about 30 minutes before scooping and baking. And for ingredient swaps, while this recipe is perfected for classic peanut butter, you can experiment cautiously. Adding a ½ cup of chocolate chips to the dough is always a win. If you’re feeling adventurous, try a good quality almond butter instead of peanut butter; it gives a slightly different but equally delicious flavor profile. And if you want to get fancy with the glaze, a simple powdered sugar and milk glaze is lovely. For a richer taste, try adding a tablespoon of cocoa powder to the glaze, or even a touch of espresso powder to enhance the chocolate if you’re adding chips.
Storing and Reheating Tips
Storing these delicious Peanut Butter Cookies is pretty straightforward, but doing it right ensures they stay wonderfully soft and chewy. At room temperature, they’re best kept in an airtight container. They’ll stay fresh and delicious for about 3-5 days. I usually just pop them into a cookie tin or a good quality plastic container. If I’m stacking them, I might put a piece of parchment paper between layers to prevent them from sticking too much. For refrigerator storage, I generally don’t refrigerate cookies unless it’s extremely hot and humid, as it can sometimes dry them out a bit. However, if you need to, an airtight container in the fridge will keep them for up to a week. They might lose a little of their chewiness but are still perfectly enjoyable. Freezer instructions are my go-to for longer storage. Once the cookies are completely cooled, wrap them tightly in plastic wrap, then place them in a freezer-safe bag or container. They can stay frozen for up to 2-3 months. To thaw, simply bring them to room temperature – this usually takes a couple of hours. For the glaze, it’s best to apply it just before serving if possible, especially if you plan on storing them. If you need to glaze ahead, let the glaze dry completely before storing the cookies in an airtight container at room temperature. If you’re freezing them, it’s often best to glaze them *after* thawing to prevent the glaze from cracking.
Frequently Asked Questions
Final Thoughts
So there you have it, my absolute favorite Peanut Butter Cookies! I truly believe this recipe is a winner because it delivers that perfect balance of flavor, texture, and ease. It’s the kind of cookie that makes you feel good, both while you’re making it and especially while you’re eating it. It’s a recipe that’s meant to be shared, to bring people together, and to create those warm, fuzzy feelings. If you enjoyed this recipe, I think you might also love my Classic Chocolate Chip Cookies or my Soft Snickerdoodles – they have that same comforting, homemade charm. Give these Peanut Butter Cookies a try, and I promise, they’ll become a staple in your baking repertoire. I can’t wait to hear how yours turn out! Don’t forget to leave a comment below and let me know your favorite way to enjoy them, or any fun variations you tried. Happy baking, everyone!
Peanut Butter Cookies
Ingredients
Main Ingredients
- 1 cup Peanut Butter
- 1 cup Granulated Sugar
- 1 Large Egg
Instructions
Preparation Steps
- Preheat oven to 375 degrees F (190 degrees C).
- In a large bowl, combine peanut butter, sugar, and egg. Mix until a dough forms.
- Roll dough into 1-inch balls. Place on a baking sheet lined with parchment paper.
- Flatten cookies with a fork, making a criss-cross pattern.
- Bake for 8-10 minutes, or until edges are golden brown.
- Let cool on baking sheet for a few minutes before transferring to a wire rack to cool completely.