Oh, the smell of baking! There’s nothing quite like it, is there? It’s that magical aroma that instantly makes a house feel like a home. And when that scent is a rich, comforting mix of peanut butter and warm cake, well, that’s just pure heaven. If you’re anything like me, you probably have a soft spot for anything peanut butter. It’s the ultimate crowd-pleaser, and for good reason! It’s creamy, a little salty, and just hits all the right notes. I remember my mom making a peanut butter swirl cake when I was little, and it was always the first thing to disappear at birthday parties. This Peanut Butter Sheet Cake is my grown-up, everyday version of that same joy. It’s the kind of cake that doesn’t require a special occasion, but somehow makes any day feel special. It’s so much easier than a layer cake, but delivers all that decadent peanut butter flavor you crave. Honestly, if you’re looking for a dessert that’s incredibly easy to whip up but tastes like you spent hours in the kitchen, this peanut butter sheet cake is your new best friend.
What is a peanut butter sheet cake?
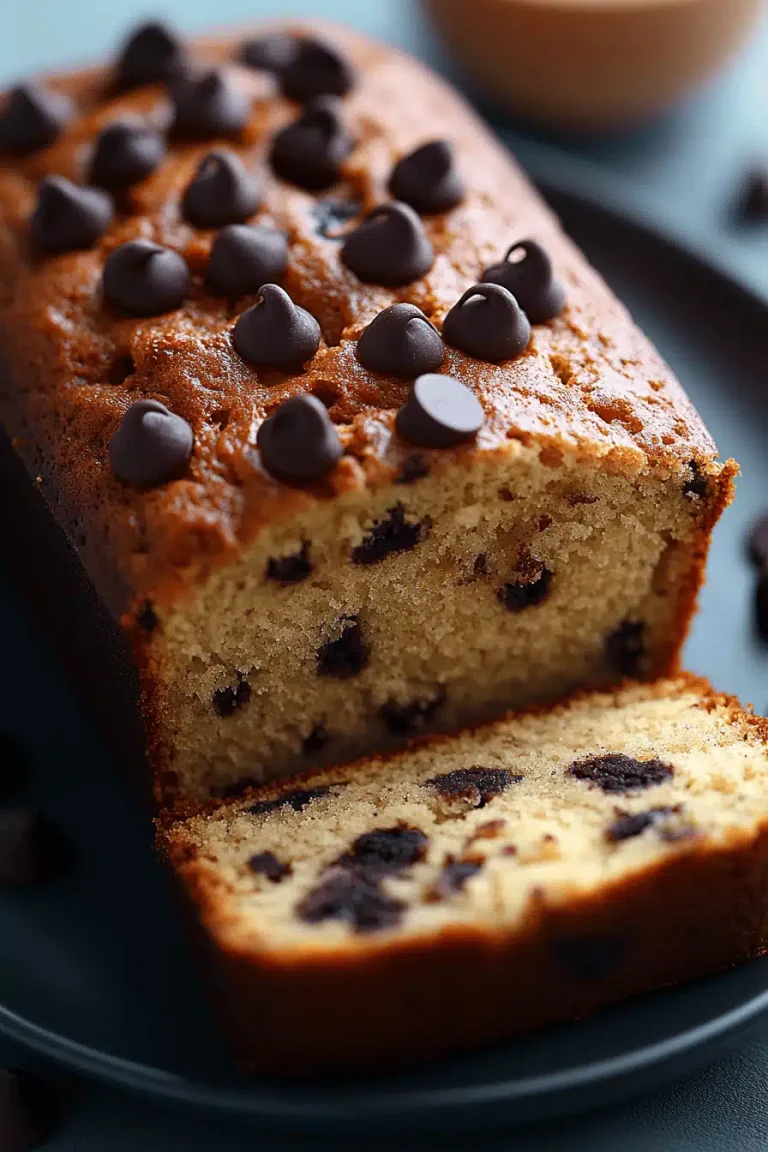
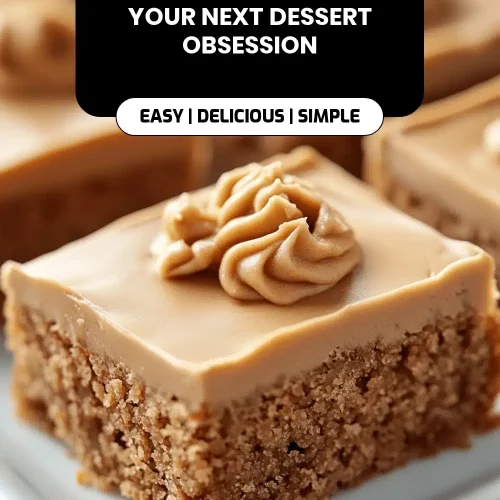
So, what exactly *is* a Peanut Butter sheet cake? Think of it as your favorite, go-to chocolate cake’s equally amazing peanut butter cousin, but baked in a convenient, easy-to-manage sheet pan. Instead of fussing with frosting layers or worrying about perfectly even cake rounds, you bake it all up in one rectangular pan. It’s essentially a tender, moist cake base that’s infused with the unmistakable flavor of peanut butter, often with a luscious peanut butter swirl right through the middle. The whole thing is usually finished off with a simple, sweet glaze that lets the peanut butter really shine. It’s not fussy, it’s not complicated, and it’s designed for maximum enjoyment with minimum effort. It’s the ultimate comfort food baked into cake form, perfect for weeknight treats, potlucks, or anytime you just need a little sweetness in your life without a lot of fuss.
Why you’ll love this recipe?
Honestly, there are so many reasons why this Peanut Butter sheet cake has become a staple in my kitchen. First off, the FLAVOR! It’s everything you dream of when you think of peanut butter. It’s got that perfect balance of sweet and salty, with a rich, nutty depth that’s incredibly satisfying. It’s not overly sweet, which I really appreciate, so you can really taste the peanut butter. Then there’s the SIMPLICITY. I mean, seriously, this is a lifesaver on busy nights or when unexpected guests pop over. You can mix it up in one bowl (sometimes even two, if you’re feeling fancy!) and it bakes up beautifully in a single pan. No fancy techniques required, and cleanup is a breeze. Plus, it’s incredibly COST-EFFECTIVE. Most of the ingredients are pantry staples you probably already have on hand, making it a budget-friendly way to satisfy a serious sweet craving. And let’s talk VERSATILITY! While I adore it just as is, it’s fantastic for serving a crowd because you can easily cut it into as many squares as you need. It’s also fantastic for packed lunches or for a simple afternoon snack. What I love most about this particular peanut butter sheet cake is how forgiving it is. Even if you’re a beginner baker, you’re going to nail this. It’s the kind of recipe that makes you feel like a baking rockstar without all the pressure. It’s seriously a game-changer when you want that homemade dessert feel without the commitment of a more elaborate cake. It’s like a warm hug in cake form!
How do I make a peanut butter sheet cake?
Quick Overview
The process for this Peanut Butter sheet cake is wonderfully straightforward. We’ll mix up a simple cake batter, create a luscious peanut butter filling that gets swirled in, bake it all together until golden and tender, and finish it off with a smooth, sweet glaze. It really is as easy as combining ingredients and letting the oven do the work. You’ll be amazed at how quickly this comes together, making it perfect for spontaneous cravings or when you need a reliable dessert for any gathering.
Ingredients
For the Main Batter:
You’ll need all-purpose flour, granulated sugar, baking soda, and salt. These are your basic cake building blocks. Make sure your baking soda is fresh, otherwise, your cake might not rise as well. I like to use a good quality all-purpose flour; nothing fancy needed here. I always sift my dry ingredients together, just to ensure there are no lumps and everything is perfectly distributed. It’s a small step that really makes a difference in the final texture.
For the Filling:
This is where the magic happens! We’ll use creamy Peanut Butter – the standard kind in the plastic jar works perfectly. Avoid natural peanut butter for this recipe as the oil separation can sometimes affect the texture. You’ll also need some softened butter to make it extra smooth and decadent. A touch of brown sugar adds a lovely caramel note and helps with that gorgeous swirl.
For the Glaze:
A simple combination of powdered sugar, a bit of milk or cream, and some melted peanut butter creates the most irresistible glaze. You can adjust the milk to get your desired consistency. For a thicker glaze, use less milk. For a runnier one, add a touch more. A tiny pinch of salt can actually enhance the sweetness and peanut butter flavor, so don’t skip it!
Step-by-Step Instructions
Step 1: Preheat & Prep Pan
First things first, let’s get your oven preheated to 350°F (175°C). Then, grab a 9×13 inch baking pan. I always like to grease and flour it really well, or even better, line it with parchment paper. This ensures your beautiful cake won’t stick, making serving and cleanup so much easier. If you’re using parchment, leave a little overhang on the sides so you can easily lift the cake out later.
Step 2: Mix Dry Ingredients
In a large mixing bowl, whisk together your all-purpose flour, granulated sugar, baking soda, and salt. Give it a good whisk until everything is nicely combined and there are no lumps. This is your base, so make sure it’s well-mixed!
Step 3: Mix Wet Ingredients
In a separate, medium-sized bowl, you’ll combine the wet ingredients. This usually involves eggs, melted butter or oil, and milk. Whisk them together until they’re smooth and well-emulsified. Sometimes I add a touch of vanilla extract here for an extra layer of flavor – it really complements the peanut butter!
Step 4: Combine
Now, pour the wet ingredients into the bowl with the dry ingredients. Mix them together with a spatula or wooden spoon until *just* combined. Be careful not to overmix! Overmixing can lead to a tough cake, and we want this to be wonderfully tender. A few streaks of flour are okay; they’ll disappear during baking.
Step 5: Prepare Filling
In another small bowl, cream together your softened butter and creamy peanut butter until smooth. Then, stir in the brown sugar. This peanut butter mixture will be thick, and that’s exactly what we want. It will form that delicious ribbon of flavor throughout the cake.
Step 6: Layer & Swirl
Pour about half of your cake batter into the prepared baking pan and spread it evenly. Then, dollop spoonfuls of the peanut butter filling mixture evenly over the batter. Don’t worry about perfection here; it’s all going to swirl together. Pour the remaining cake batter over the peanut butter dollops. Now, take a knife or a skewer and gently swirl the batter and filling together. Make figure-eights or just gentle zigzags to create those beautiful marbled patterns. You want to see ribbons of peanut butter running through the cake.
Step 7: Bake
Pop that pan into your preheated oven and bake for about 30-35 minutes. The exact time can vary depending on your oven, so keep an eye on it. You’ll know it’s done when a toothpick inserted into the center comes out clean, or with just a few moist crumbs attached. The edges should be lightly golden brown.
Step 8: Cool & Glaze
Once it’s baked, let the cake cool in the pan on a wire rack for about 15-20 minutes. While it’s cooling, whisk together the powdered sugar, milk, and melted peanut butter for the glaze. You want a pourable but not too thin consistency. Drizzle or spread the glaze evenly over the still-warm cake. The warmth of the cake will help the glaze melt slightly and spread beautifully.
Step 9: Slice & Serve
Let the cake cool completely before slicing. This is important, especially if you want clean cuts! Once it’s fully cooled and the glaze has set a bit, cut it into squares and enjoy. It’s absolutely divine served at room temperature, but I sometimes enjoy a slightly warm piece too. The contrast of the tender cake and the smooth glaze is just heavenly.
What to Serve It With
This peanut butter sheet cake is wonderfully versatile, which is one of its many charms! For breakfast, it’s surprisingly delicious. A small square with a hot cup of coffee is an absolute treat. It’s not overly sweet, so it feels almost like a decadent pastry. For brunch, I love to cut it into slightly smaller squares and arrange them on a pretty platter. It pairs beautifully with fresh fruit salad or a dollop of whipped cream. It feels elegant enough for a special occasion but still relaxed. As a dessert, it’s a winner, of course! Serve it with a scoop of vanilla ice cream, or even a drizzle of chocolate sauce if you’re feeling extra indulgent. It’s perfect after a hearty meal. For those cozy snack moments, a generous slice with a cold glass of milk is pure comfort. My kids often ask for this when they get home from school, and it’s the perfect after-school pick-me-up. My family has a tradition of having this cake on movie nights; it’s the perfect shareable treat for the couch. I’ve also found it’s fantastic alongside a rich chocolate dessert for those who really love their chocolate and peanut butter combinations.
Top Tips for Perfecting Your Peanut Butter Sheet Cake
Over the years of making this peanut butter sheet cake (and trust me, it’s been many!), I’ve picked up a few little tricks that help make it absolutely perfect every single time. First, on the Zucchini Prep: If you’re adding zucchini (which I often do for extra moisture, but this recipe works wonderfully without it too!), make sure you squeeze out as much moisture as possible. Grate your zucchini, put it in a cheesecloth or a fine-mesh sieve, and press out the excess liquid. This prevents a watery cake. For Mixing Advice: I can’t stress this enough – don’t overmix the batter! Mix until the ingredients are just combined. A few little lumps are fine. Overmixing develops the gluten in the flour, leading to a dense, tough cake, and we want this to be light and tender. For Swirl Customization: When you’re swirling the peanut butter filling, don’t go crazy trying to mix it completely. You want those distinct ribbons of peanut butter. Gentle swirls with a knife or skewer are all you need for visual appeal and delicious pockets of peanut butter goodness. For Ingredient Swaps: While this recipe is perfected with the ingredients listed, I have successfully made it with a plant-based milk for the glaze, and it turned out just as creamy. For the cake itself, I haven’t experimented too much with flour swaps, but I imagine a good 1:1 gluten-free blend might work, though the texture could be slightly different. For Baking Tips: Always trust the toothpick test! Ovens can be finicky, so don’t rely solely on the time. Also, try to bake it in the center of your oven to ensure even cooking. If your oven tends to run hot, you might need to slightly reduce the temperature or baking time. For Glaze Variations: If you prefer a richer glaze, you can substitute some of the milk with heavy cream. If you want a thinner glaze for drizzling, just add a tiny bit more milk, a teaspoon at a time, until you reach your desired consistency. I’ve also added a tiny splash of peanut butter extract to the glaze before for an extra peanut butter punch, but it’s definitely not necessary!
Storing and Reheating Tips
This peanut butter sheet cake is surprisingly resilient when it comes to storage, which is another reason I love it so much. For Room Temperature storage, if it’s not too warm where you live, the cake can stay delicious for about 2-3 days. Just make sure to cover it tightly with plastic wrap or store it in an airtight container. The glaze helps to seal in moisture. If you’re heading into warmer weather or want it to last longer, Refrigerator Storage is your best bet. Store it in an airtight container in the fridge for up to a week. The texture might firm up slightly, but it’s still absolutely delicious. When you’re ready to enjoy a slice from the fridge, I find it’s best to let it sit at room temperature for about 20-30 minutes to soften up a bit. For longer storage, Freezer Instructions are excellent. You can wrap the cooled, unfrosted cake (or individual slices) tightly in plastic wrap, then in aluminum foil or place in a freezer-safe bag. It will keep well for up to 2-3 months. To thaw, let it come to room temperature overnight on the counter. If you’ve frozen it unfrosted, you can make the glaze fresh when you’re ready to serve. For Glaze Timing Advice, it’s always best to glaze the cake once it’s mostly cooled but still slightly warm. This allows the glaze to set nicely. If you are freezing it, I would recommend freezing it *without* the glaze, and then adding the glaze once it’s thawed and at room temperature. This prevents the glaze from cracking or becoming sticky during freezing.
Frequently Asked Questions
Final Thoughts
This peanut butter sheet cake really is a special recipe for me. It’s more than just a dessert; it’s a little slice of happiness that’s incredibly easy to share. The way the peanut butter flavor permeates every bite, combined with the tender cake and sweet glaze, is just pure comfort food perfection. It’s the kind of recipe that makes you feel good about baking, no matter your skill level. If you love peanut butter as much as I do, or if you’re just looking for a reliable, delicious, and easy dessert that will impress everyone, you absolutely have to give this peanut butter sheet cake a try. It’s a winner in my book, and I hope it becomes a favorite in your home too! If you try this recipe, I’d be thrilled to hear how it turned out for you! Share your thoughts, any variations you tried, or even a picture in the comments below. Happy baking!
Peanut Butter Sheet Cake
Ingredients
Cake Ingredients
- 2.25 cups all-purpose flour
- 2 teaspoons baking powder
- 0.5 teaspoon baking soda
- 0.5 teaspoon salt
- 1 cup unsalted butter, softened
- 2 cups granulated sugar
- 2 large eggs
- 1 cup peanut butter
- 1 teaspoon vanilla extract
- 1 cup buttermilk
Frosting Ingredients
- 0.5 cup unsalted butter, softened
- 3 cups powdered sugar
- 0.5 cup peanut butter
- 0.25 cup milk
- 1 teaspoon vanilla extract
Instructions
Cake Instructions
- Preheat oven to 350 degrees F (175 degrees C). Grease and flour a 9x13 inch baking pan.
- In a large bowl, whisk together flour, baking powder, baking soda, and salt.
- In a separate bowl, cream together butter and sugar until light and fluffy. Beat in eggs one at a time, then stir in peanut butter and vanilla.
- Gradually add dry ingredients to wet ingredients, alternating with buttermilk, beginning and ending with dry ingredients. Mix until just combined.
- Pour batter into prepared pan and bake for 20-25 minutes, or until a wooden skewer inserted into the center comes out clean.
- Let cool completely before frosting.
Frosting Instructions
- In a medium bowl, beat butter until creamy. Gradually add powdered sugar, peanut butter, milk, and vanilla extract. Beat until smooth and creamy.
- Frost the cooled cake.