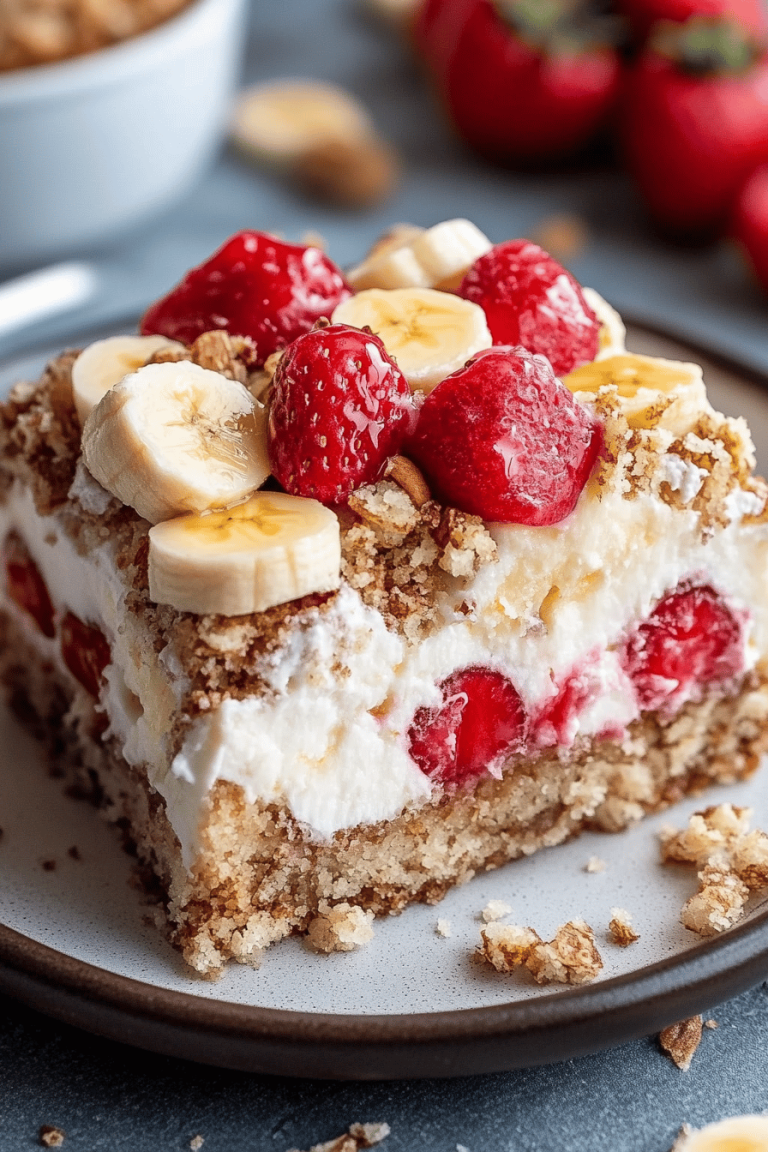
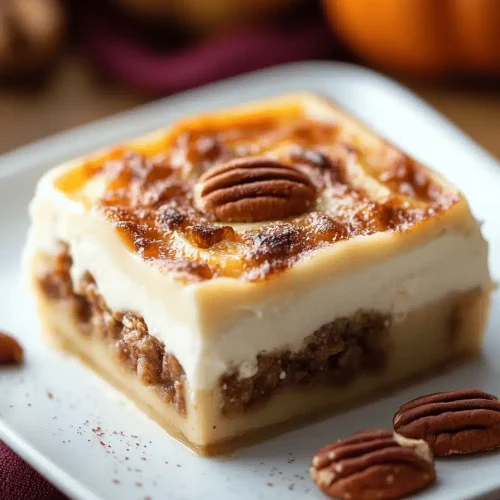
Oh, how I love Pecan Pie. There’s something so comforting about that sweet, gooey filling and the nutty crunch of pecans. It’s a classic for a reason, right? But let’s be honest, sometimes the thought of making a full-sized pie can be a little… daunting. Especially on a weeknight! That’s why I developed these amazing pecan pie bites. They’re like a little burst of pure pecan pie happiness, but so much easier to make and share. My family devours these. Seriously, I made a batch last Saturday and by Sunday morning, there wasn’t a single crumb left. My son even tried to sneak one for breakfast, bless his heart! If you’re looking for a simple way to get that incredible pecan pie flavor without all the fuss, these little gems are an absolute lifesaver. They’re honestly just as satisfying as a slice of the real thing, maybe even better because you get that perfect ratio of crust to filling in every single bite.
What are pecan pie bites?
So, what exactly are these delightful little treats? Think of them as the adorable, more portable cousins of your favorite traditional Pecan Pie. Instead of a large, traditional pie crust, we’re talking about individual portions, usually baked in mini muffin tins or sometimes even in a brownie pan and cut into squares. The magic lies in the intensely flavored, nutty filling that’s perfectly balanced with a sweet, caramel-like base. It’s all the best parts of pecan pie – the rich sweetness, the toasted nuttiness, the tender-yet-crisp texture – packed into a bite-sized package. They’re essentially a shortcut to pecan pie bliss, and honestly, they’re so addictive you’ll probably find yourself popping them one after another. They’re essentially mini celebrations of flavor!
Why you’ll love this recipe?
I’ve made more than my fair share of desserts over the years, and I can confidently say this Pecan Pie bites recipe is a winner for so many reasons. First off, the flavor is just out of this world. It’s that deep, caramel-y sweetness with the satisfying crunch of pecans that just makes you close your eyes and savor every mouthful. It’s intensely satisfying without being overwhelmingly sweet, a balance I worked hard to perfect. Secondly, and this is a big one for me, the simplicity! You don’t need to worry about blind baking pie crusts or dealing with a finicky pie dough. It’s a straightforward mix-and-bake situation, which is a lifesaver when I’m short on time but still want to whip up something special. And the cost? Super budget-friendly. Most of the ingredients are pantry staples, making it an economical way to satisfy that pecan pie craving. Plus, they’re incredibly versatile. You can easily dress them up or down, making them perfect for everything from a casual potluck to a more elegant dessert table. What I love most about these pecan pie bites is that they deliver all the nostalgic, comforting flavor of a classic pecan pie in a format that’s just so darn easy to enjoy and share. They’re truly the best of both worlds!
How do I make Pecan Pie Bites?
Quick Overview
Making these Pecan Pie bites is surprisingly straightforward. You’ll mix up a simple, no-fuss batter that forms the base, then prepare a rich, nutty pecan filling. You’ll layer these two components in your prepared muffin tins, swirl them together a bit for a gorgeous marbled effect, and bake until golden and delicious. The whole process is designed to get that incredible pecan pie flavor into your hands with minimal effort. It’s truly a straightforward path to dessert heaven, and I promise, the results are so worth it!
Ingredients
For the Main Batter:
You’ll need about 1 and 1/2 cups of all-purpose flour. I always opt for a good quality, unbleached all-purpose flour, but honestly, any standard brand works perfectly. Make sure it’s measured correctly – just spoon it into your measuring cup and level it off, no scooping! Then, we have 1 teaspoon of baking powder for a little lift, and 1/2 teaspoon of salt to balance out all that sweetness. And for richness and binding, 1/2 cup (1 stick) of unsalted butter, softened. Softened is key here; you don’t want it melted or rock hard. Just give it a gentle press with your finger, and it should yield easily. You’ll also need 1 cup of granulated sugar, 2 large eggs, and 1 teaspoon of pure vanilla extract. The vanilla is non-negotiable for me; it really elevates the whole flavor profile.
For the Filling:
This is where the Pecan Pie magic happens! We’re talking about 1 and 1/2 cups of chopped pecans. I like a mix of smaller and slightly larger pieces for texture. You can buy them pre-chopped, but I often find chopping them myself gives me more control over the size. For that classic pecan pie gooeyness, you’ll need 1 cup of packed light brown sugar. Using light brown sugar gives it a lovely caramel undertone. Then, 1/2 cup of corn syrup – this is essential for that signature texture. You can use dark corn syrup for a deeper flavor if you prefer. And for a touch of richness that makes everything sing, 1/4 cup (half a stick) of unsalted butter, melted. You’ll also want 1 teaspoon of vanilla extract here, and a pinch of salt.
For the Glaze:
This is optional, but highly recommended for that extra touch of shine and sweetness! You’ll need about 1/2 cup of powdered sugar. Make sure it’s sifted to avoid any lumps. Then, 2-3 tablespoons of milk or heavy cream. Heavy cream will give you a richer, glossier glaze, but milk works perfectly fine too. And for a hint of flavor that ties it all together, 1/2 teaspoon of vanilla extract.
Step-by-Step Instructions
Step 1: Preheat & Prep Pan
First things first, preheat your oven to 350°F (175°C). Now, grab your mini muffin tin. You’ll want to grease it really well. I usually use a combination of baking spray and then a little bit of melted butter or cooking oil brushed into each cup. This ensures your beautiful little pecan pie bites don’t stick. If you have those little silicone liners, those are fantastic too, but a well-greased tin is usually all you need. Don’t skip this step; no one likes a stuck treat!
Step 2: Mix Dry Ingredients
In a medium bowl, whisk together your 1 and 1/2 cups of all-purpose flour, 1 teaspoon of baking powder, and 1/2 teaspoon of salt. Give it a good whisk to make sure everything is evenly distributed. This ensures your leavening and salt are spread throughout the batter for a consistent texture and flavor. I always make sure to get into the corners of the bowl!
Step 3: Mix Wet Ingredients
In a separate, larger bowl, cream together your softened 1/2 cup of unsalted butter and 1 cup of granulated sugar until light and fluffy. You can use an electric mixer for this, or just a good old wooden spoon and some elbow grease. Then, beat in your 2 large eggs, one at a time, mixing well after each addition. Stir in 1 teaspoon of vanilla extract. The mixture should look smooth and slightly glossy.
Step 4: Combine
Now, gradually add the dry ingredients to the wet ingredients. Mix on low speed (if using a mixer) or stir with a spoon until just combined. Be careful not to overmix! Overmixing can lead to a tougher texture. You want to see just a few streaks of flour disappear. It should be a thick, luscious batter.
Step 5: Prepare Filling
In a separate bowl, combine your 1 and 1/2 cups of chopped pecans, 1 cup of packed light brown sugar, 1/2 cup of corn syrup, 1/4 cup of melted unsalted butter, 1 teaspoon of vanilla extract, and a pinch of salt. Stir everything together until well combined. This mixture will be thick and fragrant. The smell of the brown sugar and pecans together is just heavenly!
Step 6: Layer & Swirl
Now for the fun part! Spoon about a tablespoon of the main batter into each prepared mini muffin cup. Don’t fill them all the way up, just enough to form a base layer. Then, top each dollop of batter with about a teaspoon of the pecan filling. Now, using a toothpick or a small skewer, gently swirl the filling into the batter. You don’t need to go crazy, just a few gentle swirls to create a pretty marbled effect. This also helps ensure the pecan topping is nicely integrated.
Step 7: Bake
Bake for 18-22 minutes, or until a toothpick inserted into the center of a bite comes out clean and the edges are golden brown. The centers should be set, not jiggly. Keep an eye on them, as oven temperatures can vary. If they start to brown too quickly, you can always loosely tent them with foil.
Step 8: Cool & Glaze
Let the pecan pie bites cool in the muffin tin for about 5-10 minutes. This allows them to firm up a bit. Then, carefully transfer them to a wire rack to cool completely. Once they’re fully cooled, you can whip up the glaze. Whisk together 1/2 cup of powdered sugar, 2-3 tablespoons of milk or cream, and 1/2 teaspoon of vanilla extract until smooth. Drizzle this over the cooled bites. If you like a thicker glaze, just add a little more powdered sugar. If you like it thinner, add a tiny bit more milk.
Step 9: Slice & Serve
Once the glaze has set slightly, your pecan pie bites are ready to be enjoyed! They’re best served at room temperature. You can easily pick them up and eat them, which is part of their charm. They look so pretty on a platter, and they disappear just as fast!
What to Serve It With
These pecan pie bites are so wonderfully versatile, they fit into almost any occasion. For breakfast, they are an absolute treat alongside a steaming mug of good coffee. Imagine a Saturday morning, a cup of dark roast, and one of these little bites – pure bliss! They’re not overly sweet for a morning treat, especially without the glaze. For brunch, they add a touch of elegance to any spread. Arrange them on a tiered stand with some fresh fruit and maybe some mini quiches. They look sophisticated but are so easy to grab and enjoy. As a dessert, they’re phenomenal. They’re perfect on a dessert buffet alongside other small treats. I love serving them with a dollop of whipped cream or a small scoop of vanilla bean ice cream for an extra special touch. And for those cozy snack moments? These are my go-to. When that sweet craving hits in the evening and I don’t want to commit to a whole cake, these are just perfect. I’ll often serve them with a glass of milk or a warm cup of herbal tea. My family has a tradition of having one after Sunday dinner, and it’s always met with happy sighs!
Top Tips for Perfecting Your Pecan Pie Bites
Over the years, I’ve picked up a few tricks that I think really make these pecan pie bites shine. First, when it comes to your pecans, toasting them lightly before chopping can really bring out their nutty flavor. Just a few minutes in a dry skillet over medium heat until fragrant, then let them cool before chopping. For the batter, remember that rule about not overmixing? It’s super important. Mix just until the ingredients are combined. Overworking the flour develops gluten, which can make your bites a bit tough. If you’re using a stand mixer, use the lowest speed and stop as soon as the flour is incorporated. When it comes to the swirl, a little goes a long way. You want to create a beautiful marbled effect, not completely blend the filling into the batter. Gentle, sweeping motions with a toothpick are all you need. Some people like to add a tiny pinch of cinnamon to the filling – it’s not traditional, but it’s delicious and adds a lovely warmth. If you’re finding your glaze too thick, just add a teaspoon of milk or cream at a time until it reaches your desired drizzling consistency. If it’s too thin, whisk in a bit more powdered sugar. And for baking, always err on the side of slightly underbaking rather than overbaking. They’ll continue to cook a bit as they cool, and you want that lovely gooey center.
Storing and Reheating Tips
These pecan pie bites are best enjoyed fresh, but they do store quite well. At room temperature, they’ll stay delicious for about 2-3 days. Just keep them in an airtight container. Make sure they’re completely cooled before sealing them up, otherwise, condensation can make them soggy. If you think you won’t get through them that quickly, your refrigerator is your friend. They’ll last for up to a week in the fridge, stored in an airtight container. I find they taste best at room temperature, so if you’ve kept them in the fridge, just let them sit out for about 15-20 minutes before serving. For longer storage, freezing is an excellent option. You can freeze them for up to 2-3 months. I like to flash-freeze them on a baking sheet first, without the glaze if you plan to glaze them after thawing. Once they’re solid, transfer them to a freezer bag or airtight container. When you’re ready to enjoy them, thaw them overnight in the refrigerator or on the counter. If you want to add the glaze after freezing, make it fresh when you’re ready to serve. Just remember, the glaze is best applied when the bites are completely cool!
Frequently Asked Questions
Final Thoughts
Honestly, these pecan pie bites are one of those recipes that just brings me so much joy. They capture that deep, comforting flavor of traditional pecan pie in a format that’s so much more approachable for everyday baking. The combination of the sweet, nutty filling with that tender base is simply irresistible. They’re proof that you don’t need to spend hours in the kitchen to create something truly special and delicious. I’ve shared this recipe with friends, and they always come back raving about how easy it was and how quickly they disappeared! If you’re a fan of pecan pie but are looking for a simpler, more delightful way to enjoy it, please give these pecan pie bites a try. I promise you won’t be disappointed. If you love these, you might also enjoy my chewy chocolate chip cookies or my easy apple crumble for more comforting treats. I can’t wait to hear how yours turn out! Please leave a comment below and let me know what you think, or share your own favorite variations!
pecan pie bites
Ingredients
Crust Ingredients
- 0.75 cup salted sweet cream butter softened
- 0.33 cup light brown sugar packed
- 1.75 cups all-purpose flour
Pecan Pie Filling Ingredients
- 1.5 cups chopped pecans
- 1 cup light brown sugar packed
- 0.5 cup light corn syrup
- 3 tbsp salted sweet cream butter melted
- 1.5 tsp vanilla extract
Instructions
Preparation Steps
- Using a stand mixer, or a handheld mixer on medium-high speed, beat the butter for 1 - 1.5 minutes until smooth.
- Add the light brown sugar and continue to mix for 30 seconds.
- Add the flour and mix just until well incorporated. Cover with plastic wrap and chill in the refrigerator for 30 minutes.
- Using a medium size mixing bowl, stir together the light brown sugar, light corn syrup, butter and vanilla extract. Stir until the mixture is well incorporated.
- Stir in the pecans and set it aside.
- Preheat the oven to 350°F. Generously spray a mini muffin pan and set it aside.
- Remove the dough from the refrigerator. Using a 1 tablespoon cookie scoop, scoop out the dough and roll into balls.
- Using your thumb or a dough tamper, depress the dough into the individual muffin cups.
- Spoon enough pie filling to fill the cups, being careful to not dribble the filling.
- Bake for 12 - 15 minutes, until the crust is golden.
- Allow the mini pies to completely cool before removing from the pans.