
You know those days, right? The ones where you’re juggling a million things, the afternoon slump hits HARD, and all you want is a little sweet pick-me-up that doesn’t involve a two-hour baking project or a sugar crash an hour later? Yeah, me too. And that’s exactly why I practically live on these pumpkin no-bake energy bites when fall rolls around. Seriously, they’re a game-changer. Imagine tiny little bursts of cozy, spiced pumpkin goodness, packed with all the good stuff that keeps you going. They’re like a hug in a bite, and if you love a good oatmeal cookie or a classic energy ball, you are going to be OBSESSED with these. I’ve been making variations of these for years, but once I nailed down this pumpkin version, it became a staple. My kitchen smells like autumn magic when these are in town, and honestly, they disappear faster than you can say “trick or treat!”
What are pumpkin no-bake energy bites?
So, what exactly *are* these little delights? Think of them as your ultimate, no-fuss, healthy-ish treat. They’re essentially a delightful mix of oats, pumpkin puree, healthy fats, and a symphony of warm fall spices, all rolled into perfectly bite-sized spheres. The “no-bake” part is key here – no oven required, which is a lifesaver on those hot days or when you just can’t be bothered to fire up the oven. The name itself, “pumpkin no-bake energy bites,” pretty much sums it up: they’re packed with pumpkin flavor, you don’t bake them, and they give you a lovely little energy boost. It’s like the best parts of Pumpkin Pie and your favorite healthy snack bar all rolled into one convenient, grab-and-go package. Super simple, incredibly satisfying, and just downright delicious.
Why you’ll love this recipe?
Oh, where do I even begin with why you’ll adore these pumpkin no-bake energy bites? First off, the FLAVOR. It’s pure autumnal bliss. The sweet, earthy notes of pumpkin pair perfectly with cinnamon, nutmeg, and a touch of ginger. It tastes like fall in its most delicious form, but without all the fuss of baking a pie. Then there’s the SIMPLICITY. I’m talking about a recipe that takes maybe 10-15 minutes of active time, tops. You just toss everything into a bowl, mix, and roll. It’s so easy, my kids can help make them (and they love doing it, which is a bonus!). They are also incredibly COST-EFFECTIVE. Most of the ingredients are pantry staples, and even the pumpkin puree is pretty budget-friendly, especially when bought in season. What I love most, though, is their VERSATILITY. You can enjoy them as a quick breakfast on the go, a mid-afternoon snack to beat the slump, a healthy pre- or post-workout refuel, or even a guilt-free dessert when you’re craving something sweet. They’re fantastic with a warm cup of coffee or a creamy glass of almond milk. Compared to other no-bake balls I’ve made, these have a special cozy factor that just feels so right for this time of year. They’re a true crowd-pleaser and a personal favorite for those busy fall days.
How do I make no-bake pumpkin energy bites?
Quick Overview
Making these pumpkin no-bake energy bites couldn’t be easier. You’ll simply combine your dry ingredients, then add your wet ingredients and pumpkin puree, mix it all up until it forms a wonderfully sticky dough, and then roll them into little balls. The magic happens in the chilling process, which firms them up perfectly. It’s a no-cook, no-sweat situation that delivers maximum fall flavor and energy. Seriously, the hardest part is waiting for them to chill!
Ingredients
For the Main Batter:
Rolled Oats: About 1.5 cups. Make sure you’re using *rolled oats* (also called old-fashioned oats), not quick oats or instant oats. The old-fashioned ones give you the best texture and hold their shape. If you use quick oats, they can get a bit too mushy. I always buy a big container of these because they’re so versatile for breakfast and baking.
Nut Butter: 1/2 cup of your favorite. Peanut Butter is a classic and works beautifully, but almond butter or even cashew butter are also fantastic options. Just make sure it’s natural and unsweetened if possible, so you can control the sweetness yourself. Creamy or crunchy, either works!
Pumpkin Puree: 1/2 cup. This is the star! Make sure you’re using pure pumpkin puree, NOT pumpkin pie filling. The pie filling has added sugars and spices you don’t want messing with your perfect flavor balance. I usually buy a can when they’re on sale in the fall.
Sweetener: 1/3 cup of honey or maple syrup. Maple syrup gives it a wonderful, deep flavor that’s perfect for fall. Honey is also delicious. You can adjust this amount based on how sweet you like things. I find this amount just right, but if you’re using very sweet nut butter, you might need a little less.
Chia Seeds or Flax Seeds: 2 tablespoons. These little powerhouses add a great nutritional boost and help bind everything together. Chia seeds are my go-to for their subtle texture and health benefits. You can also use ground flax seeds if that’s what you have on hand.
Vanilla Extract: 1 teaspoon. Just a splash to round out all those wonderful flavors.
pumpkin pie Spice: 1 to 1.5 teaspoons. This is where the magic really happens! I love a good blend with cinnamon, nutmeg, cloves, and ginger. If you don’t have pumpkin pie spice, you can make your own by mixing 1 teaspoon cinnamon, 1/4 teaspoon nutmeg, 1/8 teaspoon cloves, and 1/8 teaspoon ginger.
Pinch of Salt: Just a little to enhance all the flavors.
For Rolling (Optional but Recommended):
Extra Oats, Chopped Nuts, or Cinnamon: For coating. This gives them a nice finish and an extra bit of texture. I often roll mine in a little extra cinnamon sugar or some finely chopped pecans.
Step-by-Step Instructions
Step 1: Preheat & Prep Pan
This step is technically for baking, but for no-bake treats, we’re going to prep a baking sheet or plate with parchment paper or wax paper. This is where your finished energy bites will chill. Trust me, this makes cleanup a breeze and prevents them from sticking!
Step 2: Mix Dry Ingredients
In a medium-sized bowl, add your rolled oats, chia seeds (or ground flax), pumpkin pie spice, and the pinch of salt. Give everything a good stir with a whisk or a fork to make sure the spices are evenly distributed throughout the oats. This ensures every single bite is packed with that warm, comforting flavor we’re going for.
Step 3: Mix Wet Ingredients
In a separate, larger bowl (this is where we’ll mix everything together), combine the nut butter, pumpkin puree, honey or maple syrup, and vanilla extract. Stir it all together really well until it’s smooth and creamy. It should look like a lovely, thick, pumpkin-y sauce. Make sure there are no big lumps of nut butter hiding in there.
Step 4: Combine
Now, pour the dry ingredients from the smaller bowl into the larger bowl with the wet ingredients. Use a sturdy spoon or a spatula to mix everything together. Keep stirring and folding until it’s all combined and you have a wonderfully sticky, cohesive dough. It should be thick enough to hold its shape when you roll it. If it seems a little too wet, you can add another tablespoon or two of oats. If it’s too dry, a tiny splash more maple syrup or a teaspoon of water can help.
Step 5: Prepare Filling
This step is more about deciding if you want to add anything *extra* to your bites. Some people like to add mini chocolate chips, chopped nuts, or even some dried cranberries for extra texture and flavor. If you’re adding these, stir them in now with your dry and wet ingredients. I usually keep mine simple to really let the pumpkin and spice shine, but feel free to get creative!
Step 6: Layer & Swirl
This step is more about technique for rolling. Take about a tablespoon of the dough and roll it between your palms to form a smooth ball. If you want to coat them, now’s the time! Roll the ball in some extra chopped nuts, shredded coconut, or a little cinnamon sugar mixture. Place the finished ball on your prepared baking sheet. Repeat with the remaining dough until you have a tray full of little pumpkin delights!
Step 7: Bake
This is the no-bake part! Instead of baking, we’re going to pop these into the refrigerator for at least 30 minutes. This chilling time is crucial. It allows the oats to soften slightly and the whole mixture to firm up so the bites hold their shape. You can also pop them in the freezer for about 15-20 minutes if you’re in a hurry!
Step 8: Cool & Glaze
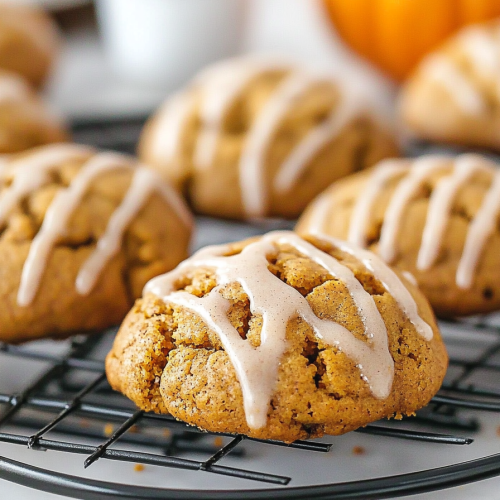
Once they’re firm and chilled, your pumpkin no-bake energy bites are ready to enjoy! If you chose to coat them, they should look lovely. If not, they’re still delicious! For a little extra something, you *could* drizzle them with a simple glaze made from powdered sugar and a tiny bit of milk or pumpkin puree, but honestly, they’re perfect as is. I usually skip the glaze to keep them on the healthier side.
Step 9: Slice & Serve
These are meant to be eaten whole, like little spheres of happiness! Serve them chilled. They are perfect for grabbing and popping into your mouth whenever that craving strikes. They look adorable arranged on a plate for a snack platter or packed into a lunchbox.
What to Serve It With
These pumpkin no-bake energy bites are so versatile, they fit into pretty much any meal or snack occasion!
For Breakfast: They’re a lifesaver for busy mornings. Grab a couple with your coffee or tea for a quick, satisfying start. They pair beautifully with a hot latte or a crisp apple cider. You can even crumble one over your yogurt or oatmeal for an extra flavor boost.
For Brunch: Arrange them on a pretty platter alongside other fall treats like mini muffins or fruit skewers. They add a lovely, wholesome element to a brunch spread. A sparkling cranberry mocktail or a mimosa would be a perfect beverage pairing.
As Dessert: When you’re craving something sweet but don’t want to go overboard, these are ideal. They satisfy that sweet tooth in a healthy way. Serve them after dinner with a small glass of milk or a cup of herbal tea. They also make a cute addition to a dessert board if you’re entertaining.
For Cozy Snacks: This is probably my favorite way to enjoy them! After the kids are in bed, I’ll sneak a couple with a big mug of hot chocolate or a warm bowl of oatmeal. They’re the perfect companion for a cozy evening reading a book or watching a movie. My kids also adore them as an after-school snack, usually with a glass of cold milk.
My family tradition is to have a batch ready to go every Monday morning. It makes getting out the door so much smoother, and knowing they have a healthy, delicious snack waiting for them always gets a thumbs-up from the kids.
Top Tips for Perfecting Your Pumpkin No-Bake Energy Bites
I’ve made these pumpkin no-bake energy bites more times than I can count, and over the years, I’ve picked up a few tricks that I think really make a difference.
Pumpkin Prep: Always, always, always use pure pumpkin puree and make sure it’s well-drained if it seems particularly watery. You don’t want excess moisture diluting your mixture, or your bites might end up too soft. I usually give my can a good stir before measuring to ensure consistency. If you’re using canned pumpkin puree that’s been open for a while, you might want to strain it a bit before using.
Mixing Advice: Don’t overmix! Once the dry and wet ingredients are just combined into a dough, stop stirring. Overmixing can make the oats tough or break them down too much, leading to a gummy texture. You want a nice, cohesive dough that holds together easily when you press it. If it feels too sticky to handle, try chilling the dough for another 10-15 minutes before rolling. This has saved me more than once when my kitchen is warm!
Swirl Customization: While there’s no “swirling” in the traditional sense with these no-bake bites, I often like to customize them by adding things in. If you’re adding mini chocolate chips or chopped nuts, make sure they’re distributed evenly. I sometimes press a single chocolate chip into the center of each ball before rolling for a little surprise inside. For coating, rolling them in finely chopped pecans or walnuts gives a lovely nutty crunch that complements the pumpkin flavor beautifully.
Ingredient Swaps: If you don’t have rolled oats, you can try steel-cut oats that have been cooked and cooled, but the texture will be different. Regular rolled oats are truly best. For the nut butter, tahini can work in a pinch, but it has a stronger flavor. If you have allergies, sunflower seed butter is a great alternative. Feel free to play with the spices too! A pinch of cardamom or a dash of allspice can add interesting depth. I’ve even tried a tiny bit of finely grated orange zest, which is surprisingly delicious!
Baking Tips: Again, no baking here! The key is the chilling time. Make sure you give them enough time in the fridge to firm up properly. If they are still too soft after 30 minutes, leave them longer. You can even make the dough ahead of time, chill it in the bowl, and then roll and coat them when you’re ready. This makes them even quicker to assemble!
Glaze Variations: If you absolutely want a glaze, keep it simple. Mix about 1/2 cup powdered sugar with 1-2 tablespoons of milk or even pumpkin puree until you get a drizzle-able consistency. You can add a tiny drop of vanilla or a sprinkle of cinnamon to that too. But honestly, I think they’re at their best without the added sugar, letting the natural sweetness of the maple syrup and the spices shine through.
Storing and Reheating Tips
One of the best things about these pumpkin no-bake energy bites is how well they store, making them perfect for meal prep.
Room Temperature: You can keep them at room temperature for a day, maybe two, if your house isn’t too warm. I usually don’t do this because I prefer them firm, but if you’re taking them out for a quick snack, it’s fine. Just make sure they’re in an airtight container so they don’t dry out. They’ll maintain their best texture when chilled, though.
Refrigerator Storage: This is my preferred method! Store them in an airtight container in the refrigerator for up to a week. They stay nice and firm, and the flavors meld together even more. I like to use glass containers with tight-fitting lids. They’re always ready to grab and go!
Freezer Instructions: Want to make a big batch and have them on hand for weeks? Freeze them! Place the rolled and chilled bites in a single layer on a baking sheet and freeze until solid, about 1-2 hours. Then, transfer them to a freezer-safe airtight container or a zip-top bag. They’ll keep in the freezer for up to 2-3 months. To thaw, just transfer them to the refrigerator overnight, or pop a few in the microwave for about 10-15 seconds if you’re in a hurry and want them slightly soft.
Glaze Timing Advice: If you do choose to add a glaze, it’s best to add it just before serving or when you’re ready to eat them. Glaze can sometimes become sticky or dissolve if left on for too long, especially in the fridge or freezer. If you’re freezing them with a glaze, make sure the glaze is completely set before you freeze them, but honestly, I’d recommend glazing after thawing for the best results.
Frequently Asked Questions
Final Thoughts
So there you have it – my absolute go-to pumpkin no-bake energy bites! I truly hope you give these a try. They are such a simple, delicious, and wholesome way to get your pumpkin fix this season. They’ve been a total lifesaver for me on busy days, providing that much-needed energy boost and satisfying my sweet cravings without the guilt. Whether you’re a busy parent, a student, a fitness enthusiast, or just someone who loves all things fall, I just know you’re going to love these little powerhouses. They’re a testament to how simple, wholesome ingredients can come together to create something truly magical. If you end up making them, I’d absolutely love to hear what you think! Drop a comment below with your thoughts or any fun variations you try. And don’t forget to share your creations on social media – I love seeing your kitchen adventures! Happy snacking!
Pumpkin No-Bake Energy Bites
Ingredients
Main Ingredients
- 1.5 cup rolled oats
- 0.75 cup pumpkin puree
- 0.5 cup peanut butter
- 0.25 cup honey
- 1 teaspoon pumpkin pie spice
- 0.25 cup chocolate chips
Instructions
Preparation Steps
- In a large bowl, combine all ingredients.
- Mix well until everything is combined.
- Roll into 1-inch balls.
- Refrigerate for at least 30 minutes before serving.


