There are some recipes that just stick with you, aren’t there? This shredded chicken is one of those for me. It’s not just another weeknight meal; it’s a hug in food form. I remember the first time I made it, I was juggling three kids, a looming deadline, and an empty fridge. I needed something quick, delicious, and most importantly, something everyone would actually eat. This shredded chicken was the answer, and honestly, it’s been a staple in my kitchen ever since. It’s so unbelievably tender and flavorful, it makes even the simplest dishes feel a little bit special. If you’ve ever felt overwhelmed by meal prep or just crave that perfectly juicy, pull-apart chicken without all the fuss, you are in the right place. This method for shredded chicken is a game-changer, way beyond your basic boiled or baked chicken breast.
What is the best shredded chicken?
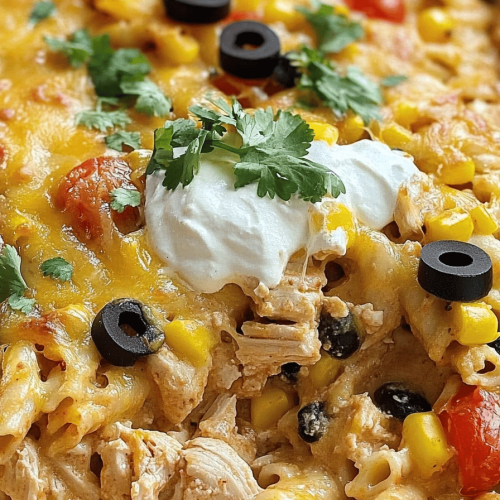
So, what exactly makes this shredded chicken so darn good? Think of it as the ultimate canvas for flavor. It’s essentially chicken breasts (or thighs, but I’m a breast gal for this!) that are gently simmered in a ridiculously flavorful broth until they are unbelievably tender. Then, they’re pulled apart into perfect, succulent strands. It’s not just about boiling chicken and hoping for the best; it’s about coaxing out every ounce of moisture and flavor. The magic is in the liquid it cooks in and the simple technique that ensures every bite is packed with deliciousness. It’s the kind of base that you can then transform into a million different meals, from tacos to salads to Creamy Pasta dishes. It’s the unsung hero of busy kitchens everywhere!
Why you’ll love this recipe?
Oh, where do I even begin with why this shredded chicken recipe is a must-try? First off, the flavor. I’m not exaggerating when I say this chicken is bursting with taste. It’s savory, incredibly moist, and has this depth that you just don’t get from plain old boiled chicken. It’s a far cry from dry, bland chicken that makes you want to drown it in sauce. Then there’s the simplicity. Seriously, you barely have to lift a finger. It’s mostly hands-off simmering time. This means you can actually get other things done while your chicken is doing its thing, transforming into tender perfection. And let’s talk about the cost-effectiveness! Chicken breasts are usually pretty budget-friendly, and this recipe stretches them beautifully, making them feel like a gourmet ingredient. What I love most is its sheer versatility. I’ve used this shredded chicken for tacos, in my famous Chicken Salad sandwiches, on top of a big green salad, mixed into pasta, and even just eaten straight from the container (don’t judge!). It’s a lifesaver on those nights when you need dinner on the table fast but don’t want to resort to takeout. It’s truly a foundational recipe that will save you so much time and stress.
How do I make shredded chicken?
Quick Overview
The process is deceptively simple. You’ll place chicken breasts in a pot, cover them with a flavorful liquid (more on that in a bit!), bring it to a gentle simmer, and let time do the rest. Once cooked, you’ll shred it with two forks and then toss it with a little bit of that cooking liquid to keep it moist and flavorful. It’s that easy! The result is incredibly tender, juicy, and seasoned chicken that’s ready to be used in countless dishes. This method ensures that the chicken stays moist and flavorful, which is something I always struggled with before.
Ingredients
For the Chicken:
4-6 boneless, skinless chicken breasts (about 1.5-2 pounds total)
For the Flavorful Simmering Liquid:
4 cups low-sodium chicken broth (this is key for controlling the saltiness)
1 cup water
2 bay leaves (don’t skip these! They add a subtle, aromatic depth)
1 teaspoon dried thyme (or a few sprigs of fresh)
1 teaspoon dried rosemary (or a sprig or two of fresh)
1/2 teaspoon black peppercorns (whole ones are best for a cleaner flavor)
2 cloves garlic, smashed (just give them a good whack with the side of your knife)
1/2 teaspoon salt (you can always add more later, so start light)
For Tossing After Shredding:
1/4 cup of the reserved cooking liquid (this is the secret to super moist shredded chicken!)
Step-by-Step Instructions
Step 1: Prepare the Chicken and Pot
Grab a pot or Dutch oven that’s large enough to hold all your chicken breasts in a single layer. I find that a medium-sized pot (around 4-6 quarts) works perfectly. Place your chicken breasts in the pot. If you’re using frozen chicken, make sure to thaw it completely first – this is really important for even cooking. Once the chicken is in, it’s time to build our flavor base!
Step 2: Create the Flavorful Simmering Liquid
Pour the chicken broth and water into the pot with the chicken. Add the bay leaves, thyme, rosemary, peppercorns, smashed garlic cloves, and salt. The aroma starts to build even at this stage, which I love! Make sure the liquid covers the chicken. If it doesn’t quite, add a little more water or broth until it does. This ensures everything cooks evenly and gets infused with all those lovely aromatics.
Step 3: Simmer Gently
Place the pot over medium-high heat and bring the liquid to a gentle boil. As soon as it starts to boil, immediately reduce the heat to low, cover the pot tightly, and let it simmer. You don’t want a rolling boil here; just a gentle, lazy simmer. This is crucial for keeping the chicken tender. We’re aiming for about 15-20 minutes, depending on the thickness of your chicken breasts. You want them cooked through but not overdone.
Step 4: Check for Doneness
After 15 minutes, gently poke one of the chicken breasts with a fork. It should be opaque throughout and flake easily. If it’s still pink inside or feels firm, let it simmer for another 5 minutes and check again. Don’t overcook it, or you’ll end up with dry chicken, and nobody wants that!
Step 5: Rest and Shred
Once the chicken is cooked, carefully remove the chicken breasts from the pot using tongs and place them on a clean cutting board or in a shallow bowl. Leave the cooking liquid in the pot – we’ll need some of that! Let the chicken rest for about 5-10 minutes. This step is really important for letting the juices redistribute throughout the meat, making it even more tender and moist. After resting, use two forks to shred the chicken. One fork to hold the chicken in place, and the other to pull it apart into shreds. You can make them as fine or as chunky as you like!
Step 6: Toss with Reserved Liquid
Now for the magic touch! Take about 1/4 cup of the reserved cooking liquid (strain out the bay leaves, peppercorns, etc., first if you’re just using a bit, or just skim the liquid from the top) and toss it with your shredded chicken. This little bit of liquid coats every strand, infusing it with that amazing flavor and ensuring it stays incredibly moist. You’ll be amazed at the difference this makes. The chicken should be glistening and perfectly seasoned.
Step 7: Serve or Store
Your perfectly shredded chicken is now ready to be used in any dish you can dream up! If you’re not using it immediately, let it cool completely before storing it in an airtight container in the refrigerator. I always make a big batch because it’s so convenient to have on hand throughout the week.
What to Serve It With
This shredded chicken is a culinary chameleon, seriously! For breakfast, I love to warm up a small portion and mix it with a scrambled egg or two for a protein-packed start to the day. It’s surprisingly good with a side of avocado toast. For a classic brunch, imagine a vibrant chicken salad sandwich on some crusty artisan bread, or a beautiful layered salad with this chicken as the star. My kids always go wild for this chicken piled into soft tortillas for simple tacos, topped with a little cheese and salsa. It’s also amazing mixed with barbecue sauce for sliders, or tossed with pesto and cherry tomatoes for a quick pasta dish. For a more dessert-like or sweet craving, while this is savory, you could imagine a slightly sweeter twist by mixing it with a mild teriyaki glaze and serving it over sticky rice. But for us, it’s usually savory. Think about serving it alongside some roasted vegetables, a fresh green salad, or even just with some comforting mashed potatoes. The possibilities are truly endless, and it always tastes fantastic!
Top Tips for Perfecting Your Shredded Chicken
Over the years, I’ve picked up a few tricks that I think make all the difference in getting this shredded chicken just right. First, when it comes to the chicken itself, using chicken breasts that are all roughly the same thickness will help them cook at the same rate, ensuring even results. If you have some really thick ones and some thin ones, you might end up with some dry bits and some undercooked bits, which is no fun. When you’re adding your aromatics to the simmering liquid, don’t be afraid to get creative! Beyond the bay leaves, thyme, and rosemary, I sometimes add a sprig of fresh parsley or even a slice of lemon for a brighter flavor. For the peppercorns, using whole ones is better than pre-ground because they release their flavor more gradually and cleanly, giving you a more nuanced taste rather than just a sharp bite. When it comes to shredding, using two forks is definitely the easiest and fastest method. For super-fine shreds, you can even pulse them briefly in a food processor, but be careful not to turn them into mush! The most important tip, though, is to reserve and use that cooking liquid. It sounds simple, but tossing the shredded chicken with just a couple of tablespoons of it makes an enormous difference in moisture and flavor. Trust me on this one; it’s the secret weapon! For ingredient swaps, if you don’t have chicken broth on hand, vegetable broth or even just water with a bouillon cube can work in a pinch, but chicken broth really adds the best depth of flavor. And if you’re sensitive to salt, definitely opt for the low-sodium broth so you can control the saltiness precisely.
Storing and Reheating Tips
This shredded chicken is a meal prep dream because it stores so beautifully. Once the chicken has cooled completely, I like to store it in an airtight container in the refrigerator. It will keep well for about 3 to 4 days. If you know you won’t use it all within that time, I highly recommend freezing it. I usually portion it out into smaller freezer bags or containers, removing as much air as possible to prevent freezer burn. Frozen shredded chicken will last for up to 2-3 months. To reheat, if it’s refrigerated, you can gently warm it in a skillet over low heat with a splash of water or some of the reserved cooking liquid until heated through. Microwaving works too, but again, add a little liquid to keep it from drying out. For frozen chicken, the best way to thaw is to transfer it from the freezer to the refrigerator overnight. Then, reheat as you would refrigerated chicken. If you’re planning to use it in a soup or stew, you can often add it directly from frozen, as it will cook through in the hot liquid. I try to avoid adding the cooking liquid during initial storage if I’m freezing it for longer periods, but I always make sure to reserve some in the fridge for immediate use!
Frequently Asked Questions
Final Thoughts
Honestly, this shredded chicken recipe is one of those things that has genuinely made my life easier and tastier. It’s a simple concept, but the execution yields such incredibly flavorful and tender results that it feels almost too good to be true for how little effort it requires. It’s the ultimate solution for busy weeknights, impromptu lunches, or anytime you just need a reliable, delicious protein base for your meals. It’s proof that you don’t need fancy ingredients or complicated techniques to create something truly wonderful. Give it a try, and I promise you’ll be hooked. I can’t wait to hear how you use it in your own creations! Let me know in the comments what your favorite way to use shredded chicken is – I’m always looking for new ideas!
Chicken Shredded
Ingredients
Main Ingredients
- 1.5 lb boneless skinless chicken breasts
- 0.5 green bell pepper, sliced
- 1 tomato, quartered
- 1 carrot, peeled and chopped
- 5 cloves garlic, minced, divided
- 3 bay leaves
- 1 tbsp olive oil
- 1 small onion, sliced long
- 1 small green bell pepper, seeded and thinly sliced
- 1 small red bell pepper, seeded and thinly sliced
- 1 tbsp tomato paste
- 0.25 cup dry white wine or chicken broth
- 0.5 cup tomato sauce
- 2 tbsp Spanish green olives optional
- 1 tsp cumin
- 0.25 tsp garlic powder
- 0.5 tsp kosher salt plus more to taste
- black pepper to taste
- chopped cilantro for garnish
Instructions
Preparation Steps
- Place chicken, bell pepper, tomatoes, carrots, and half of garlic into the slow cooker. Add just enough chicken broth to cover the chicken and vegetables and add the bay leaves. Cook high for 4 hours, or low 6 to 8 hours, until the chicken is tender.
- When done, remove chicken and shred with two forks; set aside. Discard vegetables and reserve the broth for later.
- In a large deep skillet, heat the olive oil over medium heat. Add the remaining garlic, sliced onions, green peppers, and red peppers. Cook about 3 to 4 minutes, or until soft.
- Stir in the tomato paste and wine, let it cook 2 to 3 minutes then add the cooked chicken, tomato sauce, and about 0.75 cup of the reserved broth to create a sauce. Season with cumin, garlic powder, salt, and pepper.
- Cover and simmer on low for about 8 to 10 minutes, adding more broth and seasoning if needed. Makes 4 cups.