Every year as October rolls in, I find myself craving those tiny, charming treats that pack big Halloween vibes and even bigger smiles. I remember sitting on my kitchen stool as a kid, watching my mom shape little rounds of cake, dipping them in glossy chocolate while I tried to sneak a nibble before anyone noticed. That’s exactly what these Halloween cake pops remind me of — pure joy in bite-sized form, wrapped in spooky colors and fun designs. They’re the kind of treat that’s easy to whip up, endlessly customizable, and perfect whether you’re throwing a party or just want something special with your evening cup of tea. If you love the idea of a chocolate-dipped truffle but with a festive twist, these Halloween cake pops will quickly become your go-to sweet. Plus, unlike a whole cake, you don’t have to worry about leftovers because trust me, these disappear faster than you can say “Boo!”
What is a Halloween cake pop?
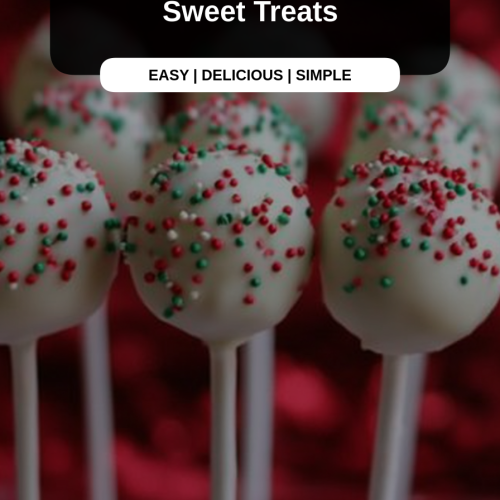
Think of Halloween cake pops as bite-sized cake balls on a stick, dressed up for the season in spooky colors, edible glitter, or creepy faces. They’re essentially small chunks of moist cake crumbled and combined with frosting, formed into balls, then dipped into chocolate or candy melts to create a firm outer shell. The real magic lies in how you decorate them—whether it’s little ghost faces, pumpkin designs, or creepy spiders, each pop becomes a mini masterpiece perfect for Halloween. These treats are a fun, playful way to enjoy cake without needing a plate and fork, making them perfect for parties or an after-school snack that feels festive but doesn’t require hours in the kitchen. It’s like cake and candy had the cutest little baby for October.
Why you’ll love this recipe?
What I love most about these Halloween cake pops is how they strike the perfect balance between fun and fuss-free. First off, the flavor is everything — rich, moist cake mixed with just the right amount of creamy frosting so each pop melts in your mouth. My recipe here uses classic chocolate and vanilla bases, but the sky’s the limit with flavor combos, especially if you love pumpkin spice or caramel for fall vibes.
But here’s the real kicker: making these cake pops is seriously simple. I always do this on a Sunday afternoon when the kids are buzzing around wanting something sweet, and I barely make a dent in the pantry — just cake mix, frosting, and candy melts. You can easily make a big batch in under an hour, and the decorating part? That’s where the real fun (and family bonding!) happens.
These cake pops also win major points for being budget-friendly. No fancy gadgets needed, and those leftover cake scraps get turned into something magical, meaning no food waste here. I honestly think everyone should have a Halloween recipe like this up their sleeve — it’s versatile enough to switch up with whatever you’ve got around and always makes a showstopping treat no matter the occasion.
How do you make a Halloween cake pop?
Quick Overview
Pulling together these Halloween cake pops is pretty straightforward. You start by baking or grabbing some cake—no shame in the store-bought option on a busy day! Then you crumble it up and mix it with frosting to create a moldable dough. After shaping your pops onto sticks, they get a dip in melted candy melts or chocolate to form a shiny, smooth coating. The real fun begins as you personalize each one with spooky decorations that fit your vibe. The process is friendly enough for busy cooks and offers that delightful ‘wow’ factor once they’re all done. Plus, you can mix and match flavors or designs without too much fuss.
Ingredients
For the Main Batter:
- 1 box of moist chocolate or vanilla cake mix (or homemade cake, cooled completely)
- Ingredients called for on the cake mix box (usually eggs, oil, water) if baking
For the Filling:
- 1/2 cup cream cheese frosting or buttercream (store-bought works, but homemade is a game changer)
For the Glaze:
- 12 oz candy melts in Halloween colors (orange, black, white, green)
- Optional: A teaspoon of vegetable oil to thin candy melts for smoother coating
- Sprinkles, edible markers, colored icing for decorating
Step-by-Step Instructions
Step 1: Bake Your Cake and Cool Completely
I can’t stress this enough — let your cake cool fully before you touch it. Slightly warm cake will make your frosting mix soggy and hard to shape. Bake according to the box or your favorite recipe, then set it on a wire rack and give it a good hour or two to come to room temp. If you’re in a hurry, speed things along in the fridge for about 30 minutes.
Step 2: Crumble the Cake
Using your hands, crumble the cake into fine crumbs in a large bowl. This part is super satisfying—and crucial. You want no lumps bigger than pea-sized. If the crumbs feel too dry, your frosting will help bring it together perfectly. I’ve learned it’s better to start with less frosting and add more if needed, so proceed slowly here.
Step 3: Mix in Frosting
Add your frosting to the crumbs and mix gently until the texture is dough-like and holds together when squeezed. You want it moist but not sticky. It’s kind of like edible play dough! If it feels a bit wet, pop it in the fridge for 20 minutes and try again. This step makes sure your cake pops won’t fall apart during dipping.
Step 4: Shape the Cake Pops
Roll your mixture into 1-inch balls using your hands. For a Halloween touch, some of mine are shaped into mini pumpkins (just roll and make little indentations with a toothpick) or ghosts (slightly oval with a little tail). Once shaped, place them on a parchment-lined tray and chill in the fridge for 20-30 minutes — this helps the pops hold their shape for dipping.
Step 5: Melt the Candy Coating
Using a microwave-safe bowl, gently melt your candy melts in 30-second bursts, stirring after each until smooth. Adding a splash of vegetable oil here is my trick to achieve that glossy, even coating that won’t crack once they dry.
Step 6: Insert Sticks & Dip
Dip the end of each cake pop stick into the melted candy, then insert it about halfway into a cake ball — this acts like glue. Once all sticks are secure and any frosting fingerprints erased, dip each pop into the candy melts, letting the excess drip off. Quick tip: tapping the stick gently against the side of the bowl helps remove that excess coating.
Step 7: Decorate While Wet
Now’s the time to add sprinkles or edible glitter before the coating hardens. For faces, I wait until the coating sets, then draw with edible markers or pipe on fondant details. This part always brings me joy because you can get as creative (or silly) as you want!
Step 8: Chill to Set
Place your decorated cake pops upright in a styrofoam block or cake pop stand and refrigerate for 15-30 minutes to fully set the coating. This step helps the pops keep their shape and really shine.
Step 9: Serve and Enjoy!
These bite-sized treats are best enjoyed at room temperature so the cake inside is tender and moist, and the chocolate shell has a nice snap. They’re perfect for passing around at parties or as a delightful personal treat as you carve pumpkins or watch scary movies.
What to Serve It With
For Breakfast: Pair these Halloween cake pops with a cozy cup of coffee or a spiced chai latte. They add a little bit of festive fun to your morning ritual, especially on chilly fall days. I like arranging them on a tiered stand alongside fresh fruit and a pumpkin oatmeal bake for an easy, mood-lifting spread.
For Brunch: Set these pops out with a few savory bites like mini quiches or cheesy grits. They’re a wonderful surprise on a brunch buffet table next to mimosas or fresh-squeezed apple cider. Trust me, the kids and adults both get wide-eyed when they spot these cute, spooky treats.
As Dessert: After a hearty fall dinner, nothing beats handing out these cake pops with some warm hot chocolate or mulled wine. The pops are rich enough to satisfy your sweet tooth without sending you into a sugar crash. For a fun twist, serve with a small bowl of whipped cream tinted with a drop of orange food coloring.
For Cozy Snacks: When the evening chill settles in, these cake pops shine paired with a cozy blanket and a good book or a scary movie marathon. My family often sneaks a few bites straight from the fridge after dinner — they’re just that addictive and comforting.
Top Tips for Perfecting Your Halloween Cake Pops
Shaping and Chill Time: Don’t skip chilling the cake balls before dipping. It’s the secret to making sure they stay firmly on the sticks and don’t crumble mid-dip. I learned this the hard way the first time I tried rushing the process — messy chocolate everywhere!
Mixing Magic: When combining cake crumbs and frosting, mix just until combined. Overmixing can make your pops dense and tough, and I’ve found that a gently folded batter keeps everything light yet moldable. Add frosting a little at a time to control consistency better.
Swirl and Color: If you’re feeling artsy, try double-dipping cake pops in two colors or swirling tinted white candy melts with toothpicks before the coating sets. It gives them a hauntingly beautiful marbled effect that wows guests. Using orange, black, white, and neon green candy melts nails the Halloween theme perfectly.
Ingredient Swaps: I’ve experimented with Greek yogurt instead of frosting to lighten things up or coconut butter for a dairy-free version. Just keep an eye on consistency—if your mixture feels too crumbly, a touch more frosting or use a firmer spoonful to keep it together. Gluten-free cake works great too—just expect a slightly different texture.
Baking Know-How: If baking homemade cake, make sure it’s fully cooled and doesn’t have extra moisture like a sticky syrup topping—that can throw off your pop mixture. Also, I like baking my cake in a sheet pan rather than a round pan—it makes crumbling faster and smoother.
Glaze Flair: For the glaze, warming candy melts low and slow is key to avoiding grainy or oily textures. A teaspoon of vegetable oil helps everything flow better during dipping and sets with a gorgeous shine. If you want to skip the candy melts, melted white chocolate tinted with gel food coloring works just as well.
Storing and Reheating Tips
Room Temperature: Once dipped and decorated, these cake pops can sit out covered on a cake pop stand or plate under a dome for up to 2 days. I like to enjoy them within the first day for maximum freshness since the texture will soften a bit over time.
Refrigerator Storage: If you want to keep them longer, store cake pops in an airtight container lined with parchment paper between layers in the fridge. They keep beautifully for up to a week, and chilling also helps maintain their shape and firmness.
Freezer Instructions: Cake pops freeze wonderfully, making this a great make-ahead snack. Wrap each pop individually in plastic wrap, then place in a freezer bag or container. They’ll keep for up to 3 months. Thaw covered in the fridge overnight, then bring to room temp before serving for best texture.
Glaze Timing Advice: For freezer storage, it’s best to dip and decorate cake pops first for full coating protection. If you want to glaze just before serving, keep undipped cake balls frozen and thaw before dipping. Adding the glaze too early might cause condensation in storage, affecting texture.
Frequently Asked Questions
Final Thoughts
This Halloween cake pop recipe isn’t just a treat—it’s a little ritual, a chance to slow down, get festive, and make memories with the people you love. They’re easy enough to throw together last minute, yet playful and sweet enough to impress both kids and grown-ups alike. I love how every year I get to tweak my designs, try new colors, or even slip little surprises inside the cake balls — last time I added mini chocolate chips, and my kids nearly lost their minds! If you give these a try, I really hope they bring you as much joy and cozy fun as they bring to my kitchen every spooky season.
Don’t forget to leave a comment telling me how yours turned out or to share your unique decorations. And if you’re into Halloween baking, check out my pumpkin bread loaf and ghost-shaped sugar cookies — they’re amazing alongside these pops. Happy baking, and may your Halloween be deliciously sweet!
Halloween cake pops
Ingredients
Main Ingredients
- 1 box Red Velvet Cake Mix
- 3 large Eggs
- 0.5 cup Vegetable Oil
- 1.25 cup Water
- 5 tablespoon Cream Cheese Frosting
- 20 oz White Chocolate Candy Melting Wafers
- 1.5 tablespoon Black Gel Food Coloring
- 0.33 cup Vegetable Shortening
- Candy Eyeballs for decorating
- 50 inch Black/White Ribbon for decorating
- Cake Pop Sticks
Instructions
Preparation Steps
- Preheat oven to 350°F.
- In a large mixing bowl, beat the cake mix, eggs, oil, and water at medium speed for 2 minutes.
- Pour the batter into a greased 9x13 inch baking dish and bake for 25-30 minutes or until a toothpick inserted comes out clean.
- Allow cake to cool in the dish for 10 minutes, then turn out onto a wire rack and cool completely.
- Break cooled cake into pieces and pulse in a food processor until crumbled finely.
- Transfer crumbs to a large bowl and mix in cream cheese frosting until well combined.
- Roll mixture into 2-inch balls. Shape 4 of them into cylindrical ghost shapes by fanning out one end.
- Melt about half of the white chocolate wafers and dip one end of the cake pop sticks about 1 inch into the melted chocolate.
- Press the dipped end of stick into the cake balls about two-thirds in. Wipe off excess chocolate.
- Chill the cake pops in refrigerator for 15 minutes to set.
- Melt remaining white chocolate wafers with half the shortening until smooth, stirring at 30-second intervals.
- Prepare a cake pop stand or container filled with beans/foam to hold cake pops upright.
- Dip each cake pop into the melted coating, push down once then lift out to let excess drip off. Do not wiggle stick.
- Allow the coating to set for 15 minutes in the holder before decorating.
- Using remaining coating, add more shortening if needed and pour into piping bag.
- Pipe mummy bandages by drawing straight lines back and forth on four of the cake pops, front and back.
- Dot remaining icing on bandages and quickly add candy eyeballs to complete mummy pops.
- Melt remaining wafers with shortening and black gel food color. Mix well.
- Use black icing in a piping bag or bottle to decorate Jack Skellington faces and ghost features on remaining cake pops.
- Cut ribbon into 5 pieces of 10 inches each and tie bows on some cake pops.
- Allow decorated cake pops to dry completely in the holder and then display for Halloween party fun.