
Oh, friends, you know how sometimes you stumble upon a recipe that just… clicks? It’s like finding that perfect song that instantly lifts your mood, or that cozy sweater you can’t stop reaching for. That’s exactly how I feel about these Vegan sesame chickpeas. They’re not just food; they’re a little hug in a bowl, a flavor explosion that somehow feels both incredibly comforting and excitingly new. I first whipped these up on a whim one Tuesday night when the fridge was looking a bit bare and I desperately needed something delicious that wouldn’t require a grocery run. Little did I know, I was about to discover my new go-to. If you’re anything like me, you’re always on the hunt for those weeknight wonders, the dishes that are so easy to make but taste like you spent hours slaving away. Well, you’ve found one! These vegan sesame chickpeas are that secret weapon. They’re packed with savory, slightly sweet, nutty goodness and have this fantastic texture that just keeps you coming back for more. Seriously, my family devours these like there’s no tomorrow, and honestly, I’m right there with them!
What are vegan sesame chickpeas?
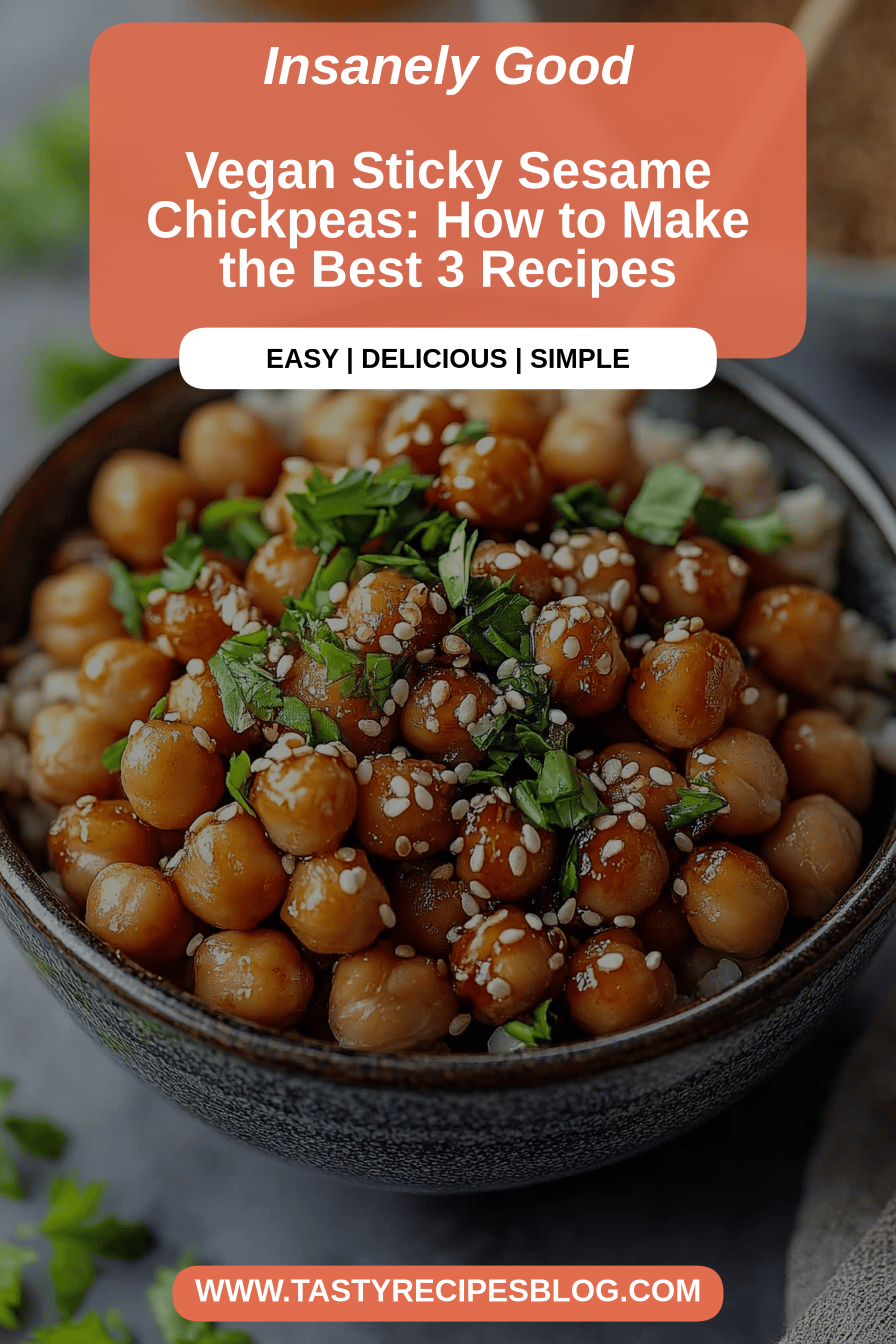
So, what exactly are these magical little morsels? Think of them as a delightful plant-based twist on those addictive, savory snacks you might have tried, but with a whole lot more heart and soul. Essentially, we’re taking humble chickpeas and coating them in a luscious, glossy sauce made with tahini (that wonderful sesame paste), a touch of sweetness, some zesty citrus, and a hint of garlic. The chickpeas get roasted to perfection, becoming slightly crispy on the outside while staying delightfully tender on the inside. They’re then tossed in that irresistible sesame glaze. It’s a dish that’s surprisingly simple but delivers a complex flavor profile. The name itself, “Vegan sesame chickpeas,” tells you exactly what you’re getting: all the goodness of chickpeas, enhanced by the incredible nutty depth of sesame. It’s wholesome, it’s flavorful, and it’s completely dairy-free and plant-powered. It’s the kind of food that makes you feel good from the inside out, and that’s always a win in my book!
Why you’ll love this recipe?
Honestly, if I had to pick just one reason why I adore this recipe, it would be the sheer joy it brings. But since you asked, let me count the ways! First off, the flavor is out of this world. That tahini-sesame combo is pure magic. It’s savory, a little bit nutty, with a subtle sweetness and a bright, tangy finish from the lemon. It’s perfectly balanced, and it coats the chickpeas in this gorgeous, sticky glaze that’s absolutely irresistible. You’ll find yourself sneaking bites straight from the pan – I know I do! Then there’s the simplicity. Seriously, this is a lifesaver on those busy weeknights when you’re tired and hungry but still want something delicious and healthy. You basically just toss everything together and let the oven do the work. It’s so straightforward, even the most novice cook can nail it. And let’s talk about budget-friendliness! Chickpeas are incredibly affordable, tahini is usually a pantry staple, and the other ingredients are common kitchen finds. This recipe proves that you don’t need fancy or expensive ingredients to create something truly spectacular. Finally, the versatility is amazing. These Vegan sesame chickpeas are fantastic as a standalone snack, but they also shine when incorporated into other meals. I’ll toss them into salads for an extra protein boost, serve them over rice bowls, or even tuck them into warm pita bread. They’re incredibly adaptable to whatever you’re craving. Compared to other snack recipes, this one hits that perfect sweet spot of healthy, satisfying, and utterly delicious. What I love most about this is that it feels like a treat, but it’s packed with plant-based protein and fiber, making it a guilt-free indulgence. It’s a recipe that truly has it all.
How do I make vegan sesame chickpeas?
Quick Overview
The magic happens in just a few simple steps. You’ll start by prepping your chickpeas to get them nice and dry for maximum crispiness. Then, you’ll whisk together a simple, flavorful sauce that’s the heart of this dish. Everything gets tossed together and roasted until the chickpeas are tender-crisp and the sauce is beautifully caramelized. It’s a process that requires minimal effort but yields maximum deliciousness. This method ensures you get that perfect balance of tender interior and slightly crispy exterior, all coated in that addictive sesame glaze. You’ll be amazed at how quickly this comes together!
Ingredients
For the Main Dish:
* 2 cans (15 ounces each) chickpeas, rinsed and thoroughly drained – Make sure they’re *really* dry! I like to pat them with paper towels or even let them air dry on a clean kitchen towel for a bit. This is key for that lovely texture.
* 1 tablespoon olive oil or avocado oil – Just enough to help them crisp up in the oven.
* 1 teaspoon smoked paprika – This adds a lovely depth and a hint of smokiness that complements the sesame so well.
* 1/2 teaspoon garlic powder – For that savory base.
* 1/4 teaspoon salt, or to taste – Don’t skip this! It really wakes up all the flavors.
* Pinch of Black Pepper
For the Irresistible Glaze:
* 1/4 cup tahini (sesame paste) – Use a good quality tahini; it makes a difference! Make sure it’s well-stirred.
* 2 tablespoons soy sauce or tamari (for gluten-free) – Tamari is my preference for a richer flavor, but soy sauce is totally fine!
* 1 tablespoon maple syrup – This balances the savory and adds that touch of sticky sweetness.
* 1 tablespoon fresh lemon juice – For brightness and tang.
* 1 teaspoon grated Fresh Ginger (optional, but highly recommended!) – It adds a wonderful zing.
* 1 clove garlic, minced or grated – Fresh garlic is always best here!
* 2-4 tablespoons water, as needed to reach desired consistency – You want it pourable but thick enough to coat the chickpeas.
Step-by-Step Instructions
Step 1: Preheat & Prep Pan
First things first, let’s get our oven heated up. Preheat it to 400°F (200°C). While the oven is preheating, grab a large baking sheet. I like to line mine with parchment paper for easy cleanup, though it’s not strictly necessary. This helps prevent sticking and makes dealing with the glaze later a breeze.
Step 2: Mix Dry Ingredients
Now, take your thoroughly drained and dried chickpeas and place them in a medium bowl. Add the olive oil, smoked paprika, garlic powder, salt, and pepper. Toss everything together really well, making sure each chickpea is coated evenly. This step is super important for getting those lovely crispy edges and infusing them with flavor right from the start.
Step 3: Mix Wet Ingredients
In a separate small bowl, whisk together all the ingredients for the glaze: the tahini, soy sauce or tamari, maple syrup, lemon juice, grated ginger (if using), and minced garlic. Start with about 2 tablespoons of water and whisk. Keep adding water, a tablespoon at a time, until you reach a thick but pourable consistency. It should be like a slightly thinned-out honey – thick enough to coat but not so thick it’s clumpy. Taste it and adjust seasoning if needed. More lemon for tang, more maple for sweetness, or a touch more soy sauce for saltiness.
Step 4: Combine
Spread the seasoned chickpeas in a single layer on your prepared baking sheet. You don’t want them overlapping too much, as this will steam them instead of roasting them. Pop them into the preheated oven.
Step 5: Bake
Roast the chickpeas for about 20-25 minutes. You’re looking for them to be golden brown and slightly firm to the touch. Give them a good shake halfway through baking to ensure even cooking. This roasting process is what gives them that wonderful texture contrast.
Step 6: Toss with Glaze
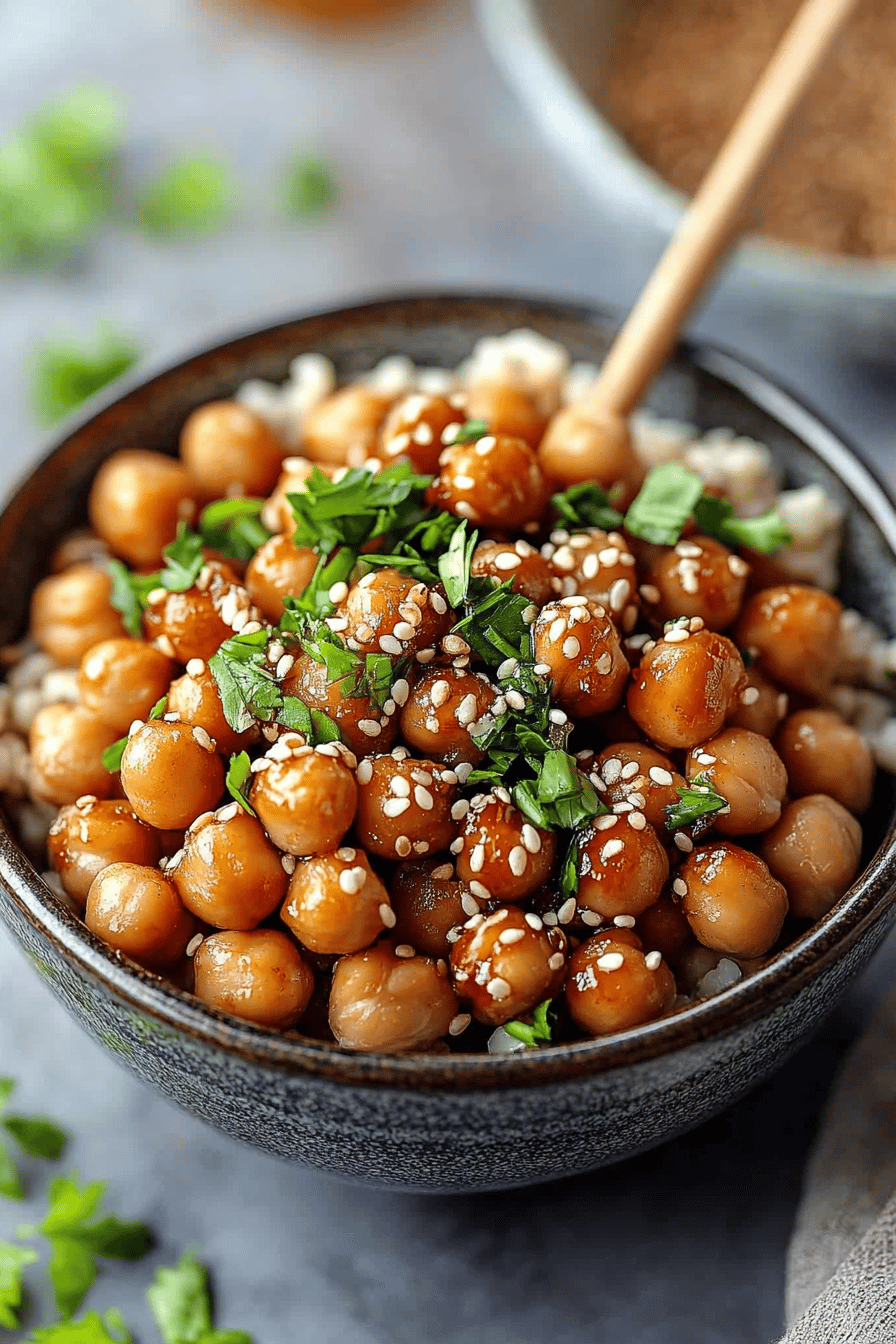
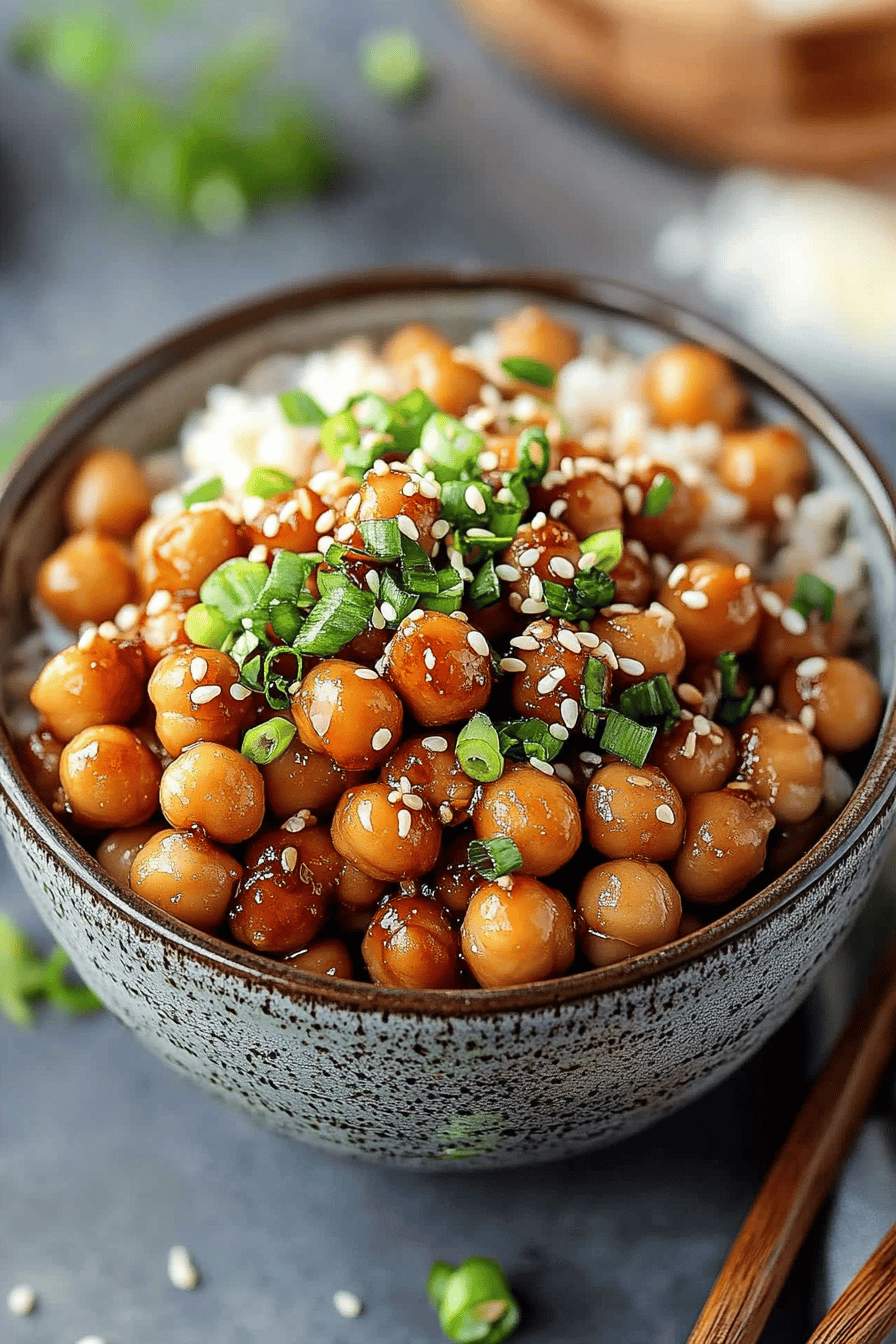
Once the chickpeas are roasted and looking gorgeous, carefully remove the baking sheet from the oven. Immediately pour the prepared sesame glaze over the hot chickpeas. Gently toss them right there on the baking sheet until every single chickpea is beautifully coated in that glossy sauce. The heat from the chickpeas will help the glaze become even more luscious.
Step 7: Final Bake (Optional, but Recommended!)
For an extra caramelized finish and to really set the glaze, you can pop them back into the oven for another 5-7 minutes. Keep a close eye on them, as the glaze can burn quickly at this stage. You want them to look a little toasted and extra sticky.
Step 8: Cool Slightly & Serve
Let the vegan sesame chickpeas cool for just a few minutes on the baking sheet. They’re best served warm, but they’re also delicious at room temperature. Garnish with a sprinkle of sesame seeds or some chopped fresh parsley if you like – it adds a nice visual touch!
What to Serve It With
Oh, the possibilities are endless with these little flavor bombs! For breakfast, I often find myself craving something savory and satisfying, so I’ll spoon these over a piece of whole-grain toast with a sprinkle of everything bagel seasoning. They’re also fantastic alongside some scrambled tofu or a simple side of avocado. For a proper brunch spread, I love to include them as part of a larger mezze-style platter. They pair wonderfully with hummus, olives, some fresh pita bread, and a big Greek salad. They add a unique texture and a punch of flavor that elevates the whole experience. As a dessert, it might sound odd, but sometimes I crave something sweet and nutty, and these hit the spot! I’ll serve a small portion with a drizzle of extra tahini and a few pomegranate seeds for a burst of color and tartness. For cozy snacks, this is my absolute go-to. They’re perfect for munching while I’m catching up on emails or watching a movie. I often serve them in small bowls alongside some crunchy veggies like carrot sticks or cucumber slices. My family also loves them stuffed into warm pita pockets with some shredded lettuce and a dollop of vegan yogurt sauce. It’s like a mini falafel-inspired wrap, but so much quicker!
Top Tips for Perfecting Your Vegan Sesame Chickpeas
I’ve made these so many times, I’ve learned a thing or two! So, let’s talk about getting them *just* right. First, the chickpea prep is non-negotiable. Rinsing them is standard, but you *really* need to get them dry. I’ve found the best method is to drain them well, then spread them out on a clean kitchen towel or paper towels and let them air dry for at least 10-15 minutes while you’re prepping the glaze. The drier they are, the crispier they get. Don’t be tempted to skip this, or you’ll end up with mushy chickpeas, and that’s just not the goal here. When it comes to mixing, the glaze consistency is key. I mentioned adding water a tablespoon at a time, and that’s because tahini can be finicky. You want it smooth and pourable, but not watery. If it’s too thick, it won’t coat the chickpeas evenly, and if it’s too thin, it’ll just run off. Experiment until you find that sweet spot. I’ve tested this with different brands of tahini, and some are naturally thicker than others, so adjusting the water is your best friend. For ingredient swaps, if you don’t have smoked paprika, a regular sweet paprika works, but you’ll lose that smoky depth. For the sweetener, maple syrup is great, but agave nectar or even a touch of brown rice syrup would also work. Just be mindful of the flavor profile each adds. The fresh ginger and garlic are truly transformative, but if you’re in a pinch, you *could* use a tiny bit of ground ginger and garlic powder in the glaze, but it won’t be quite the same. When it comes to baking, oven temperatures can vary wildly, so get to know your oven. If you find your chickpeas aren’t crisping up, try increasing the temperature by 25 degrees or roasting them a little longer, keeping a very close eye on them. Make sure you give them enough space on the baking sheet; overcrowding is the enemy of crispiness! If you want to get fancy with the glaze, you can add a pinch of cayenne pepper for a little heat, or a dash of nutritional yeast for a more cheesy, savory note. I’ve even seen people add a tiny bit of sriracha for a spicy kick, which is amazing if you like it hot! Trust me on this one: letting them cool slightly after the final toss with the glaze makes a huge difference. The glaze thickens up a bit and really adheres to the chickpeas.
Storing and Reheating Tips
Okay, so these are so good that you might find yourself with leftovers (though I wouldn’t count on it!). If you do, storing them is pretty straightforward. For storing at room temperature, I usually don’t recommend it for more than a couple of hours, especially if it’s warm out, as the glaze can get a bit sticky. If you’re planning to eat them within a few hours, just keep them covered loosely on the counter. For longer storage, the refrigerator is your best friend. Transfer any cooled vegan sesame chickpeas to an airtight container. They’ll stay good in the fridge for about 3 to 4 days. I’ve tried them on day 4, and they’re still pretty good, though the crispiness will have diminished a bit. If you want to freeze them, which is a great option if you make a big batch, make sure they are completely cooled. Wrap them well in plastic wrap, then place them in a freezer-safe bag or container. They should keep well in the freezer for up to 2 months. When it comes to reheating, I have a few favorite methods. For a quick reheat, you can pop them in a toaster oven or a regular oven at around 350°F (175°C) for about 5-10 minutes, just until warmed through. This helps revive some of that crispiness. You can also gently reheat them in a skillet over medium-low heat, tossing them occasionally. Microwaving is an option if you’re really in a hurry, but they will definitely lose their crispiness and become softer. I usually avoid the microwave unless I’m serving them in a bowl with other ingredients where texture isn’t as critical. If you’ve frozen them, thaw them in the refrigerator overnight, then reheat using the oven or toaster oven method for the best results.
Frequently Asked Questions
Final Thoughts
So there you have it, my friends! A simple, incredibly delicious recipe for vegan sesame chickpeas that I truly hope you’ll love as much as my family and I do. It’s one of those recipes that proves plant-based eating can be absolutely sensational, packed with flavor, and wonderfully satisfying. It’s perfect for when you need a quick snack, a healthy side dish, or even a star player in your next meal. If you’re a fan of this recipe, you might also enjoy my Roasted Garlic & Herb Potatoes or my Crispy Baked Sweet Potato Fries for more easy, flavorful side dish ideas! I really can’t wait to hear how your vegan sesame chickpeas turn out. Please, if you make them, let me know in the comments below! I love seeing your creations and hearing your thoughts. And don’t forget to share your own favorite ways to serve them – I’m always looking for new inspiration! Happy cooking!


