
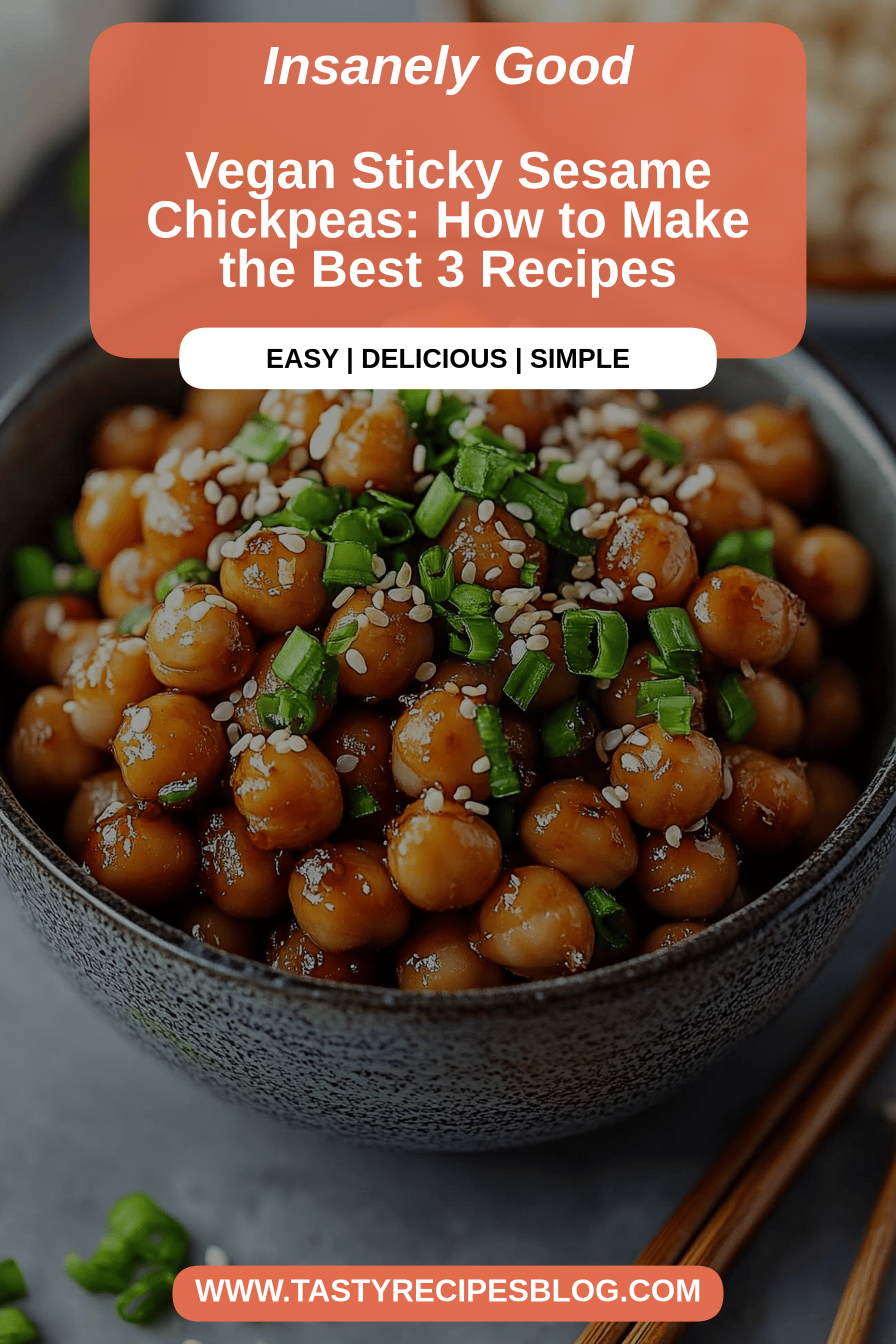
You know those days? The ones where you’re staring into the pantry, completely uninspired, and the fridge looks like a sad, empty canvas? Yeah, me too. And on those exact days, when the hunger pangs are real and the thought of cooking something complicated makes me want to order takeout for the third time this week, I reach for this recipe. My Vegan sesame chickpeas. Honestly, calling them just “chickpeas” feels like an understatement. They’re crispy, they’re savory, they have this incredible depth of flavor from the tahini and sesame oil, and they’re ridiculously easy to whip up. They remind me a little of those addictive roasted chickpeas you can buy, but so much better because you know exactly what’s going into them and you can customize them to your heart’s content. This one’s a lifesaver, truly.
What are vegan sesame chickpeas?
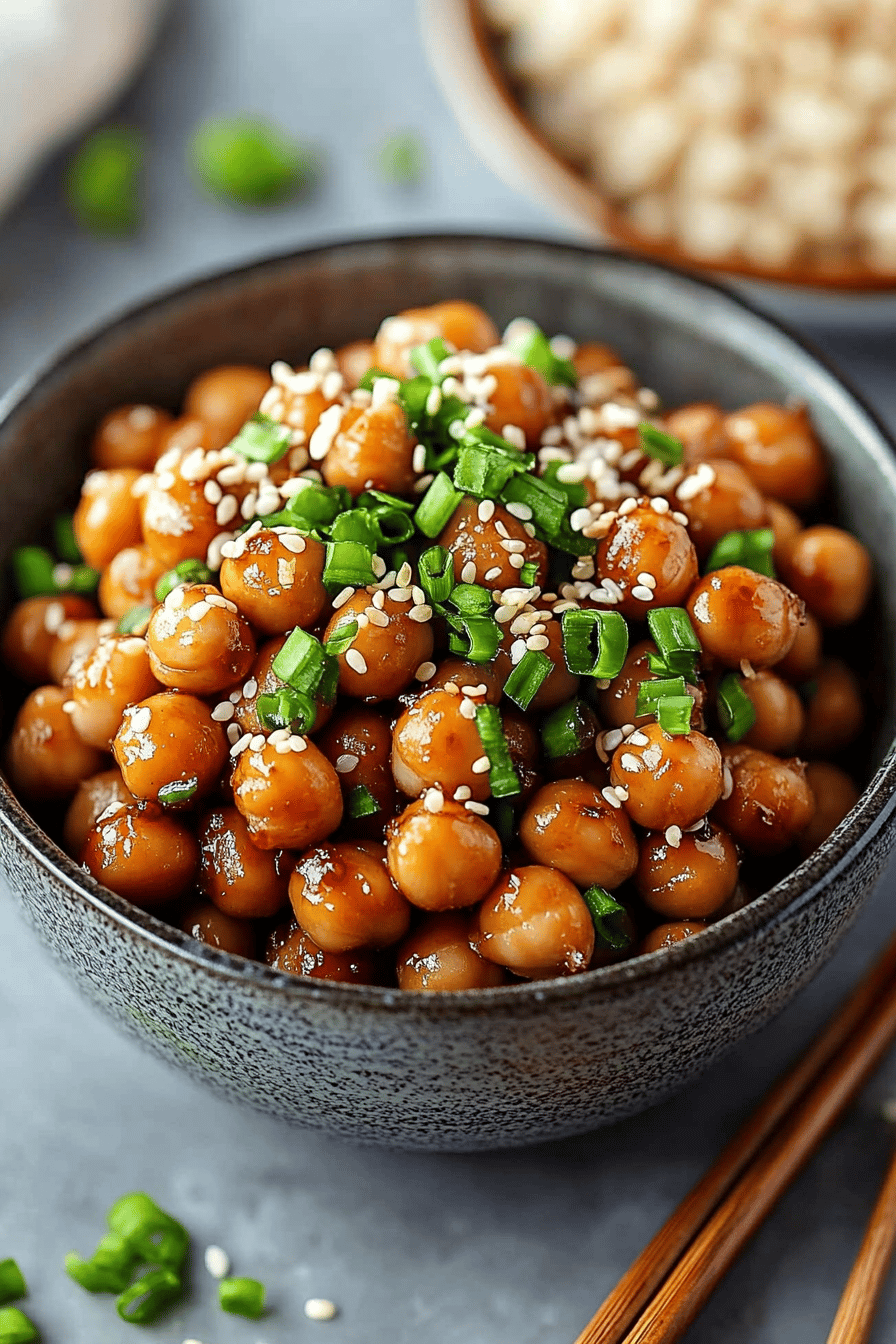
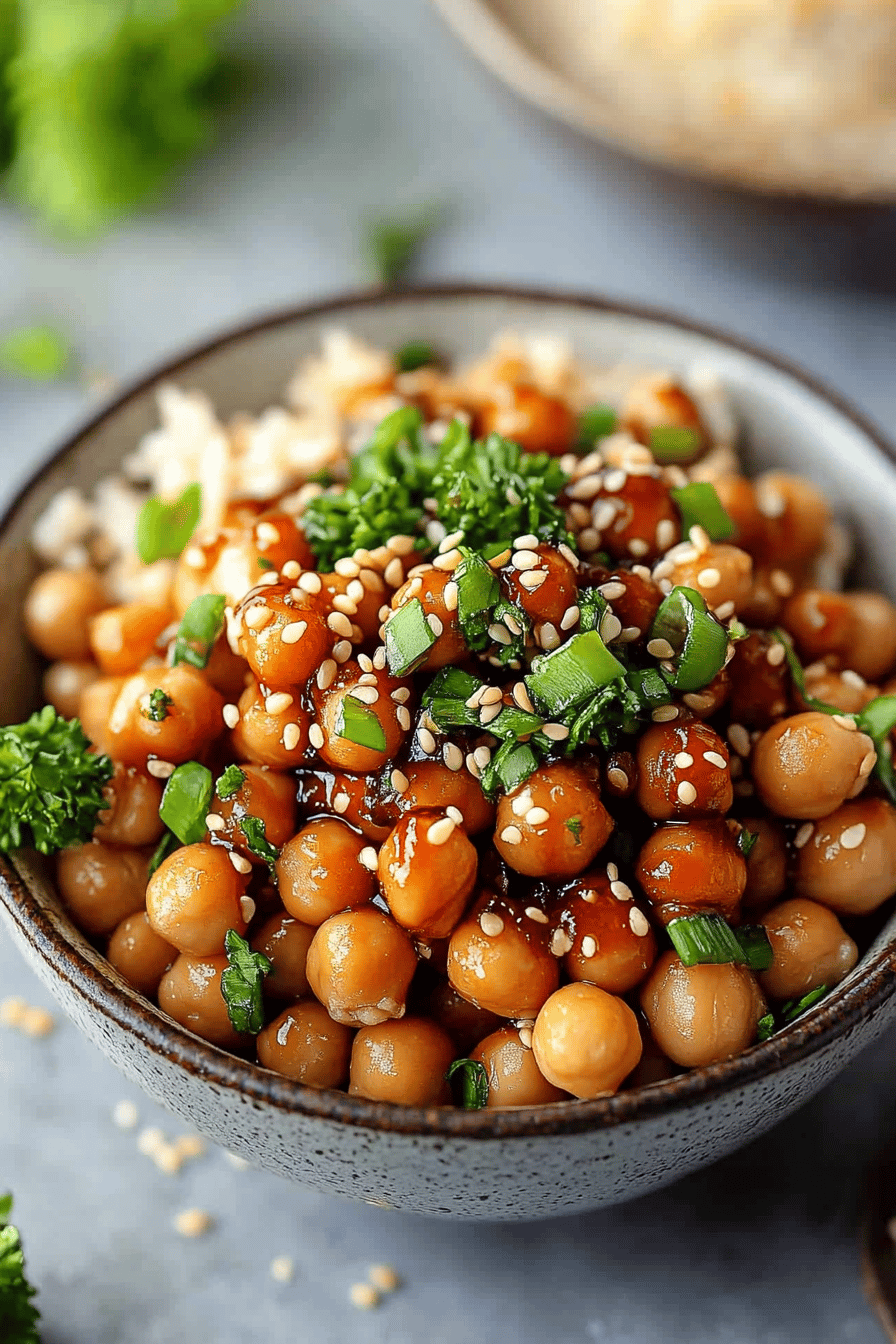
So, what exactly are these little flavor bombs? Think of them as your new favorite snack or side dish, elevated. They’re essentially roasted chickpeas that get a serious upgrade with a luscious, savory coating of tahini, sesame oil, and a few other simple seasonings. It’s not a heavy batter; it’s more of a glorious hug of flavor that clings to each individual chickpea, transforming them from humble legumes into something truly special. The name “Vegan sesame chickpeas” just says it all, doesn’t it? It tells you it’s plant-based, it highlights that gorgeous sesame flavor, and it lets you know the star ingredient is the humble chickpea. It’s essentially a way to make chickpeas exciting, satisfying, and utterly craveable without any fuss.
Why you’ll love this recipe?
There are so many reasons I keep coming back to this recipe, and I just know you’ll fall in love with it too. First off, the flavor is just out of this world. You get that nutty richness from the tahini, the toasty aroma of toasted sesame oil, a hint of garlic, and just the right amount of salt. It’s savory, it’s a little bit tangy, and it’s incredibly addictive. And the texture! When they come out of the oven, they’re perfectly crisp on the outside, with a slightly chewy interior. It’s the best of both worlds. What I love most about this is how incredibly simple it is. Seriously, you can probably count the active cooking time on one hand. It’s perfect for those nights when you’re exhausted but still want something wholesome and delicious. Plus, it’s super budget-friendly. Chickpeas are one of the most affordable pantry staples, and the other ingredients are pretty common. This means you can make a big batch without breaking the bank, which is always a win in my book. And the versatility! Oh my goodness, you can serve these in so many ways. They’re fantastic on their own, tossed into salads for a protein boost, served as a side dish with your favorite vegan main, or even sprinkled over grain bowls. I’ve even made a double batch for parties and they disappear in minutes. They really do stand out because they’re a little unexpected, a little sophisticated, but still so approachable. They’re so much more exciting than plain old roasted chickpeas, and honestly, way healthier than most store-bought snacks!
How do I make vegan sesame chickpeas?
Quick Overview
This recipe is all about simplicity and big flavor. We’re talking about draining and rinsing some chickpeas, tossing them with a magical savory sauce made from tahini and sesame oil, and then roasting them until they’re perfectly crispy and delicious. It’s a straightforward process that requires minimal effort but delivers maximum taste. You’ll be amazed at how such simple steps can transform a humble can of chickpeas into something so utterly craveable. Trust me, it’s a game-changer for quick weeknight meals or snacks.
Ingredients
For the Main Dish:
- 2 cans (15-ounce each) chickpeas, rinsed and drained very well
- 2 tablespoons tahini (sesame paste)
- 1 tablespoon sesame oil
- 1 tablespoon fresh lemon juice
- 1 clove garlic, minced
- 1/2 teaspoon smoked paprika (optional, but I love it for that smoky hint!)
- 1/4 teaspoon sea salt, or to taste
- Pinch of black pepper
For Garnishing (Optional):
- Toasted sesame seeds
- Fresh chopped parsley or cilantro
Step-by-Step Instructions
Step 1: Preheat & Prep Pan
First things first, get your oven preheating to 400°F (200°C). You’ll want to line a large baking sheet with parchment paper. This is a crucial step, not just for easy cleanup (because who loves scrubbing pans?), but it also helps the chickpeas roast evenly without sticking. Make sure you spread out the parchment paper so it covers the whole surface of the pan.
Step 2: Mix Dry Ingredients
Now, let’s get those chickpeas ready for their flavor bath. Make sure they are super, super dry. I like to spread them out on a clean kitchen towel or paper towels and gently pat them dry. The drier they are, the crispier they’ll get. You can even let them air dry for a bit while your oven preheats. This might sound like a small detail, but it makes a world of difference in the final texture. Nobody likes soggy chickpeas!
Step 3: Mix Wet Ingredients
In a medium bowl, whisk together the tahini, sesame oil, fresh lemon juice, minced garlic, smoked paprika (if you’re using it – and I really recommend it!), salt, and pepper. Whisk until everything is smooth and well combined. It should form a thick, creamy dressing. If it seems a little too thick, you can add another tiny splash of lemon juice or even a teaspoon of water to reach a good drizzling consistency. Taste it here and adjust the salt or lemon if needed; this is your chance to get the seasoning just right.
Step 4: Combine
Add the thoroughly dried chickpeas to the bowl with the tahini mixture. Gently toss them until every single chickpea is coated in that glorious sesame sauce. You want to make sure there are no dry spots. I find using my hands works best for this, just get in there and mix them around until they’re all glistening. This coating is what gives them their incredible flavor and helps them crisp up beautifully in the oven.
Step 5: Prepare Filling
This step is actually already done when you made the sauce in Step 3! The “filling” is essentially the delicious tahini-sesame sauce we just prepared.
Step 6: Layer & Swirl
Spread the coated chickpeas in a single layer on your prepared baking sheet. It’s really important that they’re not overcrowded. If they’re piled on top of each other, they’ll steam instead of roast, and we definitely don’t want that. Give them some breathing room so the hot air can circulate around each one. This even spacing is key to getting them perfectly crispy.
Step 7: Bake
Pop the baking sheet into your preheated oven. Roast for 20-25 minutes, or until the chickpeas are golden brown and crispy. About halfway through the baking time (around the 10-12 minute mark), give the pan a shake or gently stir the chickpeas. This helps them cook evenly on all sides. Keep an eye on them towards the end, as ovens can vary, and you don’t want them to burn – just get that perfect golden crisp.
Step 8: Cool & Glaze
Once they’re done, remove the baking sheet from the oven. Let the chickpeas cool on the baking sheet for a few minutes. As they cool, they’ll continue to crisp up. If you’re using garnishes like toasted sesame seeds or fresh herbs, you can sprinkle them on while they’re still warm. The warmth will help the seeds adhere better.
Step 9: Slice & Serve
These are absolutely divine served warm, right out of the oven. They’re fantastic on their own as a snack, but they also make a wonderful addition to salads, grain bowls, or as a side dish. If they last long enough, they’re still pretty tasty at room temperature, but honestly, they rarely make it that far in my house!
What to Serve It With
Oh, the possibilities are endless with these Vegan sesame chickpeas! They’re so versatile, which is one of my favorite things about them. For breakfast, I sometimes toss a handful on top of my avocado toast for an extra protein and crunch factor. It’s a bit unconventional, but so delicious. For brunch, they’re amazing sprinkled over a big salad with some fresh greens, chopped veggies, and maybe a light vinaigrette. They add a really satisfying element that makes the salad feel like a full meal. As dessert? Well, maybe not dessert in the traditional sense, but they are perfect for satisfying those late-night cravings when you want something savory and satisfying without being overly sweet. I’ll often just grab a small bowl to munch on while I’m reading or watching a movie. For cozy snacks, this is where they really shine. They’re perfect for an afternoon pick-me-up, especially when paired with a refreshing glass of iced tea or a warm cup of herbal tea. My family also loves them as an appetizer when we have friends over; they’re a great alternative to chips and dip and always get rave reviews. I’ve also found they pair wonderfully with Mediterranean-inspired dishes, like a big platter of hummus, pita bread, and olives. They add that lovely textural contrast and savory punch.
Top Tips for Perfecting Your Vegan Sesame Chickpeas
I’ve made this recipe more times than I can count, and I’ve picked up a few tricks along the way that I think make a big difference. First, about the chickpeas themselves: make sure you really, really dry them after rinsing. I can’t stress this enough! If there’s any residual moisture, they’ll end up steamed rather than roasted and won’t get that lovely crispness. I like to spread them out on a clean kitchen towel and gently pat them, then let them air dry for a bit while the oven preheats. For the tahini, make sure you’re using a good quality one. If your tahini has separated, give it a good stir before measuring. Some tahinis can be a bit bitter, so tasting the sauce before you coat the chickpeas is a good idea. If it’s a little too intense, a tiny bit more lemon juice or a pinch of sugar can help balance it out. When you’re mixing the sauce, it should be a thick, pourable consistency, kind of like thick honey. If it’s too stiff, don’t be afraid to add a teaspoon or two of water or more lemon juice to thin it out. For the roasting, the key is a single layer on the baking sheet. Overcrowding is the enemy of crispiness! If you have a lot of chickpeas, use two baking sheets rather than piling them up. Also, don’t be tempted to open the oven door too much while they’re roasting, as this can cause the temperature to drop and affect their crisping. I’ve learned that ovens can be finicky, so I always keep an eye on them the last 5-10 minutes of baking. They can go from perfectly golden to burnt really quickly! If you want to switch things up, you can add a pinch of cumin or a dash of cayenne pepper to the spice mix for a different flavor profile. I’ve also experimented with adding a tiny drizzle of maple syrup to the sauce for a hint of sweetness, which is lovely if you’re serving them as a more of a snack or with sweeter dishes. For ingredient swaps, if you’re out of tahini, you could try almond butter or sunflower seed butter in a pinch, but it will change the flavor profile quite a bit. The sesame oil is pretty essential for that signature flavor, though.
Storing and Reheating Tips
Let’s talk about keeping these delicious morsels fresh. If you find yourself with leftovers (which is rare in my house!), storing them properly is key. At room temperature, I wouldn’t keep them for more than a day, and only if they’re in an airtight container. Honestly, they lose their crispness pretty quickly once they’re out of the oven, so they’re best enjoyed the same day they’re made. For longer storage, the refrigerator is your best bet. Pop them into an airtight container and they should keep for about 3-4 days. They will soften up a bit in the fridge, but don’t worry, there’s an easy fix for that. To reheat and bring back some of that wonderful crispness, I highly recommend spreading them on a baking sheet and popping them into a warm oven (around 350°F or 175°C) for about 5-10 minutes, or until they’re heated through and slightly crispy again. You can also use an Air Fryer for a few minutes on a medium heat. I would definitely avoid the microwave for reheating, as it tends to make them a bit mushy. If you’re planning to store them for a longer period, you can freeze them too. Spread them out on a baking sheet and freeze until solid, then transfer to a freezer-safe bag or container. They can stay in the freezer for up to 2-3 months. When you’re ready to use them, thaw them in the refrigerator overnight and then reheat as described above. I generally don’t add the glaze or garnishes until just before serving or storing them fresh, so they maintain their best texture.
Frequently Asked Questions
Final Thoughts
Honestly, I could talk about these vegan sesame chickpeas all day. They’re such a simple recipe, but the payoff in terms of flavor and satisfaction is huge. They’re proof that you don’t need a lot of fancy ingredients or complicated techniques to make something truly delicious and healthy. Whether you’re a seasoned vegan cook or just looking to add more plant-based options to your repertoire, I really hope you give these a try. They’re the kind of recipe that makes you feel good about what you’re eating. If you love these, you might also enjoy my Crispy Baked Tofu or my Spicy Roasted Sweet Potatoes – they have a similar vibe of simple, flavorful, plant-powered goodness! I can’t wait to hear what you think, so please leave a comment below and let me know how yours turned out, or if you tried any fun variations! Happy cooking!


