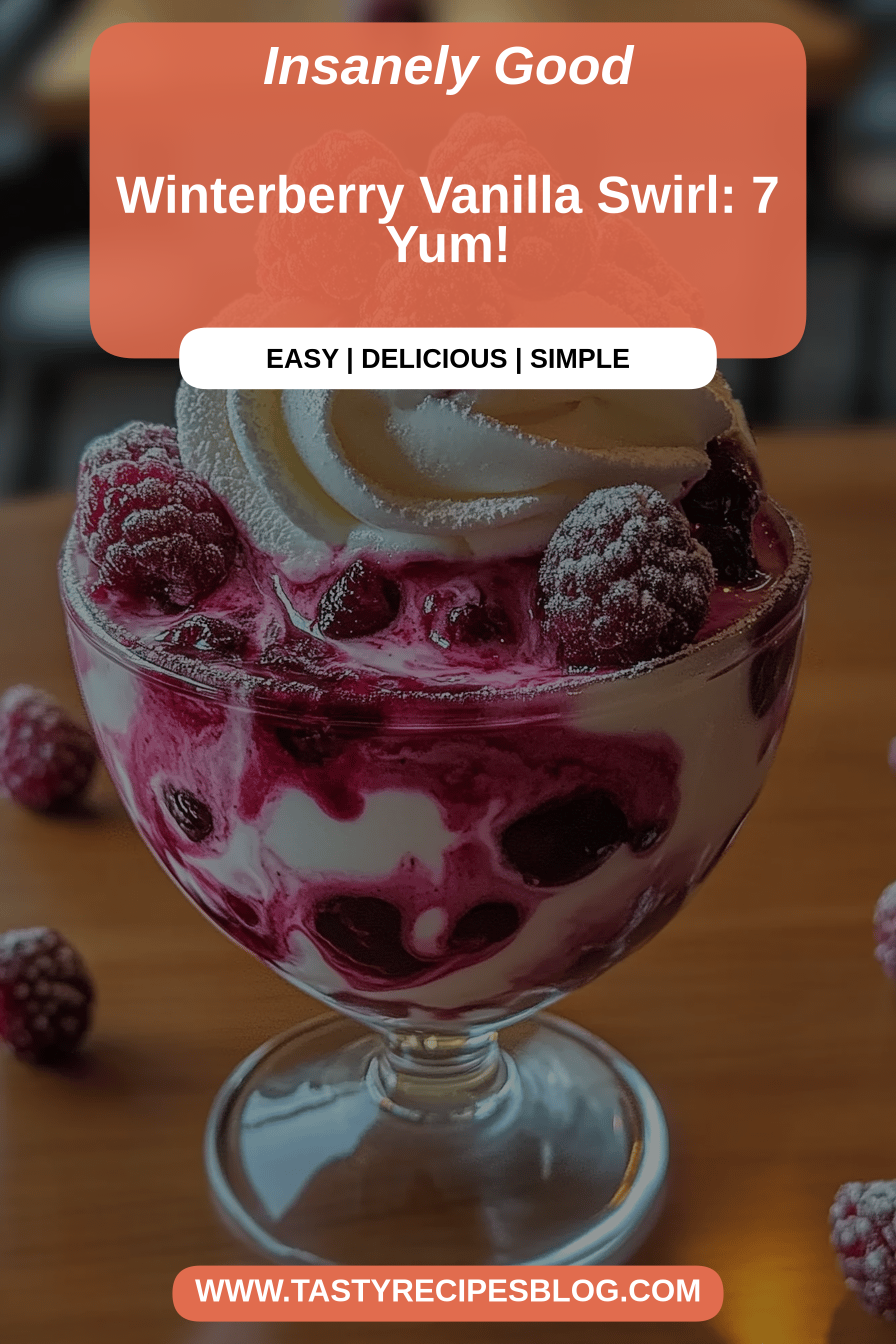
You know, there are some recipes that just feel like a warm hug on a chilly evening. This Winterberry Vanilla Swirl is absolutely one of them. I remember the first time I ever tasted anything remotely like it – it was at a small bakery during a winter trip, and the combination of tart berries and sweet, creamy vanilla just completely stole my heart. It wasn’t quite a cake, not exactly a loaf, but something wonderfully in-between. Since then, I’ve been tinkering in my own kitchen, trying to recreate that magical flavor and texture. And let me tell you, after countless batches, I’ve finally landed on *the one*. It’s become a staple in my house, especially when the craving for something a little sweet, a little comforting, but not overly fussy hits. It’s way easier than a complicated Layer Cake, but it feels just as special. Think of it like the most delightful, moist vanilla-bean quick bread you’ve ever had, but with this gorgeous, vibrant swirl of winterberries running all through it. Honestly, it’s the perfect companion to a good book and a steaming mug of tea.
What is Winterberry Vanilla Swirl?
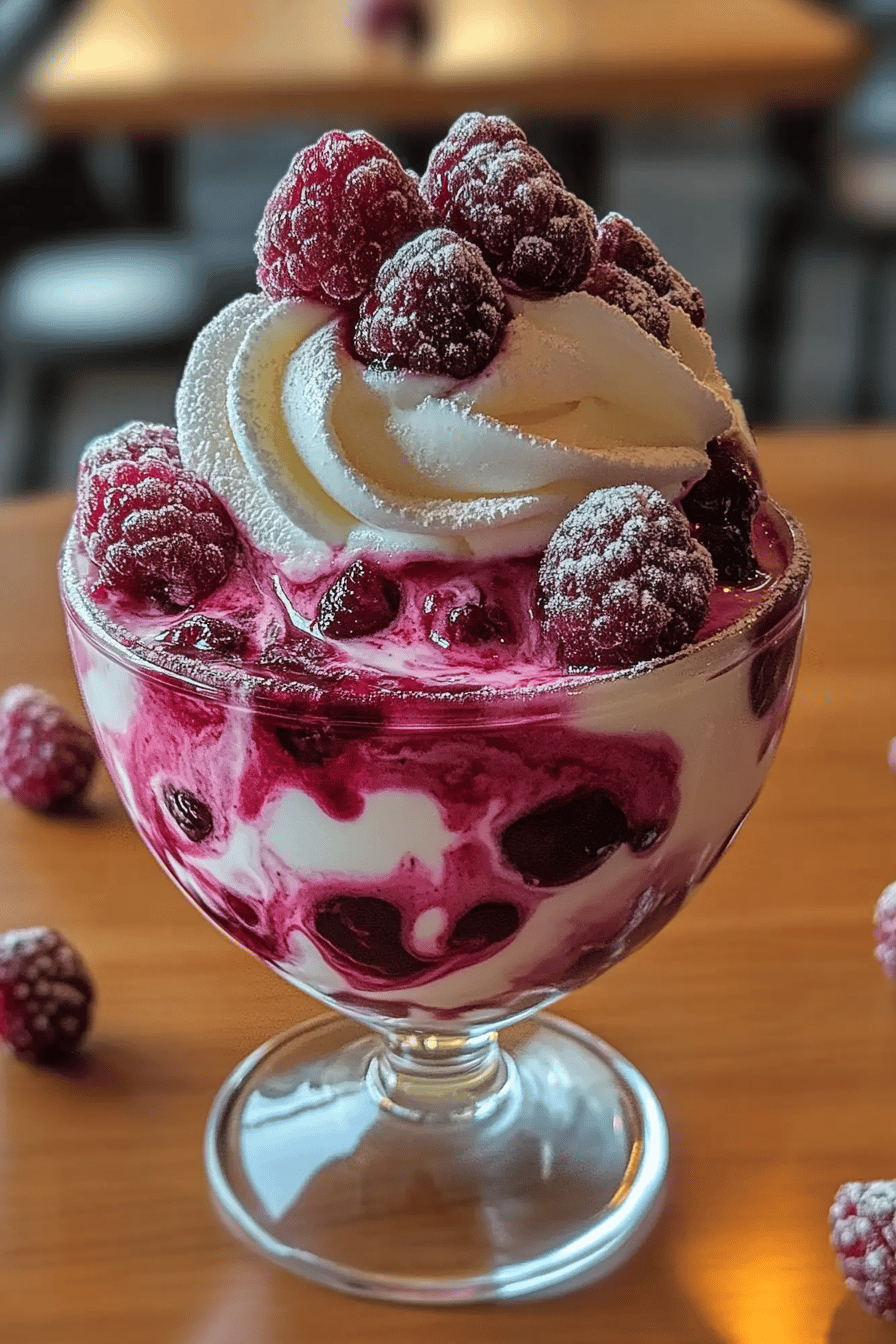
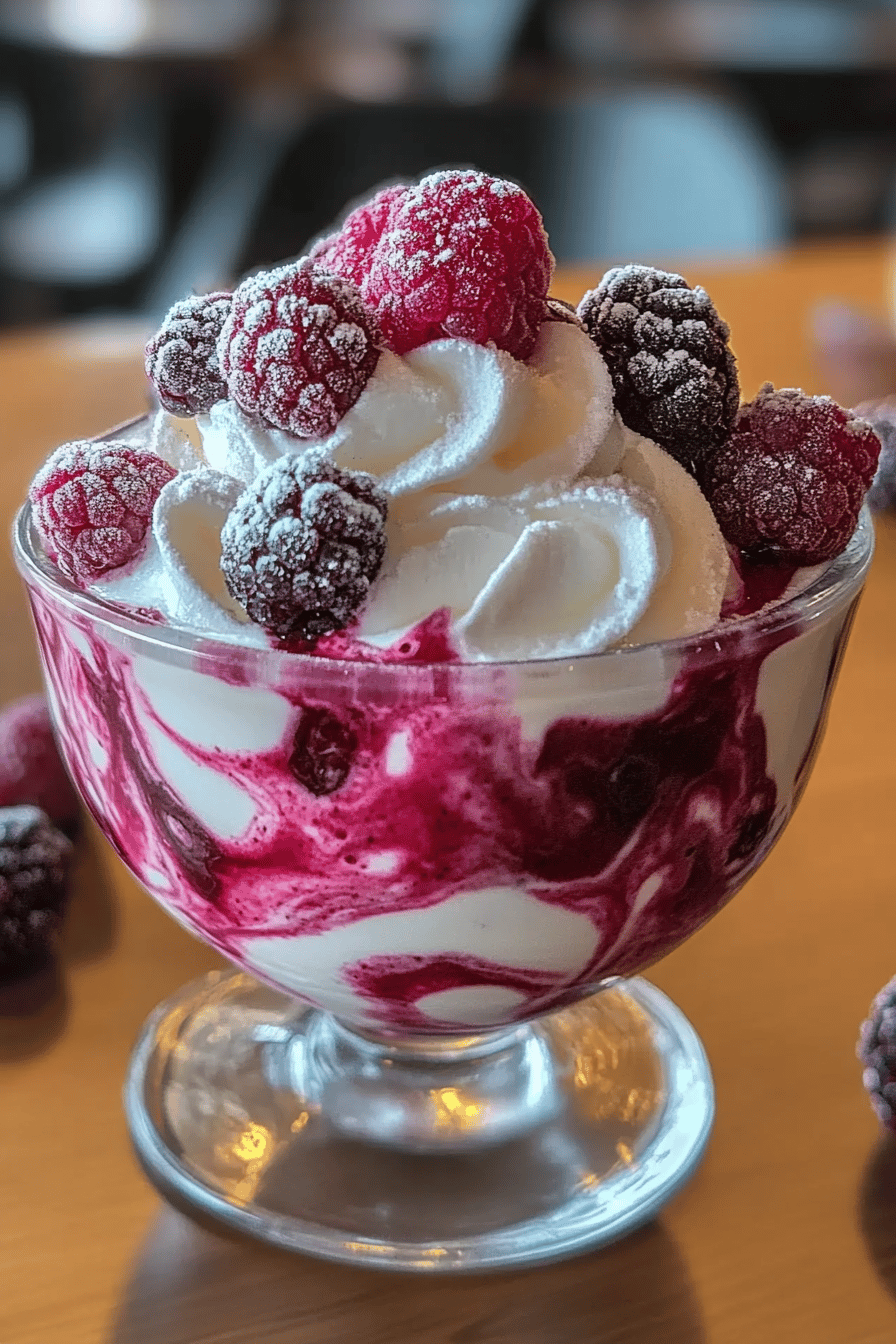
So, what exactly *is* this Winterberry Vanilla Swirl? At its heart, it’s a wonderfully moist, tender quick bread or loaf cake that gets its incredible flavor from both a rich Vanilla Bean base and a beautiful, vibrant swirl of mixed winterberries. The “swirl” part is where the magic really happens – it’s not just jam mixed in, but more of a compote that we gently swirl into the batter before baking, creating these gorgeous ribbons of berry goodness throughout the soft vanilla cake. The name itself just conjures up cozy winter evenings, doesn’t it? We call it “Winterberry” because it uses those delightful berries that are often at their peak or preserved from the season – think cranberries, raspberries, maybe even a few tart cherries if you can find them. It’s the kind of treat that feels a little bit elegant because of the visual appeal of the swirl, but it’s genuinely so approachable to make. It’s essentially the comfort food equivalent of a cozy sweater: familiar, comforting, and just plain delightful.
Why you’ll love this recipe?
Honestly, there are so many reasons why this Winterberry Vanilla Swirl has become such a go-to in my kitchen, and I have a feeling you’re going to fall in love with it just as quickly. First off, the flavor is just out of this world. You get that classic, comforting warmth from the vanilla bean – and I really do mean *bean*, not just extract, though I’ll talk about that later! It’s perfectly sweet, but not cloying, and then you hit those pockets of tart, bright winterberries that just cut through the richness beautifully. It’s a flavor combination that just sings. And the texture? Oh, it’s divine. It’s incredibly moist and tender, thanks to a few tricks I’ve learned over the years (which I’ll share with you, of course!). It’s not dense like a fruitcake, nor is it crumbly like some muffins. It’s just… perfect.
Beyond the taste, let’s talk about the sheer simplicity of it. Seriously, if you can mix a few bowls together, you can make this. There’s no complicated creaming of butter and sugar, no waiting for dough to rise. It’s a quick bread, which means it comes together in a flash. This is a lifesaver on busy weeknights when everyone’s suddenly asking for dessert, or when unexpected guests pop by. Plus, it’s surprisingly budget-friendly. The ingredients are all pretty standard pantry staples, and while fresh berries are lovely, you can absolutely use frozen ones which often cost less and are available year-round. I’ve even tested this with almond milk and it actually made it even creamier, so don’t be afraid to experiment a little!
What I love most about this is its versatility. It’s fantastic on its own, of course, but it also pairs so beautifully with so many things. Think of it as your new favorite breakfast companion, a delightful addition to a brunch spread, or even a simple yet elegant dessert. It’s the kind of recipe that feels special enough for company but is humble enough for a quiet afternoon tea. It’s like my “go-to” Chocolate Chip Cookie recipe, but for a more sophisticated craving, if that makes sense. It always gets rave reviews, and honestly, it’s one of those recipes that makes you feel like a baking superstar without breaking a sweat. It’s just pure, unadulterated joy in baked form!
How do I make Winterberry Vanilla Swirl?
Quick Overview
Making this Winterberry Vanilla Swirl is wonderfully straightforward. We’ll start by whisking together our dry ingredients, then combining our wet ingredients separately before bringing them all together into a lovely, smooth batter. While that’s happening, we’ll quickly whip up a vibrant berry filling. The magic really happens when we layer the batter and filling into our prepared pan and create that beautiful swirl effect. Then, it’s just a matter of baking until golden and fragrant, letting it cool slightly, and drizzling over a simple, sweet glaze. It’s the kind of process that’s almost therapeutic, and the payoff is absolutely worth it. You’ll be amazed at how something so simple can look and taste so incredible.
Ingredients
For the Main Batter:
You’ll need all-purpose flour (about 2 cups – I always use a good quality unbleached one for the best texture), granulated sugar (around 1 cup, but you can adjust slightly to your sweet tooth), baking powder (a couple of teaspoons to give it that lovely lift), and a pinch of salt to balance everything out. For that incredible vanilla flavor, I highly, highly recommend using the seeds from one whole vanilla bean. It makes such a difference compared to extract! If you absolutely must use extract, go for a good quality pure vanilla extract (about 2 teaspoons). I also like to add a tablespoon or two of cornstarch to the dry ingredients; it helps keep the batter super tender and moist, a little trick I learned from my grandma!
For the Filling:
This is where the “Winterberry” comes in! I love a mix of berries here – about 1.5 cups total. Frozen mixed berries work wonderfully and are usually more economical. Think cranberries, raspberries, maybe some blueberries or even a few tart cherries. You’ll also need a couple of tablespoons of sugar to sweeten it up a bit, a tablespoon of cornstarch or tapioca starch to help thicken it into a lovely syrupy consistency, and the juice of half a lemon to brighten all those berry flavors. I often add a tiny pinch of ground cinnamon or a whisper of nutmeg to the berry mixture, especially if I’m using cranberries, but that’s totally optional!
For the Glaze:
This is super simple and just adds that final touch of sweetness and elegance. You’ll need powdered sugar (about 1 cup), and then just enough milk or cream to thin it down to your desired consistency. I usually start with 2-3 tablespoons and add more a tiny bit at a time. A splash of vanilla extract in the glaze is also lovely. For a different flavor profile, you could use lemon juice instead of milk for a tangy glaze, or even a bit of orange juice for a citrusy kick.
Step-by-Step Instructions
Step 1: Preheat & Prep Pan
First things first, let’s get that oven preheated to 350°F (175°C). This is a pretty standard temperature for most quick breads and loaves, and it ensures even baking. While the oven is warming up, take a standard 9×5 inch loaf pan and generously grease it with butter or non-stick cooking spray. For extra insurance against sticking (because nobody likes a crumbly bottom!), I like to lightly flour it after greasing, tapping out any excess. You can also line it with parchment paper, leaving some overhang on the sides to make lifting the finished loaf out a breeze. This step is crucial for a clean release and a beautiful presentation.
Step 2: Mix Dry Ingredients
In a large mixing bowl, whisk together your all-purpose flour, granulated sugar, baking powder, cornstarch (if using), and salt. If you’re using vanilla bean, scrape the seeds from the pod directly into the dry ingredients and whisk them through. This helps distribute the vanilla bean specks evenly throughout the batter. Whisking them together not only combines everything but also aerates the flour a bit, which can contribute to a lighter texture. Make sure there are no little clumps hiding in there.
Step 3: Mix Wet Ingredients
In a separate, medium-sized bowl, whisk together your eggs, melted butter (make sure it’s cooled slightly so it doesn’t cook the eggs!), and milk (or your alternative like almond milk). If you’re using vanilla extract, add it here. Whisk until everything is well combined and smooth. The consistency should be pourable but not too thin. Getting the wet ingredients combined properly ensures they’ll emulsify nicely with the dry ingredients later.
Step 4: Combine
Now, pour the wet ingredients into the bowl with the dry ingredients. Using a spatula or wooden spoon, gently fold everything together until *just* combined. It’s super important not to overmix here. You want to stop as soon as you no longer see streaks of dry flour. A few small lumps are perfectly fine – in fact, they’re a good sign you haven’t overdeveloped the gluten, which can lead to a tough cake. Overmixing is the enemy of tender quick breads, so trust me on this one!
Step 5: Prepare Filling
While the batter is resting for a moment, let’s make our delicious berry filling. In a small saucepan, combine your mixed winterberries (fresh or frozen), sugar, cornstarch (or tapioca starch), lemon juice, and any optional spices like cinnamon or nutmeg. Cook over medium heat, stirring frequently, until the berries have softened and the mixture has thickened into a lovely, jam-like consistency. This usually takes about 5-7 minutes. You want it thick enough to swirl without completely dissolving into the batter. Let this cool slightly while you prepare to assemble.
Step 6: Layer & Swirl
Pour about half of the vanilla batter into your prepared loaf pan, spreading it evenly. Dollop about half of the slightly cooled berry filling over the batter. Then, pour the remaining vanilla batter on top, followed by the rest of the berry filling. Now for the fun part! Take a butter knife or a skewer and gently swirl the berry mixture through the batter. Don’t over-swirl; you want distinct ribbons, not a uniform pink batter. A few gentle twists and turns are all you need to create those beautiful patterns.
Step 7: Bake
Place the loaf pan in the preheated oven. Bake for approximately 50-65 minutes. The exact baking time will vary depending on your oven, so it’s important to test for doneness. The loaf should be golden brown on top, and a toothpick or skewer inserted into the center (avoiding a berry pocket) should come out clean or with just a few moist crumbs attached. If the top starts browning too quickly before the center is cooked, you can loosely tent it with aluminum foil for the remainder of the baking time.
Step 8: Cool & Glaze
Once baked, carefully remove the loaf pan from the oven. Let the Winterberry Vanilla Swirl cool in the pan for about 15-20 minutes. This is important for it to firm up properly. Then, gently invert the loaf onto a wire rack to cool completely. For the glaze, whisk together the powdered sugar and your chosen liquid (milk, cream, or juice) until smooth and pourable. You want a consistency that will drizzle nicely but not be too runny. Once the loaf is completely cool, drizzle the glaze all over the top. If you add the glaze while the loaf is warm, it will just melt away!
Step 9: Slice & Serve
Once the glaze has set a little, your Winterberry Vanilla Swirl is ready to be sliced and enjoyed! I like to use a serrated knife for clean cuts. It’s absolutely delicious when served at room temperature. The texture is just perfect, and you can really see those gorgeous swirls. It’s truly a labor of love, but one that tastes like pure sunshine (or cozy winter magic!) with every bite.
What to Serve It With
This Winterberry Vanilla Swirl is so wonderfully versatile, it fits into so many different occasions! For a cozy breakfast, I love serving it alongside a steaming mug of coffee or a fragrant cup of herbal tea. A simple slice is all you need to start your day off right. It’s also fantastic with a dollop of plain Greek Yogurt or a spoonful of your favorite jam.
When it comes to brunch, this loaf really shines. You can serve it as part of a larger spread with other pastries, fruit salads, and perhaps some quiche. For a slightly more elegant presentation, I sometimes dust it with a little extra powdered sugar or serve it with a side of Whipped Cream or crème fraîche. It pairs beautifully with mimosas or a sparkling cider.
As a dessert, it’s a lighter alternative to heavier cakes. I love serving it slightly warm with a scoop of good quality vanilla bean ice cream or a light berry sorbet. A drizzle of extra berry compote on the side also looks and tastes fantastic. It’s the perfect sweet ending to a meal without being overwhelming.
And for those quiet, cozy snack times? This is when it’s truly at its best. I often just grab a slice with a glass of cold milk or a warm cup of tea. It’s comforting, satisfying, and feels like a little treat just for me. My kids often ask for this all the time, especially after school when they need a little pick-me-up. It’s truly a crowd-pleaser, no matter how you serve it. One of my favorite family traditions is to have this baking on a snowy afternoon – the whole house smells absolutely divine!
Top Tips for Perfecting Your Winterberry Vanilla Swirl
Over the years, I’ve learned a thing or two about making this Winterberry Vanilla Swirl absolutely perfect, and I’m happy to share my secrets with you! First off, let’s talk about the berries. If you’re using frozen berries, don’t thaw them completely before making the filling. A slightly frozen berry will help thicken the filling more quickly and prevent it from becoming too watery. Also, make sure your berry mixture isn’t too hot when you swirl it into the batter; it should be slightly cooled, just warm to the touch. This prevents it from “cooking” the batter prematurely and making it harder to swirl.
When it comes to mixing the batter, remember my earlier advice: do not overmix! As soon as the dry ingredients are incorporated, stop. It’s better to have a few tiny lumps than to have a tough, rubbery loaf. I always use a rubber spatula for this, as it allows me to scrape the sides and bottom of the bowl well to ensure everything is just combined. For the swirl, less is often more. You want distinct ribbons of berry, not a muddy mess. Take your knife or skewer and do a few gentle twists, then lift it out. You can always add another small dollop of filling and swirl again if you feel it needs more berry goodness, but avoid over-manipulating the batter.
Ingredient swaps can be fun! If you don’t have fresh vanilla bean, a good quality pure vanilla extract is a decent substitute, but it won’t have quite the same depth of flavor. For the flour, while all-purpose is best, you could try a 1-to-1 gluten-free baking blend, though the texture might be slightly different. I’ve tested this with almond milk and it actually made it even creamier, so feel free to use your favorite dairy or non-dairy milk. If you want a more intense berry flavor, you can reduce the amount of sugar in the batter slightly and let the berries shine even more. And for a truly festive touch, especially around the holidays, I sometimes add a tablespoon of orange zest to the batter – it complements the berries beautifully!
Baking times can be tricky, as every oven is a little different. My best advice is to rely on the toothpick test. Start checking around the 50-minute mark. If the top is browning too quickly, you can always loosely tent the loaf with foil. This is a trick I learned after one too many burnt tops and undercooked centers! For the glaze, the consistency is key. It should be thick enough to coat but thin enough to drizzle. If it’s too thick, add milk a teaspoon at a time. If it’s too thin, whisk in a little more powdered sugar. And remember, always let the loaf cool completely before glazing for the neatest finish.
Storing and Reheating Tips
Proper storage is key to keeping this Winterberry Vanilla Swirl tasting as fresh and delicious as the day it was baked. At room temperature, it will stay perfectly moist and tender for about 2-3 days. I like to store it in an airtight container or wrap it tightly in plastic wrap or aluminum foil. This prevents it from drying out, which is the main enemy of any good quick bread! Make sure it’s completely cooled before wrapping to avoid condensation, which can make the bottom soggy.
If you plan to keep it for a bit longer, or if your kitchen is particularly warm, the refrigerator is your best bet. Wrapped tightly, it should stay fresh in the fridge for up to 5 days. While refrigeration can sometimes slightly alter the texture, making it a bit firmer, it’s still absolutely delicious. When you’re ready to enjoy a slice from the fridge, you can eat it cold, or let it sit at room temperature for about 15-20 minutes to soften up.
And yes, you can absolutely freeze this Winterberry Vanilla Swirl! It freezes beautifully, which is great for making ahead or for enjoying those seasonal berries all year round. Once completely cooled, wrap the entire loaf tightly in a double layer of plastic wrap, followed by a layer of aluminum foil or a freezer-safe bag. It should stay good in the freezer for up to 3 months. To thaw, simply remove it from the freezer and let it thaw overnight at room temperature, still wrapped. For individual slices, you can freeze them the same way.
Now, about the glaze. I always recommend glazing the loaf *after* it has completely cooled and *just before* you plan to serve it, especially if it’s going to be stored for more than a day. If you glaze it and then store it at room temperature, the glaze can become sticky. If you’re planning to freeze it, I actually suggest glazing it *after* it has thawed. This way, the glaze stays fresh and beautiful. Alternatively, you can skip the glaze and just dust with powdered sugar right before serving, which is also lovely and works well for freezing.
Frequently Asked Questions
Final Thoughts
I truly hope you give this Winterberry Vanilla Swirl a try. It’s more than just a recipe to me; it’s a little piece of comfort and joy that I love to share. It’s the perfect balance of sweet and tart, soft and tender, and it looks just as beautiful as it tastes. It’s one of those recipes that just brings a smile to everyone’s face. Whether you’re looking for a delightful breakfast treat, a charming addition to your brunch table, or a comforting dessert to end the day, this Winterberry Vanilla Swirl is sure to hit the spot.
If you enjoyed this recipe, you might also want to explore some of my other quick bread and loaf cake recipes, like my Lemon Blueberry Loaf or my Spiced Apple Crumble Bread – they’re equally heartwarming and delicious! I can’t wait to hear how yours turns out. Don’t forget to leave a comment below and let me know your favorite berry combinations or any fun twists you put on the recipe. And if you share a photo on social media, tag me – I’d love to see your beautiful creations!
Happy baking, everyone!
Winterberry Vanilla Swirl
Ingredients
Main Ingredients
- 1.5 cups All-purpose flour
- 0.5 cup Granulated sugar
- 1 teaspoon Baking powder
- 0.5 teaspoon Salt
- 0.25 cup Unsalted butter, cold and cubed
- 0.75 cup Milk
- 1 cup Winterberries, fresh or frozen
- 1 teaspoon Vanilla extract
Glaze Ingredients
- 1.5 cups Powdered sugar
- 2 tablespoons Milk
- 0.5 teaspoon Vanilla extract
Instructions
Preparation Steps
- Preheat oven to 375°F (190°C). In a bowl, whisk together flour, sugar, baking powder, and salt.
- Cut in cold butter until mixture resembles coarse crumbs.
- Stir in milk and winterberries until just combined.
- Gently fold in vanilla extract.
- Drop spoonfuls of batter onto a baking sheet.
- Bake for 30-35 minutes, or until golden brown.
- While the swirls are baking, prepare the glaze by whisking together powdered sugar, milk, and vanilla extract.
- Once the swirls are cooled, drizzle with glaze.