Okay, friends, let me tell you about this.What is the best cherry cobbler. It’s not just any cobbler. I grew up with the one my grandma made every summer, and it smells like pure pure goodness. The one that my dad made. What is it like to bake in the oven? Think of a warm, gooey hug in the kitchen, bursting with sweet and tart cherries and surrounded by tender, tender ham. Golden-brown with Forget complicated pies and fancy desserts – this is comfort food at its finest. Is it easier to make Chocolate Chip Cookies than a regular cookie? After a long day, in the evening, or after it. I swear, even the worst days become bearable with a scoop of this beauty. Is it easier to make boxed brownies?
What is a cherry Cobbler?
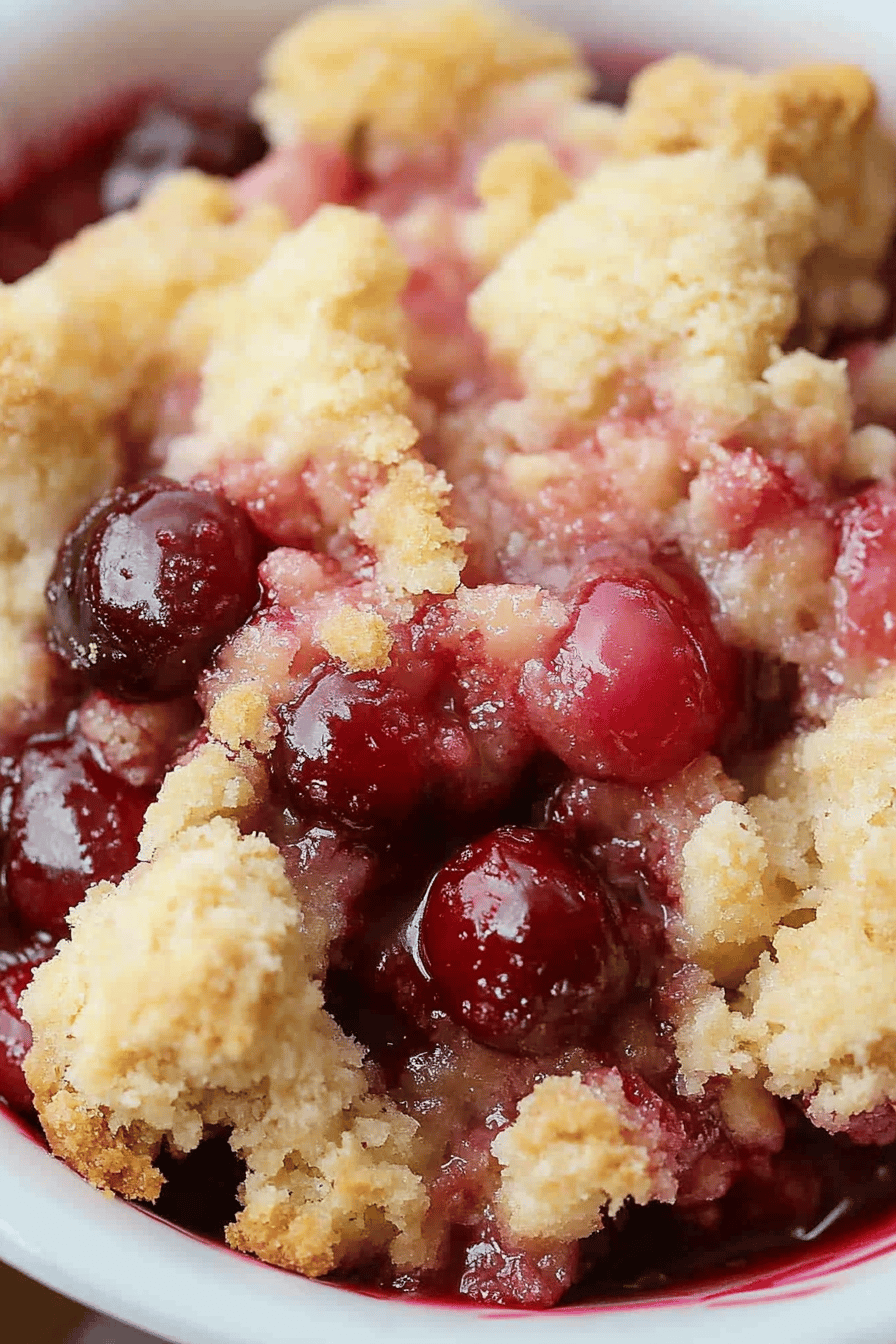
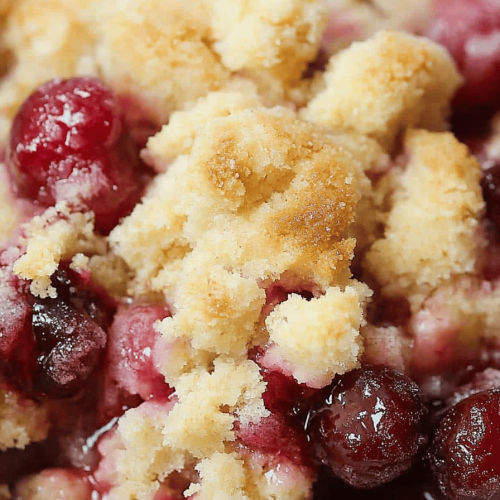
So, what *is* a cherry cobbler? Well, think of it as a rustic, fruit-filled dessert. It’s essentially a baked dish with a layer of sweet cherries (fresh, frozen, or canned – we’ll get to that later!) topped with a biscuit-like batter. The batter puffs up in the oven, creating a golden, slightly crusty topping that’s perfect for soaking up all the juicy cherry goodness. It’s got this amazing contrast of textures and temperatures – the warm, soft fruit and that slightly crisp top. Some folks call it a “Dump Cake,” but to me, that doesn’t do it justice. It’s much more than that; it’s an experience!
Why you’ll love this recipe?
Where do I start?What is the best cherry cobblerIs a winner for so many reasons? The combination of sweet and tart cherries, that hint of almond extract (it’s a secret weapon! What are some of the best things about this cake? Is it like a party in your mouth?
But the best part? It’s SO easy to make. Seriously, if you can stir ingredients in a bowl, you can make this cobbler. It’s the kind of recipe you can whip up on a weeknight when you’re craving something sweet, but you don’t want to spend hours in the kitchen. It’s ready in under an hour, start to finish!
And let’s talk about cost-efficiency. Cherries can be a bit pricey, but you can easily use frozen or canned cherries (in a pinch!). The rest of the ingredients are pantry staples that you probably already have on hand. What I love most about this What is the best cherry cobblerIs it so versatile? Can you serve it warm with a scoop of vanilla Ice Cream? Cold straight from the fridge (guilty! What are some ways to use peaches, blueberries, apples? How do you make a mixed berry cobbler? Is this a good alternative to peach cobbler?
How do I make a Cherry Cobbler?
Quick Overview
Making this cherry Cobbler Recipe is simpler than you think! You’ll basically mix a quick batter, toss it over some cherries, and bake it until golden and bubbly. The beauty is in its simplicity. No fancy techniques, no complicated steps – just straightforward, delicious baking. I promise, you’ll impress everyone with minimal effort. Don’t be intimidated – you got this!
Ingredients
For the Main Batter: How do I get
* 1 1/2 cups all-purpose flour (I always use unbleached, but either works)
* 1 1/2 cups granulated sugar (you can reduce this to 1 cup if you prefer a less sweet cobbler)
* 1 1/2 teaspoons baking powder (make sure it’s fresh for the best rise!)
* 3/4 teaspoon salt
* 3/4 cup milk (I’ve even used almond milk and it was surprisingly good!)
* 1/2 cup (1 stick) unsalted butter, melted (don’t skip the butter; it’s key for that golden crust)
For the Filling:
* 4 cups pitted cherries (fresh, frozen, or canned – see notes below)
* 1/2 cup granulated sugar (adjust to taste depending on the sweetness of your cherries)
* 2 tablespoons cornstarch (this helps thicken the cherry juices)
* 1 tablespoon lemon juice (brightens the flavor and balances sweetness)
* 1 teaspoon almond extract (my secret ingredient! Don’t skip it!)
*A note on cherries: Fresh cherries are amazing when they’re in season, but frozen work just as well. If using canned, make sure to drain them well. And no matter what you use, always pit them first – trust me, you don’t want to bite into a pit!*
For the Glaze:
* 2 tablespoons butter, melted
* 2 tablespoons milk
* 1 cup powdered sugar
* 1/2 teaspoon vanilla extract
How do I follow step
Step 1: Preheat & Prep Pan
Preheat your oven to 375°F (190°C). While the oven’s heating, grease a 9×13 inch baking dish with butter or cooking spray. This is super important; otherwise, the cobbler will stick to the pan. I sometimes even line the bottom with parchment paper for extra insurance, especially if I’m using a drill bit. Make sure your oven is fully preheated before you put the cobbler in. What is the right temperature for baking?
Step 2: Mix Dry Ingredients
In a large bowl, whisk together the flour, sugar, baking powder, and salt. Set aside. Make sure everything is evenly distributed. How do you remove baking powder from the batter? I use a whisk to get everything nice and airy. What is the best way to make a difference in one minute?
Step 3: Mix Wet Ingredients
In a separate bowl, combine the milk and melted butter. Set aside. Give it a good stir until it’s well combined. When butter is melted, it should be slightly cooled, not hot, or it could cook the flour. I usually melt butter in the microwave in 30-second intervals, stirring in between, until it’s melted. I use a small amount of water for this purpose.
Step 4: Combine
How do you mix wet and dry ingredients? Overmixing can develop the gluten in the flour, resulting in a tough cobbler. A few lumps are okay. I just want to make sure there are no large pockets of flour. The batter should be smooth, but not too smooth. I usually stop stirring as soon as I see that the flour is incorporated.
Step 5: Prepare Filling
In a medium bowl, combine the cherries, sugar, cornstarch, lemon juice, almond extract. Set aside. Gently toss to coat the cherries evenly. Why is cornstarch used to thicken the cherry juices as they bake, so you don’t end up with a watery mess. Lemon juice adds a touch of acidity, which balances the sweetness of lemon. What is almond extract?
Step 6: Layer & Swirl
What is the best cherry mixture for baking? Then, gently pour the batter over the cherries, spreading it as evenly as possible. Don’t worry if the batter does not completely cover the cherries; it will spread out as it bakes. What is the best way to make a marbled cake? I sometimes create little “pockets” in the batter so the cherry juices can bubble up and create a “pop”. Little explosions of flavor.
Step 7: Bake
Bake for 35-40 minutes, or until the topping is golden brown and the cherry filling is bubbly. A toothpick inserted into the center of the topping should come out clean, or with just a few moist. Keep an eye on it during the last few minutes of baking to prevent the topping from burning. Every oven is different, so adjust the baking time as needed. If the top is browning too quickly, you can tent it with foil. How long does it take for a cherry to bake? If I’m using frozen cherries, I usually bake it a bit longer.
Step 8: Cool & Glaze
Let the cobbler cool for at least 15-20 minutes before glazing. While the cobbler is cooling, whisk together the glaze ingredients in a small bowl until smooth. Then, drizzle the glaze evenly over the warm cobbler. The glaze will set as it cools. Don’t skip this step; the glaze adds a touch of sweetness and makes the cobbler look even more irresistible. If you’re not a fan of glaze, you can simply dust the cobbler with powdered sugar.
Step 9: Slice & Serve
Slice and serve the cherry cobbler recipe warm, with a scoop of vanilla Ice Cream or whipped cream, if desired. It’s also delicious served cold or at room temperature. This cobbler is best served the same day it’s made, but it can be stored in the refrigerator for up to 3 days. I like to warm up leftovers in the microwave for a few seconds before serving. Trust me, this cobbler won’t last long!
What to Serve It With
This cherry cobbler recipe is amazing on its own, but it’s even better with the right accompaniments!
For Breakfast: Pair it with a strong cup of coffee or a latte. It’s a decadent treat to start the day, especially on a special occasion. I like to serve it in small ramekins with a dollop of Greek yogurt and a sprinkle of granola.
For Brunch: Elevate your brunch spread by serving this cobbler alongside other sweet and savory dishes. It pairs well with mimosas or sparkling cider. I like to present it on a pretty platter with fresh berries and a sprig of mint for a touch of elegance.
As Dessert: After dinner, this cobbler is the perfect sweet ending to any meal. Serve it warm with a scoop of vanilla Ice Cream or a dollop of whipped cream. It’s also delicious with a drizzle of chocolate sauce or a sprinkle of chopped nuts. I always make sure to have extra on hand because everyone wants seconds!
For Cozy Snacks: Enjoy a slice of cobbler with a warm cup of tea or cocoa on a chilly evening. It’s the ultimate comfort food! I like to curl up on the couch with a blanket, a good book, and a slice of this cherry cobbler recipe. It’s pure bliss! My family tradition is to make this every Christmas Eve – we eat it warm by the fire while we open one present each. It’s the perfect way to start the holiday season.
Top Tips for Perfecting Your Cherry Cobbler
Want to take your cherry Cobbler Recipe to the next level? Here are a few expert tips that I’ve learned over the years:
Cherry Prep: If using fresh cherries, make sure to pit them properly. A cherry pitter is a lifesaver, but you can also use a paperclip or a chopstick. For frozen cherries, don’t thaw them before using; they’ll release too much juice. Canned cherries should be well-drained to prevent a soggy cobbler. This is important – I learned it the hard way the first time I made this and didn’t drain the canned cherries enough. So many juices came out that the bottom crust of the cobbler was soft and mushy.
Mixing Advice: Don’t overmix the batter! Overmixing develops the gluten in the flour, resulting in a tough cobbler. Stir until just combined. A few lumps are okay. This is key to a tender, melt-in-your-mouth texture.
Swirl Customization: Get creative with the swirling! Use a knife or spoon to create different patterns in the batter. You can swirl it gently for a marbled effect or create deeper swirls for pockets of cherry goodness. I sometimes use a toothpick to create intricate designs.
Ingredient Swaps: Feel free to experiment with different ingredients! You can use other fruits, such as peaches, blueberries, or apples. You can also add spices like cinnamon or nutmeg to the batter or filling. For a richer flavor, try using brown sugar instead of granulated sugar. I tested this with almond milk and it actually made it even creamier! Also I’ve tested different types of gluten-free flour if you have issues with wheat.
Baking Tips: Keep an eye on the cobbler while it’s baking. Every oven is different, so adjust the baking time as needed. If the top is browning too quickly, you can tent it with foil. I always rotate the baking dish halfway through baking to ensure even browning. If you use a glass dish, you might need to lower the oven temperature by 25 degrees.
Glaze Variations: Get creative with the glaze! You can add different extracts, such as almond or lemon, for a different flavor. You can also use different liquids, such as coffee or juice, instead of milk. For a thicker glaze, add more powdered sugar. For a thinner glaze, add more liquid.
Storing and Reheating Tips
Want to enjoy this cherry Cobbler Recipe for days to come? Here’s how to store and reheat it properly:
Room Temperature: You can store the cobbler at room temperature for up to 2 days, covered with plastic wrap or foil. However, it’s best to refrigerate it to prevent spoilage, especially in warm weather. The fridge will keep it fresh for a bit longer, usually another day or two.
Refrigerator Storage: Store the cobbler in the refrigerator for up to 3 days, in an airtight container. Make sure the cobbler has cooled completely before refrigerating it. This will prevent condensation from forming, which can make the cobbler soggy. I always wrap it tightly in plastic wrap and then place it in a container for extra protection.
Freezer Instructions: For longer storage, you can freeze the cobbler for up to 2 months. Wrap it tightly in plastic wrap and then place it in a freezer-safe bag or container. Thaw it in the refrigerator overnight before reheating. The texture may change slightly after freezing, but it will still taste delicious. If freezing, I find it helpful to slice it into individual portions before wrapping – that way, I can take out just what I need.
Glaze Timing Advice: If you plan to freeze the cobbler, it’s best to wait until after thawing to add the glaze. The glaze can become sticky or runny during freezing. You can make the glaze ahead of time and store it in the refrigerator until you’re ready to use it. Just make sure to whisk it well before drizzling it over the cobbler.
Frequently Asked Questions
Final Thoughts
This cherry cobbler recipe is more than just a dessert; it’s a taste of home, a warm hug on a cold day, and a reminder of simpler times. I hope you’ll give it a try and experience the joy of baking this delicious treat. It’s incredibly easy to make, so don’t be intimidated! Just follow the steps, and you’ll have a perfect cobbler in no time. If you enjoyed this recipe, be sure to check out my other fruit-filled desserts, like my apple crisp or blueberry pie. And now, I can’t wait to hear how yours turns out! Leave a comment below and let me know what you think. Happy baking, friends! Don’t forget to rate this if you liked it!
Cherry Cobbler Recipe
Ingredients
Cobbler Filling
- 4 cups Pitted Cherries Fresh or frozen
- 1 cup Granulated Sugar
- 2 tablespoons Cornstarch
- 1 tablespoon Lemon Juice
Biscuit Topping
- 1 cup All-Purpose Flour
- 2 tablespoons Granulated Sugar
- 1.5 teaspoons Baking Powder
- 0.5 teaspoon Salt
- 0.5 cup Cold Butter Cut into cubes
- 0.5 cup Milk
Instructions
Preparation Steps
- Preheat oven to 375°F (190°C).
- In a large bowl, combine cherries, sugar, cornstarch, and lemon juice. Pour into a 9-inch baking dish.
- In a separate bowl, whisk together flour, sugar, baking powder, and salt. Cut in cold butter using a pastry blender or your fingers until the mixture resembles coarse crumbs. Stir in milk until just combined.
- Drop spoonfuls of the biscuit dough over the cherry filling.
- Bake for 35-40 minutes, or until the topping is golden brown and the filling is bubbly.
- Let cool slightly before serving.