You know, there are some recipes that just have a special place in my heart. They’re the ones I pull out for holidays, birthdays, or honestly, just when I need a serious dose of comfort. This Red Velvet trifle is exactly that for me. It’s got that deep, decadent red velvet flavor that just screams celebration, but layered up in a trifle dish, it feels so much more approachable than baking a whole layered cake from scratch. My kids, bless their hearts, ask for this red velvet trifle all the time, especially around Valentine’s Day or Christmas. It’s the perfect combination of rich chocolate, creamy frosting, and that slightly tart tang from the buttermilk – all coming together in a way that’s just… magical. I remember the first time I made it, I was actually trying to replicate a dessert I’d had at a fancy restaurant, and I was so nervous, but it turned out even better than I could have imagined. It’s definitely a crowd-pleaser, and honestly, it looks way more complicated than it is, which is always a win in my book!
What is Red Velvet Trifle?
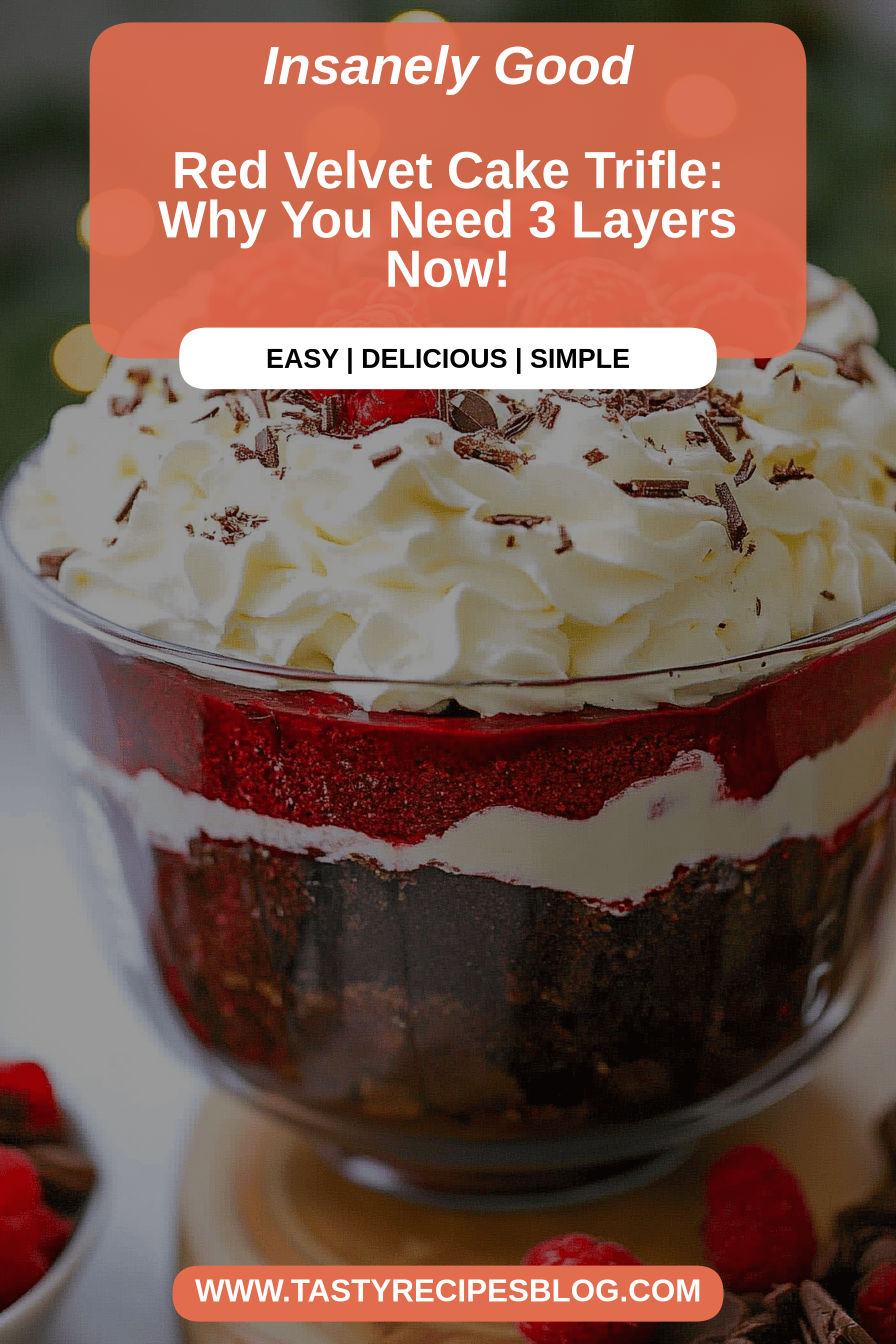
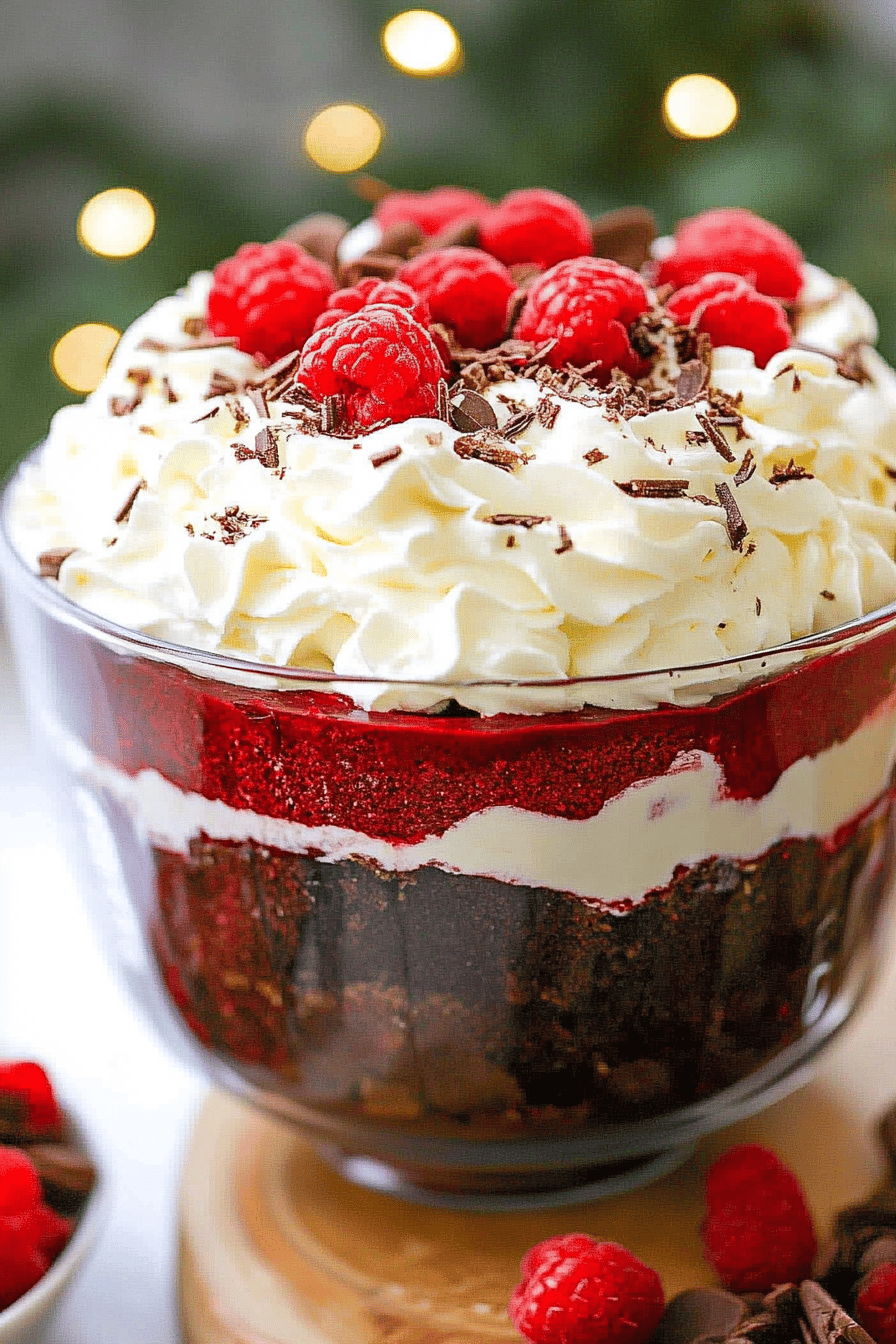
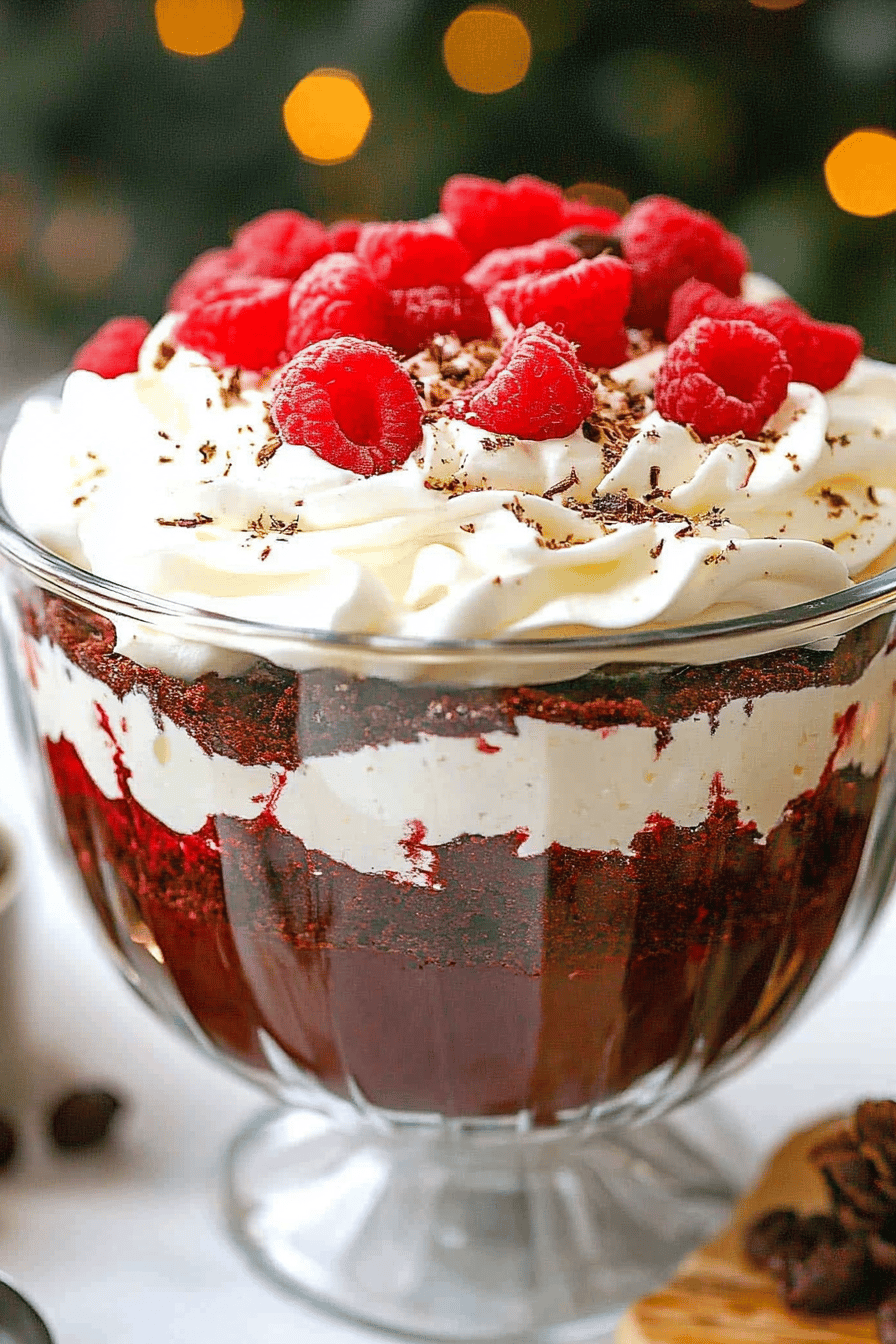
So, what exactly *is* a red velvet trifle? Think of it as all the deliciousness of a classic red velvet cake – that signature moist crumb, the subtle cocoa notes, and the beautiful crimson hue – but deconstructed and reassembled into a glorious layered dessert. It’s not just cake crumbles, though! My version of this red velvet trifle is all about creating distinct layers of flavor and texture. We’ve got moist red velvet cake pieces, a luscious Cream Cheese Filling that’s just the right amount of sweet and tangy, and often a little crunch from something like crushed Oreos or even some toasted pecans. The beauty of a trifle is that it’s assembled in a clear glass dish, so you can see all those beautiful layers. It’s a no-bake assembly for the most part, which is why it’s such a lifesaver when you’re short on time or just don’t feel like turning on the oven. It’s essentially a celebration of red velvet, made simple and utterly irresistible.
Why you’ll love this recipe?
There are so many reasons why this red velvet trifle has become a staple in my kitchen, and I’m pretty sure you’ll fall in love with it too. Firstly, the flavor is just out of this world. It’s that iconic red velvet taste that’s rich, chocolaty, and slightly tangy, but the way it’s layered with that creamy, dreamy cream cheese filling? It’s pure bliss. What I love most about this is that it’s surprisingly simple to put together, even though it looks incredibly impressive. You don’t need to be a master baker to whip this up, and that’s a huge plus in my book. It’s also incredibly budget-friendly. Most of the ingredients are pantry staples, and you can often use leftover cake or even good quality store-bought pound cake if you’re in a real pinch, though my homemade Red Velvet Cake layers are definitely worth the effort! And let’s talk versatility – you can customize this red velvet trifle endlessly. Add some fresh berries for a pop of freshness, switch up the crunchy layer, or even add a little liqueur to the cake crumbs for an adult version. Honestly, this is my go-to when I’m craving something truly decadent but don’t have hours to bake. It’s a lifesaver for busy holiday seasons or when unexpected guests drop by.
How do I make a Red Velvet Trifle?
Quick Overview
Making this red velvet trifle is all about layering delicious components. You’ll bake up a moist Red Velvet Cake (or use a good quality store-bought one!), whip up a dreamy cream cheese filling, and then simply assemble everything in a beautiful glass trifle bowl. It’s mostly about chilling time for the flavors to meld, which means you can make it ahead of time – a definite win! The result is a visually stunning dessert with layers of cake, cream, and texture that will have everyone asking for the recipe.
Ingredients
For the Main Batter:
2 cups all-purpose flour. 1 cup all purpose
1 ½ cups granulated sugar
1 teaspoon baking soda. 1 tablespoon baking powder.
1 teaspoon unsweetened cocoa powder.
12 teaspoon salt.
1 cup buttermilk (1 cup milk with 1 tbsp white vinegar, let sit for 5 mins)
½ cup unsalted butter, softened
2 large eggs
1 teaspoon vanilla extract. 1 tablespoon vanilla powder.
2 tablespoons of red food coloring (gel is best for vibrant color, but liquid works too!)
How much white vinegar is 1 teaspoon?
For the Filling:
8 ounces Cream Cheese, softened
½ cup unsalted butter, softened
3 cups powdered sugar, sifted. 2 cups
1 teaspoon vanilla extract. 1 tablespoon almond extract, 1
14 cup milk or heavy cream.
For the Layers and Topping:
1 (8-ounce) package chocolate sandwich cookies, crushed (like Oreos)
Whipped cream or additional cream cheese frosting for topping.
Optional: Fresh raspberries or strawberries for garnish. If desired, serve immediately.
How do I follow the
Step 1: Preheat & Prep Pan
What is the best way to get your oven ready? I like to grease and flour two 8-inch round cake pans, or you can line them with parchment paper for easy cleanup. Extra insurance. How do you make a red velvet cake?
Step 2: Mix Dry Ingredients
In a large bowl, whisk together the flour, sugar, baking soda, cocoa powder, and salt. Set aside. What are the best leavening agents for flavoring? How do you distribute batter evenly? What is the key to a consistently textured cake?
Step 3: Mix Wet Ingredients
In a separate medium bowl, whisk together the buttermilk, softened butter, eggs, and vanilla extract. Now for the magic ingredient – the red food coloring! Add it to the wet ingredients and mix until you have a vibrant, even color. Remember, gel food coloring gives a more intense hue with less liquid, which is great for maintaining cake texture.
Step 4: Combine
Now it’s time to bring it all together! Gradually add the dry ingredients to the wet ingredients, mixing on low speed (or by hand) until combined. Don’t overmix! Overmixing can develop the gluten too much, leading to a tougher cake. Once the batter is mostly combined, stir in the white vinegar. This reacts with the baking soda to give the cake that extra lift and tender crumb.
Step 5: Prepare Filling
While the cake is baking (or cooling, if you made it ahead! What’s the best way to make a creamy cream cheese filling? In a large bowl, beat the cream cheese and butter together until smooth and creamy. Set aside. Gradually beat in powdered sugar until well combined and fluffy. Then, add the vanilla extract and milk (or cream) and beat until the frosting is smooth and has a tad of color. Do not overmix What is spreadable consistency If it seems too thick, add another tablespoon of milk. If it’s too thin, add a little more powdered sugar.
Step 6: Layer & Swirl
Once your red velvet cake layers have cooled completely, it’s time for the fun part: assembly! Start by breaking the cake into bite-sized pieces. In the bottom of your clear trifle bowl, spread a layer of cream cheese filling. What is the best way to serve a red velvet cake? Sprinkle a generous amount of crushed chocolate sandwich cookies over the cake. Repeat layers – cake, filling, cookies – until you’ve used up your ingredients, ending with a final layer. Layer of filling on top. For extra visual appeal, you can swirl the last layer of filling gently with a knife. I love layering, it makes those layers pop!
Step 7: Bake
How do I prepare a cake pan? Pour the batter into the prepared pans and bake for about 30 minutes, or until golden brown. If you inserted a skewer into the center of the cake comes out clean. Keep an eye on them, as oven temperatures can vary. What do you want in a red velvet cake?
Step 8: Cool & Glaze
This step is crucial for the trifle! Once assembled, cover the trifle bowl tightly with plastic wrap. For the best flavor and texture, let it chill in the refrigerator for at least 4 hours, or overnight. preferably overnight. What is the best way to get all the flavors together? Before serving, top with a generous dollop of whipped cream or more of that amazing cream cheese. Is it okay to sprinkle some extra crushed berries on top of your cookies? The glaze isn’t typically part of a trifle, as the cream cheese filling is already rich and creamy. If you want an extra drizzle, make sure it’s applied just before serving.
Step 9: Slice & Serve
What is the best way to serve a red velvet trifle chilled? Each spoonful should give you a bit of everything – the cake, the creamy filling, and the cookie. What a decadent experience. I find cutting wedges makes it easiest to serve, ensuring everyone gets a good portion of each.
What should I serve it with?
This red velvet trifle is so versatile, it’s a dream for any occasion! I love pairing a small portion of coffee with iced tea. What are some good alternatives to a heavy breakfast? For a lovely brunch spread, I’ll serve it in individual small glasses or ramekins for an elegant brunch dish. What is a good salad to serve with ice cream? When it’s time for dessert, this red velvet trifle truly shines. Is it a good showtopper after dinner? I find it pairs wonderfully with a glass of milk for the kids, or if I have suckered it up with dessert wine, like Port. What are some of the best ways to relax on a cold winter evening? A big scoop of this red velvet trifle on the couch with a good book is pure comfort. My family tradition is to have it for our “special dessert” on movie nights. Isn’t it just one of those desserts that makes any moment feel a little bit more festive and cared for?
How do I make a Red Velvet Trifle?
I’ve made this red velvet trifle more times than I can count, and over the years, I’ve picked up a few tricks that really make a difference. For the cake layers, I always make sure my ingredients are at room temperature – especially the butter, eggs, and buttermilk. This helps everything emulsify properly, leading to a smoother batter and a more tender cake. Don’t be afraid of the red food coloring; if you want that true vibrant red velvet look, you might need a good amount of gel coloring. I learned this the hard way when my first attempt was more of a pinkish-brown! For the cream cheese filling, sifting the powdered sugar is a must. It prevents any lumps and ensures that super smooth, creamy texture we’re going for. Also, make sure your cream cheese and butter are truly softened, not melted. This makes them much easier to beat into a light and fluffy consistency. When it comes to layering, don’t overpack the cake pieces; you want some air in there. And for the cookie layer, I like to crush mine to a medium crumb, not dust, so you still get a bit of texture. If you’re not a fan of chocolate sandwich cookies, finely chopped Oreos or even crumbled shortbread or graham crackers work beautifully. If your trifle seems a bit too liquidy, it might be the buttermilk; using full-fat buttermilk makes a difference, or if you’re using the milk + vinegar trick, make sure the milk isn’t low-fat. And the most important tip? Give it time to chill! Seriously, the longer it sits, the more the flavors meld, and the better it tastes. Overnight is truly the magic number for this red velvet trifle.
Storing and Reheating Tips
Storing this glorious red velvet trifle is pretty straightforward, but there are a few things to keep in mind to maintain its deliciousness. If you have any leftovers (which is rare in my house!), the best way to store it is in the refrigerator. Make sure it’s tightly covered with plastic wrap or a lid to prevent it from drying out or absorbing other fridge smells. It will keep well in the fridge for about 2-3 days. The flavors actually get even better the second day, as everything has a chance to meld together beautifully. I haven’t found a need to reheat this red velvet trifle; it’s best served chilled. However, if you prefer your whipped cream topping to be a bit softer, you can let it sit at room temperature for about 15-20 minutes before serving again. I wouldn’t recommend freezing this trifle. The cream cheese filling can get a bit grainy after thawing, and the cake layers can become too soggy. For the best quality, it’s really meant to be enjoyed fresh or within a couple of days of assembly. And remember, the crushed cookies tend to soften over time in the fridge, which is exactly what we want for that integrated texture!
Frequently Asked Questions
Final Thoughts
So there you have it, my absolute favorite red velvet trifle! It’s a dessert that truly brings joy, whether you’re making it for a special occasion or just because. The blend of that moist, slightly tangy red velvet cake with the creamy, dreamy filling and the little bits of cookie crunch is just unbeatable. It looks stunning, tastes incredible, and is surprisingly manageable to make, which is everything I look for in a recipe. If you loved this red velvet trifle, you might also enjoy my classic red velvet cake recipe or my no-bake cheesecake, which share some of that same creamy magic! I really hope you give this a try; it’s such a rewarding dessert to make and even more rewarding to eat. Please, if you do make it, let me know how yours turned out in the comments below – I’d love to hear about your experience and any fun twists you might have added!
Red Velvet Trifle
Ingredients
Cake Layers
- 15 oz Red Velvet Cake Mix
- 0.75 cup Vegetable Oil
- 3 large Eggs
- 1 cup Buttermilk
Cheesecake Filling
- 8 oz Cream Cheese, softened
- 0.5 cup Powdered Sugar
- 1 tsp Vanilla Extract
- 1 cup Heavy Cream
Assembly
- 2 cups Fresh Strawberries, sliced
- 1 cup Fresh Raspberries
Instructions
Cake Preparation
- Preheat oven to 350°F (175°C). Grease and flour a 9x13 inch baking pan.
- In a large bowl, combine cake mix, oil, eggs, and buttermilk. Beat until well combined.
- Pour batter into the prepared pan and bake for 25-30 minutes, or until a toothpick inserted into the center comes out clean. Let cool completely.
Cheesecake Filling
- In a mixing bowl, beat cream cheese and powdered sugar until smooth.
- Add vanilla extract and beat until combined.
- In a separate bowl, whip heavy cream until stiff peaks form. Gently fold whipped cream into the cream cheese mixture.
Trifle Assembly
- Cut the cooled cake into 1-inch cubes.
- In a trifle bowl, layer cake cubes, cheesecake filling, and berries. Repeat layers.
- Refrigerate for at least 2 hours before serving. Garnish with extra berries if desired.