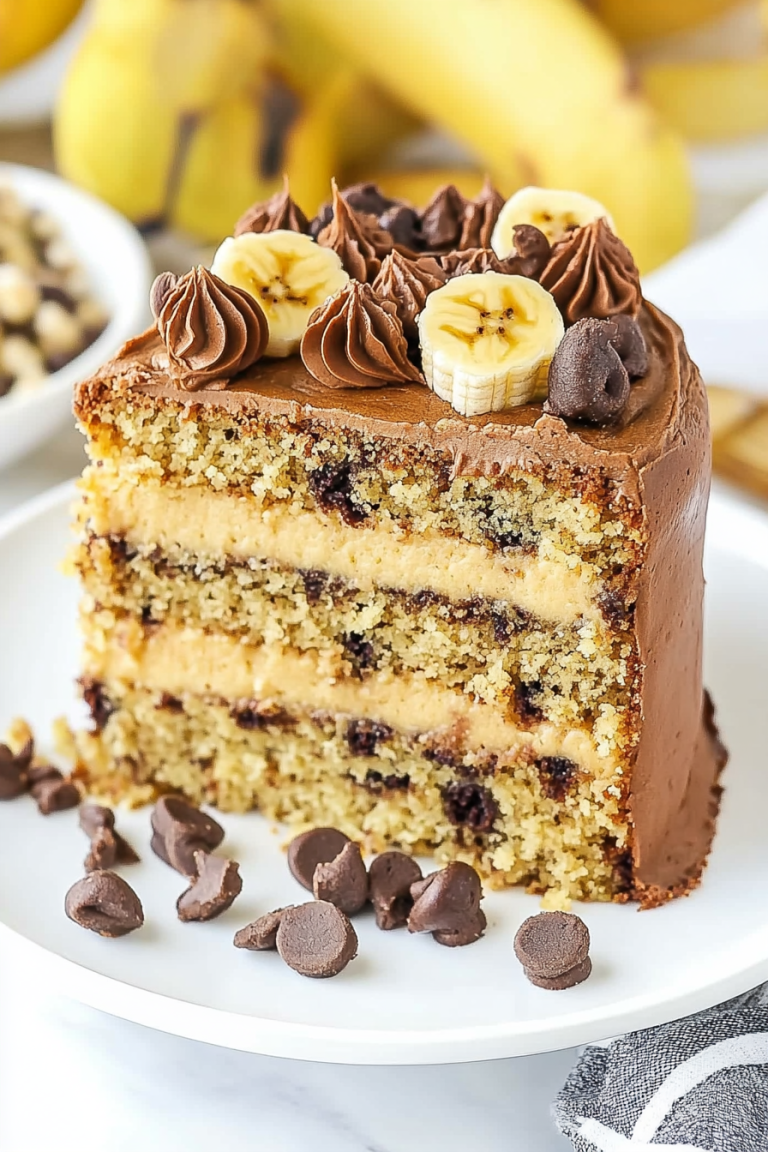
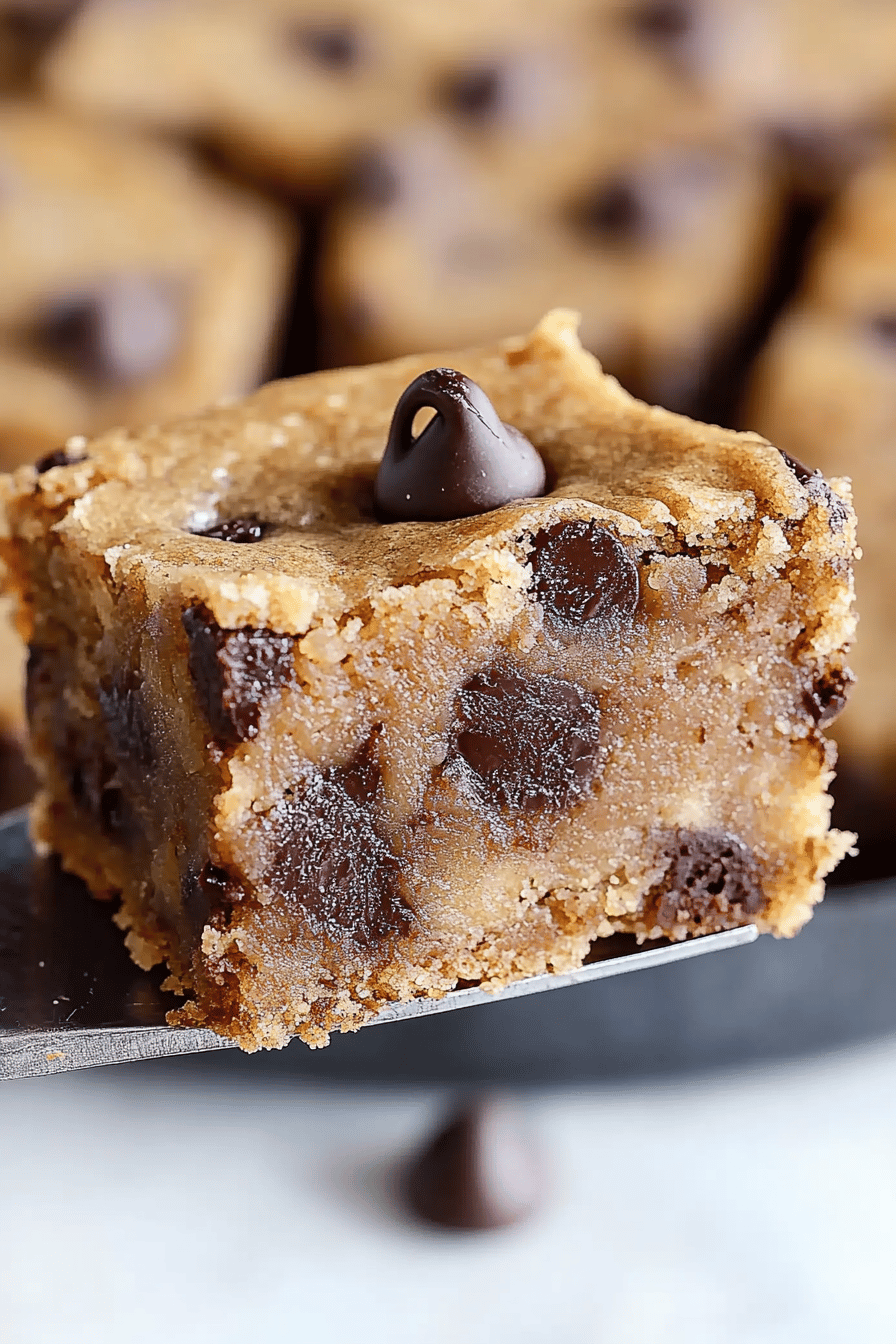
You know those days? The ones where you’ve got a hankering for something sweet, maybe a little bit comforting, but the thought of pulling out all the stops for a full-blown cake or pie just feels like too much? That’s exactly when these Banana Chocolate Chip Bars come to the rescue. Seriously, they are my ultimate go-to. They’re like the cozy, reliable friend in my recipe binder. My kids practically beg for them every other week, and honestly, I can’t blame them. They’re so ridiculously moist and bursting with that perfect banana-chocolate combo. If you’ve ever loved banana bread, but wanted something a little more portable and, dare I say, decadent, then you are in for a treat. These bars are so much easier than my grandma’s famous banana bread cookies, and the chocolate chips just melt into the softest, most glorious pockets of pure bliss. They’ve become a staple in our house, especially during busy weeknights when a sweet craving hits hard and fast.
What are banana chocolate chip bars?
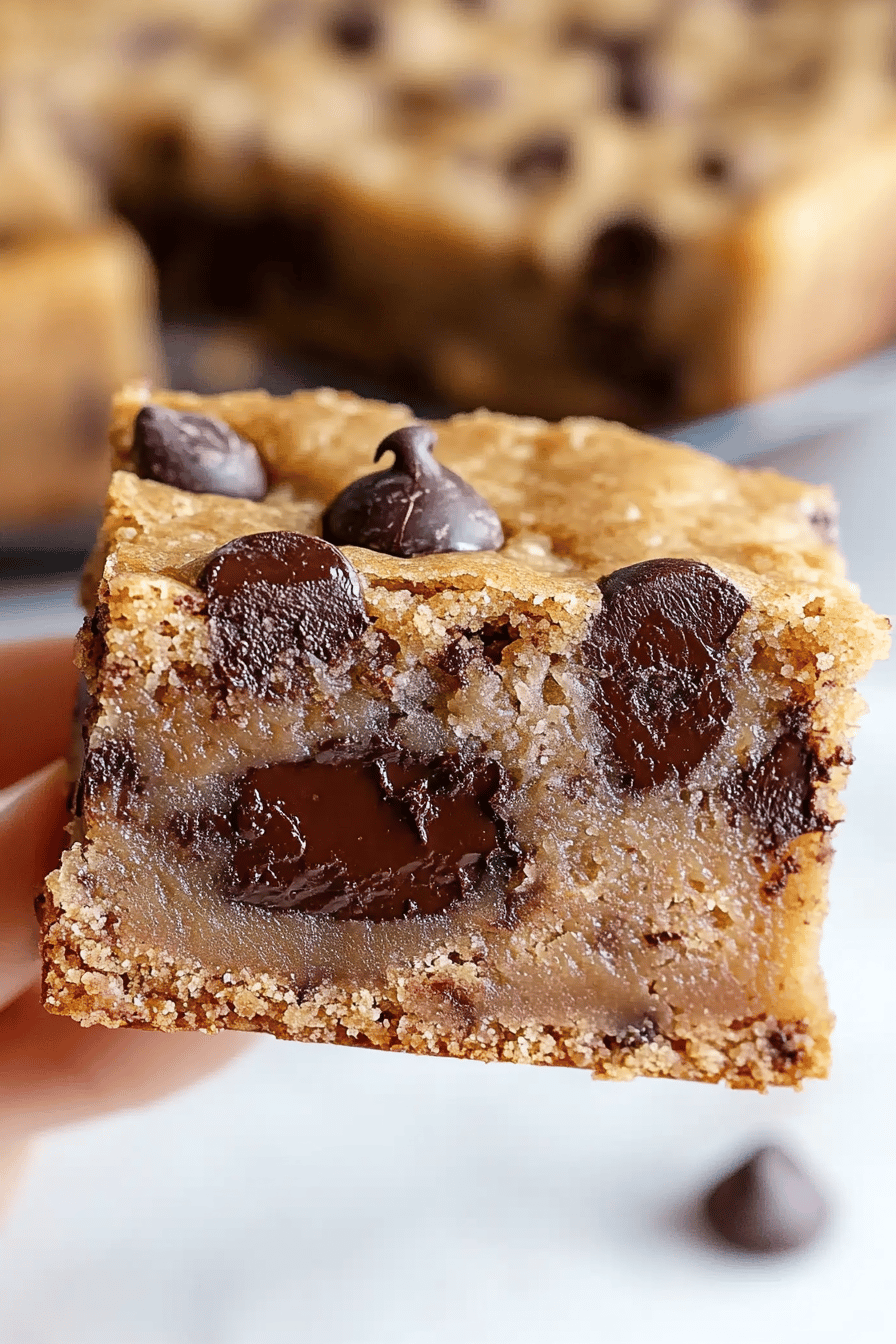
So, what exactly are these magical little squares of happiness? Think of them as the ultimate mashup between moist banana bread and a gooey Chocolate Chip Cookie, baked into a convenient bar form. It’s essentially a dense, incredibly flavorful batter infused with ripe bananas and studded with generous amounts of chocolate chips. The texture is what really sets them apart – they’re not cakey, and they’re not crumbly like a cookie. They’re perfectly soft, chewy, and melt-in-your-mouth tender. The bananas provide an amazing natural sweetness and moisture, while the chocolate chips bring that irresistible richness that just makes everything better. It’s the kind of dessert that feels both homemade and a little bit special, all rolled into one easy-to-make treat. They’re the perfect bite-sized indulgence, great for when you want a little something sweet without the commitment of slicing a whole cake.
Why you’ll love this recipe?
There are so many reasons why I’ve fallen head over heels for these banana chocolate chip Bars, and I just know you will too! First and foremost, the flavor is absolutely divine. The natural sweetness of ripe bananas, combined with the rich, melty chocolate chips, creates a flavor profile that’s both comforting and incredibly satisfying. It’s that perfect balance of sweet and rich, without being overwhelmingly sugary. Then there’s the simplicity. Honestly, this recipe is a lifesaver on busy nights. You likely have most of the ingredients in your pantry right now. It comes together in under 20 minutes, and the baking time is pretty standard. It’s so much less fuss than most other baked goods. And speaking of fuss, let’s talk about cost-efficiency. Bananas are usually pretty affordable, and the other ingredients are common pantry staples. This recipe delivers a huge flavor payoff for a relatively low cost, which is always a win in my book. I also adore their versatility. You can pack them for school lunches, enjoy them as a breakfast treat (I totally do!), serve them at a potluck, or just have them on hand for that 10 pm craving. They’re far more satisfying than my simple no-bake energy bites, and they bring a smile to everyone’s face. What I love most about these bars, though, is the pure, unadulterated comfort they bring. Every bite feels like a warm hug, and that’s something truly special.
How do you make banana chocolate chip bars?
Quick Overview
Making these Banana Chocolate Chip Bars is ridiculously straightforward. You’ll basically mash some ripe bananas, mix them with your wet ingredients, then combine that with your dry ingredients, stir in a boatload of chocolate chips, and bake until golden and gooey. That’s pretty much it! The beauty of this recipe is that it’s incredibly forgiving. Even if you’re new to baking, you’ll nail this. The finished product is always wonderfully moist and packed with flavor, proving that deliciousness doesn’t need to be complicated.
Ingredients
For the Main Batter:
You’ll need about 3 very ripe bananas, mashed. The riper, the better! Those brown spots are where all the sweetness and flavor hide. I usually aim for about 1 ½ cups of mashed banana. I also use unsalted butter, softened – about ½ cup (1 stick). Using unsalted gives you control over the saltiness. For sugar, I go with a mix of brown sugar and granulated sugar, about ¾ cup packed brown sugar for that caramel-y depth and ¼ cup granulated sugar for sweetness. Eggs are essential for binding; 2 large eggs, at room temperature if you can, usually do the trick. For the flour, all-purpose is perfect, about 1 ¾ cups. Don’t forget your leavening agents: 1 teaspoon baking soda and ½ teaspoon baking powder for that perfect lift. A pinch of salt, about ½ teaspoon, balances out all the sweetness. And of course, the star: 1 to 1 ½ cups of your favorite chocolate chips – I’m partial to semi-sweet, but milk chocolate or Dark Chocolate work wonderfully too! You can even use a mix!
For the Filling:
This recipe doesn’t really have a separate “filling” in the traditional sense, but the chocolate chips themselves act as pockets of deliciousness! If you wanted to get fancy, you could swirl in some cream cheese or a thick fruit jam before baking, but honestly, the chocolate chips are all you need for pure bliss. Just make sure you have plenty to distribute throughout the batter.
For the Glaze:
This is optional, but highly recommended for that extra touch of indulgence! I usually make a simple glaze with about 1 cup of powdered sugar, whisked with 2-3 tablespoons of milk (or almond milk for a creamier texture). A splash of vanilla extract (½ teaspoon) really elevates it. If you want a chocolate glaze, just whisk in a tablespoon or two of unsweetened cocoa powder along with the powdered sugar. The key is to get a pourable but not too thin consistency. It should gently coat the back of a spoon.
Step-by-Step Instructions
Step 1: Preheat & Prep Pan
First things first, get your oven preheated to 350°F (175°C). This ensures even baking from the start. Then, grab an 8×8 inch baking pan. I like to line mine with parchment paper, leaving a little overhang on the sides. This makes it super easy to lift the bars out once they’re baked and cooled. Give the parchment a little grease or spray with non-stick spray, just to be safe. Trust me, this little step saves so much hassle later!
Step 2: Mix Dry Ingredients
In a medium bowl, whisk together your flour, baking soda, baking powder, and salt. Whisking them thoroughly ensures that the leavening agents are evenly distributed, which means your bars will rise beautifully and consistently. You want to see no streaks of baking soda or powder left behind. This also helps aerate the flour a bit, leading to a lighter texture.
Step 3: Mix Wet Ingredients
In a larger bowl, cream together your softened butter and both sugars until light and fluffy. This is where you build the base for that tender texture. Then, beat in the eggs, one at a time, until fully incorporated. Stir in the mashed bananas and vanilla extract. Make sure the bananas are really well mashed – no big lumps! The mixture might look a little separated or curdled at this stage, especially with the banana; don’t worry about it, it’s totally normal.
Step 4: Combine
Now, it’s time to bring everything together. Gradually add the dry ingredients to the wet ingredients. Mix on low speed or by hand until just combined. Be careful not to overmix! Overmixing develops the gluten in the flour too much, which can lead to tough bars. Stop mixing as soon as you no longer see streaks of dry flour. A few little lumps are perfectly fine.
Step 5: Prepare Filling
This step is super simple for these bars! Just gently fold in your chocolate chips into the batter. Make sure they are evenly distributed throughout. I like to reserve a small handful to sprinkle on top before baking for extra visual appeal and that immediate chocolate hit.
Step 6: Layer & Swirl
Spoon the batter evenly into your prepared baking pan. If you reserved some chocolate chips, sprinkle them over the top now. You can gently press them in a little. For an extra pretty look, you can also swirl in a dollop of cream cheese frosting or some thick fruit jam right into the batter before baking, but for pure, unadulterated banana chocolate chip goodness, the chips alone are fantastic. Just make sure the batter is spread evenly to ensure consistent baking.
Step 7: Bake
Pop the pan into your preheated oven. Bake for about 25-35 minutes, or until a wooden skewer or toothpick inserted into the center comes out clean or with moist crumbs attached (no wet batter!). Keep an eye on them towards the end, as oven temperatures can vary. If the top starts browning too quickly, you can loosely tent it with aluminum foil.
Step 8: Cool & Glaze
Once baked, let the bars cool in the pan on a wire rack for at least 15-20 minutes. This is crucial! It allows them to set up properly. Trying to cut them too soon will result in a crumbly mess. Once they’ve cooled slightly, you can lift them out using the parchment paper overhang. Let them cool completely on the wire rack before glazing. If you’re using the glaze, whisk together your powdered sugar, milk, and vanilla until smooth and pourable. Drizzle it generously over the cooled bars. Let the glaze set for about 15-30 minutes before slicing.
Step 9: Slice & Serve
Once the glaze has set (or if you skipped it!), use a sharp knife to cut the bars into squares. I usually aim for 16 bars, but you can cut them smaller or larger depending on your preference. Serve them at room temperature for the best texture and flavor. They’re perfect on their own or with a glass of cold milk!
What to Serve It With
These Banana Chocolate Chip Bars are so versatile, they truly fit into any part of your day! For breakfast, I love them simply paired with a hot cup of coffee. They’re a step up from toast, making those rushed mornings feel a little more special. Sometimes I’ll even warm one up slightly and serve it with a dollop of Greek yogurt for a more substantial start. For brunch, they’re a crowd-pleaser. Arrange them on a pretty platter alongside fresh fruit, pancakes, or quiches. They add that perfect sweet note to balance out the savory options. For dessert, they’re fantastic on their own, but if you want to elevate them, serve a warm bar with a scoop of vanilla bean ice cream – pure heaven! A drizzle of caramel sauce also pairs beautifully. And for those cozy snack moments, they’re just perfect. Grab one with a glass of milk while you’re curled up with a book, or serve them to the kids after school. My family also loves them when we have movie nights; they’re easy to hold and share. Honestly, the only thing you really need to serve them with is a smile and good company!
Top Tips for Perfecting Your Banana Chocolate Chip Bars
Over the years of making these, I’ve picked up a few tricks that I think really make a difference, and I want to share them with you! First off, Banana Ripeness is Key. I cannot stress this enough. The browner and spottier your bananas are, the sweeter and more flavorful your bars will be. Don’t toss those overripe bananas! Mash them really well, ensuring there are no large lumps, as this contributes to the smooth, moist texture. When it comes to Mixing Advice, remember that you want to mix the wet and dry ingredients *just until combined*. Overmixing is the enemy of tender baked goods. It develops the gluten too much, leading to tough bars instead of soft, chewy ones. So, stop mixing as soon as you don’t see any dry flour streaks. It’s better to have a few tiny lumps than to overwork the batter. For Swirl Customization, while these bars are amazing with just chocolate chips, if you’re feeling adventurous, you can swirl in things like a thick caramel sauce or a simple cream cheese mixture. Just remember to keep the swirl relatively thick so it doesn’t seep too much into the batter and make it gummy. For Ingredient Swaps, if you don’t have brown sugar, you can use all granulated sugar, but you might lose a little of that lovely caramel depth. If you’re out of butter, you can try a neutral oil like vegetable or canola oil, but the texture might be slightly different – less rich. For Baking Tips, always rely on the toothpick test for doneness rather than just the clock. Ovens can be tricky! If the top is browning too quickly before the center is cooked, loosely tent the pan with foil. And finally, for Glaze Variations, don’t feel limited to just the simple vanilla glaze. You can add a touch of cinnamon to the glaze for warmth, or even a little espresso powder for a mocha flavor. If you want a thicker glaze, use less liquid; for a thinner one, add a bit more. Remember, it’s all about personal preference!
Storing and Reheating Tips
These bars are fantastic for making ahead, which is why I love them so much. For Room Temperature Storage, once they are completely cooled and the glaze has set (if you used one), store them in an airtight container. They’ll stay wonderfully fresh and moist for about 2-3 days. Just make sure they’re not in direct sunlight or a warm spot. If you’re looking for longer storage, Refrigerator Storage is your best bet. Keep them in an airtight container or wrap them tightly in plastic wrap. They’ll be good in the fridge for up to a week. I find they actually get even more fudgy and delicious after a day or two in the fridge! If you need to freeze them, that’s perfectly fine too. For Freezer Instructions, wrap individual bars or the whole pan (once cooled and glazed) tightly in plastic wrap, then in a layer of aluminum foil or place them in a freezer-safe bag or container. They’ll keep well in the freezer for up to 2-3 months. To thaw, transfer them from the freezer to the refrigerator overnight. For Glaze Timing Advice, if you plan to freeze the bars, it’s often best to glaze them *after* thawing. This prevents the glaze from cracking or becoming sticky during the freezing and thawing process. However, if you’re just storing them at room temperature or in the fridge, glazing them before storing is perfectly fine!
Frequently Asked Questions
Final Thoughts
So there you have it – my go-to recipe for the most delightful Banana Chocolate Chip Bars. They are proof that you don’t need fancy techniques or rare ingredients to make something truly special. They’re the perfect blend of comfort, simplicity, and incredible flavor. I hope you’ll give them a try and find them to be just as much of a lifesaver and crowd-pleaser in your kitchen as they are in mine. If you love these, you might also enjoy my Zucchini Brownies for another sneaky veggie treat, or my Classic Chocolate Chip Cookie Bars for a more traditional cookie experience. Let me know in the comments below how yours turn out, and if you add any fun twists! I love hearing from you all. Happy baking!
Banana Chocolate Chip Bars
Ingredients
Main Ingredients
- 1.5 cup all-purpose flour
- 1 teaspoon baking soda
- 0.5 teaspoon salt
- 0.75 cup unsalted butter, softened
- 0.75 cup granulated sugar
- 0.5 cup packed brown sugar
- 2 eggs
- 3 ripe bananas, mashed
- 1 teaspoon vanilla extract
- 1 cup chocolate chips
Instructions
Preparation Steps
- Preheat oven to 350°F (175°C). Grease and flour a 9x13 inch baking pan.
- In a medium bowl, whisk together the flour, baking soda, and salt.
- In a large bowl, cream together the butter, granulated sugar, and brown sugar until light and fluffy.
- Beat in the eggs one at a time, then stir in the mashed bananas and vanilla extract.
- Gradually add the dry ingredients to the wet ingredients, mixing until just combined.
- Stir in the chocolate chips.
- Pour the batter into the prepared pan and spread evenly.
- Bake for 25-30 minutes, or until a toothpick inserted into the center comes out clean.
- Let cool completely before cutting into bars and serving.