Oh, where do I even begin with this apple pie Bread? It’s one of those recipes that feels like a warm hug on a chilly day, or a sweet little secret I’m thrilled to finally share with you. You know those moments when you’re craving something comforting, something that tastes *exactly* like your favorite dessert but is somehow easier to whip up? That’s this bread. It’s not quite a cake, not quite a loaf, but that perfect, delightful something in between that satisfies every sweet tooth in the house. Honestly, if you love apple pie but sometimes just don’t have the time (or the energy!) to fuss with a whole pie crust, this Apple Pie Bread is going to be your new best friend. It’s got all the warm, spiced apple goodness you’d expect, baked into a tender, moist loaf that slices like a dream. My kids, bless their hearts, practically inhale this when I make it, and it’s a lifesaver on busy weekend mornings or when unexpected guests pop over. I’ve tinkered with this recipe for years, and I’m so proud of how it turns out every single time. I hope you love it as much as we do!

What is Apple Pie bread?
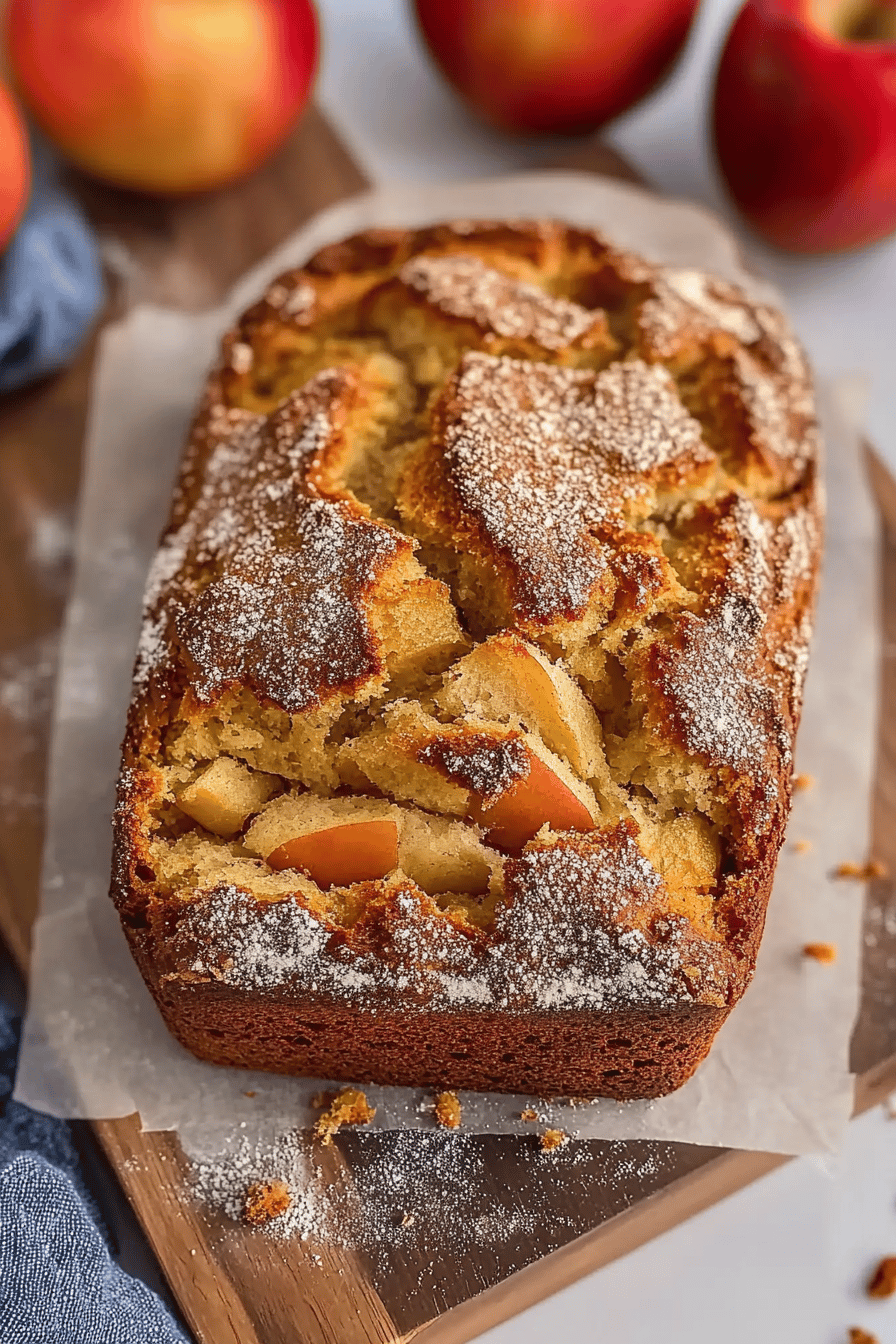
So, what exactly *is* Apple Pie Bread? Think of it as all the best parts of a classic apple pie – the tender, juicy apples, the warm cinnamon spice, that hint of Brown Sugar sweetness – but in a format that’s way more relaxed and approachable. It’s essentially a quick bread, meaning it uses a leavening agent like baking soda or baking powder instead of yeast, so there’s no waiting around for dough to rise. It’s a brilliant shortcut to getting that iconic apple pie flavor without all the fuss. The “bread” part comes from its loaf-like structure; it’s baked in a loaf pan, making it super easy to slice and serve. It’s got a wonderfully moist crumb, thanks to a few secret ingredients I’ll share, and the apples are swirled right into the batter, creating little pockets of pure apple-cinnamon bliss in every bite. It’s the kind of baked good that makes your kitchen smell absolutely divine while it’s baking, filling your home with that cozy, autumnal aroma, no matter the season.
Why you’ll love this recipe?
There are so many reasons why this Apple Pie Bread Recipe has become a staple in my kitchen, and I bet it will in yours too! First off, the FLAVOR is just out of this world. Seriously, it tastes *exactly* like biting into a warm slice of homemade apple pie, but with the comforting texture of a tender quick bread. The apples get wonderfully soft and melty, mingling perfectly with the cinnamon, nutmeg, and brown sugar. It’s like a cozy blanket for your taste buds.
And the SIMPLICITY! This is where it really shines. If you can stir ingredients together, you can make this bread. There’s no fancy pastry technique involved, no chilling dough, just straightforward mixing and baking. It’s perfect for those evenings when a craving hits but the thought of baking a whole pie feels overwhelming. I often whip this up on a Saturday morning, and it’s ready by the time we’re all awake and ready for a treat.
Let’s talk COST-EFFICIENCY too. Most of the ingredients are pantry staples, and apples are usually pretty budget-friendly, especially when they’re in season. It’s a way to get a delicious, homemade dessert or breakfast treat without breaking the bank. This loaf really stretches, making it great for feeding a crowd or just having leftovers for yourself (if you can resist!).
The VERSATILITY is another huge win. I love this Apple Pie Bread for breakfast, obviously, but it’s also fantastic as an afternoon snack with a cup of tea, or even warmed up and served with a scoop of vanilla Ice Cream for dessert. It’s incredibly adaptable too. I’ll get into some variations later, but you can easily adjust the spices or add nuts. It’s a recipe I can always count on to be a hit, and that’s saying something with my picky eaters! It’s like my tried-and-true Apple Crumble Bars, but in a more convenient, loaf form.
How do I make apple pie bread?
Quick Overview
Making this Apple Pie Bread is wonderfully straightforward! You’ll essentially mix up a simple quick bread batter, layer in a spiced apple filling, swirl it all together, and bake until golden and fragrant. The process is designed to be fuss-free, ensuring that even beginners can achieve fantastic results. The key is not to overmix the batter, which keeps the bread tender, and to get a good swirl of the apple mixture throughout. It truly is a weeknight-friendly recipe that delivers a seriously satisfying treat.
Ingredients
For the Main Batter:
Here’s what you’ll need to get that tender, moist bread base going:
- 2 ½ cups all-purpose flour: I always use all-purpose, but if you’re feeling adventurous, you could try a 1:1 gluten-free blend.
- 1 ½ teaspoons baking soda: This is what gives our bread its lovely lift! Make sure it’s fresh.
- ½ teaspoon salt: Essential for balancing all the sweetness and enhancing flavors.
- 2 teaspoons ground cinnamon: The star spice for that classic apple pie vibe. Don’t skimp here!
- ½ teaspoon ground nutmeg: A little goes a long way to add warmth and complexity.
- ¼ teaspoon ground cloves (optional, but recommended!): This adds a really deep, aromatic note that just sings with apples.
- 1 cup (2 sticks) unsalted butter, softened: Make sure it’s truly softened, not melted. This is crucial for a tender crumb.
- 1 ½ cups granulated sugar: You can reduce this slightly if you prefer a less sweet bread, maybe to 1 ¼ cups.
- 2 large eggs: Room temperature is best, as they incorporate more easily into the batter.
- 1 teaspoon vanilla extract: Pure vanilla extract makes a big difference in flavor!
- 1 cup buttermilk: Ah, the secret to incredible moisture! If you don’t have buttermilk, you can make a substitute by adding 1 tablespoon of lemon juice or white vinegar to 1 cup of milk and letting it sit for 5 minutes.
For the Filling:
This is where the magic happens!
- 3 medium apples (about 2 cups chopped): Honeycrisp, Fuji, Gala, or Granny Smith all work beautifully. I like a mix for varied texture and sweetness.
- 2 tablespoons all-purpose flour: To help thicken the apple juices and prevent a soggy bottom.
- ¼ cup packed light brown sugar: Adds that lovely caramel note.
- 1 teaspoon ground cinnamon: More cinnamon for that true apple pie essence.
- ¼ teaspoon ground allspice: If you have it, this adds another layer of warm spice complexity.
- 1 tablespoon lemon juice: Brightens the apple flavor and helps prevent browning.
For the Glaze:
A simple drizzle to finish it off.
- 1 cup powdered sugar: Sifted if you want it super smooth.
- 2-3 tablespoons milk or heavy cream: Start with 2 and add more until you reach your desired drizzling consistency.
- ½ teaspoon vanilla extract (optional): For an extra touch of flavor.
Step-by-Step Instructions
Step 1: Preheat & Prep Pan
First things first, let’s get your oven ready. Preheat it to 350°F (175°C). While that’s warming up, grab a standard 9×5 inch loaf pan. Grease it really well with butter or cooking spray, and then lightly flour it. You can also line it with parchment paper, leaving some overhang on the sides to make it easier to lift the finished bread out – that’s my favorite trick! A well-greased and floured pan is key to preventing sticking, and nobody wants their beautiful loaf stuck in the pan.
Step 2: Mix Dry Ingredients
In a large bowl, whisk together the 2 ½ cups of all-purpose flour, 1 ½ teaspoons of baking soda, ½ teaspoon of salt, 2 teaspoons of ground cinnamon, ½ teaspoon of nutmeg, and the optional ¼ teaspoon of cloves. Whisking these together thoroughly ensures that your leavening agents and spices are evenly distributed throughout the batter, meaning every bite will be consistently delicious. Give it a good whisk until everything looks uniform.
Step 3: Mix Wet Ingredients
In a separate, larger bowl (or the bowl of your stand mixer if you’re using one), cream together the 1 cup of softened unsalted butter and 1 ½ cups of granulated sugar until light and fluffy. This usually takes a few minutes. Then, beat in the 2 large eggs, one at a time, making sure to scrape down the sides of the bowl after each addition. Stir in the 1 teaspoon of vanilla extract. Finally, gradually add the 1 cup of buttermilk, alternating with the dry ingredients you mixed in step 2. I usually add about a third of the dry ingredients, mix until just combined, then half of the buttermilk, mix, another third of the dry, mix, the remaining buttermilk, mix, and finally the last of the dry ingredients. Mix until just combined – we don’t want to overmix!
Step 4: Combine
Okay, so this is where we bring the wet and dry ingredients together. Remember how I said to alternate adding the dry and wet ingredients? That’s because it helps create a more tender crumb. Once you’ve added the last bit of dry ingredients, mix on low speed (or gently by hand with a spatula) until *just* combined. You might still see a few little streaks of flour, and that’s perfectly fine! Overmixing develops the gluten in the flour too much, which can lead to a tough, dense bread. We want airy and tender, so stop as soon as you don’t see large pockets of dry flour. The batter will be thick, which is exactly what we want.
Step 5: Prepare Filling
While the batter is resting slightly, let’s prep our apple filling. Peel, core, and dice your 3 medium apples into small, bite-sized pieces (about ½-inch cubes work great). In a medium bowl, toss the diced apples with 2 tablespoons of flour, ¼ cup of packed light Brown Sugar, 1 teaspoon of cinnamon, and the optional ¼ teaspoon of allspice. Drizzle with 1 tablespoon of lemon juice and give it all a gentle toss to coat the apples evenly. This flour will help absorb some of the apple juices as it bakes, preventing the bread from getting soggy. The spices and brown sugar make these little apple gems taste like they’ve been simmered for hours!
Step 6: Layer & Swirl
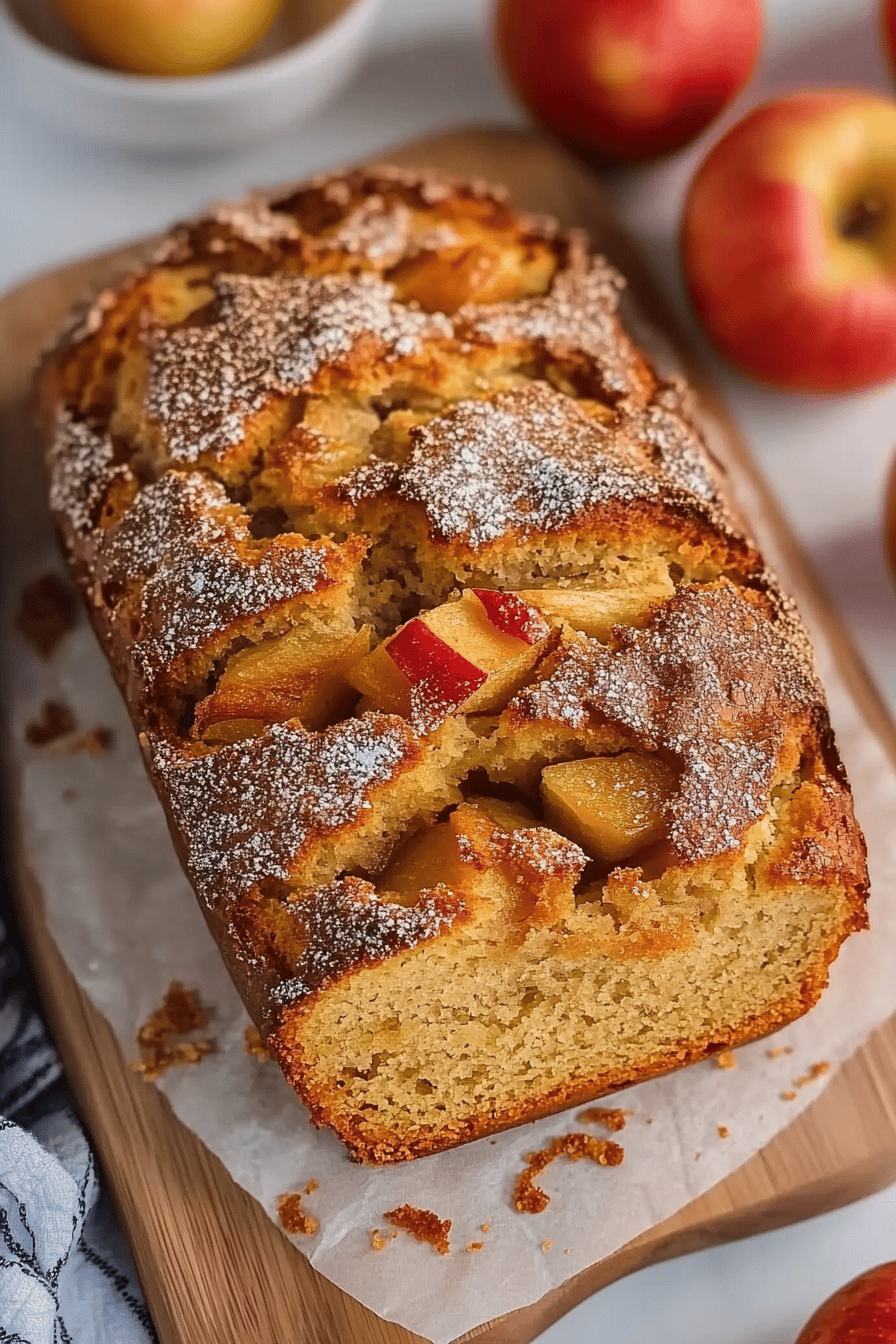
Now for the fun part! Pour about half of the batter into your prepared loaf pan and spread it evenly. Sprinkle about half of the apple filling mixture over the batter. Dollop the remaining batter on top of the apples, spreading it as best you can (it might be a little tricky, and that’s okay!). Then, scatter the rest of the apple filling over the top. Now, grab a butter knife or a skewer and gently swirl it through the batter and apples. You don’t want to over-swirl or you’ll mix everything into one uniform color, but a few gentle passes will create those beautiful apple-filled streaks throughout the bread. Aim for a marbled effect.
Step 7: Bake
Place the loaf pan in your preheated oven. Bake for 50-60 minutes, or until a wooden skewer or toothpick inserted into the center of the loaf comes out clean (or with just a few moist crumbs, no wet batter!). If the top of the bread starts to brown too quickly, you can loosely tent it with aluminum foil for the last 10-15 minutes of baking. Ovens can vary, so keep an eye on it towards the end!
Step 8: Cool & Glaze
Once baked, carefully remove the loaf pan from the oven and let it cool in the pan for about 15-20 minutes. This allows the bread to set up properly. Then, use the parchment paper overhang (if you used it) or carefully invert the pan onto a wire rack to remove the bread completely. Let it cool for at least another 30 minutes, or until it’s completely cool, before glazing. This is important because a warm loaf will melt the glaze. For the glaze, whisk together 1 cup of powdered sugar with 2 tablespoons of milk (or cream) and ½ teaspoon of vanilla extract. Add more milk, a teaspoon at a time, until you get a thick but pourable consistency. Drizzle it over the cooled bread. It will set slightly as it dries.
Step 9: Slice & Serve
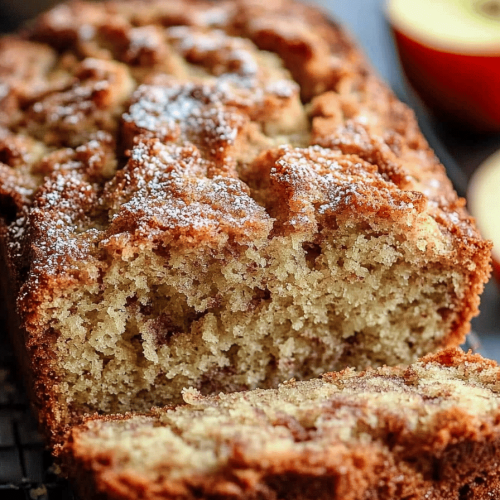
Once the glaze has set a bit, it’s time to slice and enjoy your masterpiece! Use a serrated knife for clean cuts, especially through the apples. This bread is absolutely delicious served at room temperature, but I’m partial to warming up a slice slightly and serving it with a dollop of whipped cream or a scoop of vanilla ice cream. It’s also fantastic with a cup of coffee or tea. Seriously, the aroma when you slice into it is just incredible!
What to Serve It With
This Apple Pie Bread is so wonderfully versatile, it can honestly fit into any meal or occasion! Here are a few of my favorite ways to serve it:
For Breakfast: It’s a dream with a strong cup of coffee or a steaming mug of chai tea. I love serving it lightly toasted for a bit of extra crispness. Sometimes, I’ll even spread a thin layer of cream cheese on a slice – sounds a little indulgent, but it’s just divine!
For Brunch: Elevate your brunch spread by serving this alongside some scrambled eggs, bacon, and a fresh fruit salad. It adds that perfect sweet touch that everyone adores. A mimosa or a fancy iced coffee would pair beautifully here.
As Dessert: This is where it truly shines for me. Serve a warm slice with a generous scoop of high-quality vanilla bean ice cream. The contrast of the warm, spiced bread and cold ice cream is pure bliss. A drizzle of caramel sauce on top is also a fantastic addition for extra decadence.
For Cozy Snacks: On a lazy afternoon or a chilly evening, there’s nothing better than a slice of this bread with a glass of milk or a cup of hot apple cider. It’s pure comfort food. My family often requests this when we’re settling in for a movie night!
One of my favorite family traditions is to make this on the first crisp autumn day of the year. We’ll serve it warm with a glass of milk after an afternoon of apple picking. It just makes everything feel so cozy and special. The way the sweet, spiced apples complement the soft bread is just unbeatable.
Top Tips for Perfecting Your Apple Pie Bread
I’ve made this Apple Pie Bread more times than I can count, and over the years, I’ve picked up a few tricks that make it even better. Here are some of my top tips to help you achieve apple pie bread perfection!
Apple Prep: The type of apple you use makes a difference! I love a mix of sweet and tart apples, like Fuji or Gala for sweetness and Granny Smith for a little tang. Make sure to dice them into uniform, bite-sized pieces so they cook evenly. If your apples are particularly juicy, you might want to let them sit in a colander for 10-15 minutes after tossing them with the flour and sugar to drain off some excess moisture before adding them to the batter. This helps prevent a gummy texture in your bread.
Mixing Advice: Remember what I said about not overmixing? This is probably the most crucial tip for a tender quick bread. Mix the wet and dry ingredients until *just* combined. A few small lumps are okay! Overmixing develops the gluten, leading to a tough, rubbery loaf. When you’re folding in the apples and swirling, be gentle. You want pockets of apple goodness, not a homogenous mixture.
Swirl Customization: To get those beautiful swirls, don’t go crazy with the knife. A few gentle passes through the batter are all you need. Think of it as marbling. You can even use a toothpick to create a more intricate pattern if you’re feeling artistic! The goal is to distribute the apple filling throughout the loaf without disturbing the batter too much.
Ingredient Swaps: If you don’t have buttermilk, the milk-and-vinegar/lemon-juice trick I mentioned earlier works wonderfully. For the spices, feel free to adjust them to your liking. If you love ginger, a pinch of ground ginger in the batter or filling is lovely. You can also add a handful of chopped walnuts or pecans to the apple filling for a bit of crunch. Make sure your baking soda is fresh; an old leavening agent can result in a flat bread.
Baking Tips: Every oven is different, so the baking time can vary. Start checking for doneness around the 50-minute mark. The toothpick test is your best friend here! If the top is browning too quickly but the center isn’t done, loosely tent the loaf with aluminum foil. This reflects the heat and prevents the crust from burning while the inside finishes baking. Make sure your oven rack is in the center of the oven for even heat distribution.
Glaze Variations: The simple powdered sugar glaze is classic, but you can get creative! For a tangier glaze, add a teaspoon of lemon juice instead of some of the milk. For a richer flavor, use heavy cream instead of milk. You can also omit the glaze entirely and simply dust the cooled loaf with a bit of powdered sugar for a more rustic look. If you plan to store the bread for a day or two before serving, I’d recommend waiting to glaze it until just before you plan to serve it, as the glaze can sometimes make the top a bit sticky over time.
Storing and Reheating Tips
Once you’ve baked this incredible Apple Pie Bread, you’ll want to keep it fresh so you can enjoy it over a few days. Luckily, it stores beautifully!
Room Temperature: Properly cooled Apple Pie Bread can be stored at room temperature for up to 2-3 days. The best way to keep it fresh is to wrap it tightly in plastic wrap or place it in an airtight container. If you’ve already glazed it, the plastic wrap will help keep the glaze from getting too sticky. It will maintain its lovely moisture and flavor for several days this way.
Refrigerator Storage: If you live in a very warm or humid climate, or if you want to extend its shelf life, you can store the cooled, un-glazed bread in the refrigerator for up to a week. Again, an airtight container or tightly wrapped plastic wrap is key. The texture might become slightly firmer when refrigerated, but it will re-soften when reheated.
Freezer Instructions: This bread freezes wonderfully, making it perfect for making ahead! Allow the loaf to cool completely. If you’ve glazed it, you can either freeze it un-glazed and glaze it after thawing, or freeze it with the glaze on (though it might become a little sticky). Wrap the cooled loaf tightly in a layer of plastic wrap, then in a layer of aluminum foil, or place it in a freezer-safe bag. It can be stored in the freezer for up to 3 months. To thaw, remove the wrappings and let it sit at room temperature for a few hours, or thaw overnight in the refrigerator.
Glaze Timing Advice: My personal preference is to glaze the bread *after* it has completely cooled. If you’re planning to freeze it, I’d suggest freezing it un-glazed and then making a fresh glaze to drizzle over it once it’s thawed and ready to serve. If you must glaze before freezing, just be aware that the glaze might soften slightly upon thawing. If you’re storing it at room temperature and want to reheat it, the glaze holds up well.
Frequently Asked Questions
Final Thoughts
There you have it – my absolute favorite Apple Pie Bread recipe! I truly believe this is one of those recipes that will become a cherished part of your baking repertoire. It’s got that perfect balance of comforting flavors, incredible texture, and, most importantly, it’s wonderfully achievable for any home baker. It’s the kind of recipe that makes you feel proud when you pull it out of the oven, and even prouder when you see the smiles it brings to the faces of your loved ones. It’s proof that you don’t need a fancy pastry skill to create something truly delicious and special.
If you enjoyed this recipe, I think you might also love my Spiced Pear Muffins or my Easy Cinnamon Swirl Coffee Cake – they both capture that cozy, baked-goods-from-scratch feeling.
I’m so excited for you to try this Apple Pie Bread. Please, if you make it, let me know how it turns out in the comments below! I’d love to hear your thoughts, any variations you tried, or any funny stories that happen in your kitchen while baking it. Your feedback means the world to me, and I always love seeing your creations. Happy baking, and may your kitchen always be filled with the scent of warm apples and cinnamon!
Apple Pie Bread
Ingredients
Main Ingredients
- 3 cups All-purpose flour
- 1 teaspoon Baking soda
- 1 teaspoon Salt
- 1 cup Granulated sugar
- 0.75 cup Brown sugar, packed
- 2 large Eggs
- 0.75 cup Vegetable oil
- 1 teaspoon Vanilla extract
- 3 cups Diced apples (Granny Smith)
- 1 teaspoon Cinnamon
- 0.25 teaspoon Nutmeg
Instructions
Preparation Steps
- Preheat oven to 350°F (175°C). Grease and flour a loaf pan.
- In a large bowl, whisk together flour, baking soda, and salt.
- In a separate bowl, combine granulated sugar, brown sugar, eggs, oil, and vanilla extract. Mix well.
- Add the wet ingredients to the dry ingredients and mix until just combined.
- In a separate bowl, toss the diced apples with cinnamon and nutmeg.
- Gently fold the apples into the batter.
- Pour the batter into the prepared loaf pan.
- Bake for 50-60 minutes, or until a toothpick inserted into the center comes out clean.
- Let the bread cool in the pan for 10 minutes before transferring it to a wire rack to cool completely.