
Oh, my friends, gather ‘round! I have a confession to make. There’s one recipe that has completely, utterly, and irrevocably stolen my carb-loving heart. It’s a recipe I’ve tinkered with, perfected over countless late nights, and now, I can’t imagine my kitchen without it. I’m talking about a truly spectacular Garlic Parmesan focaccia. Now, I know what you might be thinking – focaccia is great, but is it *that* revolutionary? Stick with me, because this isn’t just any focaccia. This is the kind of bread that makes you close your eyes and hum with pure, unadulterated joy. It’s the perfect crispy-chewy balance, infused with that irresistible garlicky, cheesy goodness. It’s so good, it’s almost a crime to serve anything else alongside it, and honestly, it often becomes the star of the show. It’s the kind of thing my kids clamor for when they smell it baking, and it’s my secret weapon for making even a simple weeknight dinner feel like a feast.

What is Parmesan Focaccia?
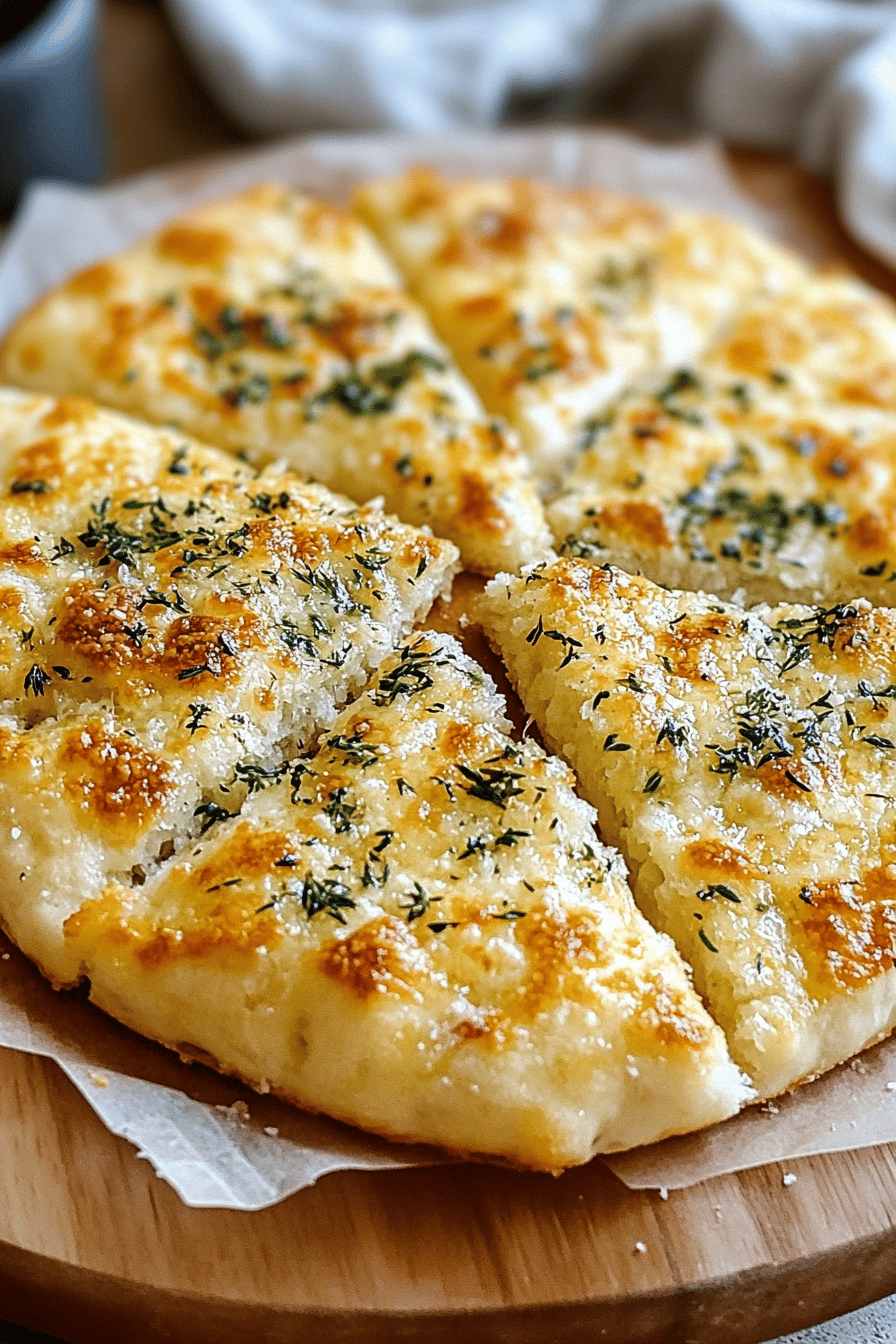
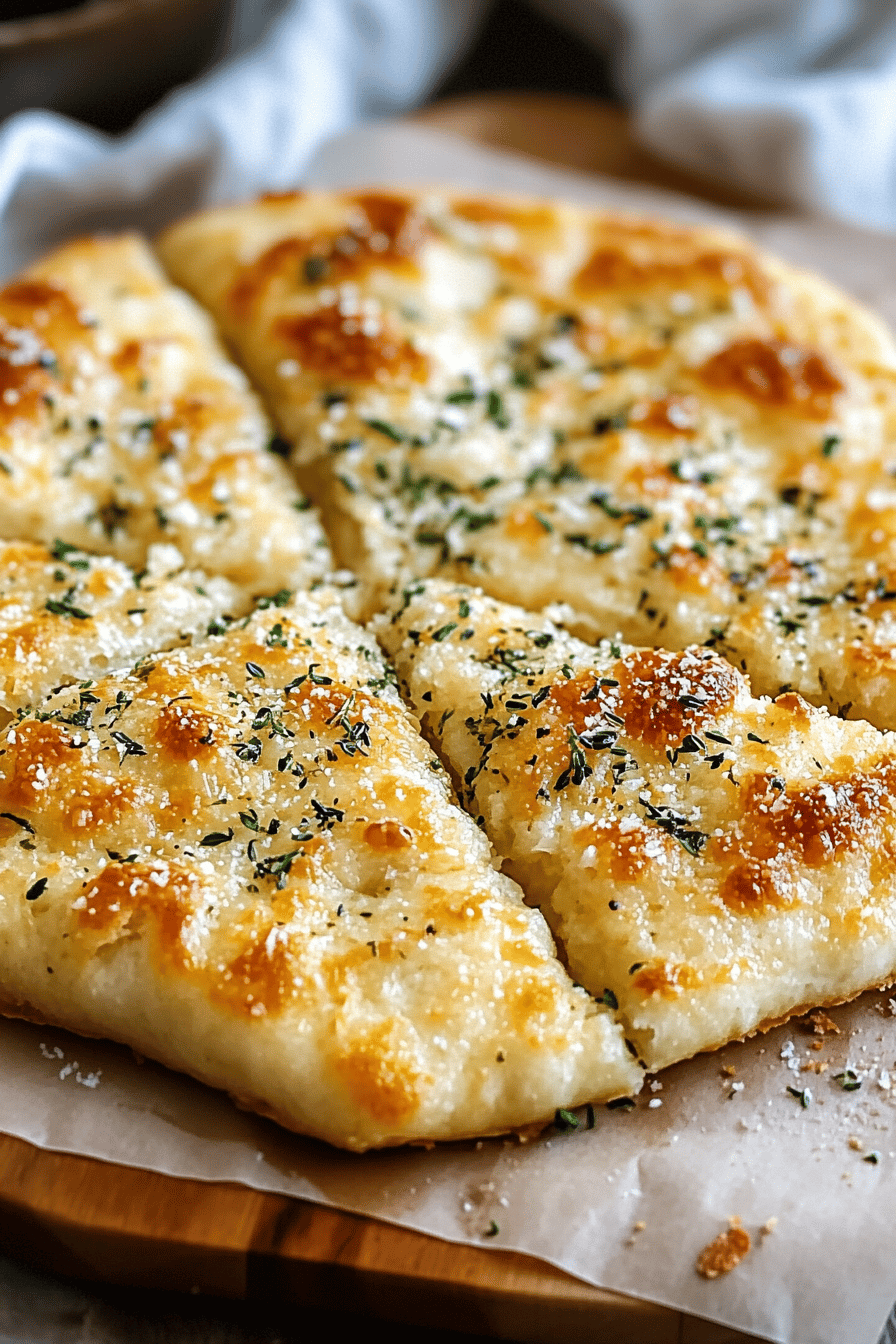
So, what exactly is this magical bread we’re talking about? At its core, it’s a variation of classic Italian focaccia, that wonderfully dimpled, olive oil-rich flatbread. But we’re taking it to a whole new level of deliciousness. Think of it as the ultimate upgrade. Instead of just plain, it’s a canvas for incredible flavor. The “Garlic Parmesan” part isn’t just a sprinkle on top; it’s infused into the dough and layered throughout, creating pockets of savory delight with every bite. It’s essentially a cloud of pillowy bread, kissed with the perfect amount of sea salt, fragrant garlic, and sharp, nutty Parmesan cheese, all baked to a golden-brown perfection with those signature crispy edges and a soft, chewy interior. It’s rustic, it’s elegant, and it’s surprisingly forgiving for even beginner bakers.
Why you’ll love this recipe?
Honestly, where do I even begin? This Garlic Parmesan focaccia has earned its permanent spot in my recipe rotation for so many reasons. First and foremost, the flavor is just out of this world. That intoxicating aroma of roasted garlic and melted Parmesan fills your home the moment it’s in the oven, and trust me, it’s an invitation everyone will RSVP ‘yes’ to. The texture is absolutely perfect – a delightful contrast between the crisp exterior, thanks to a generous amount of olive oil, and that wonderfully airy, chewy crumb inside. It’s far simpler to make than you might think, too! I used to be intimidated by yeasted breads, but this recipe is incredibly straightforward. The ingredients are all pantry staples, making it a budget-friendly way to impress your family and friends. And the versatility! You can serve this at breakfast, lunch, dinner, or as a late-night snack. It’s the perfect accompaniment to soups, salads, pasta dishes, or just enjoyed on its own with a swipe of butter. What I love most about this particular garlic parmesan focaccia is its ability to elevate any meal. It’s the kind of bread that makes people ask for the recipe, and it always gets rave reviews. It’s a little bit fancy, a lot delicious, and surprisingly easy to pull off, which is basically my trifecta of baking perfection.
How do I make Parmesan Focaccia with Garlic?
Quick Overview
The process is actually quite simple and deeply rewarding. We’ll start by activating our yeast, then gently combining our dough ingredients. After a lovely rise, we’ll dimple it just right, generously layer it with a garlicky, cheesy goodness, and bake it until it’s golden and fragrant. The final drizzle of Olive oil and sprinkle of Parmesan is the crowning glory. It’s a process that requires a little patience for rising, but the hands-on time is minimal, making it totally manageable even on a busy weeknight. You’ll end up with a show-stopping loaf that tastes like it came from a gourmet bakery.
Ingredients
For the Main Batter:
This is where the magic begins! We need good quality active dry yeast (about 2 ¼ teaspoons, or one packet) – make sure it’s not expired! Warm water (around 1 ½ cups, not too hot, not too cold, think like a cozy bath) is crucial for waking up the yeast. A touch of granulated sugar (1 tablespoon) feeds the yeast and helps with browning. And of course, all-purpose flour (about 4 cups) – I usually just grab whatever’s in the pantry. Don’t overthink it! Fine sea salt (1 ½ teaspoons) is key for flavor, so don’t skip it. And a generous amount of extra virgin olive oil (¼ cup for the dough, plus more for greasing and drizzling) – this is what gives focaccia its signature moistness and beautiful crust. The better the olive oil, the more flavor you’ll get!
For the Filling:
This is where the “garlic parmesan” truly shines! We’re talking about freshly minced garlic – I’m talking at least 4-6 cloves, depending on how much you love garlic (I always add an extra couple!). Freshly grated Parmesan cheese is non-negotiable here. About 1 cup should do it, but again, feel free to go a little wild. A pinch of dried herbs like rosemary or thyme can add another layer of deliciousness, but it’s totally optional. And a good drizzle of olive oil (about 2-3 tablespoons) helps bind it all together and ensures it melts beautifully into the bread.
For the Glaze:
This isn’t really a “glaze” in the sweet sense, but more of a finishing touch that brings it all home. A final generous drizzle of extra virgin olive oil (about 2-3 tablespoons) right after it comes out of the oven. And an extra sprinkle of flaky sea salt (like Maldon) and a little more grated Parmesan cheese for good measure. It’s simple, but it makes all the difference in that final flavor pop and beautiful finish.
Step-by-Step Instructions
Step 1: Preheat & Prep Pan
First things first, let’s get our oven preheated to a nice, warm 425°F (220°C). While it’s heating up, grab a 9×13 inch baking pan. Generously grease it with a few tablespoons of olive oil. I mean, really get into the corners. This is key for that wonderfully crisp bottom and edge. Some people like to use parchment paper, but I find the olive oil alone does the trick beautifully and gives you that authentic focaccia crunch.
Step 2: Mix Dry Ingredients
In a large mixing bowl, whisk together your flour, salt, and sugar. Make sure they’re well combined. This ensures everything is evenly distributed, so you don’t end up with salty pockets or bland spots. It’s a simple step, but it’s the foundation for great flavor distribution.
Step 3: Mix Wet Ingredients
In a separate, smaller bowl or a liquid measuring cup, combine your warm water with the active dry yeast. Give it a gentle stir and let it sit for about 5-10 minutes. You should see it get foamy and bubbly on top – that’s how you know your yeast is alive and ready to work its magic! If it doesn’t foam, your yeast might be old, or the water was too hot, so start again with fresh yeast and correctly tempered water.
Step 4: Combine
Now, pour the foamy yeast mixture into the bowl with your dry ingredients. Add the ¼ cup of olive oil. Using a sturdy spoon or a dough whisk, mix everything together until it just comes together into a shaggy, wet dough. Don’t overmix here; we’re not trying to develop gluten like we would for a baguette. We want it slightly sticky. If it seems too dry, add a tablespoon of water at a time. If it seems way too wet, add a tablespoon of flour at a time.
Step 5: Prepare Filling
While your dough is having its first rise, let’s get our flavor bomb ready. In a small bowl, combine the minced garlic, grated Parmesan cheese, and the 2-3 tablespoons of olive oil. Stir it all together until it forms a nice paste-like consistency. If you’re adding any herbs, toss them in now. This little mixture is going to create those irresistible pockets of savory goodness.
Step 6: Layer & Swirl
Gently scrape the shaggy dough into your prepared, oiled baking pan. Don’t knead it further. Wet your hands slightly with water or oil and gently stretch and press the dough to fill the pan. It might not reach all the way at first, and that’s okay! Let it rest for about 10-15 minutes, and it will relax and spread further. Now, using your oiled fingertips, make generous dimples all over the surface of the dough. Don’t be shy! These dimples are perfect for holding all that delicious garlic and cheese. Spoon dollops of your garlic parmesan mixture into the dimples and gently swirl it around a bit. You don’t need to perfectly distribute it; those little clusters of flavor are what make it so wonderful.
Step 7: Bake
Place the pan in your preheated oven and bake for 20-25 minutes, or until the focaccia is a beautiful golden brown and feels firm to the touch. The edges should be lovely and crisp. You can also insert a toothpick into the center; if it comes out clean, it’s done. The smell at this stage is just unbelievable – it’s seriously my favorite part!
Step 8: Cool & Glaze
As soon as it comes out of the oven, while it’s still piping hot, drizzle the remaining 2-3 tablespoons of olive oil all over the surface. Immediately sprinkle with flaky sea salt and a little extra grated Parmesan cheese. Let it cool in the pan for at least 10-15 minutes before attempting to remove it. This allows the flavors to meld and prevents it from falling apart. You can then carefully lift it out or serve it directly from the pan.
Step 9: Slice & Serve
Once it’s cooled enough to handle (but still gloriously warm!), slice it into squares or rectangles. I love using a sharp knife or a pizza cutter. Serve it warm for the absolute best experience. The cheese will be gooey, the garlic fragrant, and the crust perfectly crisp.
What to Serve It With
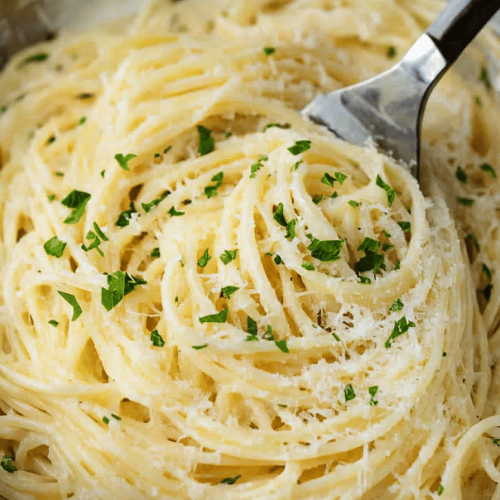
This garlic parmesan focaccia is so versatile, it can truly be part of any meal. For breakfast, I love to toast a slice and top it with a perfectly poached egg and a sprinkle of chives. It’s a decadent way to start the day! On a brunch spread, it’s a showstopper alongside fresh fruit, a light salad, and maybe some mini quiches. It’s also surprisingly elegant as a light dessert. Imagine a warm slice with a drizzle of honey and a side of mascarpone cheese – sounds crazy, but it’s divine! For a simple, cozy snack, it’s perfect just as it is, maybe with a glass of your favorite wine. I also often make a big batch when we have friends over for dinner; it’s fantastic served alongside a hearty soup, a fresh green salad, or any pasta dish. My family also devours it with Grilled Chicken or steak. Honestly, the possibilities are endless, and it always disappears in minutes!
Top Tips for Perfecting Your Garlic Parmesan Focaccia
Over the years, I’ve learned a few tricks that really make this garlic parmesan focaccia sing. For the garlic, I always recommend mincing it very finely. If you have a garlic press, now’s the time to use it! Nobody wants a huge chunk of raw garlic. And don’t be afraid to use plenty; the heat of the oven mellows it beautifully. When it comes to the Parmesan, freshly grated is key. Pre-shredded cheese often has anti-caking agents that can affect meltability and flavor. For the dough, resist the urge to overmix. We want a slightly sticky, shaggy dough. It will handle the high heat and oil much better that way. When you’re dimpling, make sure your hands are oiled or wet. This prevents sticking and creates those beautiful, deep wells that are perfect for holding all the goodness. Also, don’t be too precious with the swirl! A rustic, uneven distribution of the garlic and cheese is part of its charm. For ingredient swaps, if you’re not a huge fan of Parmesan, a sharp cheddar or Gruyere would also be delicious, though it will change the flavor profile. If you don’t have active dry yeast, instant yeast will work, but you can mix it directly with the flour without proofing. For baking, remember that ovens can vary. Keep an eye on it during the last few minutes, and if it’s browning too quickly on top, you can loosely tent it with foil. And the final olive oil drizzle? Don’t skip it! It’s what gives focaccia its signature richness and helps the flaky salt adhere.
Storing and Reheating Tips
This garlic parmesan focaccia is undeniably best enjoyed fresh and warm, but it does store surprisingly well. If you happen to have any leftovers (a rare occurrence in my house!), you can keep it at room temperature, well-covered, for up to two days. I usually just wrap it tightly in plastic wrap or place it in an airtight container. For longer storage, pop it in the refrigerator for up to 4-5 days. When you’re ready to reheat, the best method is to pop a slice back into a warm oven (around 350°F or 175°C) for about 5-8 minutes, until it’s warmed through and the crust is re-crisped. You can also use a toaster oven or a skillet over medium-low heat. If you plan to freeze it, slice the focaccia first, then wrap individual slices tightly in plastic wrap, followed by a layer of aluminum foil or a freezer-safe bag. It will keep in the freezer for up to 2-3 months. Thaw overnight in the refrigerator and then reheat as usual. For the glaze, I always apply it fresh after baking. If you’re storing for a while, you can re-warm and add a little extra drizzle of olive oil and a sprinkle of salt before serving.
Frequently Asked Questions
Final Thoughts
So there you have it – my absolute favorite garlic parmesan focaccia recipe! I truly hope you give this a try because it’s more than just bread; it’s an experience. It’s that comforting, delicious, and surprisingly easy bake that makes any meal feel special. It’s the smell wafting from your oven, the satisfying crunch of the crust, and the pure joy on everyone’s faces when they take their first bite. If you love this recipe, you might also enjoy my Rustic Rosemary Focaccia or my incredibly popular No-Knead Crusty Bread. I can’t wait to hear how your garlic parmesan focaccia turns out! Please leave a comment below and let me know your thoughts, or share any variations you tried. Happy baking, my friends!
Garlic Parmesan Focaccia
Ingredients
Main Ingredients
- 3.5 cups All-purpose flour
- 2 teaspoons Active dry yeast
- 1.5 teaspoons Salt
- 1.75 cups Warm water
- 0.25 cup Olive oil
- 4 cloves Garlic minced
- 0.5 cup Grated Parmesan cheese
Instructions
Preparation Steps
- In a large bowl, whisk together the flour, yeast, and salt.
- Add the warm water and olive oil to the dry ingredients. Mix until a shaggy dough forms.
- Knead the dough on a lightly floured surface for 5-7 minutes, or until it becomes smooth and elastic.
- Place the dough in a lightly oiled bowl, turning to coat. Cover and let rise in a warm place for 1 hour, or until doubled in size.
- Preheat oven to 400°F (200°C). Grease a baking sheet.
- Punch down the dough and spread it onto the prepared baking sheet. Use your fingers to create dimples all over the surface.
- In a small bowl, mix together the minced garlic and remaining olive oil. Brush this mixture over the dough.
- Sprinkle with Parmesan cheese and bake for 20 minutes, or until golden brown.
- Let cool slightly before slicing and serving.


