Oh, friends, I am SO excited to share this recipe with you today. If you’re anything like me, there are certain flavors that just scream “comfort” and “joy,” and for me, that’s anything with peppermint. Especially when it’s paired with a rich, dark chocolatey goodness. My absolute favorite treat that combines these two is, hands down, homemade Peppermint Patties. Forget those store-bought ones that can sometimes taste a little artificial; we’re talking about the real deal here, folks. The kind that have that perfect snap when you bite into them, that delightful cool minty burst, followed by the deep, satisfying chocolate. It reminds me so much of my childhood, sneaking these little treasures from my grandma’s cookie jar. While they look fancy, they’re surprisingly simple to whip up, and I swear, they’re even better than the ones you’d find at the fanciest bakery. This recipe for peppermint patties is a total game-changer!

What are some good homemade peppermint patties?
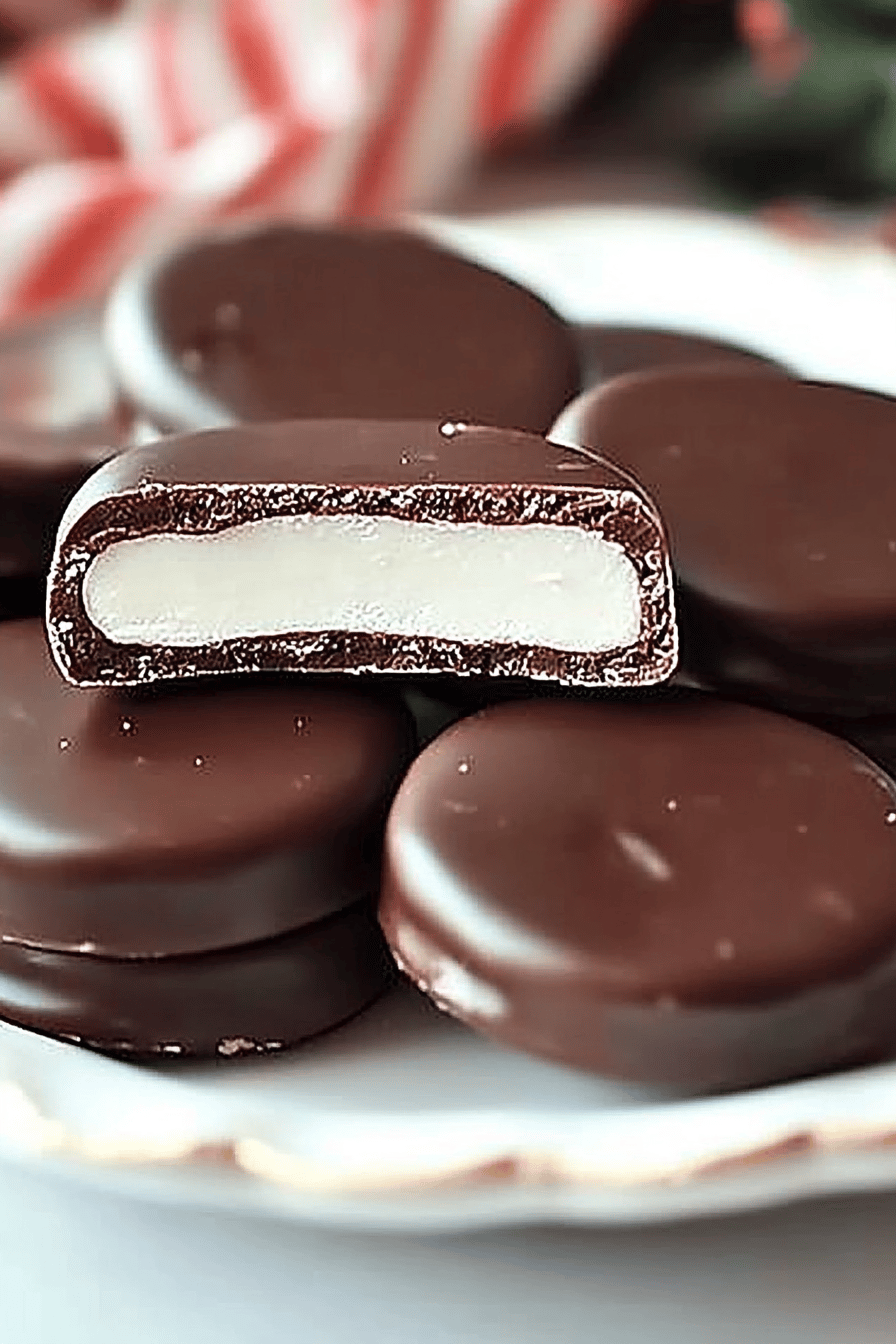
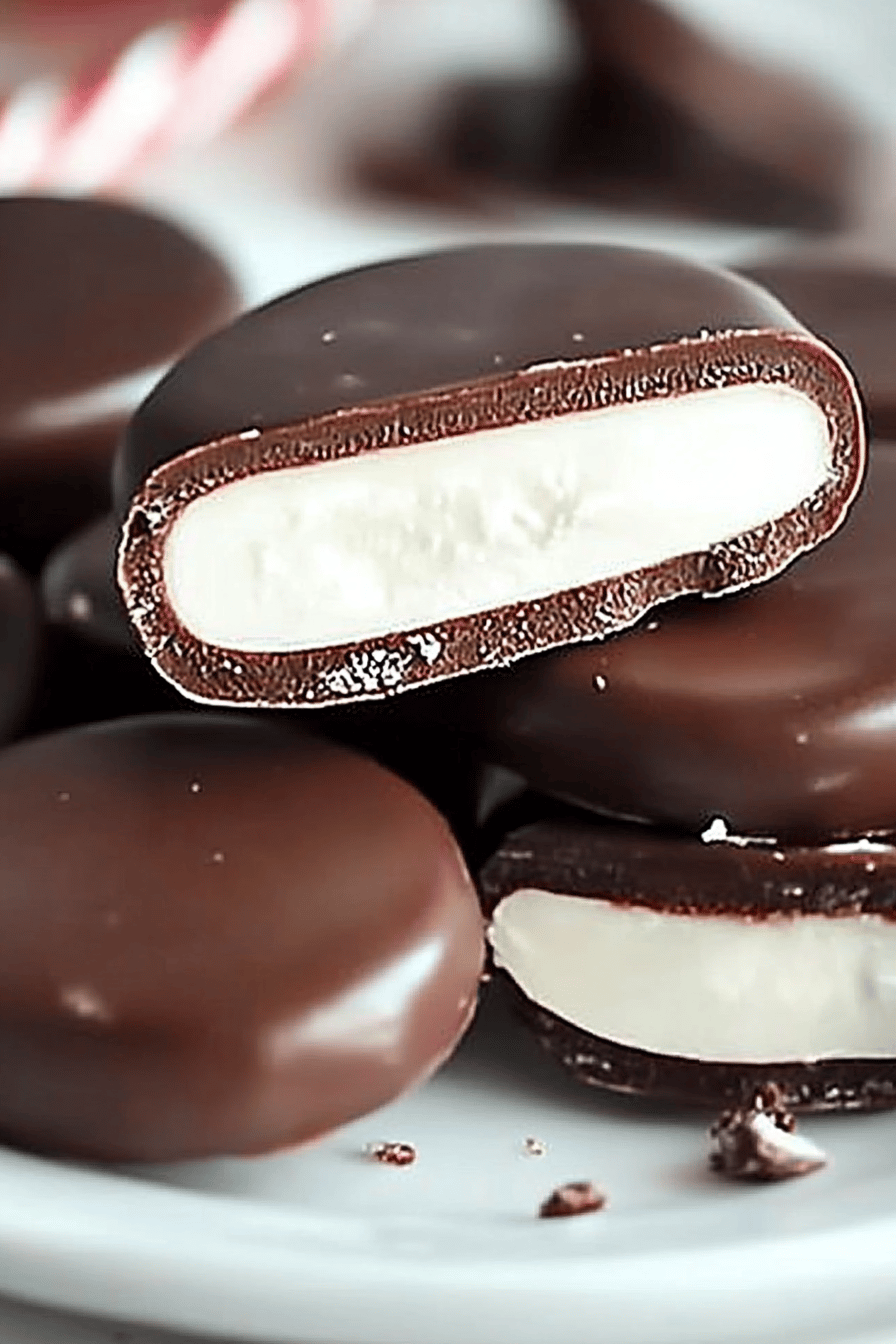
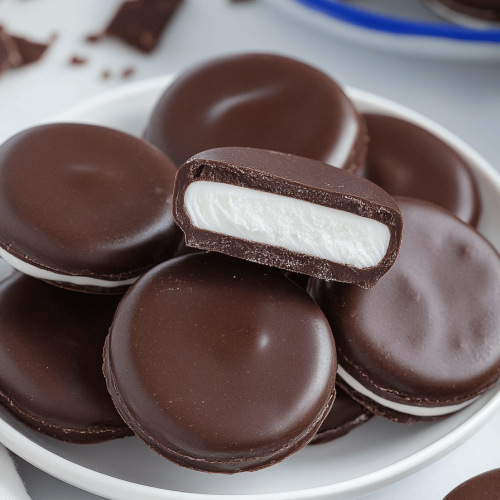
So, what exactly are we making here? Think of these homemade peppermint patties as little discs of pure bliss. They’re essentially a soft, melt-in-your-mouth peppermint-flavored confection center, enrobed in a smooth, rich Dark Chocolate coating. It’s that classic combination you probably know and love, but made with love right in your own kitchen. The “patty” part comes from their flat, round shape, making them perfect for stacking or just enjoying one by one. What I love most is the control you have over the ingredients. You can make them as intensely minty or as mildly flavored as you like, and you can choose the exact type of chocolate that makes your heart sing. It’s not a hard candy, and it’s not a fudge; it’s this wonderful middle ground that’s both refreshing and decadent. It’s a bit like a chocolate truffle meeting a mintmallow, if that makes any sense at all!
Why you’ll love this recipe?
There are so many reasons why this recipe for peppermint patties has become a staple in my kitchen, and I just know you’re going to adore it too. Firstly, the flavor is just out of this world. That burst of cool, clean peppermint paired with decadent dark chocolate? It’s pure magic. It’s not overly sweet, which is a huge win for me. The texture is also phenomenal. You get that slight resistance from the chocolate shell, followed by the soft, almost creamy interior that just melts on your tongue. It’s incredibly satisfying without being heavy.
And let’s talk about simplicity. Honestly, I was a little intimidated at first, thinking it would be complicated, but it’s really quite straightforward. The steps are logical, and the ingredients are super accessible. You don’t need any fancy equipment, just your basic kitchen tools. This makes it a fantastic option for when you want something special but don’t have hours to spend in the kitchen. Plus, the cost-efficiency is a major plus! Making these at home is so much more budget-friendly than buying premium chocolates.
Versatility is another biggie. While they’re obviously divine on their own, you can totally customize them. Want a stronger mint flavor? Add a few extra drops of extract. Prefer a milk chocolate coating? Go for it! You can even play with the shape or add a little swirl of White Chocolate on top for decoration. They’re perfect for gift-giving, holiday platters, or just as a little treat to brighten your day. What I love most about this recipe is that it’s a guaranteed crowd-pleaser. Every single person who tries them raves about them, and they always disappear in minutes at my house. It’s become my go-to for when I need a pick-me-up or a thoughtful homemade gift.
How do I make peppermint patties?
Quick Overview
This recipe is all about creating a delightful peppermint-infused center and coating it in a luscious chocolate shell. We’ll whip up a simple, smooth filling that holds its shape beautifully, let it chill just enough to handle, then dip it in melted chocolate. The key is in the quality of your ingredients and a little bit of patience during the chilling and dipping stages. Trust me, the reward is so worth it. It’s a straightforward process that feels incredibly rewarding, and the results are truly spectacular. You’ll be amazed at how professional these look!
Ingredients
For the Main Filling:
2 cups powdered sugar (also known as confectioners’ sugar or icing sugar). Make sure it’s sifted to avoid any lumps in your filling.
1/4 cup unsalted butter, softened. Room temperature is key here – it makes mixing so much easier and ensures a smooth consistency.
2-3 tablespoons milk or half-and-half. Start with 2 and add more only if needed. This helps achieve the perfect creamy, yet firm, texture.
1 teaspoon peppermint extract. This is where you get that wonderful, invigorating mint flavor. Use good quality extract; it makes a difference!
A tiny pinch of salt. Just a touch to balance the sweetness and enhance the other flavors.
For the Chocolate Coating:
12 ounces good quality dark chocolate chips or finely chopped dark chocolate bar (around 60-70% cacao is ideal). I like using a mix of chips and a chopped bar for the best melt and snap.
1 tablespoon coconut oil or vegetable shortening. This helps the chocolate melt smoothly and achieve that beautiful glossy finish without seizing.
Step-by-Step Instructions
Step 1: Preheat & Prep Pan
You don’t actually need to preheat an oven for this recipe! Instead, we need to get our “setting station” ready. Line a baking sheet with parchment paper or wax paper. This is crucial because our peppermint patties will need to chill and firm up before we can coat them in chocolate, and you don’t want them sticking!
Step 2: Mix Dry Ingredients
In a medium bowl, whisk together the sifted powdered sugar and the tiny pinch of salt. Whisking them together now ensures the salt is evenly distributed and helps break up any small clumps in the sugar.
Step 3: Mix Wet Ingredients
In a separate, larger bowl, cream together the softened unsalted butter until it’s light and fluffy. This can be done with an electric mixer or a sturdy whisk and some elbow grease. Stir in the peppermint extract. Make sure you don’t go overboard with the extract; a little goes a long way and too much can make it taste medicinal.
Step 4: Combine
Gradually add the dry ingredients (powdered sugar and salt mixture) to the butter and peppermint mixture. Mix on low speed, or stir gently, until just combined. The mixture will be crumbly at first. Now, start adding the milk or half-and-half, one tablespoon at a time, mixing after each addition. You’re looking for a consistency that is thick but pliable, like a soft Cookie Dough or playdough. It should hold its shape but not be too dry or too sticky. If it’s too dry, add another half tablespoon of milk. If it’s too wet, add a tablespoon more powdered sugar. Don’t overmix; just get it to come together.
Step 5: Prepare Filling
Once your filling is the right consistency, gently knead it a few times in the bowl to make it smooth. Take small portions of the dough and roll them into balls about 1-inch in diameter, then flatten them into discs about 1/2-inch thick. You can also simply press the dough out evenly onto your prepared parchment-lined baking sheet, about 1/2-inch thick, and then cut it into rounds with a cookie cutter or a knife. Aim for uniformly sized patties so they all bake and coat evenly.
Step 6: Layer & Swirl
This step is more about shaping the filling. Once you have your flattened discs, I like to gently press them with my thumb or the back of a spoon to make them a bit more uniform and to create a small indentation that helps the chocolate adhere better. Place these shaped patties onto the prepared baking sheet, leaving a little space between them. Then, pop the whole sheet into the refrigerator for at least 30 minutes, or even the freezer for about 15-20 minutes, until they are firm to the touch. This chilling step is critical for preventing them from falling apart when you dip them in the chocolate.
Step 7: Bake
No baking required for this step! The chilling in the fridge or freezer is all the “cooking” these patties need to firm up.
Step 8: Cool & Glaze
While your peppermint centers are chilling, prepare your chocolate coating. In a microwave-safe bowl, combine the dark chocolate chips (or chopped chocolate) and the coconut oil or shortening. Microwave in 30-second intervals, stirring well after each interval, until the chocolate is completely melted and smooth. Be careful not to overheat it! Alternatively, you can melt the chocolate using a double boiler. Once melted and smooth, remove the chilled peppermint patties from the refrigerator. Using a fork or a dipping tool, dip each chilled patty into the melted chocolate, ensuring it’s fully coated. Let any excess chocolate drip back into the bowl. Place the chocolate-coated patties back onto the parchment-lined baking sheet. You can gently smooth out any drips with the tip of your fork if you like. If you’re feeling fancy, you can drizzle a little extra melted chocolate over the tops in a decorative pattern while the coating is still wet.
Step 9: Slice & Serve
Allow the chocolate coating to set completely. This can take about 30-60 minutes at room temperature, or you can speed it up by popping the baking sheet back into the refrigerator for about 10-15 minutes. Once the chocolate is fully set, your beautiful homemade peppermint patties are ready! Gently peel them off the parchment paper. They are best served at room temperature, so they have that perfect texture.
What to Serve It With
These delightful peppermint patties are so versatile, they really work for almost any occasion! I find they’re particularly lovely when paired with a warm beverage.
For Breakfast: While not a traditional breakfast item, a single peppermint patty alongside your morning coffee is a decadent little treat. It’s like a little reward to start your day. I sometimes serve a small plate of them with my morning pastry on a weekend, and it feels extra special.
For Brunch: These are wonderful additions to a brunch spread. They look so elegant arranged on a platter. I love serving them with a light Fruit Salad or some creamy yogurt parfaits. A sparkling cider or a mimosa also pairs beautifully. For presentation, try dusting a few with a tiny bit of edible glitter if you’re feeling festive.
As Dessert: This is where they truly shine! They are the perfect after-dinner treat. Serve them with a rich cup of coffee, a decadent hot chocolate, or even a small glass of port wine. They’re fantastic alongside a slice of chocolate cake or brownies, or simply on their own as a sweet ending to a meal. My family loves them with a scoop of vanilla bean ice cream – the hot chocolatey mint and cold ice cream is a winning combo!
For Cozy Snacks: Honestly, these are my go-to for a late-night craving. When I just need something sweet and satisfying, but don’t want to bake a whole cake, I grab one of these. They’re perfect for a movie night or just a quiet moment with a cup of tea. They also make an incredible homemade gift, wrapped in little cellophane bags tied with ribbon.
My kids always ask for these when we have friends over, and they’re a huge hit at holiday parties. They’re just universally loved!
Top Tips for Perfecting Your Peppermint Patties
I’ve made these peppermint patties more times than I can count, and over the years, I’ve picked up a few tricks that really help ensure they turn out perfectly every single time. Don’t be afraid to experiment a little once you get the hang of it!
Filling Consistency is Key: The most common issue people run into is a filling that’s too crumbly or too soft. If it’s too crumbly, it won’t hold its shape. Add your milk or half-and-half *very* slowly, just a teaspoon at a time, until it comes together into a pliable dough. If it becomes too soft and sticky, it’s usually because there’s too much liquid or the butter was too warm. In that case, you can try adding a tablespoon more sifted powdered sugar to firm it up, or chill the dough for an extra 15-20 minutes before shaping. Aim for a texture that’s like firm playdough – it holds its shape when pressed but isn’t hard.
Don’t Overdo the Peppermint: While we love that minty kick, too much peppermint extract can make your patties taste like toothpaste or mouthwash. It’s better to start with the recommended amount and taste a tiny bit of the raw filling (if you’re comfortable doing so!) to gauge the flavor. You can always add a tiny bit more if needed, but you can’t take it away. Good quality peppermint extract makes a world of difference here.
Chill Thoroughly: This cannot be stressed enough! Those chilled peppermint centers are crucial for a smooth dipping experience. If they’re too soft, they’ll start to melt into the chocolate, making a messy coating and a soft patty that might fall apart. I often put them in the freezer for about 20 minutes if I’m in a hurry, as this firms them up very quickly. Make sure they are firm enough that they don’t dent easily when you touch them.
Smooth Chocolate Coating: When melting your chocolate, the key is low and slow, and stirring frequently. Overheating chocolate can make it seize up and become grainy, which is just the worst. Using a tablespoon of coconut oil or vegetable shortening helps ensure a super smooth, glossy coating that sets up beautifully. If your chocolate seems too thick even after melting, you can add another *tiny* bit of the oil/shortening, a half teaspoon at a time, until it reaches a good dipping consistency.
Dipping Technique: Don’t be afraid to really swirl the patties in the chocolate to get them fully coated. Use a fork or a dipping tool, let the excess drip off for a few seconds, and then gently tap the fork on the side of the bowl to help release any extra chocolate. Placing them on parchment paper is a lifesaver for easy removal once set.
Ingredient Swaps: If you don’t have regular milk, a dairy-free milk like almond milk or oat milk works fine, though you might need slightly less or more depending on its thickness. For the chocolate, you can absolutely use milk chocolate or even white chocolate, but remember that milk chocolate is sweeter, so you might want to adjust the peppermint extract slightly if you prefer a less sweet treat. Dark chocolate truly balances the sweetness best, in my opinion.
Doneness Testing: For the patties themselves, there’s no baking, so “doneness” just means they’ve firmed up enough to handle. For the chocolate, it’s set when it’s no longer tacky and has a nice snap to it. If you press gently, it shouldn’t leave a fingerprint.
I learned the hard way early on about the importance of chilling; my first batch turned into a chocolate-covered mess because the centers were too soft! Trust me on this one: chill them well!
Storing and Reheating Tips
These homemade peppermint patties are best stored properly to maintain their delightful texture and flavor. Since they have a chocolate coating, temperature is key!
Room Temperature: If you plan to enjoy them within a day or two, storing them in an airtight container at cool room temperature is perfectly fine. However, if your kitchen is warm, the chocolate might soften or melt, so it’s best to keep them in a cool, dry place. Avoid direct sunlight. They’ll typically stay fresh for about 3-4 days this way, though the chocolate coating might lose a little of its shine in humid conditions.
Refrigerator Storage: For longer storage, the refrigerator is your best bet. Place them in an airtight container, making sure they aren’t packed too tightly to avoid smushing the chocolate coating. You can place parchment paper between layers if you’re stacking them. They will keep well in the fridge for up to 2-3 weeks. When you take them out, let them sit at room temperature for about 10-15 minutes to soften the chocolate slightly for the best eating experience. Reheating isn’t really necessary or recommended for the patties themselves, as they are meant to be enjoyed cool or at room temperature.
Freezer Instructions: If you want to make a big batch and save some for later, freezing is an excellent option! First, make sure the chocolate coating is completely set. Then, wrap each peppermint patty individually in plastic wrap or place them in a single layer on a baking sheet and freeze until solid. Once frozen, transfer them to a freezer-safe airtight container or a heavy-duty freezer bag. They can be stored in the freezer for up to 2-3 months. To thaw, transfer the desired amount from the freezer to the refrigerator and let them thaw overnight. Then, bring them to room temperature before serving for the best texture.
Glaze Timing Advice: I always recommend applying the glaze when your peppermint centers are firm and chilled. If you’re planning on refrigerating or freezing them, applying the glaze before storage is the way to go. The chocolate coating acts as a protective layer. If you plan to eat them very soon after making and are worried about the chocolate setting perfectly in a warm environment, you can always try glazing them just before serving.
Frequently Asked Questions
Final Thoughts
I truly hope you give these homemade peppermint patties a try. They’re more than just a treat; they’re little moments of joy that you can create with your own two hands. The combination of cool, refreshing mint and rich, decadent chocolate is simply irresistible, and knowing you made them from scratch just adds to the satisfaction. They’re perfect for special occasions, a thoughtful homemade gift, or simply for treating yourself because, well, you deserve it! If you love this recipe, you might also enjoy my recipe for homemade chocolate truffles or my no-bake cookie dough bites – they’re in a similar vein of delicious, easy-to-make treats!
I can’t wait to hear how yours turn out! Please leave a comment below and tell me what you think, or share your own favorite variations. Happy baking, and more importantly, happy eating!
Peppermint Patties
Ingredients
Main Ingredients
- 3 cups powdered sugar
- 0.25 cup heavy cream
- 1 teaspoon peppermint extract
- 0.25 cup unsalted butter softened
- 12 ounces semi-sweet chocolate chips
- 1 tablespoon vegetable shortening
Instructions
Preparation Steps
- In a large bowl, beat together the powdered sugar, heavy cream, peppermint extract, and butter until smooth.
- Roll the mixture into 1-inch balls and place them on a baking sheet lined with parchment paper.
- Melt the chocolate chips and shortening in a double boiler or microwave.
- Dip each peppermint patty into the melted chocolate, covering it completely. Place back on the parchment paper.
- Refrigerate for at least 30 minutes, or until the chocolate is set.