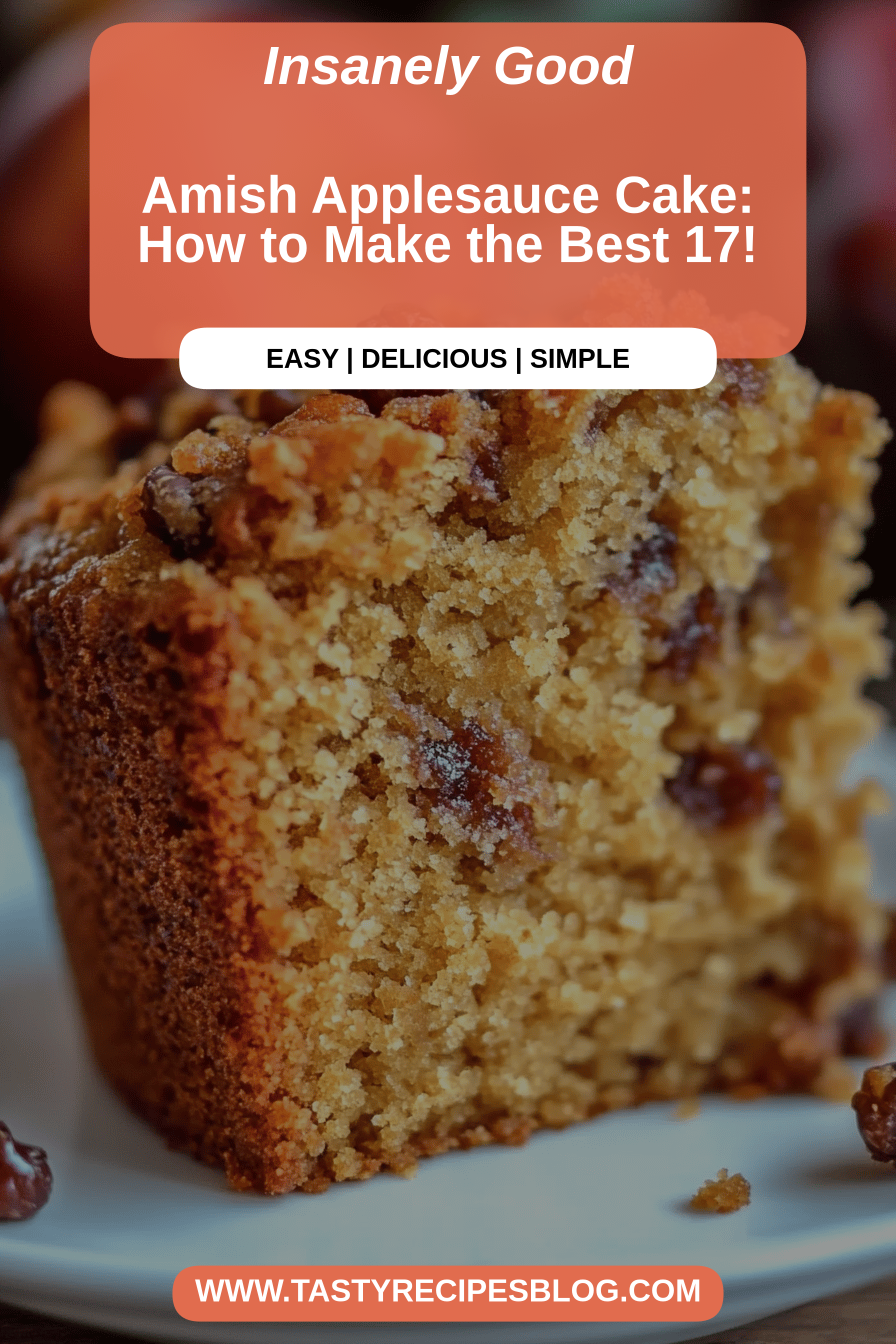
You know those recipes that just feel like coming home? The ones that smell like your childhood, bring a smile to your face before you even take a bite, and somehow make even a Tuesday feel like a special occasion? Well, this Amish Applesauce Cake is exactly that for me. It’s not fancy, it’s not complicated, but oh, is it ever delicious. I’ve been making this cake for years, and it’s become a real staple in my kitchen, especially when I need something comforting and ridiculously easy. It reminds me a bit of a spice cake, but with this wonderful, moist depth that only applesauce can provide. Honestly, if you’re looking for a simple, heartwarming dessert that tastes like it took hours to make but only takes a fraction of the time, you’ve found your match. This Amish Applesauce Cake is a true gem, and I’m so excited to share it with you!
What is an Amish Applesauce Cake?
So, what exactly is Amish Applesauce Cake? At its heart, it’s a wonderfully moist, spiced cake that gets its incredible texture and flavor from applesauce. Think of it as a super cozy, down-to-earth dessert that’s packed with warm spices like cinnamon, nutmeg, and cloves. The applesauce isn’t just for moisture, either; it lends a subtle sweetness and a tender crumb that’s hard to achieve with other ingredients. It’s called “Amish” because, well, it’s a recipe often found in Amish communities, known for their simple, wholesome, and delicious cooking. These recipes are typically made with pantry staples, are forgiving, and deliver big on flavor without any fuss. This cake is the epitome of that – it’s the kind of dessert that makes you feel good from the inside out. It’s essentially a warm hug in cake form, perfect for sharing (or not!).
Why you’ll love this recipe?
I have a recipe for Applesauce Cake and I know you will too. I’m so in love with it.flavor is just out of this world. It’s rich, warm, and perfectly spiced, with that lovely hint of apple that makes it feel both familiar and special. It’s not overly sweet, which I really appreciate, letting the spices and the tender cake shine through. Then there’s the simplicity. Seriously, this cake is a lifesaver on busy nights. You probably have most of the ingredients in your pantry right now. It comes together so quickly, with minimal fuss and no fancy techniques required. Plus, it’s incredibly cost-effective. Applesauce, flour, sugar, spices – these are all budget-friendly ingredients that create something truly delicious. And don’t evenversatility. While it’s absolutely divine on its own, it’s also fantastic with a dollop of whipped cream, a scoop of vanilla Ice Cream, or even a drizzle of caramel sauce. I’ve even made a simple glaze for it that takes it to another level, perfect for when you want to impress without the stress. Compared to a heavy chocolate cake or a fussy fruit tart, this Amish Applesauce Cake is just pure, unadulterated comfort and joy. What I love most about this is that it’s so forgiving; even if you’re not a seasoned baker, you’ll nail this recipe. It’s the kind of cake that brings people together and sparks happy memories.
How to Make Amish Applesauce Cake
Quick Overview
Making this Amish Applesauce Cake is wonderfully straightforward. You’ll basically mix your dry ingredients together in one bowl, your wet ingredients in another, then combine them gently. The applesauce does all the heavy lifting for moisture and flavor! The batter comes together in minutes, and then you bake it until it’s perfectly golden and fragrant. The whole process from start to finish is so easy, and the results are incredibly rewarding. It’s the perfect recipe for beginners or for anyone who just wants a delicious cake without a lot of fuss.
Ingredients
For the Main Batter:
You’ll need all-purpose flour (about 2 cups should do it), granulated sugar (1 cup is a good starting point, but feel free to adjust slightly based on your applesauce sweetness), baking soda (1 teaspoon, this is key for lift!), ground cinnamon (1 to 2 teaspoons, I love a generous amount!), ground nutmeg (half a teaspoon for that warm spice), ground cloves (a pinch, it adds a wonderful depth!), salt (half a teaspoon to balance the sweetness), eggs (2 large ones, at room temperature if possible), unsweetened applesauce (about 1.5 cups – make sure it’s not the sweetened kind, or your cake might be too sweet!), melted unsalted butter or vegetable oil (half a cup – I often use a mix of both for the best texture), and vanilla extract (1 teaspoon for that classic flavor). When I buy applesauce, I usually opt for a good quality, unsweetened variety. If you have homemade applesauce, even better!
For the Filling:
This is optional but adds an extra layer of deliciousness! I often make a quick filling with about 1 cup of chopped pecans or walnuts (toasted brings out their flavor!), and a tablespoon or two of Brown Sugar mixed with a teaspoon of cinnamon. You can also add raisins or dried cranberries here if you like a bit of chewiness.
For the Glaze:
This is what really elevates the cake. You’ll need powdered sugar (about 1.5 cups), a few tablespoons of milk or cream (start with 2 and add more as needed to reach desired consistency), and a splash of vanilla extract. Sometimes I add a little extra cinnamon to the glaze too, just for fun.
Step-by-Step Instructions
Step 1: Preheat & Prep Pan
First things first, get your oven preheating to 350 degrees Fahrenheit (175 degrees Celsius). Grab a 9×13 inch baking pan. I like to grease it really well with butter or cooking spray and then flour it. This step is crucial to prevent any sticking, so don’t skip it! If you’re feeling fancy, you can also line the bottom with parchment paper after greasing. For this cake, a good, thorough prep makes all the difference.
Step 2: Mix Dry Ingredients
In a large mixing bowl, whisk together your all-purpose flour, granulated sugar, baking soda, cinnamon, nutmeg, cloves, and salt. Whisking helps to break up any lumps and distribute everything evenly. You want to make sure that baking soda is well-incorporated so you get a nice, even rise. It should look like a lovely, aromatic blend of spices!
Step 3: Mix Wet Ingredients
In a separate medium bowl, whisk together your eggs, unsweetened applesauce, melted butter or oil, and vanilla extract until everything is smooth and well combined. If you’re using oil, the batter will be a bit looser. If you’re using butter, it might be slightly thicker. The key here is just to get everything nicely emulsified. The applesauce should be fully incorporated into the wet ingredients.
Step 4: Combine
Now, pour the wet ingredients into the bowl with the dry ingredients. Using a spatula or a wooden spoon, gently mix everything together until just combined. Be careful not to overmix! Overmixing can lead to a tough cake, and we want this one to be tender. A few small lumps are perfectly fine. You’ll see the batter start to come together, looking thick and fragrant.
Step 5: Prepare Filling
If you’re using the optional filling, now’s the time to prepare it. In a small bowl, combine your chopped nuts (pecans or walnuts are my favorites!), Brown Sugar, and cinnamon. If you’re adding raisins or dried cranberries, toss them in now too. This little mix adds such a delightful texture and flavor boost to the cake.
Step 6: Layer & Swirl
Pour about half of the cake batter into your prepared baking pan and spread it out evenly. Sprinkle your prepared filling mixture over the top of this batter layer. Then, carefully spoon the remaining batter over the filling, trying to cover it as much as possible. If you want to get fancy, you can use a knife or a skewer to gently swirl the filling into the top layer of batter. Don’t overdo the swirling; you want distinct pockets of filling, not a muddy mess.
Step 7: Bake
Pop the pan into your preheated oven. Bake for about 30-40 minutes. The exact time will depend on your oven, of course. You’ll know it’s done when a toothpick inserted into the center comes out clean, or with just a few moist crumbs attached. The top should be golden brown, and the edges should be pulling away slightly from the sides of the pan. The aroma filling your kitchen will be absolutely divine!
Step 8: Cool & Glaze
Once the cake is baked, let it cool in the pan on a wire rack for about 15-20 minutes. This allows it to set up properly. While it’s cooling, you can whip up the glaze. In a small bowl, whisk together the powdered sugar, a few tablespoons of milk or cream, and vanilla extract. Start with a little liquid and add more until you get a smooth, pourable consistency. Once the cake has cooled slightly, drizzle or spread the glaze over the top. I love when the glaze drips down the sides a bit!
Step 9: Slice & Serve
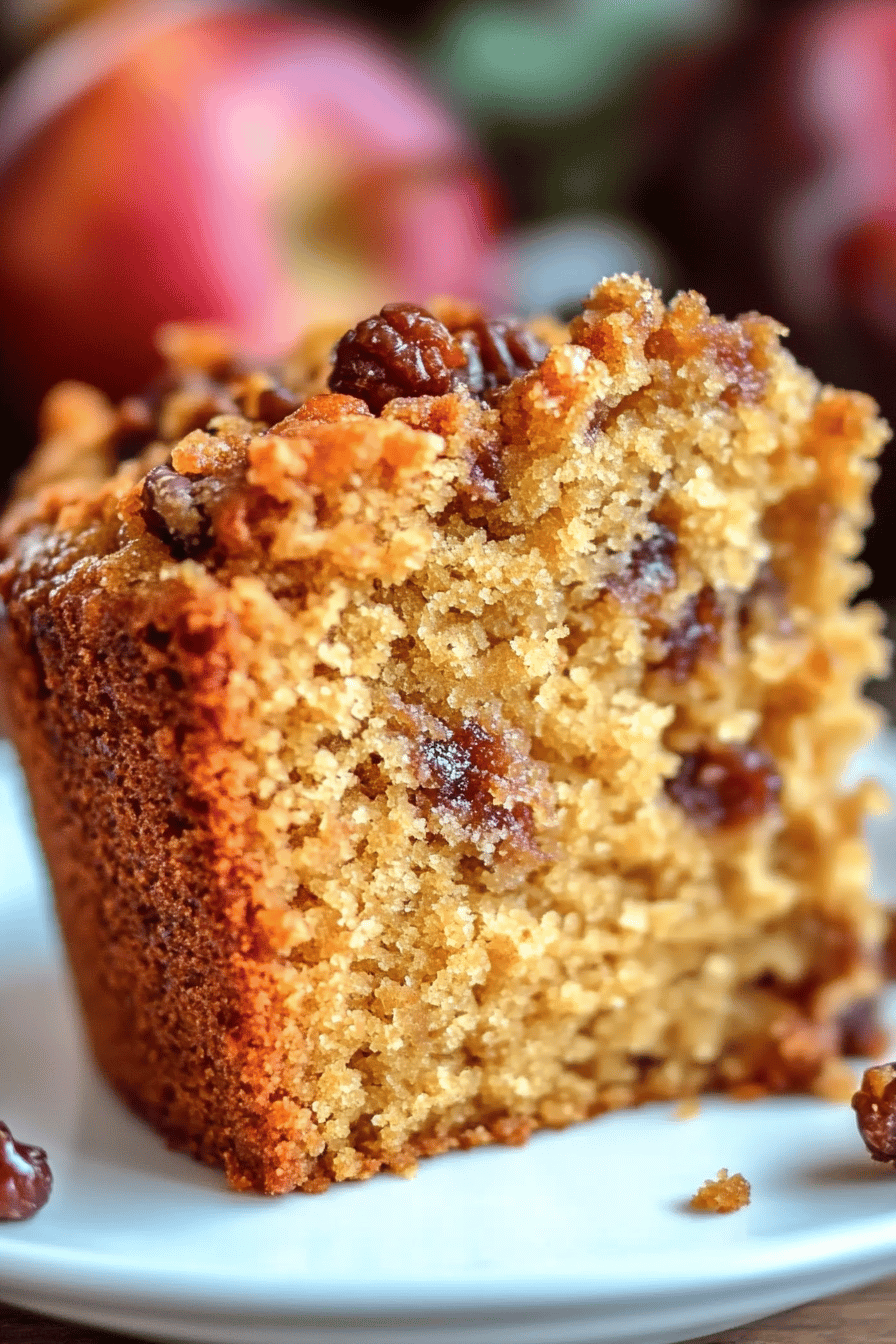
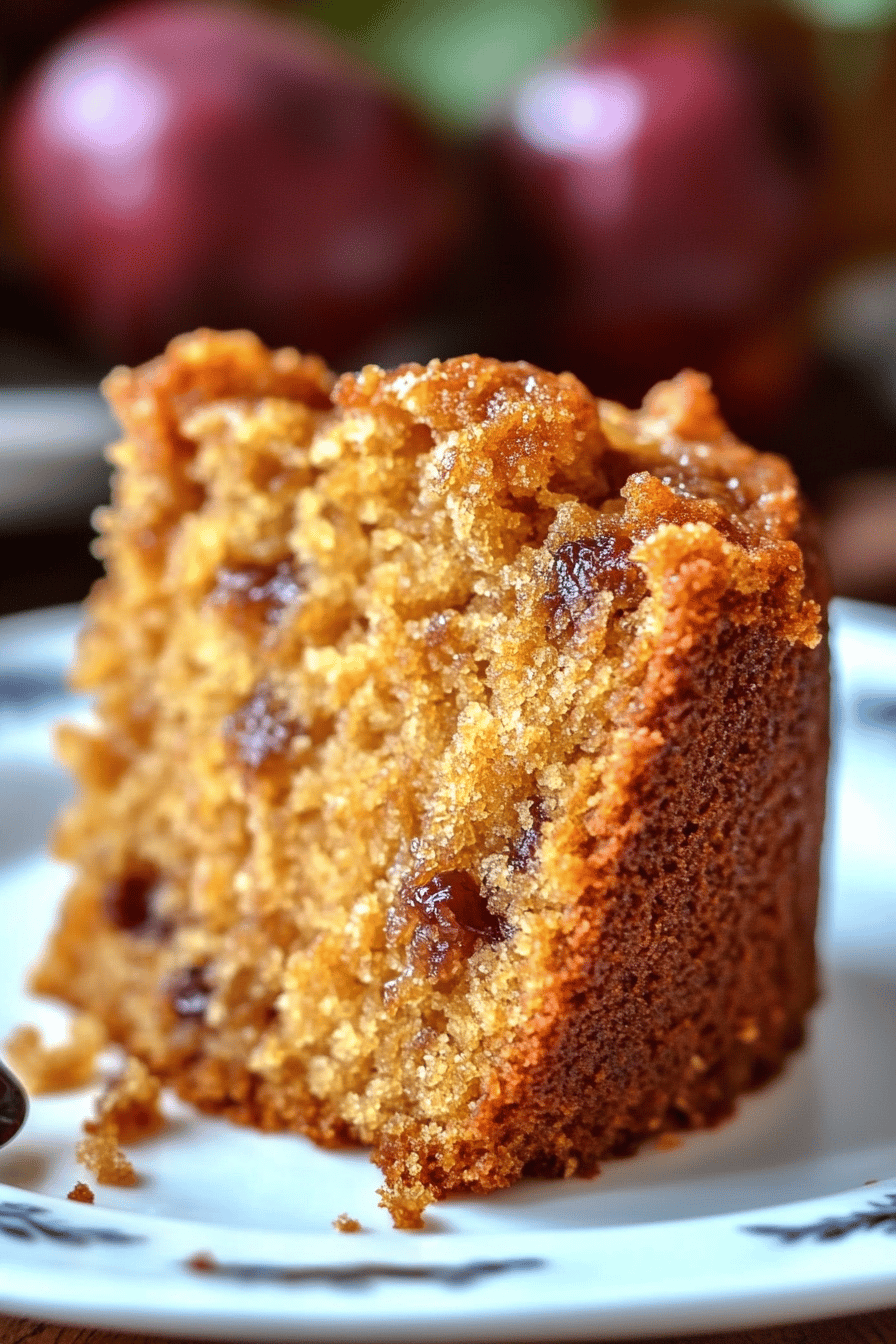
Let the glaze set for a few minutes before slicing. I find it’s best served slightly warm or at room temperature. Cut into squares and enjoy! The texture should be incredibly moist and tender, with those delightful pockets of spiced nuts. It’s truly a treat!
What to Serve It With
This Amish Applesauce Cake is so wonderfully versatile, it fits in perfectly at any time of day and for any occasion. For breakfast, a warm slice with your morning coffee is pure bliss. The spices wake you up in the best way, and it feels like a much more indulgent start than your usual toast. For brunch, imagine this beautifully glazed cake as the centerpiece! You can plate it elegantly with a small dollop of lightly sweetened whipped cream or a tiny scoop of crème fraîche. Pair it with a mimosa or a nice pot of tea. As a dessert, it’s a winner every time. Serve it warm with a scoop of good quality vanilla bean Ice Cream, or a drizzle of salted caramel sauce. It’s also fantastic alongside a warm apple cider or a rich coffee. And for those cozy snack times, when you just need a little something sweet without the fuss of baking a whole pie, this cake is your answer. Cut yourself a generous slice and enjoy it with a cold glass of milk. My family also loves it with a spoonful of plain Greek yogurt – the tanginess is a nice contrast to the sweetness of the cake. Seriously, there’s no wrong way to enjoy this comforting treat!
Top Tips for Perfecting Your Amish Applesauce Cake
Over the years, I’ve learned a few tricks that make this Amish Applesauce Cake absolutely perfect every single time. Here are my go-to tips:
Applesauce Choice: This is a big one! Make sure you’re using unsweetened applesauce. If you use sweetened, your cake will likely be too sweet, and the spice balance will be off. Homemade unsweetened applesauce is fantastic if you have it. If using store-bought, check the label to be sure. I’ve tested this with different brands, and they all work well, but the unsweetened variety is key.
Mixing Advice: Remember that gentle touch when combining wet and dry ingredients! Overmixing develops the gluten in the flour, which can make your cake tough or rubbery. Mix until you just see no dry streaks of flour. A few small lumps are a good sign you haven’t overdone it. I always tell people to stop mixing as soon as it looks “just combined.”
Swirl Customization: If you’re adding the optional nut filling, don’t go crazy with the swirling. You want those distinct pockets of nutty, spiced goodness. A gentle push with a knife or skewer to create a few swirls is usually enough. This ensures you get a bite with filling in it. You can also experiment with adding chocolate chips or dried fruit into the filling mix!
Ingredient Swaps: If you don’t have butter, vegetable oil or even melted coconut oil works beautifully as a fat. For the spices, feel free to play around! If you love ginger, add a pinch of ground ginger. If you’re not a fan of cloves, you can omit them or reduce them to just a tiny bit. For a vegan version, I’ve had success using flax eggs (1 tablespoon flaxseed meal + 3 tablespoons water, let sit for 5 minutes) and a plant-based milk instead of dairy milk in the glaze, though the texture might be slightly different. It’s also great with almond milk in the glaze, making it even creamier!
Baking Tips: Ovens can be quirky! Always trust the toothpick test. If the top is browning too quickly but the inside isn’t cooked, you can loosely tent the cake with aluminum foil. I usually bake this on the middle rack to ensure even heat circulation. If you’re making it in different pan sizes, like muffins, the baking time will need to be adjusted significantly. For muffins, I’d start checking around 20-25 minutes.
Glaze Variations: For a thinner glaze, add milk or cream a teaspoon at a time until you reach your desired consistency. For a thicker glaze, add more powdered sugar. You can also add a touch of lemon zest or juice to the glaze for a little zing, or even some orange extract for a citrusy twist. If you’re not a fan of powdered sugar glazes, a simple dusting of powdered sugar right before serving is lovely too!
Storing and Reheating Tips
This Amish Applesauce Cake is quite forgiving when it comes to storage, which is another reason I love it so much. If you happen to have any leftovers (which is rare in my house!), here’s how to keep it tasting its best:
Room Temperature: If the cake is not glazed, or if the glaze has fully set and isn’t sticky, it can be stored at room temperature for up to 2-3 days. Make sure it’s covered tightly with plastic wrap or stored in an airtight container. This is perfect for keeping it moist and delicious for a few days of snacking.
Refrigerator Storage: If your cake is glazed with a soft glaze or if you live in a very warm climate, it’s best to store it in the refrigerator. Wrap it tightly in plastic wrap or place it in an airtight container. It will keep well in the fridge for about 4-5 days. The texture might firm up slightly when chilled, but it will soften again as it comes to room temperature.
Freezer Instructions: This cake freezes beautifully! If you’ve baked it without the glaze, wrap the cooled cake (or individual slices) tightly in a layer of plastic wrap, followed by a layer of aluminum foil. It can be frozen for up to 2-3 months. When you’re ready to enjoy it, thaw it overnight in the refrigerator, then bring it to room temperature before slicing. If you want to freeze it with the glaze, it’s best to freeze it unfrosted and add the glaze after thawing. The texture holds up remarkably well!
Glaze Timing Advice: For the best results, I always recommend glazing the cake only when it has cooled down significantly. If you glaze a warm cake, the glaze can melt and become too thin, or even soak into the cake in an undesirable way. If you’re storing unglazed cake and planning to glaze it later, you can easily whip up a fresh glaze when you’re ready to serve.
Frequently Asked Questions
Final Thoughts
There you have it – my cherished Amish Applesauce Cake Recipe! I truly hope you give this one a try. It’s more than just a cake; it’s a little slice of comfort, a taste of tradition, and proof that sometimes the simplest recipes are the most satisfying. It’s the perfect recipe for when you want something homemade and delicious without spending hours in the kitchen. The aroma that fills your home while it bakes is just the icing on the cake, pun intended! If you enjoy this recipe, you might also love my Classic Apple Crumble or my Easy Cinnamon Swirl Bread – they have that same warm, comforting vibe. I can’t wait to hear how your Amish Applesauce Cake turns out! Please leave a comment below and let me know your thoughts, any variations you tried, or how quickly it disappeared from your kitchen. Happy baking!
Amish Applesauce Cake
Ingredients
Main Ingredients
- 2 cups all-purpose flour
- 1 teaspoon baking soda
- 0.5 teaspoon salt
- 1 teaspoon cinnamon
- 0.5 teaspoon nutmeg
- 1 cup granulated sugar
- 0.5 cup vegetable oil
- 2 large eggs
- 1 teaspoon vanilla extract
- 1.5 cups applesauce
- 1 cup chopped walnuts or pecans
Instructions
Preparation Steps
- Preheat oven to 350°F (175°C). Grease and flour a 9x13 inch baking pan.
- In a large bowl, whisk together flour, baking soda, salt, cinnamon, and nutmeg.
- In a separate bowl, combine sugar, oil, eggs, and vanilla extract. Mix well.
- Add the wet ingredients to the dry ingredients and mix until just combined.
- Stir in the applesauce and nuts.
- Pour batter into prepared pan and bake for 40-45 minutes, or until a wooden skewer inserted into the center comes out clean.
- Let cool completely before frosting or serving.