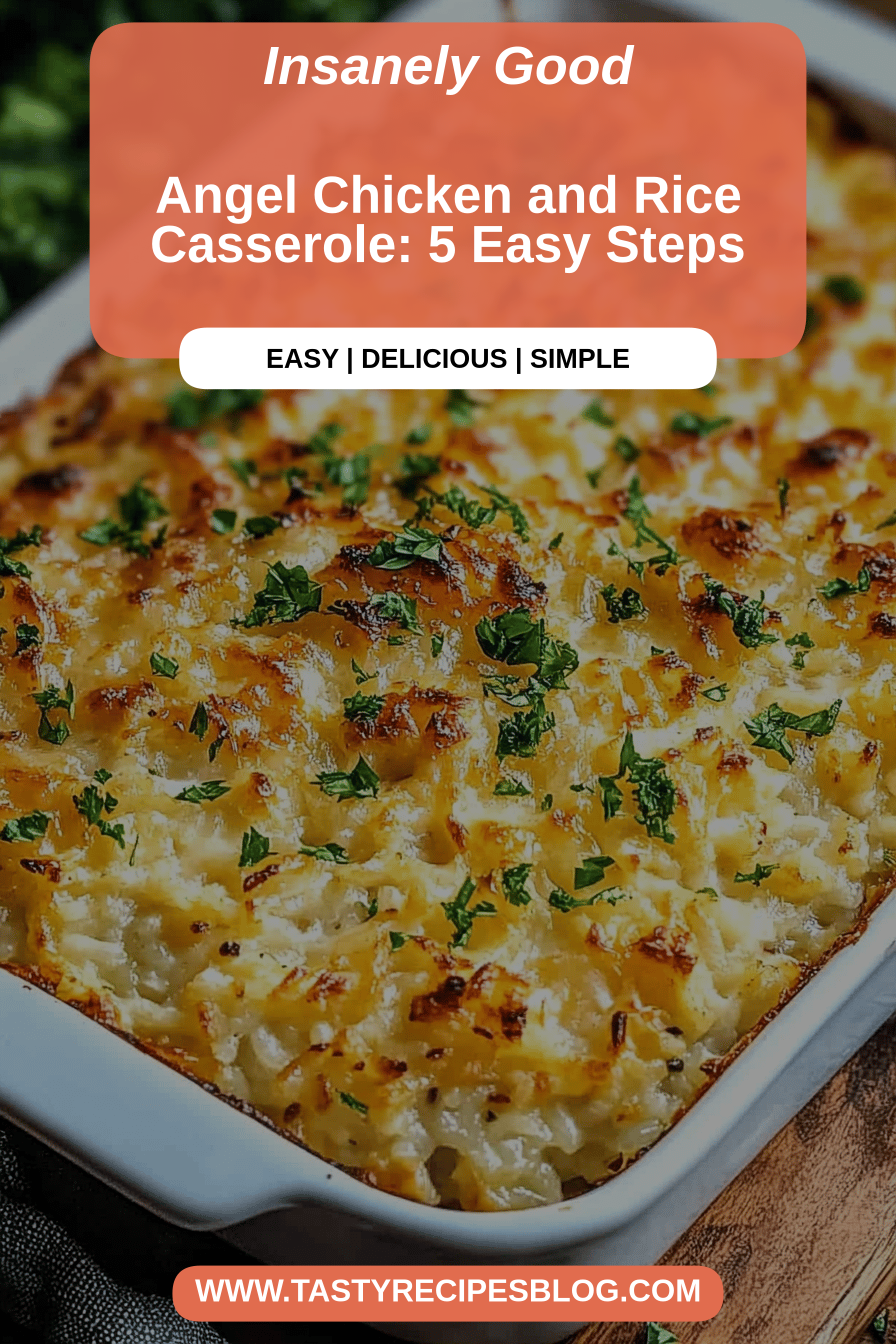
You know those nights, right? The ones where your brain feels like mush, the fridge looks suspiciously empty, and the thought of complicated cooking makes you want to order takeout for the fifth time this week? Yeah, I’ve been there. And on those nights, there’s one recipe that always comes to my rescue, a beacon of pure, unadulterated comfort food: my Angel Chicken and Rice. It’s not fancy, it’s not gourmet (though it sure tastes like it!), but it is consistently, wonderfully delicious. Think of it as a hug in a dish. Honestly, it’s become so popular in my house that my kids have started calling it “The Magic Chicken Rice,” which, I have to admit, is pretty accurate. It’s the kind of meal that makes everyone happy, from the pickiest eater to the most discerning adult. It’s got that perfect balance of savory chicken, fluffy rice, and a hint of something sweet and dreamy that just makes it… well, angelic. If you love a good casserole, but you’re looking for something with a bit more finesse without the fuss, this Angel Chicken and Rice is your new best friend. It’s truly a lifesaver.
What is Angel Chicken and Rice?
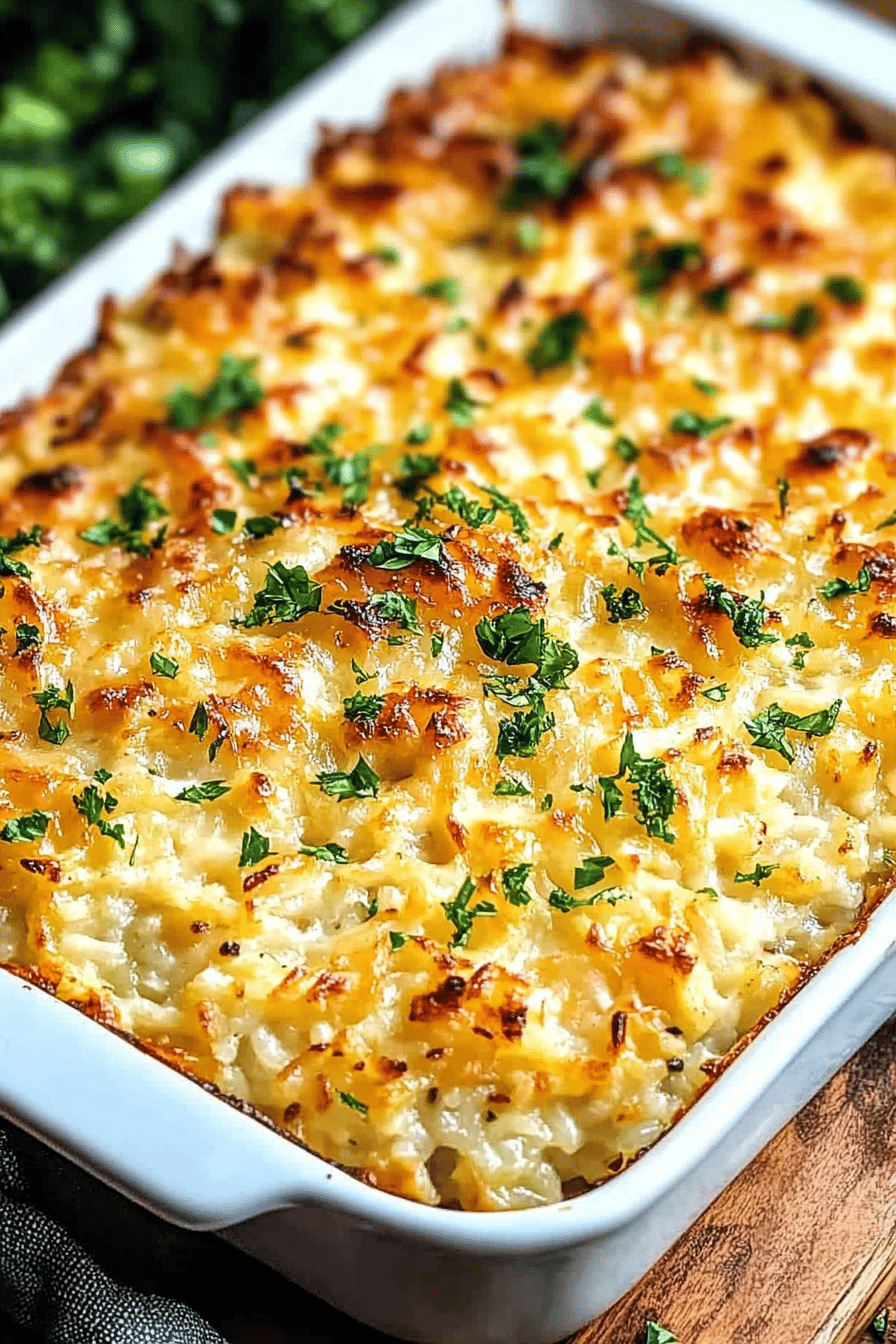
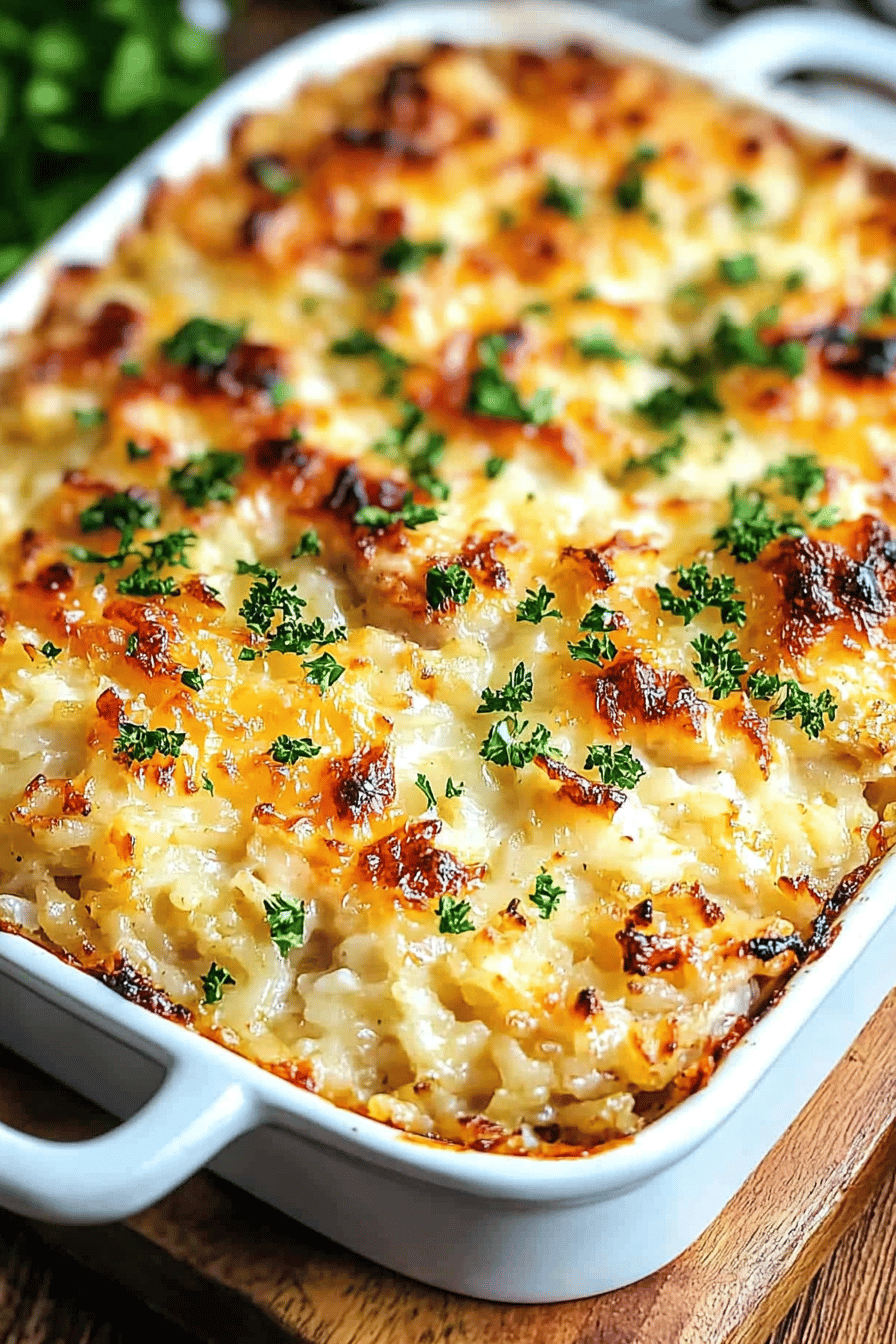
So, what exactly is this Angel Chicken and Rice that’s become my go-to? At its heart, it’s a baked dish where tender pieces of chicken are nestled into a creamy, savory rice base, all swirled with a touch of sweetness. The “angel” part, I think, comes from that light, almost ethereal quality it has – it’s incredibly satisfying without feeling heavy. It’s not quite a casserole, and it’s definitely not just plain chicken and rice. It’s a harmonious blend where each component plays its part beautifully. The rice becomes wonderfully tender and infused with flavor, the chicken stays moist and succulent, and that subtle sweet swirl? Oh, that’s the secret ingredient that elevates everything. It’s like a gentle whisper of sweetness that cuts through the richness and makes every bite sing. It’s essentially a one-pan wonder that delivers maximum flavor with minimal effort, perfect for those times when you want something truly special without spending hours in the kitchen.
Why you’ll love this recipe?
Honestly, there are so many reasons why this Angel Chicken and Rice Recipe has earned a permanent spot in my recipe binder, and why I’m so excited to share it with you. First off, the flavor is just out of this world. It’s savory, it’s creamy, it’s got that little hint of sweetness that makes it so addictive. It’s the kind of taste that makes you close your eyes and savor every single bite. What I love most about this dish, though, is its sheer simplicity. I’m talking about real, achievable simplicity. You don’t need a culinary degree or a pantry full of exotic ingredients. Everything is readily available at your local grocery store, and the steps are straightforward enough that even a beginner can nail it. I’ve made this more times than I can count, and it never fails to impress. Plus, it’s incredibly budget-friendly. The ingredients are all humble staples, proving that you don’t need to spend a fortune to eat exceptionally well. And talk about versatile! This recipe is a chameleon. It’s fantastic for a weeknight dinner because it’s so easy, but it’s also elegant enough to serve at a casual get-together or a Sunday brunch. You can even jazz it up or simplify it based on your mood or what you have on hand. It’s like a blank canvas for deliciousness. Compared to other chicken and rice dishes, this one has that magical touch that elevates it from everyday to extraordinary. It’s a reliable crowd-pleaser, and that’s a pretty big deal when you’re cooking for a family or guests!
How do I make angel chicken and rice?
Quick Overview
Making this Angel Chicken and Rice is surprisingly straightforward. You’ll start by preparing your chicken and a creamy rice mixture, then layer them together in a baking dish. A simple, sweet swirl gets layered in before it all bakes to golden, bubbly perfection. The beauty of this dish lies in its simplicity; it’s mostly hands-off once it’s in the oven. You get a rich, comforting meal with minimal active cooking time, which is precisely why it’s such a lifesaver for me on busy days.
Ingredients
For the Main Batter:
2 cups uncooked long-grain white rice (like Basmati or Jasmine), rinsed very well until water runs clear. This is key to avoiding gummy rice!
4 cups chicken broth, low-sodium is best so you can control the saltiness.
1.5 pounds boneless, skinless chicken breasts or thighs, cut into 1-inch pieces. Thighs tend to stay a bit more moist, but breasts are fantastic here too.
1 cup milk (whole milk makes it creamier, but I’ve tested 2% and it works fine).
1/2 cup grated Parmesan cheese. A good quality Parmesan makes a difference in flavor.
1/4 cup unsalted butter, melted. Don’t skimp on the butter; it adds richness!
2 large eggs, lightly beaten. These bind everything together and add to the creamy texture.
1 teaspoon salt, or to taste. Remember your broth might be salty.
1/2 teaspoon black pepper.
For the Filling:
1 tablespoon olive oil.
1 medium onion, finely chopped. A sweet onion like Vidalia is lovely here.
2 cloves garlic, minced. Fresh garlic is always best!
1 cup frozen peas and carrots mix (optional, but adds a nice pop of color and sweetness).
For the Glaze:
1/2 cup powdered sugar.
2 tablespoons milk or cream.
1/2 teaspoon vanilla extract. For that extra hint of warmth.
Step-by-Step Instructions
Step 1: Preheat & Prep Pan
First things first, preheat your oven to 375°F (190°C). Grab a 9×13 inch baking dish. You don’t need to grease it heavily; a light spray of cooking oil or a tiny bit of butter rubbed around will do the trick. We want the edges to get a little golden, not stick!
Step 2: Mix Dry Ingredients
In a large mixing bowl, combine the rinsed rice, salt, and pepper. Give it a good stir to make sure everything is evenly distributed. This simple step ensures your rice is seasoned from the get-go, which is so important for the overall flavor profile.
Step 3: Mix Wet Ingredients
In a separate, medium-sized bowl, whisk together the chicken broth, milk, beaten eggs, grated Parmesan cheese, and melted butter. Whisk until everything is well combined and smooth. This mixture is what will cook the rice and make it beautifully creamy.
Step 4: Combine
Pour the wet ingredients into the bowl with the dry rice. Stir gently until just combined. Be careful not to overmix here; we don’t want to break down the rice too much at this stage. Just ensure all the rice is moistened.
Step 5: Prepare Filling
Heat the Olive oil in a skillet over medium heat. Add the chopped onion and cook until softened and translucent, about 5-7 minutes. Then, stir in the minced garlic and cook for another minute until fragrant. If you’re using the peas and carrots, stir them in now and cook for another 2-3 minutes just to thaw them slightly. This sautéed onion and garlic base adds so much depth of flavor!
Step 6: Layer & Swirl
Spread about half of the rice mixture evenly into the prepared baking dish. Scatter the sautéed onion and garlic mixture (and vegetables, if using) over the rice. Then, evenly distribute the chicken pieces over this layer. Pour the remaining rice mixture over the chicken. Now for the fun part! You can dollop spoonfuls of the sweet glaze mixture over the top and gently swirl it in with a knife or skewer to create a marbled effect. Don’t over-swirl; you want distinct ribbons of sweetness.
Step 7: Bake
Cover the baking dish tightly with aluminum foil. Bake for 45 minutes. Then, remove the foil and bake for an additional 15-20 minutes, or until the rice is tender, the chicken is cooked through, and the top is lightly golden brown. The smell that fills your kitchen during this time is absolutely divine!
Step 8: Cool & Glaze
Once it’s out of the oven, let the Angel Chicken and Rice rest for about 10 minutes. This is crucial for the flavors to meld and the dish to set up properly. While it’s resting, whisk together the powdered sugar, milk, and vanilla extract in a small bowl until smooth. It should be a pourable consistency, like thick cream. Drizzle this glaze over the warm dish. The residual heat will help it set just a bit.
Step 9: Slice & Serve
Cut into squares and serve warm. This dish is perfect on its own, but I’ll give you some serving suggestions below!
What to Serve It With
This Angel Chicken and Rice is a complete meal in itself, but it’s also wonderful when paired with a few thoughtful additions. For a truly decadent breakfast, a small dollop of Greek Yogurt or a side of fresh berries can be surprisingly delightful. The tanginess cuts through the richness beautifully. If you’re serving it for brunch, I love to pair it with a crisp green salad with a light vinaigrette – it adds a much-needed freshness. A mimosa or a sparkling cider would be perfect alongside it. As a dessert option, it’s a bit unconventional, but the sweet swirl and creamy texture have a dessert-like quality. A light dusting of cinnamon or a drizzle of honey can enhance that aspect even further. For those cozy snack moments when you just need something comforting, I often just grab a fork and eat it straight from the dish (shh, don’t tell anyone!). Sometimes, a simple side of steamed broccoli or asparagus is all you need to round out the meal for a more traditional dinner. My kids, however, are perfectly happy with just a big slice of Angel Chicken and Rice, no sides needed – and that’s saying something!
Top Tips for Perfecting Your Angel Chicken and Rice
Over the years, I’ve learned a few little tricks that I think make this Angel Chicken and Rice even better. So, here are my top tips to help you achieve chicken and rice perfection. Firstly, when it comes to prepping the rice, rinsing is non-negotiable. I rinse mine until the water runs completely clear. This removes excess starch, preventing a gummy texture and ensuring each grain stays separate and fluffy. For mixing, remember the golden rule: don’t overmix. You want to combine the wet and dry ingredients just until they come together. Overworking the batter can lead to a tougher texture in the final dish, and we’re aiming for tender and creamy here. The swirl is where you can really have fun! I like to use a knife or a skewer and make gentle figure-eights or random swirls. Don’t try to mix it in completely; you want those beautiful ribbons of sweetness. For ingredient swaps, if you don’t have chicken broth, vegetable broth works, but it will change the flavor profile slightly. For the milk, I’ve experimented with non-dairy alternatives. Almond milk made it surprisingly creamy, but oat milk can sometimes add a slight sweetness that might alter the balance if you’re not careful. Baking is usually pretty forgiving, but keep an eye on your oven. If it’s running hot, you might need to reduce the temperature slightly or shorten the baking time. If the top starts browning too quickly before the rice is cooked, just pop the foil back on loosely. For the glaze, consistency is key. If it’s too thick, add a tiny bit more milk; if it’s too thin, add a touch more powdered sugar. And my biggest lesson learned? Taste as you go! Especially with the salt. Chicken broth varies in sodium content, so tasting and adjusting is crucial. Trust me on this one, it makes all the difference.
Storing and Reheating Tips
One of the best things about this Angel Chicken and Rice is how well it keeps. If you happen to have any leftovers (which is rare in my house!), they store beautifully. You can keep it covered at room temperature for a couple of hours, but for longer storage, pop it in the refrigerator. Make sure it’s in an airtight container. It will stay good in the fridge for about 3-4 days. The flavor actually tends to deepen overnight, making it even tastier the next day. If you want to freeze it, that’s totally doable too. Let the dish cool completely, then portion it into freezer-safe containers or wrap it tightly in plastic wrap and then foil. It can stay in the freezer for up to 2 months. When you’re ready to reheat, there are a few ways to go. For refrigerated portions, you can gently reheat it in the microwave, stirring halfway through, until warmed through. Or, if you prefer, you can pop it in a 350°F (175°C) oven, covered, for about 20-30 minutes, or until heated through. For frozen portions, it’s best to thaw them in the refrigerator overnight before reheating. If you’re in a rush, you can reheat directly from frozen in the oven, but it will take longer, probably around 45-60 minutes, covered. I usually wait to add the glaze until just before serving, especially if I’m reheating. If you do reheat a portion that already has glaze on it, the glaze might become a little more liquidy, but it still tastes delicious!
Frequently Asked Questions
Final Thoughts
So there you have it – my beloved Angel Chicken and Rice! It’s a dish that truly embodies comfort food for me. It’s incredibly satisfying, surprisingly easy, and consistently delicious. It’s the kind of recipe that makes you feel good about cooking and even better about sharing. If you love comforting, flavorful meals that don’t take a ton of effort, I really hope you’ll give this one a try. It’s become a staple for a reason! If you enjoy this recipe, you might also love my Creamy Lemon Herb Chicken Bake or my One-Pan Roasted Sausage and Veggies – they have that same comforting, fuss-free vibe. I can’t wait to hear what you think of the Angel Chicken and Rice! Let me know in the comments below if you try it, and how you liked it. Do you have any special family twists you’d add? I’m always looking for new ideas! Happy cooking, and enjoy every delicious bite!
Angel Chicken and Rice
Ingredients
Main Ingredients
- 1.5 pounds Boneless, skinless chicken breasts
- 1 cup Long-grain rice
- 1 can Cream of mushroom soup 10.75 oz can
- 1 cup Chicken broth
- 0.5 cup Milk
- 0.25 cup Butter, melted
- 0.5 teaspoon Salt
- 0.25 teaspoon Black pepper
Instructions
Preparation Steps
- Preheat oven to 375 degrees F (190 degrees C).
- Cut chicken breasts into bite-sized pieces.
- In a 9x13 inch baking dish, combine rice, cream of mushroom soup, chicken broth, milk, melted butter, salt, and pepper. Stir well.
- Place chicken pieces evenly over the rice mixture.
- Cover the baking dish with foil and bake for 30 minutes.
- Remove the foil and bake for an additional 15 minutes, or until the rice is tender and the chicken is cooked through.
- Let stand for 5-10 minutes before serving.


