You know those days when you just crave something sweet, something warm, something that feels like a hug in a bowl? For me, that’s usually when my mind drifts to baked pears. It’s not just a dessert; it’s a whole mood. I remember my grandma making them on crisp autumn evenings, the house filling with the most incredible aroma of cinnamon and ripe fruit. It was so simple, yet it felt so special. Honestly, if you’re looking for a dessert that screams cozy without demanding hours in the kitchen, this is your go-to. It’s like the sophisticated cousin of apple crumble, but way less fussy and, dare I say, even more elegant. I’ve tried so many variations over the years, but this particular way of making baked pears always brings me back to that feeling of pure, unadulterated comfort. It’s the kind of dish that makes you slow down and savor every single bite, and honestly, who couldn’t use a little more of that?
What is baked pear?
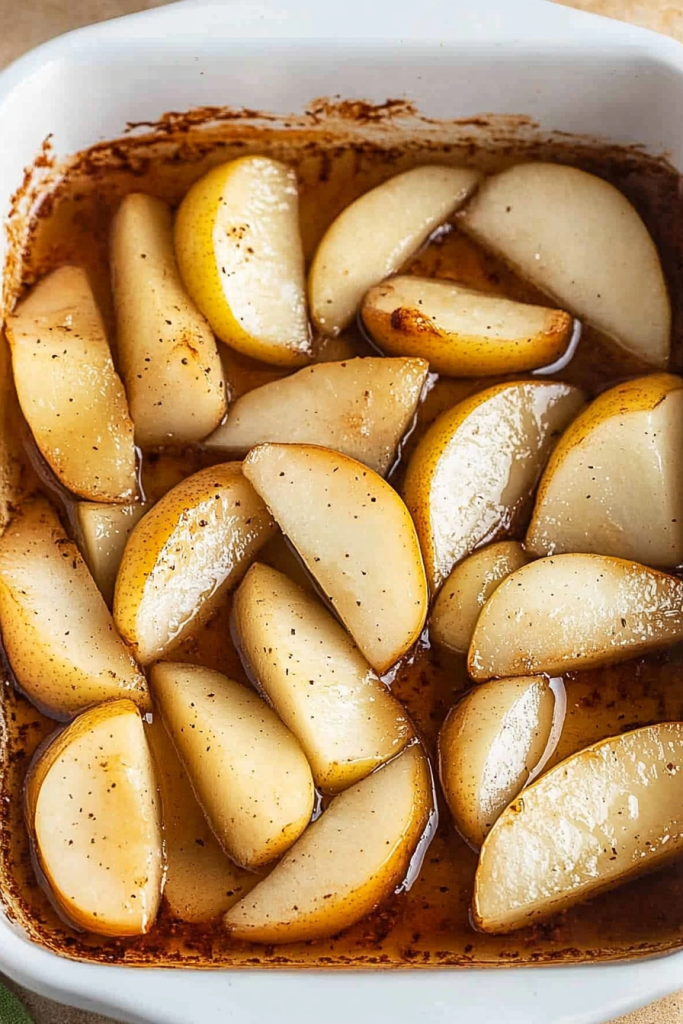
So, what exactly are we talking about when we say “baked pears”? At its heart, it’s incredibly straightforward: ripe pears, usually halved or cored, then baked until they’re wonderfully tender and fragrant. Think of it as nature’s perfect little edible bowl. We’re not talking about a complicated pastry or a lengthy bake time here. It’s more about letting the natural sweetness and subtle tartness of the fruit shine, amplified by a few simple, delicious companions. It’s the kind of dish that feels incredibly wholesome, yet indulgent enough to satisfy any sweet craving. The name itself, “baked pears,” perfectly captures its essence. It’s honest, it’s direct, and it promises exactly what it delivers: a warm, delightful baked fruit experience. It’s not fussy, it’s not complicated, and that’s precisely why it’s so universally loved.
Why you’ll love this recipe?
Oh, where do I even begin with why you’ll adore this baked pears recipe? First off, the flavor is just out of this world. When those pears bake, they caramelize slightly, their natural sugars intensifying, and they become this melt-in-your-mouth tender marvel. Paired with the warm spices and a hint of sweetness, it’s pure bliss. Then there’s the simplicity. Seriously, if you can cut a pear in half, you can make this. It’s a lifesaver on busy weeknights when you want something impressive but have zero energy. And budget-friendly? Absolutely! Pears are often more affordable than other fruits, and the other ingredients are pantry staples. What I truly love most, though, is its incredible versatility. Serve it warm for dessert with a dollop of whipped cream or Ice Cream, or enjoy it for a sophisticated breakfast or a comforting afternoon snack. It’s far more forgiving than, say, a delicate cake or a temperamental soufflé. This recipe is my go-to when I want something sweet but healthy-ish, and it always hits the spot without making me feel guilty. It’s the perfect antidote to a stressful day, and the aroma alone will make your kitchen feel like the coziest place on earth.
How do I make baked pears?
Quick Overview
This recipe is all about letting beautiful pears do their thing in the oven. We’ll prep them, fill them with a delightful mix of warming spices and a touch of sweetness, and then let them bake until they’re perfectly tender. The whole process is wonderfully hands-off, which is exactly why I adore it. You get maximum flavor with minimal effort, making it an absolute winner for any occasion, from a casual weeknight treat to a more elegant dessert.
Ingredients
For the Pears:
4 ripe but firm pears (Bosc or Anjou are my favorites for
1 tablespoon unsalted butter, softened (or coconut oil for a dairy-free option)
1 tablespoon Brown Sugar (or maple syrup for a refined sugar-free touch)
1/2 teaspoon ground cinnamon
1/4 teaspoon ground nutmeg
Pinch of ground cloves (optional, but oh-so-good!)
For the Optional Topping (highly recommended!):
2 tablespoons chopped walnuts or pecans
1 tablespoon rolled oats
1 teaspoon Brown Sugar
1/2 teaspoon ground cinnamon
Step-by-Step Instructions
Step 1: Preheat & Prep Pan
First things first, let’s get that oven heated up! I always preheat to 375°F (190°C). While it’s warming, grab a baking dish that’s just big enough to hold your pear halves snugly. You don’t want them rolling around. A shallow dish works perfectly. If you’re worried about sticking, a quick spritz of non-stick spray or a tiny bit of butter on the bottom never hurts, though it’s usually not necessary.
Step 2: Halve & Core the Pears
Now for the stars of the show. Wash your pears gently. Then, with a sharp knife, carefully slice each pear in half lengthwise, from the stem down to the base. Use a spoon or a melon baller to scoop out the core and seeds from each half. You want a nice little cavity for all those yummy fillings. Don’t worry if you accidentally scoop a little too deep; it just gives more room for deliciousness!
Step 3: Mix the Filling
In a small bowl, combine the softened butter (or coconut oil), brown sugar (or maple syrup), cinnamon, nutmeg, and those optional cloves. Mix it all up until it forms a nice, slightly paste-like consistency. This is where all that warm, cozy flavor really comes from. I sometimes like to add a tiny bit more cinnamon if I’m feeling particularly festive!
Step 4: Stuff the Pears
Take each pear half and generously spoon or spread the butter-sugar-spice mixture into the hollowed-out core area. Don’t be shy! I like to get a good amount packed in there. You want those flavors to really meld with the pear as it bakes.
Step 5: Prepare the Optional Topping
If you’re going for that extra crunch and flavor boost (and trust me, you should!), mix together the chopped nuts, rolled oats, brown sugar, and cinnamon in another small bowl. This adds a delightful texture and a deeper, toasted flavor that’s just divine.
Step 6: Top and Arrange
Sprinkle the nut and oat mixture evenly over the filling in each pear half. Gently place the filled pear halves, cut-side up, in your prepared baking dish. Make sure they’re nestled in there nicely.
Step 7: Bake
Pop the baking dish into your preheated oven. Bake for about 30-45 minutes, or until the pears are fork-tender. How long this takes can really depend on the ripeness and type of pear you’re using. You should be able to easily pierce them with a fork, and they should look slightly softened and juicy. Keep an eye on the topping; if it looks like it’s browning too quickly, you can loosely tent the dish with foil.
Step 8: Rest and Serve
Once they’re tender and fragrant, carefully remove the dish from the oven. Let the baked pears rest in the dish for about 5-10 minutes. This allows the juices to settle and makes them easier to handle. They’re truly best served warm.
Step 9: Garnish (Optional)
For an extra touch, you can drizzle a little extra honey or maple syrup over the top, or add a tiny dollop of whipped cream or a scoop of vanilla bean Ice Cream. A tiny sprinkle of fresh mint leaves can also add a beautiful pop of color.
What to Serve It With
These baked pears are so wonderfully versatile, which is another reason they’re a staple in my kitchen. For a truly comforting breakfast, I love serving them warm with a dollop of thick Greek yogurt and a sprinkle of granola. It feels so decadent but is packed with good stuff to start the day. If you’re looking to impress at brunch, imagine these beautiful pears nestled on a plate next to a fluffy stack of pancakes or some crispy bacon. A little drizzle of maple syrup and they’re absolutely show-stopping. As a dessert, they’re a dream! My absolute favorite way is with a scoop of high-quality vanilla bean ice cream, letting it slowly melt into the warm pear juices. A rich, dark chocolate sauce is also an incredible pairing. And for those cozy, quiet evenings when you just need a little sweet treat, these are perfect on their own, perhaps with a small glass of dessert wine or a warm cup of chai tea. My kids actually love them topped with a spoonful of peanut butter, which is a fun, slightly different twist we discovered one evening when we were out of ice cream!
Top Tips for Perfecting Your Baked Pears
Over the years of making these little gems, I’ve picked up a few tricks that I think really elevate them. For the pears themselves, choosing the right kind is key. You want them ripe enough to be sweet but still firm enough to hold their shape. Bosc and Anjou are my tried-and-true favorites for their texture and flavor when baked. If they’re too soft, they’ll turn to mush, which isn’t the worst thing, but it’s not the lovely tender-but-still-there texture we’re aiming for. When you’re coring them, don’t be afraid to make a decent-sized cavity. This isn’t just to hold the filling; it also helps the pear cook more evenly from the inside out. For the filling, I’ve found that softened butter works best for really coating the inside of the cavity and helping the sugar caramelize beautifully. If you’re using maple syrup, make sure it’s a good quality one; the flavor really comes through. And don’t skimp on the spices! Cinnamon and nutmeg are non-negotiable for me, but a tiny pinch of cloves or even cardamom can add an extra layer of warmth that is just heavenly. When it comes to the topping, the nuts and oats are optional, but they add such a wonderful textural contrast. Make sure your nuts are chopped into relatively small pieces so they toast evenly. And if you find your topping is browning too quickly before the pears are tender, don’t hesitate to loosely tent your baking dish with aluminum foil. It’s a simple trick that saves the day! I once tried baking them without the topping entirely, and while they were still good, they definitely lacked that extra dimension. Trust me, that little crunch makes all the difference. Finally, a word on baking time: ovens can be so different! Start checking around the 30-minute mark and gently poke the pears with a fork. They should yield easily but not be completely mushy. It’s better to err on the side of slightly underbaked and pop them back in for a few more minutes than to overdo it.
Storing and Reheating Tips
One of the best things about baked pears is how well they keep, which makes them perfect for meal prep or just having a delightful treat ready to go. If you have any leftovers (which is rare in my house!), you can store them at room temperature for up to a day if they haven’t been topped with ice cream or whipped cream. Just make sure they’re covered in an airtight container. For longer storage, your refrigerator is the best bet. Pop them in a sealed container, and they should stay lovely and fresh for about 3-4 days. The texture will soften a bit more over time, but they’re still delicious. I’ve even frozen them! Let them cool completely, then wrap each pear half individually in plastic wrap, followed by a layer of aluminum foil, or place them in a freezer-safe bag. They can last in the freezer for up to 2 months. When you’re ready to enjoy them again, the best way to reheat is gently in a low oven (around 300°F or 150°C) until warmed through, or you can carefully reheat them in the microwave on a lower power setting. If you stored them with a crunchy topping, it might lose some of its crispness, but the pear itself will be wonderfully tender and flavorful again. I usually add any fresh whipped cream or ice cream *after* reheating, as those don’t fare well in the oven or microwave!
Frequently Asked Questions
Final Thoughts
So there you have it – my absolute favorite way to make baked pears. It’s a recipe born from simple comfort, enhanced by a few thoughtful touches that really make it sing. It’s proof that you don’t need complicated steps or fancy ingredients to create something truly special and delicious. Whether you’re looking for a healthy-ish breakfast, a light dessert, or just a little something sweet to brighten your day, this recipe has you covered. I really hope you give these baked pears a try. They’re more than just a dessert; they’re an experience, a little moment of warmth and happiness. If you love this, you might also enjoy my recipe for Spiced Apple Crumble or my Easy Berry Cobbler – they have that same cozy, comforting vibe! I can’t wait to hear how yours turns out, so please leave a comment below and share your thoughts and any fun variations you try. Happy baking, my friends!
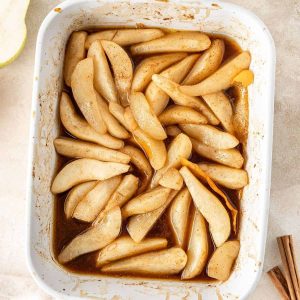
Baked Pears with Honey and Cinnamon
Ingredients
Main Ingredients
- 2 medium Ripe pears (such as Bosc or Anjou)
- 2 tablespoons Honey
- 0.5 teaspoon Ground cinnamon
- 0.25 teaspoon Ground nutmeg
- 1 tablespoon Water
- pinch Salt
Instructions
Preparation Steps
- Preheat oven to 375°F (190°C).
- Cut pears in half lengthwise and scoop out the seeds.
- In a small bowl, mix honey, cinnamon, nutmeg, water, and salt.
- Place the pear halves cut-side up in a baking dish. Drizzle the honey mixture over the pears.
- Bake for 30 minutes, or until the pears are tender.
- Serve warm, with a dollop of whipped cream or a sprinkle of chopped nuts (optional).


