Oh, you know those days? The ones where you’re craving something sweet, something comforting, but you also want it to be a little bit wholesome and, importantly, something you can actually eat without feeling that familiar gluten-y bloat later? Yeah, I have *a lot* of those days. And this banana slice gluten-free recipe? It’s my absolute secret weapon. It’s the one I whip up when friends pop over unexpectedly, when the kids declare they’re starving *again* right before dinner, or honestly, just when that 3 pm slump hits and only a little bit of baked goodness will do. It reminds me so much of those Banana Bread Muffins my grandma used to make, but it’s somehow lighter, more delicate, and has this wonderful moist crumb that’s just… divine. Forget those dry, crumbly gluten-free baked goods you might have tried in the past; this banana slice gluten-free beauty is a game-changer. It’s proof that gluten-free can be utterly, ridiculously delicious.
What is gluten free banana slice?
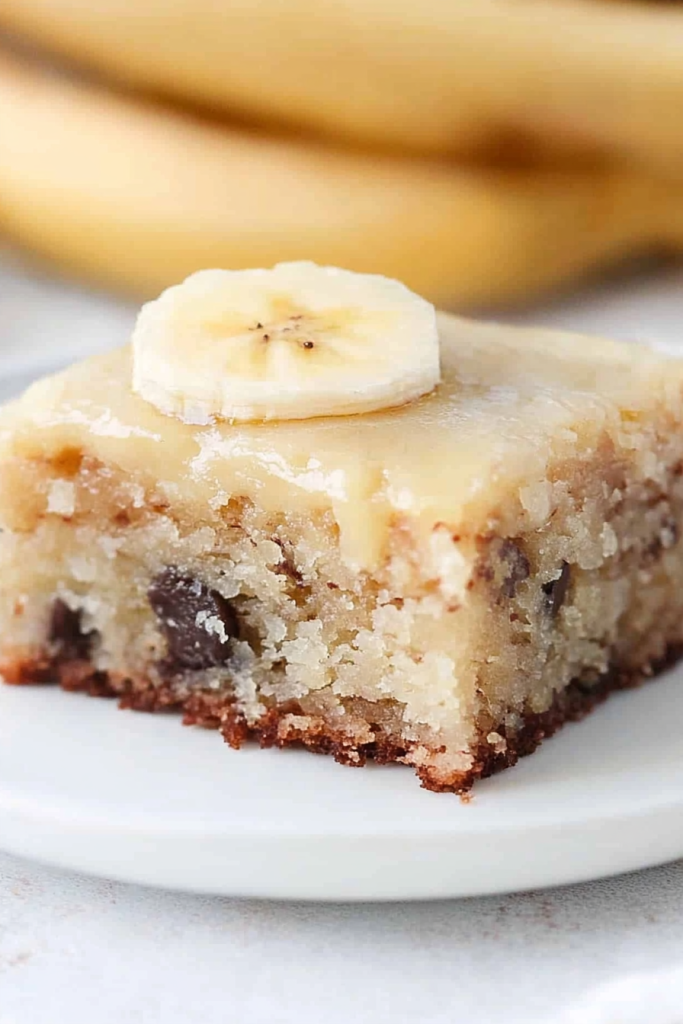
So, what exactly *is* this delightful thing we’re talking about? Think of it as a super moist, tender, and incredibly flavorful bar cake, but with all the wonderful elements of perfect Banana Bread. It’s baked in a pan and then sliced into convenient bars – hence the name! The “gluten-free” part just means we’re swapping out traditional wheat flour for a blend that works beautifully without any gluten, ensuring everyone can enjoy a slice of this sunshine. The “banana” is, of course, the star. We use super ripe bananas, which not only lend a fantastic natural sweetness but also contribute to that incredibly soft texture. It’s essentially comfort food in bar form, designed to be easy to make, easy to serve, and utterly irresistible. It’s not a heavy cake, nor is it a dense cookie; it’s that perfect middle ground that makes it so versatile and universally loved.
Why you’ll love this recipe?
Honestly, where do I even begin? There are so many reasons why this banana slice gluten-free recipe has become a staple in my kitchen. First off, the FLAVOR. The ripe bananas bring this incredible natural sweetness, a warmth that just feels like a hug. And when you add a hint of cinnamon or even a dash of nutmeg, oh my goodness, the aroma that fills your house is pure magic. It’s like walking into a cozy bakery! Then there’s the SIMPLICITY. I’ve tested this recipe more times than I can count, and it’s remarkably forgiving. Even if your bananas aren’t perfectly mashed, or you’re a little off on the whisking, it still turns out beautifully. It’s honestly one of those lifesaver recipes for busy weeknights or when you need a quick bake sale contribution. It’s also incredibly COST-EFFECTIVE. Bananas are usually pretty affordable, and the rest of the ingredients are pantry staples. You don’t need any fancy, expensive flours or ingredients to make this taste like a million bucks. And the VERSATILITY! This is what really seals the deal for me. You can enjoy it as is, warm from the oven with a cup of coffee, or dress it up a bit. It’s perfect for a grab-and-go breakfast, a delightful afternoon tea treat, or even a light dessert with a dollop of Whipped Cream. I’ve even added a sprinkle of chocolate chips or chopped walnuts for an extra layer of texture and flavor, and it’s always a hit. What I love most about this is how it satisfies that sweet craving without feeling overly indulgent. It’s a way to bake something truly delicious that feels a little bit healthier, and that’s a win-win in my book. It’s definitely a step up from your average banana muffin, offering a more refined texture and presentation, making it feel special enough for guests but easy enough for everyday enjoyment.
How do I make banana slices gluten free?
Quick Overview
This banana slice gluten-free recipe is all about simple steps that come together quickly. You’ll mash your ripe bananas, mix them with your wet ingredients, then gently combine them with your dry ingredients. A quick pour into a prepared pan, a little bake time, and voilà – you have golden, delicious bars ready to be enjoyed. The magic is in how the ingredients meld together to create a wonderfully moist and tender crumb. It’s a straightforward process that even novice bakers can master, and the result is always incredibly rewarding.
Ingredients
For the Main Batter:
You’ll want to gather about 3 very ripe, spotty bananas. The spottier, the sweeter and more flavorful they’ll be! For the gluten-free flour blend, I usually use a good quality 1:1 baking blend that contains xanthan gum. This is key for mimicking the structure that wheat flour provides. If your blend doesn’t have it, you might need to add about 1 teaspoon. You’ll also need baking soda and baking powder for that perfect lift, a pinch of salt to enhance all the flavors, and some warm spices like cinnamon or nutmeg – a teaspoon of cinnamon is usually my go-to. For the fat, melted unsalted butter or a neutral-flavored oil like coconut oil or avocado oil works wonderfully. Then, you’ll need a couple of large eggs, and for that extra moisture and richness, some milk. I’ve had great success with both dairy milk and unsweetened almond milk; it really just makes it creamier. A little vanilla extract is a must for that classic comforting flavor. And finally, a touch of granulated sugar or Brown Sugar to complement the banana’s sweetness.
For the Filling:
This is where you can really personalize your banana slice! I love to keep it simple with a swirl of cinnamon-sugar mixture. Just combine a couple of tablespoons of brown sugar with about a teaspoon of cinnamon. You can also toss in some chopped nuts like walnuts or pecans, or even some dark chocolate chips for a decadent touch. If you’re feeling adventurous, a spoonful of smooth Peanut Butter swirled in can be amazing, but make sure it’s well-softened or thinned slightly so it swirls easily.
For the Glaze:
This is optional, but oh-so-good! It’s usually a simple powdered sugar glaze. You’ll need about a cup of powdered sugar, a tablespoon or two of milk (or lemon juice for a little tang!), and a tiny splash of vanilla extract. You’re aiming for a thick but pourable consistency. If it’s too thick, add milk a teaspoon at a time; too thin, add more powdered sugar.
Step-by-Step Instructions
Step 1: Preheat & Prep Pan
First things first, let’s get that oven ready. Preheat it to 350°F (175°C). I like to use an 8×8 inch or 9×9 inch baking pan for this recipe. You’ll want to grease it really well with butter or cooking spray, and then I like to line it with parchment paper, leaving a little overhang on two sides. This makes it SO easy to lift the whole thing out of the pan later. Trust me, this little step saves a lot of heartache!
Step 2: Mix Dry Ingredients
In a medium bowl, whisk together your gluten-free flour blend, baking soda, baking powder, salt, and your chosen spice (cinnamon is my fave!). Whisking them together well ensures that all your leavening agents are evenly distributed, which means you’ll get a nice, even rise. You don’t want one bite to be dense and another to be airy, right?
Step 3: Mix Wet Ingredients
In a separate, larger bowl, mash those ripe bananas until they’re mostly smooth. A few small lumps are totally fine; they add character! Then, add your melted butter or oil, eggs, milk, vanilla extract, and sugar. Whisk everything together until it’s well combined and creamy. Make sure the eggs are fully incorporated.
Step 4: Combine
Now, pour your dry ingredients into the wet ingredients. Here’s the key: mix *just* until combined. Overmixing gluten-free batters can sometimes lead to a slightly tougher texture, so gentle is the way to go. A few streaks of flour are okay; they’ll disappear as you spread it into the pan. You want to be careful not to develop any gluten, even though we’re using gluten-free flour.
Step 5: Prepare Filling
If you’re adding a swirl, now’s the time to get that ready. In a small bowl, mix your brown sugar and cinnamon. If you’re adding chocolate chips or nuts, toss them in this mixture too. This helps them distribute better throughout the batter.
Step 6: Layer & Swirl
Pour about half to two-thirds of the batter into your prepared pan and spread it evenly. Sprinkle your filling mixture (cinnamon-sugar, chips, nuts) evenly over the top. Then, dollop the remaining batter over the filling. You don’t need to spread it perfectly; just try to cover most of it. Now, take a knife or a skewer and gently swirl it through the batter to create those lovely ribbons of flavor. Don’t go too deep or over-swirl, or you’ll just mix everything together.
Step 7: Bake
Pop that pan into your preheated oven. Bake for about 25-35 minutes. The exact time will depend on your oven and the pan you use. You’ll know it’s done when a toothpick inserted into the center comes out clean or with just a few moist crumbs attached. The edges should be golden brown.
Step 8: Cool & Glaze
Once baked, let the banana slice cool in the pan for about 15-20 minutes. This is important for it to set up properly. Then, use the parchment paper overhangs to carefully lift the entire block out of the pan and place it on a wire rack to cool completely. Once it’s fully cooled, you can drizzle on your glaze if you’re using one. Let the glaze set for about 10-15 minutes before slicing.
Step 9: Slice & Serve
Once cooled (and glazed, if using), use a sharp knife to cut your banana slice into bars. I usually cut it into 9 or 12 squares. Serve them at room temperature for the best texture. They’re absolutely perfect just as they are!
What to Serve It With
This banana slice gluten-free is a real chameleon when it comes to serving. For a simple BREAKFAST, it’s fantastic alongside a steaming mug of black coffee or a glass of your favorite milk. It’s sturdy enough to hold up in a lunchbox, too. If you’re planning a leisurely BRUNCH, slice it a bit thinner and serve it on a pretty platter with some fresh berries like raspberries or blueberries. A dollop of Greek yogurt or a light crème fraîche would be lovely too. For a more decadent DESSERT, warm it up slightly and serve it with a scoop of vanilla bean ice cream or a drizzle of warm caramel sauce. It’s also wonderful as a post-dinner treat with a cup of herbal tea. And for those COZY SNACKS, honestly, just a square with a glass of milk while you curl up with a good book is pure bliss. My family loves it with a sprinkle of toasted coconut flakes on top, especially in the summer months. And for a twist, try serving it with a side of homemade whipped cream infused with a little maple syrup.
Top Tips for Perfecting Your Banana Slice Gluten-Free
I’ve made this recipe so many times, and I’ve learned a few tricks along the way that I think make all the difference. When it comes to the BANANAS, don’t be tempted to use yellow, firm ones. You need those super ripe, brown-spotted bananas for the best sweetness and moisture. Mash them well, but a few small lumps are really okay; they add texture. For your GLUTEN-FREE FLOUR BLEND, I always recommend using a good quality all-purpose blend designed for 1:1 substitution. Brands like Bob’s Red Mill 1-to-1 Baking Flour or King Arthur Measure for Measure are usually my go-to, as they have the right balance of starches and flours and often include xanthan gum, which is crucial for binding in gluten-free baking. If yours doesn’t, add about a teaspoon. When you’re MIXING THE BATTER, remember the golden rule: don’t overmix! As soon as the dry ingredients are just incorporated into the wet, stop. Overmixing can make gluten-free baked goods tough or gummy. A few little streaks of flour are fine; they’ll cook out. For the SWIRL CUSTOMIZATION, think about visual appeal. Don’t over-swirl; you want distinct ribbons, not a muddy mess. A gentle zig-zag motion with a butter knife works best. For INGREDIENT SWAPS, if you don’t have milk, water or even orange juice (for a different flavor profile!) can work in a pinch, though milk provides a richer texture. If you’re out of eggs, a flax egg (1 tablespoon flaxseed meal + 3 tablespoons water, let sit for 5 minutes) can work as a binder, though the texture might be slightly denser. For BAKING TIPS, always use the middle rack in your oven. If your oven tends to run hot, you might want to reduce the temperature by about 10-15 degrees Fahrenheit. To check for doneness, insert a toothpick into the center. It should come out with moist crumbs attached, not wet batter. If the top is browning too quickly, you can loosely tent it with foil. For GLAZE VARIATIONS, consider adding a little lemon zest or a drop of almond extract for a different flavor profile. If you prefer a less sweet topping, a simple dusting of powdered sugar is also lovely, or skip the glaze altogether and serve warm with a dollop of whipped cream.
Storing and Reheating Tips
Keeping your banana slice gluten-free fresh is pretty straightforward, and it holds up well. At ROOM TEMPERATURE, it will stay good for about 2-3 days if stored in an airtight container. Make sure it’s completely cool before sealing it up, or you might get condensation, which can make it soggy. If you’ve glazed it, it’s best to wait until the glaze is fully set before storing. For REFRIGERATOR STORAGE, it can last for up to a week. Again, an airtight container is your best friend here. The texture might firm up a bit in the fridge, which is why reheating is sometimes nice. To reheat, you can pop a slice in a toaster oven or a regular oven at around 300°F (150°C) for about 5-10 minutes until warmed through. You can also microwave it for about 15-20 seconds, but be careful not to overheat it, or it can become tough. FREEZER INSTRUCTIONS are also great for this recipe. Once completely cooled and unglazed (or the glaze is set), wrap individual slices tightly in plastic wrap, then place them in a freezer-safe bag or container. They’ll keep well for up to 2-3 months. To thaw, remove from the freezer the night before and let it thaw in the refrigerator, or thaw at room temperature for a few hours. If you glazed it and froze it, the glaze might soften a bit upon thawing, so you might want to re-glaze or add a fresh dusting of powdered sugar after it’s thawed. Generally, if you plan to eat it within a day or two, room temperature is perfect. For longer storage, the fridge is your best bet. The GLZE TIMING ADVICE is crucial: always let the banana slice cool completely before applying glaze. If you’re freezing, it’s often easier to freeze the plain bars and glaze them *after* thawing for the freshest finish.
Frequently Asked Questions
Final Thoughts
So there you have it – my go-to banana slice gluten-free recipe that truly hits all the right notes. It’s a testament to how incredibly delicious and satisfying gluten-free baking can be. It’s simple enough for a weeknight treat, yet special enough for guests. The moist crumb, the sweet banana flavor, and that lovely hint of spice just make it utterly irresistible. If you’re a fan of banana bread, or just love a good, comforting baked good, you absolutely have to give this a try. It’s the kind of recipe that makes you feel good about what you’re eating. If you try this recipe and love it as much as my family and I do, please leave a comment below and let me know how yours turned out! I’d also love to hear about any variations you come up with. Happy baking, and enjoy every single delicious slice!
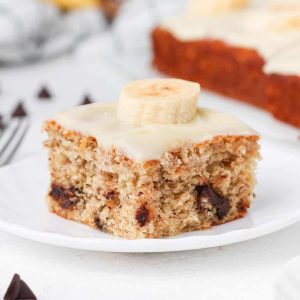
banana slice gluten-free
Ingredients
Main Ingredients
- 3 medium Ripe Bananas
- 1.5 cup Rolled Oats
- 0.5 cup Almond Flour
- 0.25 cup Maple Syrup
- 0.25 cup Coconut Oil, melted
- 1 teaspoon Baking Powder
- 0.5 teaspoon Cinnamon
- 0.25 teaspoon Salt
- 0.5 cup Chocolate chips (optional)
Instructions
Preparation Steps
- Preheat oven to 350°F (175°C). Grease and flour a 8x8 inch baking pan.
- In a large bowl, mash the bananas. Add the oats, almond flour, maple syrup, melted coconut oil, baking powder, cinnamon, and salt. Stir until well combined.
- Fold in the chocolate chips, if using.
- Pour the batter into the prepared pan and spread evenly.
- Bake for 30-35 minutes, or until a toothpick inserted into the center comes out clean.
- Let cool completely before slicing and serving.


