Oh, brussels sprouts. Just saying the word can send shivers down some people’s spines, conjuring up images of soggy, sulfurous little green balls from childhood. I get it, I really do. For the longest time, I was right there with you, avoiding them like the plague. They were the vegetable I’d always push to the side of my plate, a mandatory but unwelcome addition to Thanksgiving dinner. But then, something changed. It was a drizzly Tuesday evening, I was feeling uninspired by my usual weeknight rotation, and I decided to give brussels sprouts another chance, this time with a little more… love. And wow. Just wow. This recipe completely flipped my perspective. Forget bitter and bland; think nutty, caramelized, and utterly addictive. It’s become my go-to when I want something healthy that tastes like a treat. Honestly, it’s so good, I often catch myself sneaking them right off the baking sheet before they even make it to the table.
What are Crispy Roasted Brussels sprouts?
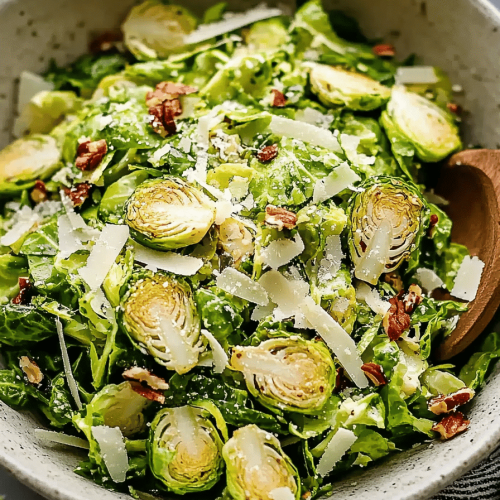
So, what exactly are these magical brussels sprouts? They’re essentially just that – brussels sprouts, roasted to perfection. But the “perfection” is where the magic happens. We’re talking about transforming those humble little brassicas into something truly special. Think of it as an extreme makeover for vegetables. Instead of boiling or steaming them into submission, we’re going to blast them with heat, letting their natural sugars caramelize and coaxing out a delightful nutty flavor. The outer leaves get wonderfully crispy and almost chip-like, while the insides become tender and sweet. It’s the kind of simple preparation that lets the vegetable truly shine, and it’s so easy, you’ll wonder why you ever bothered with other methods. It’s the anti-soggy sprout, the hero of the vegetable world, and my absolute favorite way to eat them.
Why you’ll love this recipe?
There are so many reasons why this recipe has earned a permanent spot in my Weekly Meal Plan, and I just know you’re going to fall in love with it too. First off, the flavor is just… incredible. We’re talking a symphony of nutty, slightly sweet, and savory notes. When they roast, those little leaves turn delightfully crispy, offering a satisfying crunch that’s surprisingly addictive. It’s like eating savory candy! And the best part? It’s ridiculously simple. Seriously, this is a lifesaver on busy nights. You basically toss them with a few ingredients and let the oven do all the hard work. No fancy techniques, no complicated steps. Plus, brussels sprouts are incredibly budget-friendly, making this a fantastic way to eat healthy without breaking the bank. They’re also surprisingly versatile. While this recipe is fantastic on its own, they pair beautifully with so many things. I’ve served them alongside everything from a simple grilled chicken breast to a hearty steak, and they always get rave reviews. What I love most about this is that it’s proof that healthy food can be unbelievably delicious. It’s the dish that finally converted my picky eaters, and that’s saying something!
How do I make crispy Brussels sprouts?
Quick Overview
The process is wonderfully straightforward: trim and halve your sprouts, toss them with Olive oil and seasonings, and roast them at a high temperature until they’re tender on the inside and wonderfully crisp and browned on the outside. It’s all about getting that beautiful caramelization. This method takes all the guesswork out of cooking brussels sprouts and guarantees a delicious result every single time. You’ll be amazed at how easy it is to transform these often-maligned veggies into a crowd-pleasing favorite.
Ingredients
For the Brussels sprouts: For the Brussels sprouts: For the Brussels sprouts: For the Brussels sprouts: For the Brussels sprouts: For
2 pounds fresh brussels sprouts (look for firm, green ones with no yellowing)
3 tablespoons extra virgin olive oil (good quality makes a difference here!)
1/2 teaspoon sea salt (or to taste)
1/4 teaspoon freshly ground Black Pepper (don’t skip the fresh grind!)
For the Optional Flavor Boost:
1-2 cloves garlic, minced (add this in the last 10 minutes of roasting for best flavor)
1 tablespoon balsamic glaze (drizzled on after roasting)
Step-by-Step Instructions
Step 1: Preheat & Prep Pan
First things first, get your oven preheating to a nice, hot 400°F (200°C). This high heat is key for achieving that delicious crispiness. While the oven heats up, grab a large baking sheet. You can line it with parchment paper for super easy cleanup, which I *always* do when I can. It’s one of my favorite little kitchen hacks. Make sure the parchment paper is flat and covers the entire surface so nothing sticks.
Step 2: Trim & Halve the Sprouts
Now, for the brussels sprouts themselves. Give them a good rinse under cool water. Then, you’ll want to trim off the very end of the stem. It’s usually a bit tough and woody. Just slice it off with a sharp knife. Next, cut each sprout in half lengthwise. If you have any particularly large ones, you can quarter them to ensure they all cook evenly. Removing any loose or yellowing outer leaves is also a good idea – they can sometimes be a bit bitter.
Step 3: Season Generously
Place all your halved brussels sprouts into a large mixing bowl. Drizzle them generously with the extra virgin olive oil. Don’t be shy with the oil; it helps everything crisp up beautifully. Sprinkle in your sea salt and freshly ground Black Pepper. Now, get your hands in there and toss everything together really well. You want to make sure every single sprout is coated in oil and seasonings. This is crucial for even cooking and great flavor.
Step 4: Arrange on Baking Sheet
Spread the seasoned brussels sprouts out onto your prepared baking sheet in a single layer. This is SUPER important. If they’re piled on top of each other, they’ll steam instead of roast, and we’re definitely not going for steamed sprouts here! Give them a little breathing room so the hot air can circulate around them, helping them get nice and crispy. Don’t overcrowd the pan; if necessary, use two baking sheets.
Step 5: Roast to Perfection
Pop the baking sheet into your preheated oven. Now, here’s where the magic happens. Roast them for about 20-30 minutes. The exact time will depend on your oven and the size of your sprouts. You’re looking for them to be tender when you poke them with a fork, and the cut sides should be beautifully browned and caramelized. I like to give the pan a good shake halfway through to ensure even browning, or even flip them with a spatula if I’m feeling particularly attentive.
Step 6: Add Garlic (Optional)
If you’re using the minced garlic, now is the time to add it. About 10 minutes before they’re done roasting, sprinkle the minced garlic over the sprouts. This gives the garlic a chance to get fragrant and tender without burning. Just toss them gently on the baking sheet. It adds another wonderful layer of flavor that I absolutely adore.
Step 7: Drizzle and Serve
Once they’re perfectly roasted, carefully remove the baking sheet from the oven. If you’re using balsamic glaze, give them a generous drizzle now. The sweet and tangy glaze is just the perfect finish. Give them a final gentle toss right on the pan. They should be irresistible at this point. Serve them warm immediately. That crispy texture is best when they’re fresh out of the oven!
What to Serve It With
These crispy roasted brussels sprouts are so versatile, they honestly fit in with almost any meal. For breakfast, I love them crumbled into a frittata or served alongside some crispy bacon and a perfectly poached egg. The slight bitterness of the sprouts cuts through the richness of the eggs and bacon beautifully. For brunch, they make an elegant side dish, especially with a drizzle of that balsamic glaze. Picture them alongside some smoked salmon or a lovely quiche – they really elevate the whole spread. As a simple dessert? Okay, hear me out! A small portion of these with a tiny drizzle of honey or maple syrup can satisfy a sweet craving in a surprisingly sophisticated way, especially when you want something light after a richer meal. But my absolute favorite is for cozy dinners or even just as a substantial snack. They’re fantastic with Grilled Chicken or steak, roasted pork, or even alongside some hearty pasta. I’ve also found they are surprisingly good with a really good quality sausage. My kids, who used to shun any green vegetable, now ask for “crunchy green bits” which is code for these brussels sprouts. They’re also great tossed with some toasted slivered almonds for an extra textural element and a nutty crunch that complements the sprouts perfectly.
Top Tips for Perfecting Your Crispy Roasted Brussels Sprouts
I’ve made these brussels sprouts more times than I can count, and over the years, I’ve picked up a few tricks that really make a difference. First off, for the best results, always trim the very end of the stem. It’s tough and can be a bit bitter. If you notice any sad, yellowing outer leaves, just peel those off. They’ll only detract from the overall flavor and texture. When it comes to seasoning, don’t be afraid of the olive oil! It’s essential for getting that beautiful crispiness and golden-brown color. And use good quality olive oil if you can – it really does make a difference in the final taste. Salt and pepper are crucial, but I’ve also found that a pinch of red pepper flakes added with the salt and pepper can give them a lovely little kick, especially if you like a bit of heat. When you’re spreading them on the baking sheet, single layer is the golden rule. Seriously, this is non-negotiable if you want crispy sprouts. Overcrowding leads to steaming, and nobody wants steamed sprouts! If your baking sheet is looking too full, just grab another one. It’s worth it. I’ve learned this the hard way after many batches of less-than-crispy sprouts. If you’re adding garlic, like I often do, make sure to add it in the last 10-15 minutes of roasting. If you add it too early, it can burn and turn bitter. My kids actually love picking out the little crispy bits of garlic afterwards! For a sweet and tangy finish, that balsamic glaze drizzle is a game-changer. You can buy it pre-made or make your own by simmering balsamic vinegar until it thickens. Trust me on this one, it’s addictive! And finally, don’t overcook them. You want them tender on the inside but still with a slight bite, not mushy. The caramelized edges are what you’re really aiming for. Keep an eye on them, and when they look beautifully browned and crispy, they’re ready!
Storing and Reheating Tips
Honestly, these brussels sprouts are best enjoyed immediately, fresh out of the oven when they’re at their crispiest. But life happens, and sometimes you’ll have leftovers, which is totally fine! If you do have some that need to be stored, let them cool down completely before putting them away. Trying to store warm food can create condensation, which makes things soggy – and that’s the opposite of what we want here. For storing at room temperature, I wouldn’t recommend it for more than a couple of hours, as they really lose their crispness quickly. Your best bet is the refrigerator. Transfer them to an airtight container or a resealable bag. They should keep well in the fridge for about 3-4 days. The texture will soften a bit over time, but they’ll still be tasty. When it comes to reheating, the microwave is generally your enemy if you’re aiming for crispiness. It tends to make them soft and rubbery. Instead, I highly recommend reheating them in a dry skillet over medium heat for a few minutes, stirring occasionally, or even popping them back into a hot oven (around 375°F or 190°C) on a baking sheet for about 5-10 minutes. This helps to bring back some of that much-loved crispiness. If you want to freeze them, it’s doable, but know that they won’t be as crisp as freshly made. Let them cool completely, then spread them on a baking sheet and freeze until solid. Once frozen, transfer them to a freezer-safe bag or container. They can be stored in the freezer for up to 2-3 months. To thaw, transfer them to the refrigerator overnight and then reheat as mentioned above. For best results, I usually reserve the balsamic glaze drizzle for *after* reheating, so it doesn’t get too sticky or burn.
Frequently Asked Questions
Final Thoughts
There you have it – my absolute favorite way to prepare brussels sprouts! I truly hope this recipe helps you fall in love with these little green powerhouses as much as I have. They’re proof that with a little heat and a dash of love, even the most misunderstood vegetables can become stars of the show. They’re easy, healthy, and most importantly, unbelievably delicious. If you try this recipe, please let me know in the comments below how it turned out for you! I love hearing about your kitchen adventures and any tweaks you might have made. And if you’re looking for more simple, flavorful vegetable side dishes, be sure to check out my roasted broccoli with garlic and lemon or my simple sauteed green beans. Happy cooking, and I can’t wait to hear your thoughts!
Honey-Glazed Roasted Brussels Sprouts
Ingredients
Main Ingredients
- 1 pound Brussels sprouts, trimmed and halved
- 2 tablespoons Olive oil
- 2 tablespoons Honey
- 1 tablespoon Balsamic vinegar
- 0.25 teaspoon Salt
- 0.25 teaspoon Black pepper
Instructions
Preparation Steps
- Preheat oven to 400°F (200°C).
- In a large bowl, toss Brussels sprouts with olive oil, salt, and pepper.
- Spread Brussels sprouts in a single layer on a baking sheet.
- Roast for 20-25 minutes, or until Brussels sprouts are tender and browned, flipping halfway through.
- In a small bowl, whisk together honey and balsamic vinegar.
- Drizzle the honey glaze over the roasted Brussels sprouts and toss to coat.
- Serve immediately.


