I remember the first time I tried making cauliflower wings. Honestly, I was a little skeptical. Could broccoli really pull off the same “wow” factor as traditional chicken wings? My family is usually pretty set in its ways when it comes to snacks, especially on game days or movie nights. But I’d heard so much buzz, and I was determined to find a plant-based alternative that my picky eaters (and myself!) would actually devour. This recipe, my friends, is that discovery. It’s so good, so outrageously flavorful, and surprisingly easy to whip up, that it has completely stolen the show. Forget everything you thought you knew about veggies; these cauliflower wings are a total game-changer, and they disappear from the platter faster than you can say “seconds, please!”

What are Cauliflower wings?
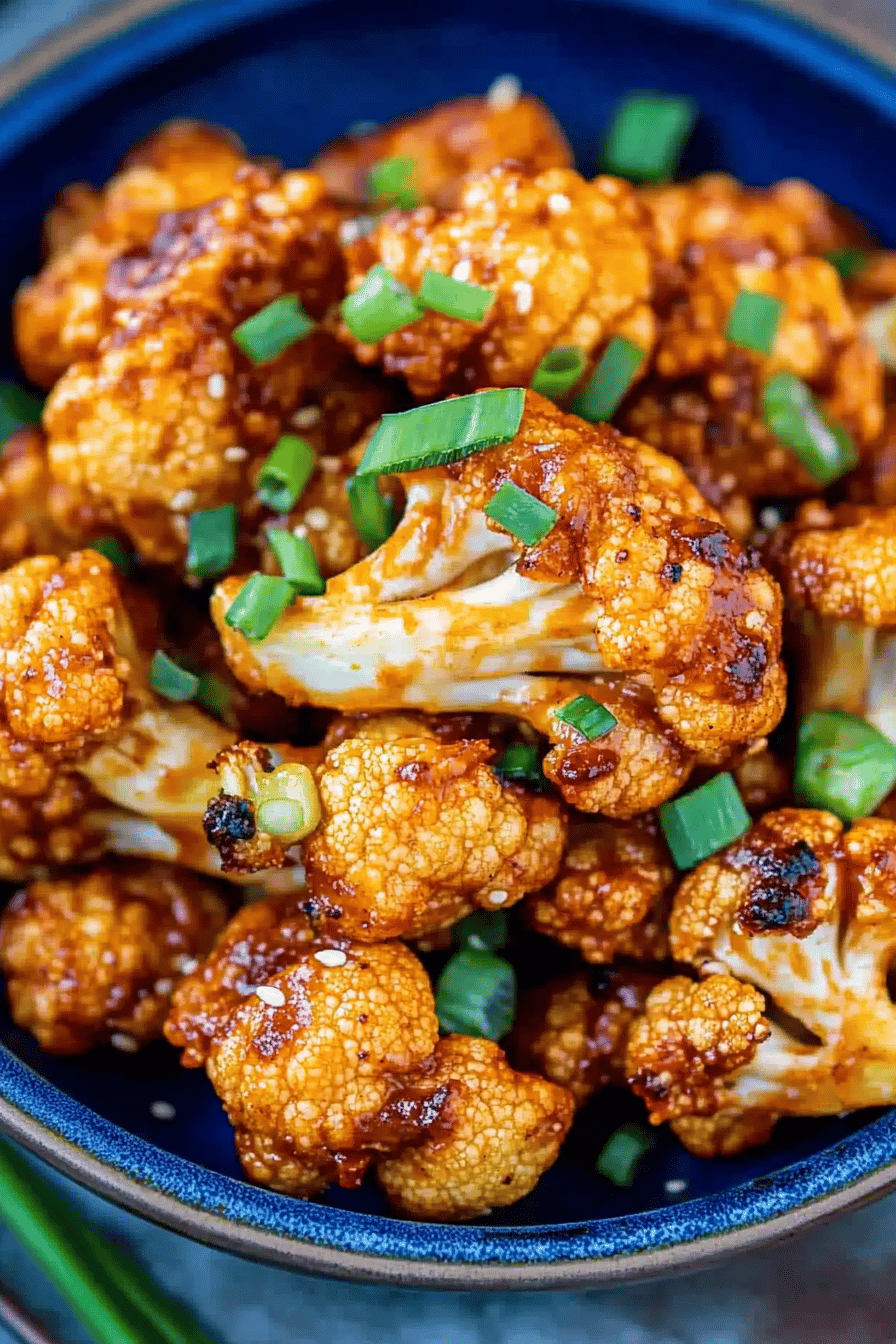
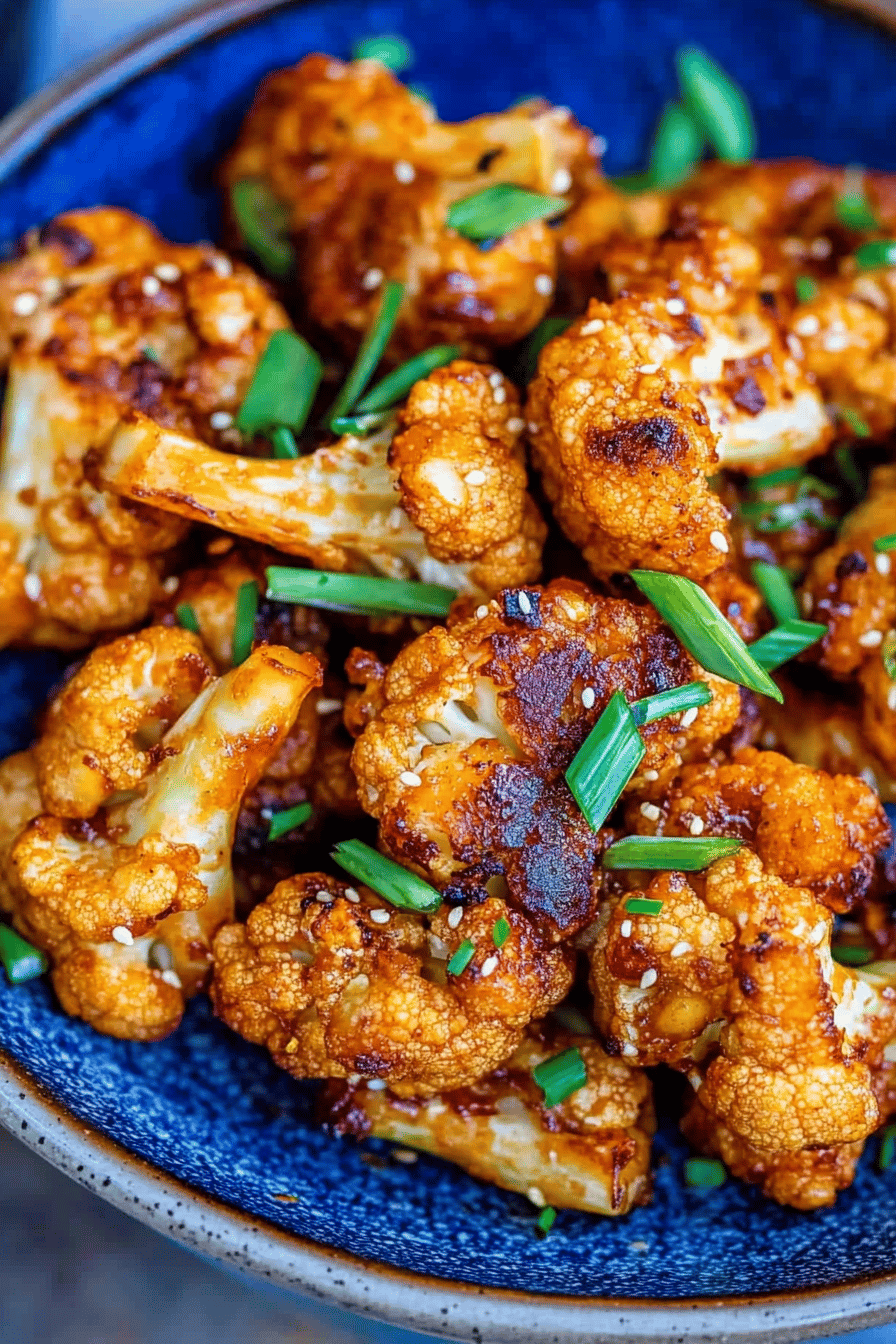
So, what exactly are these magical cauliflower wings? Think of them as your favorite crispy, saucy appetizer, but made with a humble head of cauliflower instead of meat. We’re talking about florets of cauliflower that get coated in a flavorful batter, baked until they’re perfectly tender on the inside and delightfully crispy on the outside, and then tossed in a glorious, crave-worthy sauce. It’s essentially a delicious illusion, a way to satisfy those savory, crunchy cravings without any of the guilt. They’re not trying to *be* chicken, oh no. They’re their own magnificent thing, a celebration of how versatile and delicious vegetables can be when treated with a little love and a lot of flavor. This recipe takes that concept and elevates it, giving you that satisfying bite and incredible taste experience everyone loves.
Why you’ll love this recipe?
What is the secret behind making cauliflower wings?flavor is just out of this world. We’re talking a complex blend of savory, slightly sweet, and a hint of spice that makes you want to keep popping them into your mouth. The coating gets perfectly crispy in the oven, and then that glaze? Oh, that glaze is pure magic. It’s sticky, flavorful, and coats every single piece beautifully. Then there’s the simplicity. Honestly, you guys, it’s so straightforward. Once you get the hang of coating the cauliflower, the rest is a breeze. It’s the kind of recipe that’s perfect for a weeknight when you need a quick appetizer or a fun side dish, but it’s also impressive enough to serve at a party. And speaking of parties, the Cost-efficiency: What is the best way to measure cost-efficiency? is a huge win. Cauliflower is usually pretty budget-friendly, making this a fantastic way to create a crowd-pleasing dish without breaking the bank, especially compared to other appetizers. Plus, the versatility! You can serve these with ranch dip, blue cheese dressing, a side of celery sticks – they’re amazing on their own, but they’re also fantastic piled onto a salad or tucked into tacos. What I truly love most about this recipe, though, is the look on people’s faces when they try them for the first time and can’t believe it’s cauliflower. It’s that moment of delicious surprise that makes all the effort (which, let’s be honest, isn’t much!) totally worth it. It’s a healthier alternative that doesn’t taste like a compromise at all. If you’re a fan of my crispy baked onion rings, you’re going to adore these!
How to Make Cauliflower Wings
Quick Overview
In a nutshell, we’re going to chop up a head of cauliflower into bite-sized florets, batter them up with a savory, seasoned mix, bake them until they’re golden and crispy, and then toss them in a luscious, flavorful glaze. It sounds simple, and it truly is! The magic happens in the combination of a perfectly seasoned coating and a glorious, sticky glaze that locks in all the flavor. This method bypasses the deep-frying mess but still delivers that irresistible crunch and taste. It’s a lifesaver for busy nights when you want something exciting and delicious without a lot of fuss.
Ingredients
For the Main Batter:
- 1 large head of cauliflower, cut into bite-sized florets
- 1 cup all-purpose flour (or a gluten-free blend for GF option)
- 1/2 cup panko breadcrumbs (adds extra crispiness!)
- 1 teaspoon garlic powder
- 1 teaspoon onion powder
- 1/2 teaspoon smoked paprika (for that lovely smoky depth)
- 1/4 teaspoon cayenne pepper (optional, for a little kick!)
- 1/2 teaspoon salt
- 1/4 teaspoon black pepper
- 3/4 cup unsweetened plant-based milk (almond or soy work beautifully)
- 1 tablespoon apple cider vinegar (this helps activate the leavening in the flour, making it fluffier!)
For the Filling:
- 1 tablespoon olive oil (for sautéing)
- 1 small onion, finely chopped
- 2 cloves garlic, minced
- 1/4 cup vegetable broth or water
- 1/4 teaspoon dried thyme
For the Glaze:
- 1/2 cup your favorite hot sauce (Frank’s RedHot is my classic go-to, but feel free to experiment!)
- 2 tablespoons vegan butter (or regular butter if not dairy-free)
- 1 tablespoon maple syrup (just a touch for balance and shine)
- 1 teaspoon Worcestershire sauce (check for vegan if needed)
Step-by-Step Instructions
Step 1: Preheat & Prep Pan
First things first, preheat your oven to 400°F (200°C). This is crucial for getting that perfect crisp. Grab a large baking sheet and line it with parchment paper. This step is non-negotiable, trust me! It prevents sticking and makes cleanup an absolute dream. If you don’t have parchment paper, a light coating of oil on the baking sheet will work in a pinch, but parchment is really the way to go.
Step 2: Mix Dry Ingredients
In a large bowl, whisk together the flour, panko breadcrumbs, garlic powder, onion powder, smoked paprika, cayenne pepper (if using), salt, and Black Pepper. Give it a good whisk until everything is well combined. You want to make sure all those spices are evenly distributed so every bite is packed with flavor. The panko is our secret weapon for that extra-crunchy texture!
Step 3: Mix Wet Ingredients
In a separate medium bowl or large measuring cup, combine the plant-based milk and Apple Cider vinegar. Let it sit for about 5 minutes. You’ll notice it starts to curdle slightly – that’s exactly what we want! It creates a sort of vegan “buttermilk” that adds a lovely tenderness to the coating.
Step 4: Combine
Pour the wet ingredients into the bowl with the dry ingredients. Now, stir gently until *just* combined. It’s really important not to overmix here. A few small lumps are perfectly fine! Overmixing can lead to a tough coating, and we want light and crispy. The batter should be thick enough to coat the cauliflower but not so thick that it’s gloopy. If it seems too thick, add a tablespoon of milk at a time until it reaches the right consistency. If it’s too thin, add a tablespoon of flour.
Step 5: Prepare Filling
While the batter is resting, let’s make a quick filling. Heat the olive oil in a small skillet over medium heat. Add the finely chopped onion and sauté until softened, about 3-4 minutes. Then, add the minced garlic and cook for another minute until fragrant, being careful not to burn it. Pour in the Vegetable Broth or water and add the dried thyme. Let it simmer for a minute or two, allowing the flavors to meld. This filling adds an extra layer of savory depth that really makes these cauliflower wings special. Some people skip this, but I honestly think it’s worth the extra few minutes!
Step 6: Layer & Swirl
Add the prepared cauliflower florets to the batter and gently toss until each piece is evenly coated. You want a good, thick coating on all of them. Now, arrange the battered cauliflower in a single layer on your prepared baking sheet. Make sure they’re not touching too much, as this allows them to crisp up properly. Drizzle the onion and garlic filling mixture evenly over the cauliflower. Some people like to swirl the filling into the batter before coating, but I find drizzling it over after they’re on the pan gives a nice distribution of flavor without making the batter too wet.
Step 7: Bake
Pop the baking sheet into your preheated oven. Bake for 20-25 minutes, or until the cauliflower is tender when pierced with a fork and the edges of the coating are golden brown and crispy. I like to flip them halfway through baking for even crisping, but it’s not strictly necessary if you’re in a rush. Keep an eye on them in the last few minutes, as oven temperatures can vary.
Step 8: Cool & Glaze
While the cauliflower is baking, prepare your glaze. In a small saucepan, melt the vegan butter over medium heat. Add the hot sauce, maple syrup, and Worcestershire sauce. Stir until well combined and heated through. This glaze is incredibly simple but tastes so complex and delicious. Once the cauliflower is baked and crispy, carefully remove it from the oven. Let it cool for just a minute or two – you don’t want to add the glaze to piping hot cauliflower as it can make it soggy. Then, add the crispy cauliflower to the saucepan with the glaze and gently toss until every piece is beautifully coated. Work quickly so they don’t lose their crispiness!
Step 9: Slice & Serve
Serve these beauties immediately while they are hot and incredibly crispy! They are perfect on their own, or with your favorite dipping sauce like vegan ranch or blue cheese. The smell alone will have everyone flocking to the kitchen, asking what’s for snack time. They’re best enjoyed fresh, but I’ll share my tips for storing them below!
What to Serve It With
These cauliflower wings are surprisingly versatile and can be enjoyed in so many ways! For Breakfast, they’re a fun, savory addition alongside scrambled tofu or a plant-based egg scramble. A little drizzle of sriracha and a side of avocado makes for a fantastic start to the day. For Brunch, they’re a showstopper! Arrange them artfully on a platter with a variety of dipping sauces and a fresh green salad. A mimosa or a crisp sparkling cider pairs perfectly. As Dessert? Hear me out! While these are savory, they can be an unexpected appetizer before a sweet meal. Think of them as a flavorful palate opener. And for those Cozy Snacks at home, they are pure comfort. Serve them piled high with a side of crunchy carrot and celery sticks and a generous dollop of cool, creamy ranch. We often have them as our main event for movie nights, surrounded by popcorn and good company. My kids especially love them dipped in ketchup, which is always a win!
Top Tips for Perfecting Your Cauliflower Wings
I’ve made this recipe countless times, and over the years, I’ve picked up a few little tricks that really elevate these cauliflower wings from good to absolutely unforgettable. First, when it comes to the Zucchini Prep (wait, I’m getting ahead of myself! That’s from a different recipe I love! My bad! Let’s stick to cauliflower!), the key is to get your florets a consistent size. This ensures they cook evenly. Aim for florets that are about 1-1.5 inches – not too big, not too small. For Mixing Advice, remember what I said about not overmixing the batter. Seriously, resist the urge to stir it to oblivion! A few lumps are your friends here; they create a better texture. You want enough batter to coat each piece nicely, but not so much that it becomes heavy. For Swirl Customization, the filling part is where you can get creative. While I love the savory onion and garlic, you could easily add a pinch of smoked paprika to the filling for more smokiness or a dash of nutritional yeast for a cheesy undertone. When it comes to Ingredient Swaps, the hot sauce is really your playground. If you like it milder, use a less spicy hot sauce or even a BBQ sauce. For a sweeter glaze, increase the maple syrup slightly. If you’re not a fan of vegan butter, a good quality Olive oil can work in a pinch for the glaze, though the butter adds a lovely richness. And for Baking Tips, if your cauliflower is browning too quickly on top but isn’t crispy enough, you can tent it loosely with foil for the last 5-10 minutes of baking. Conversely, if it’s not browning, you can turn up the heat slightly for the final few minutes, but watch it carefully! Finally, for Glaze Variations, don’t be afraid to experiment! A tablespoon of honey (or agave for vegan) instead of maple syrup can change the sweetness profile. A tiny pinch of ginger can add a nice warmth. The possibilities are truly endless, and that’s what makes this recipe so fun to make over and over again.
Storing and Reheating Tips
So, what happens if, by some miracle, you have leftovers? It’s rare in my house, but it does happen! For Room Temperature storage, these are best eaten fresh. If you must leave them out, try to keep them covered loosely for no more than an hour or two, but they will lose some of their crispiness. For Refrigerator Storage, let the cauliflower wings cool completely before storing them in an airtight container. They’ll generally stay good for about 2-3 days. The crispiness will diminish a bit, but they’ll still be delicious! For Freezer Instructions, this is a bit trickier because of the batter and glaze. I wouldn’t recommend freezing them after they’ve been glazed. If you want to freeze them, bake them until they’re done but *before* glazing. Let them cool completely, then freeze them in a single layer on a baking sheet until solid, then transfer them to a freezer-safe bag or container. They’ll last about 1-2 months. When you’re ready to cook them from frozen, bake them at around 375°F (190°C) until heated through and crispy, then toss them with the glaze while still warm. Glaze Timing Advice is crucial: always glaze them right before serving for maximum crispness. If you refrigerate leftovers, you can reheat them in a toaster oven or a regular oven at about 375°F (190°C) for about 5-10 minutes until heated through and slightly crisped up again. Microwaving will make them soft, so I always steer clear of that method for these!
Frequently Asked Questions
Final Thoughts
I truly hope you give these cauliflower wings a try. They’re more than just a recipe; they’re a little bit of kitchen magic that proves healthy eating can be incredibly delicious and satisfying. They’re a testament to how a simple vegetable can be transformed into something truly crave-worthy. They’ve earned their spot as a regular in my recipe rotation, and I have a feeling they’ll become a favorite in your home too. If you love these, you might also want to check out my recipe for crispy baked sweet potato fries – another crowd-pleaser that’s surprisingly easy to make! I can’t wait to hear what you think once you’ve made them. Please leave a comment below and let me know how yours turned out, or share any fun glaze variations you tried! Happy cooking!

Cauliflower Wings
Ingredients
Main Ingredients
- 1 head cauliflower
- 0.75 cup all-purpose flour
- 0.5 cup water
- 1 tablespoon soy sauce
- 1 tablespoon sesame oil
- 0.5 cup sweet chili sauce
- 1 tablespoon sriracha
Instructions
Preparation Steps
- Preheat oven to 400°F (200°C). Cut the cauliflower into bite-sized florets.
- In a bowl, whisk together flour, water, soy sauce, and sesame oil to make the batter.
- Dip each cauliflower floret into the batter, ensuring it's fully coated.
- Place the battered florets on a baking sheet lined with parchment paper.
- Bake for 20-25 minutes, flipping halfway through, until golden brown and crispy.
- In a bowl, combine sweet chili sauce and sriracha. Toss the baked cauliflower wings in the sauce.
- Serve immediately and enjoy!


