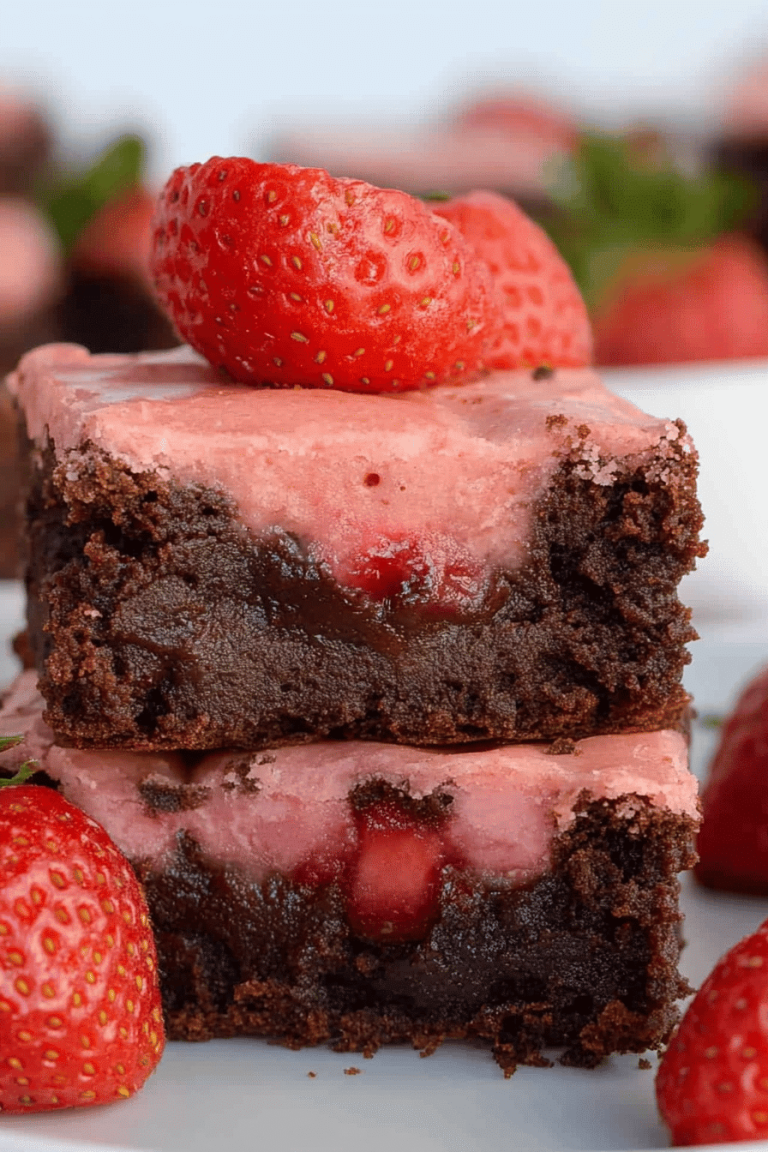
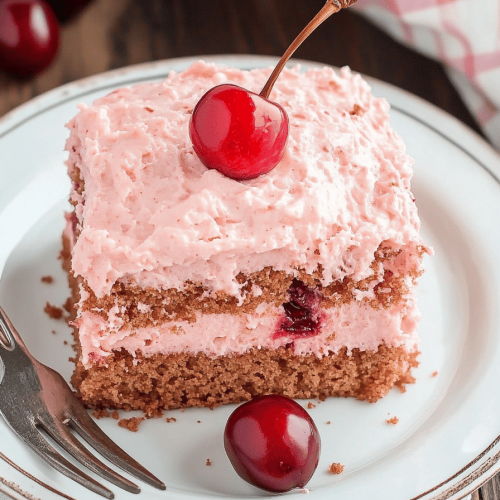
Oh, where do I even begin with this cherry Slab Pie? It’s one of those recipes that feels like a warm hug on a plate, a true taste of nostalgia for me. I remember my grandmother making this every summer when the cherry trees in her backyard were bursting with fruit. The aroma filling her kitchen was just… magical. It’s so much simpler than a traditional double-crust pie, which I sometimes find a bit fiddly, but it delivers all the incredible, comforting flavor you could ever want. If you’re anything like me and sometimes just crave a delicious, fruity treat without all the fuss, then this cherry slab pie is about to become your new best friend.
What is a cherry slab pie?
So, what exactly is a cherry slab pie? Think of it as a generous, easy-going cousin to the classic Cherry Pie. Instead of being baked in a standard round pie dish, it’s made in a large rectangular baking pan, like a jelly roll pan or a 9×13 inch pan. This means you get way more delicious pie per pan – a fact I definitely appreciate! The crust is typically a simple, buttery single crust that lines the bottom and sides of the pan, and then it’s filled to the brim with a glorious, ruby-red cherry filling. It’s essentially a giant, shareable slice of pure cherry happiness, perfect for feeding a crowd or just indulging in for days (if it lasts that long, which, let’s be honest, it probably won’t!).
Why you’ll love this recipe?
There are so many reasons why this cherry slab pie has earned a permanent spot in my recipe rotation. First off, the flavor is just out of this world. Sweet, tart cherries are simmered into a luscious filling that has just the right amount of brightness. It’s not overly sweet, which I really appreciate; you can truly taste the fruit. Then there’s the crust – it’s flaky, buttery, and perfectly golden brown. It’s also surprisingly easy to make. I’m not going to lie, sometimes the idea of rolling out pie dough and doing all those fancy crimps can feel like a lot of work, especially on a weeknight. But this slab pie? It’s a lifesaver. You just press the dough into the pan. Done. Plus, it’s incredibly cost-effective. Cherries are usually pretty affordable, especially when they’re in season, and the rest of the ingredients are pantry staples. And the versatility! You can serve this warm with a scoop of vanilla Ice Cream, chilled for a picnic, or even cut into smaller squares for a potluck. Honestly, what I love most about this cherry slab pie is that it feels like a special occasion treat, but it’s so simple to whip up that you can enjoy it anytime. It’s way more forgiving than a traditional pie, and you end up with so much more of that amazing filling-to-crust ratio, which is always a win in my book.
How do I make a cherry slab pie?
Quick Overview
Making this cherry slab pie is really quite straightforward. You’ll whip up a simple butter crust, press it into your baking pan, and then fill it with a luscious cherry mixture. Bake it until golden and bubbly, let it cool just enough to set, and then dive in! It’s a process that’s forgiving for beginners and a quick win for experienced bakers. The key is good quality cherries and not overworking the dough.
Ingredients
For the main battery (crust):
This is a super simple, sturdy crust that’s perfect for holding all that delicious filling. I always use cold butter and a bit of ice water – it makes all the difference for flakiness! Don’t be tempted to skip chilling it; it’s worth the wait.
- 2 ½ cups all-purpose flour
- 1 teaspoon granulated sugar
- 1 teaspoon salt
- 1 cup (2 sticks) unsalted butter, very cold, cut into cubes
- ½ cup ice water, plus more if needed
For the Filling:
This is where the magic happens! I love using fresh cherries when they’re in season for the best flavor, but frozen ones work wonderfully too. If you use frozen, make sure to drain them really well. I sometimes add a tiny bit of almond extract for an extra layer of flavor, but it’s totally optional! Don’t be afraid to adjust the sugar based on how sweet or tart your cherries are.
- 6 cups fresh or frozen (thawed and drained) pitted cherries
- ¾ cup granulated sugar (adjust to taste)
- ¼ cup cornstarch
- 1 tablespoon lemon juice
- 1 teaspoon vanilla extract
- ½ teaspoon ground cinnamon (optional, but lovely)
- Pinch of salt
For the Glaze:
This glaze is like the cherry on top, literally! It adds a beautiful sheen and a little extra sweetness. A simple mix of powdered sugar and milk is all you need. I sometimes add a tiny drop of red food coloring to make it extra vibrant, but that’s just for looks!
- 1 cup powdered sugar
- 2-3 tablespoons milk or cream
- ½ teaspoon vanilla extract (optional)
Step-by-Step Instructions
Step 1: Preheat & Prep Pan
First things first, preheat your oven to 375°F (190°C). This temperature is perfect for getting a golden, crispy crust and letting the filling bubble up beautifully. Grab your favorite 9×13 inch baking pan or a similar-sized sturdy baking sheet with raised edges (like a jelly roll pan). I like to lightly grease my pan, just to ensure nothing sticks, although a good crust usually holds up well on its own. You can also line it with parchment paper for extra insurance and easier cleanup – a trick I learned after a particularly sticky pie incident years ago!
Step 2: Mix Dry Ingredients
In a large bowl, whisk together the flour, sugar, and salt for your crust. This ensures everything is evenly distributed, which is key for a consistent texture. You want to create a nice, even foundation for your delicious pie. Don’t skip this little step; it makes a difference!
Step 3: Mix Wet Ingredients
Now, it’s time to cut in the cold butter. This is where the flakiness comes from! You can use a pastry blender, a fork, or even your fingertips (if your hands aren’t too warm). You want to work the butter into the flour until you have a mixture that resembles coarse crumbs with some pea-sized pieces of butter still visible. Those little pockets of butter will melt in the oven and create those delightful flaky layers. Then, gradually add the ice water, just a tablespoon at a time, mixing until the dough *just* comes together. Be careful not to overmix! You want it to be shaggy, not a smooth ball.
Step 4: Combine
Turn the dough out onto a lightly floured surface. Gently bring it together with your hands, pressing it into a rough disc. It doesn’t need to be perfectly smooth – in fact, a little rustic is good! The goal is to get it to a point where you can press it into your pan without it crumbling apart. If it feels too dry, add another teaspoon of ice water. If it feels too sticky, dust it with a tiny bit more flour. The less you handle it, the more tender your crust will be. This is a lesson I learned the hard way – overworking dough equals tough pie!
Step 5: Prepare Filling
In a separate large bowl, combine your pitted cherries (fresh or thawed frozen), sugar, cornstarch, lemon juice, vanilla extract, cinnamon (if using), and salt. Gently toss everything together until the cherries are evenly coated. The cornstarch is crucial here; it will thicken the juices as the pie bakes, preventing a soggy bottom and creating that perfect, luscious cherry filling. Taste a cherry and adjust the sugar if needed. This is also a good time to add that pinch of salt, which really helps to enhance all the other flavors.
Step 6: Layer & Swirl
Now, grab your prepared baking pan. Take your pie dough and gently press it evenly into the bottom and up the sides of the pan. Don’t worry about making it perfectly neat; a slightly rustic edge is part of the charm of a slab pie. Once the crust is in place, pour the prepared cherry filling evenly over the dough. Make sure to spread it out so you have a nice, even layer of glorious red fruit. If you’re feeling fancy, you can even make little decorative swirls in the filling with the back of a spoon, but it’s absolutely not necessary for deliciousness!
Step 7: Bake
Place your cherry slab pie into the preheated oven. Bake for 35-45 minutes, or until the crust is golden brown and the filling is bubbly. You’ll see those gorgeous juices bubbling up around the edges – that’s a good sign! If the crust edges start to brown too quickly before the center is done, you can loosely tent the pan with aluminum foil. Keep an eye on it; ovens can be so finicky!
Step 8: Cool & Glaze
This is perhaps the hardest part: waiting! Let the pie cool on a wire rack for at least 30 minutes, preferably an hour. This gives the filling time to set up properly so it doesn’t all run out when you slice it. While the pie is cooling, whisk together the powdered sugar, 2 tablespoons of milk, and vanilla extract (if using) in a small bowl. Add more milk, a teaspoon at a time, until you reach your desired drizzling consistency. It should be thick enough to coat a spoon but thin enough to drizzle. Once the pie has cooled a bit, drizzle the glaze all over the top. It adds such a lovely touch!
Step 9: Slice & Serve
Once the glaze has set slightly, it’s time to cut into this masterpiece. Use a sharp knife to cut it into squares. Because it’s a slab pie, you get generous portions, perfect for sharing. Serve it warm, at room temperature, or even chilled. It’s absolutely divine with a scoop of vanilla Ice Cream or a dollop of whipped cream. The combination of warm, fruity filling, flaky crust, and cool creamy topping is just heavenly.
What to Serve It With
This cherry slab pie is so versatile, it works with almost anything! For a cozy breakfast, I love cutting it into smaller squares and serving it alongside a strong cup of coffee. The sweetness is just enough to kickstart the day without being overwhelming. For brunch, I usually plate it a bit more elegantly, maybe with a tiny dusting of powdered sugar or a few fresh mint leaves, and pair it with a sparkling rosé or a mimosa. It’s a real crowd-pleaser at any gathering. As a dessert, it’s practically perfect on its own, but if you want to go all out, a scoop of good quality vanilla bean ice cream is non-negotiable in my house. The warm pie and cold ice cream is a classic for a reason! And for those late-night cravings? A simple square, maybe slightly warmed up, is pure comfort. My kids also love it with a glass of cold milk, and honestly, who can blame them? It’s just that good.
Top Tips for Perfecting Your Cherry Slab Pie
I’ve made this cherry slab pie more times than I can count, and over the years, I’ve picked up a few tricks that I think really make a difference. First, for the cherries: if you’re using fresh, make sure they’re pitted. It’s a bit of a chore, but totally worth it. If you’re using frozen, thaw them completely and drain them *really* well. Excess liquid is the enemy of a crisp crust! For the crust, remember that cold is your friend. Keep your butter and water as cold as possible. I even chill my flour for a bit before I start. And seriously, don’t overwork the dough. Just bring it together until it’s manageable. When it comes to the filling, don’t be afraid to adjust the sugar. Cherries vary so much in sweetness. Taste them! And make sure you use enough cornstarch; it’s what gives you that lovely, thick, jammy filling. If your crust edges start browning too fast while baking, just loosely tent them with foil. It’s a simple fix that can save your pie from burning. For the glaze, consistency is key. You want it thick enough to drizzle but not so thin that it just runs off. Start with less liquid and add more as needed. And finally, patience during the cooling stage is a virtue! It really does help the pie set up perfectly, making it easier to slice and more enjoyable to eat. Trust me on this one – the wait is always worth it!
Storing and Reheating Tips
This cherry slab pie is pretty forgiving when it comes to storage. If you have any leftovers (which is rare in my house!), you can leave it covered at room temperature for up to two days. Make sure it’s properly covered with plastic wrap or an airtight lid to keep it from drying out. If you live in a warm climate or if it’s particularly humid, I’d err on the side of caution and pop it in the refrigerator after about 24 hours. In the fridge, it will stay delicious for about 4-5 days. When you’re ready to enjoy a slice, you can have it cold, or if you prefer it warm, just pop a slice in the microwave for about 20-30 seconds, or until warmed through. You can also reheat the whole pie gently in a low oven (around 300°F or 150°C) for about 10-15 minutes. If you plan on freezing portions, I recommend doing so before you add the glaze, as the glaze can sometimes become a bit streaky or soft after freezing and thawing. Wrap individual slices tightly in plastic wrap, then place them in a freezer-safe bag or container. Frozen pie slices should be good for up to 2-3 months. To thaw, just leave them at room temperature for a bit, or gently reheat as described above. If you froze it without glaze, you can always whip up a fresh drizzle to add once it’s warmed!
Frequently Asked Questions
Final Thoughts
Honestly, this cherry slab pie is just pure joy. It’s the kind of dessert that makes everyone happy, from picky eaters to seasoned foodies. It’s got that perfect balance of sweet and tart, that comforting, flaky crust, and it’s so incredibly easy to make. Whether you’re looking for a showstopper for a holiday gathering or just a delicious treat to brighten up a regular Tuesday, this pie delivers. I truly hope you give it a try and that it brings as much happiness to your kitchen as it does to mine. If you love this recipe, you might also enjoy my classic apple pie or my easy blueberry crumble bars. They share that same spirit of simple, delicious baking. Don’t forget to let me know how your cherry slab pie turns out in the comments below – I always love hearing your feedback and seeing your variations!
cherry slab pie
Ingredients
Main Ingredients
- 2.5 cups all-purpose flour
- 0.5 teaspoon salt
- 1 cup cold unsalted butter cut into cubes
- 0.5 cup ice water
- 6 cups fresh cherries pitted
- 1 cup granulated sugar
- 0.25 cup cornstarch
- 0.25 teaspoon almond extract
- 1 tablespoon butter cut into small pieces, for topping
Instructions
Preparation Steps
- Make the crust: In a large bowl, whisk together the flour and salt. Cut in the cold butter until the mixture resembles coarse crumbs. Gradually add the ice water, mixing until the dough just comes together.
- Divide the dough in half, flatten into discs, wrap in plastic wrap, and chill for at least 30 minutes.
- Preheat oven to 375°F (190°C). On a lightly floured surface, roll out one disc of dough into a large rectangle. Transfer to a baking sheet.
- In a bowl, combine the cherries, sugar, cornstarch, and almond extract. Pour the cherry mixture over the crust.
- Roll out the second disc of dough and place it over the cherry filling. Crimp the edges to seal.
- Cut slits in the top crust for venting. Dot with butter.
- Bake for 45-50 minutes, or until the crust is golden brown and the filling is bubbly.
- Let cool completely before serving.