There are certain recipes that just *feel* like home, aren’t there? The kind that, the moment you smell them baking, transport you back to your grandma’s kitchen or your mom’s busiest weeknights. For me, that recipe is this chocolate chip cookie pie. It’s not just a dessert; it’s a hug in edible form. Forget fussing with rolling out dough or dealing with parchment paper disasters. This is pure, unadulterated joy in a pie dish, and honestly, it’s even better than a regular chocolate chip cookie in so many ways. Think of it as all the gooey, melty goodness of your favorite cookie, baked into a perfectly shareable pie format. It’s the ultimate crowd-pleaser, the answer to “what’s for dessert?”, and quite possibly, my most requested recipe ever. Seriously, the moment this goes into the oven, my kids start hovering, and the questions begin: “Is it ready yet?” It’s that good.
What is chocolate chip cookie pie?
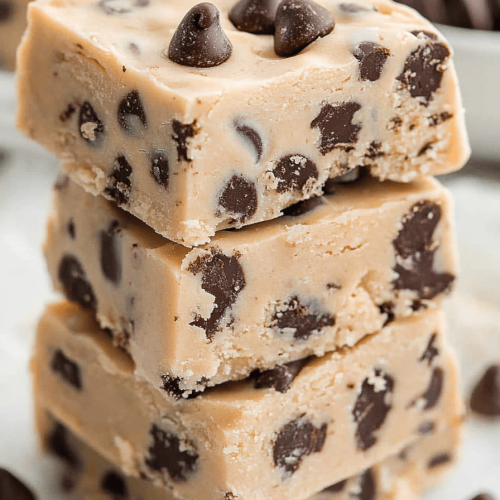
So, what exactly is this magical thing called a Chocolate Chip Cookie pie? Imagine your absolute favorite chocolate chip cookie recipe, but instead of forming individual cookies, you press that glorious dough into a pie plate and bake it until it’s golden brown, perfectly chewy in the center, and just a little bit crisp around the edges. It’s like the best parts of a cookie, amplified and made into a pie. There’s no complicated crust to worry about – the cookie dough *is* the crust and the filling, all rolled into one delicious package. It’s simple, it’s decadent, and it’s ridiculously satisfying. It’s the kind of dessert that makes you feel like a baking superhero without actually having to be one. Think of it as a giant, warm, gooey chocolate chip cookie, but in pie form, which, let’s be honest, is always a good idea when you’re craving something sweet and comforting.
Why you’ll love this recipe?
There are so many reasons why this chocolate chip cookie pie has become my go-to. First off, the FLAVOR is out of this world. It’s got that classic sweet, buttery, vanilla-kissed cookie taste, but when it’s baked as a pie, the edges get wonderfully caramelized, and the center stays incredibly soft and gooey. The melty chocolate chips create little rivers of pure bliss throughout. Then there’s the SIMPLICITY. Seriously, if you can stir ingredients together, you can make this pie. There’s no chilling dough, no intricate steps. You mix it, press it into the pan, and bake. It’s a lifesaver on busy nights when you need a showstopper dessert but don’t have hours to spare. Plus, it’s incredibly COST-EFFECTIVE. Most of the ingredients are pantry staples, making it a budget-friendly way to satisfy a serious sweet tooth. What I love most about this recipe, though, is its VERSATILITY. It’s fantastic on its own, of course, but it’s also the perfect canvas for all sorts of toppings and pairings. Think a scoop of vanilla Ice Cream melting into a warm slice, or a drizzle of caramel sauce. It’s a guaranteed win every single time, and it’s way more impressive than it has any right to be for how easy it is.
How do I make chocolate chip cookie pie?
Quick Overview
Making this Chocolate Chip cookie pie is wonderfully straightforward. You’ll whisk together your dry ingredients, then cream together your butter and sugars until fluffy. Add in your egg and vanilla, then gently incorporate the dry ingredients into the wet. Finally, stir in those all-important chocolate chips. Press this dough into a pie plate, and bake until golden and puffed. The whole process from start to finish takes less than an hour, including baking time, making it perfect for spontaneous dessert cravings or last-minute gatherings. It’s the kind of recipe that lets you achieve maximum deliciousness with minimum effort, and who doesn’t love that?
Ingredients
For the Main Batter:
2 ¼ cups all-purpose flour
1 teaspoon baking soda
½ teaspoon salt
1 cup (2 sticks) unsalted butter, softened – Make sure it’s softened to room temperature, not melted! It makes all the difference in getting that light, airy texture.
¾ cup granulated sugar
¾ cup packed light Brown Sugar – The brown sugar is key for that chewy texture and caramel notes.
2 large eggs – Room temperature eggs incorporate better.
1 ½ teaspoons pure vanilla extract – Use the good stuff; it really shines here.
2 cups chocolate chips – I love a mix of semi-sweet and milk chocolate chips for ultimate flavor!
For the Filling:
(Optional, but highly recommended for an extra decadent experience!)
½ cup more chocolate chips (any kind you like)
¼ cup chopped nuts (like walnuts or pecans, if you’re a fan)
For the Glaze:
(Optional, but adds a beautiful finish!)
½ cup powdered sugar
1-2 tablespoons milk (or water for a thinner glaze)
A tiny splash of vanilla extract
Step-by-Step Instructions
Step 1: Preheat & Prep Pan
First things first, let’s get that oven hot. Preheat it to 375°F (190°C). Grab a standard 9-inch pie plate. You don’t need to grease it heavily since the cookie dough has plenty of butter, but a very light spray or a tiny bit of butter rubbed around the bottom and sides can’t hurt, especially if your pie plate is older and prone to sticking. This ensures your beautiful cookie pie releases easily.
Step 2: Mix Dry Ingredients
In a medium bowl, whisk together the all-purpose flour, baking soda, and salt. Whisking them together ensures the baking soda and salt are evenly distributed, which is super important for a consistent rise and flavor. You want to avoid any pockets of salt or leavening!
Step 3: Mix Wet Ingredients
In a large bowl, using an electric mixer (or a good old stand mixer with the paddle attachment), cream together the softened butter, granulated sugar, and packed light brown sugar. Beat them on medium speed until the mixture is light, fluffy, and pale in color, usually about 3-4 minutes. This creaming process is crucial for incorporating air, which makes the cookie pie tender. Next, beat in the eggs, one at a time, mixing well after each addition. Stir in the vanilla extract until just combined.
Step 4: Combine
Gradually add the dry ingredients to the wet ingredients. Mix on low speed (or stir with a sturdy spatula) until just combined. Be careful not to overmix here! Overmixing develops the gluten in the flour, which can lead to a tougher cookie pie. You want to see just a few streaks of flour remaining, then you’ll finish it off by hand.
Step 5: Prepare Filling
If you’re adding extra chocolate chips or nuts, gently fold them into the dough now. This is where you get those extra pockets of gooey chocolate and a bit of crunch. Reserve about ¼ cup of the chocolate chips if you want to press them into the top before baking for a prettier finish.
Step 6: Layer & Swirl
Spoon the cookie dough into your prepared pie plate. Using your hands (lightly greased if needed) or a spatula, press the dough evenly into the bottom and up the sides of the pie plate, creating a crust. Make sure it’s as uniform as possible so it bakes evenly. If you reserved some chocolate chips, press them gently into the top surface of the dough. Some people like to swirl in a bit of extra caramel or peanut butter here for added decadence, but I usually keep it classic!
Step 7: Bake
Bake in the preheated oven for 25-35 minutes, or until the edges are golden brown and the center is set but still looks a little soft and gooey. A toothpick inserted near the center should come out with moist crumbs attached, not wet batter. The pie will continue to set up as it cools. Keep an eye on it, as oven temperatures can vary!
Step 8: Cool & Glaze
Let the cookie pie cool in the pie plate on a wire rack for at least 20-30 minutes before slicing. This is important! If you try to slice it too hot, it will fall apart. While it’s cooling, you can whip up a quick glaze by whisking together the powdered sugar, 1 tablespoon of milk, and vanilla extract until smooth. Add more milk, a teaspoon at a time, if you prefer a thinner glaze. Once the pie has cooled slightly, drizzle the glaze over the top. It adds a touch of sweetness and elegance.
Step 9: Slice & Serve
Once the pie has cooled enough to hold its shape, slice it into wedges using a sharp knife. It’s best served warm, but it’s also delicious at room temperature. For the ultimate indulgence, serve a warm slice with a scoop of vanilla ice cream – it’s absolute heaven!
What to Serve It With
This chocolate chip cookie pie is so versatile, it fits into almost any occasion! For BREAKFAST, honestly, a warm slice with a strong cup of coffee is surprisingly satisfying. It feels indulgent but the cookie base makes it feel more breakfast-y than a traditional slice of cake. My kids sometimes sneak a sliver with their morning milk! For BRUNCH, I love to serve it with a dollop of fresh whipped cream and a few fresh berries – raspberries or strawberries add a lovely tartness that cuts through the sweetness. It looks so elegant on a brunch spread. As DESSERT, it’s in its true element. A scoop of high-quality vanilla bean ice cream is non-negotiable for me. A drizzle of warm caramel or hot fudge sauce takes it over the top. It’s perfect for dinner parties when you want something impressive but easy. And for COZY SNACKS, well, this is its native habitat. A warm slice, a glass of milk, and a good book – pure bliss. My family tradition is to have it on movie nights, cut into big, generous wedges. It’s the perfect comforting treat after a long week.
Top Tips for Perfecting Your Chocolate Chip Cookie Pie
Over the years, I’ve learned a few tricks that make this chocolate chip cookie pie absolutely foolproof and consistently delicious. First, the quality of your BUTTER and SUGAR matters. Using good unsalted butter gives you better flavor control, and don’t skimp on the brown sugar – it’s essential for that chewy, moist texture that makes this pie so divine. When you’re MIXING, remember: less is more with flour. Once the dry ingredients are mostly incorporated, stop. Overmixing will lead to a tougher pie. You want that tender, cookie-like crumb. For the CHOCOLATE CHIPS, I highly recommend using a mix of semi-sweet and milk chocolate. It gives you layers of chocolate flavor. Also, gently pressing some chips onto the surface before baking makes it look extra appealing. If you’re finding your pie browns too quickly around the edges during BAKING, you can loosely tent the pie with foil for the last 10-15 minutes. Ovens vary wildly, so trust your eyes and the toothpick test over the exact time. For the GLAZE, consistency is key. Start with less liquid and add more as needed. You want it thick enough to drizzle but not so thin that it just runs off. If you find your dough is too sticky to press into the pan easily, try chilling it for about 15-20 minutes; it makes it much more manageable. And a little secret I learned: if you accidentally overbake it slightly, a dollop of ice cream will miraculously make it taste perfect!
Storing and Reheating Tips
Honestly, this pie rarely lasts long enough to need storing, but when it does, I’ve got you covered. At ROOM TEMPERATURE, it will keep well for about 2-3 days in an airtight container. I usually just cover the pie plate tightly with plastic wrap or aluminum foil. It’s best to enjoy it within the first day or two for optimal freshness. If you need to store it for longer, REFRIGERATOR STORAGE is your best bet. Wrap the pie tightly in plastic wrap, then place it in an airtight container or a pie carrier. It should stay good in the fridge for up to a week, though the texture might change slightly, becoming a bit firmer. To bring it back to its gooey glory, you can reheat a slice in a 300°F (150°C) oven for about 5-10 minutes, or until warmed through. For FREEZER INSTRUCTIONS, I like to bake the pie, let it cool completely, then wrap it very tightly in a double layer of plastic wrap, followed by a layer of aluminum foil. It can be frozen for up to 2-3 months. Thaw it overnight in the refrigerator and then reheat as described above. For the glaze, I always recommend applying it *after* the pie has cooled if you plan to store it, or just before serving if you’re eating it right away. Applying it to a hot pie can make it too runny.
Frequently Asked Questions
Final Thoughts
So there you have it – my absolute favorite chocolate chip cookie pie. It’s the kind of recipe that brings pure joy, from the moment you start mixing to the last delicious bite. It’s proof that you don’t need to be a pastry chef to create something truly special and utterly irresistible. This pie is a testament to simple ingredients coming together to create pure magic. It’s forgiving, it’s delicious, and it’s guaranteed to be a hit with everyone you share it with. If you love classic chocolate chip cookies, you are going to adore this elevated, pie-shaped version. Give it a try and I promise, it’ll become a staple in your baking repertoire, just like it has in mine. I can’t wait to hear how yours turns out! Don’t forget to share your thoughts and any fun variations you try in the comments below – I love hearing from you!
Chocolate Chip Cookie Pie
Ingredients
Main Ingredients
- 2.25 cups All-purpose flour
- 1 teaspoon Baking soda
- 1 teaspoon Salt
- 1 cup Unsalted butter, softened
- 0.75 cup Granulated sugar
- 0.75 cup Packed brown sugar
- 1 teaspoon Vanilla extract
- 2 large Eggs
- 2 cups Chocolate chips
Instructions
Preparation Steps
- Preheat oven to 350°F (175°C). Grease a 9-inch pie pan.
- In a medium bowl, whisk together the flour, baking soda, and salt.
- In a large bowl, cream together the softened butter, granulated sugar, and brown sugar until light and fluffy.
- Beat in the vanilla extract and eggs one at a time.
- Gradually add the dry ingredients to the wet ingredients, mixing until just combined.
- Stir in the chocolate chips.
- Press the cookie dough into the prepared pie pan.
- Bake for 30-35 minutes, or until the edges are golden brown and the center is set.
- Let cool completely before slicing and serving.