You know those moments when a craving hits, not just for something sweet, but for something *comforting*? Something that wraps you up like a warm blanket and whispers tales of cozy evenings? That’s exactly what these Chocolate Peppermint Grahams do for me. They’re not just cookies; they’re a memory, a feeling, and honestly, a little bit of magic. I remember my grandma making something similar when I was a kid, and the scent of chocolate and peppermint would fill her kitchen, instantly making everything feel festive and bright. Now, when I whip up a batch, it’s like bottling up that feeling and sharing it. They’re the perfect antidote to a long day, an easy win when friends pop over unexpectedly, and let’s be real, a total lifesaver when that 10 pm sweet tooth decides to make an appearance. Forget complicated cakes or fussy pastries; these Chocolate Peppermint Grahams are pure, unadulterated joy in a simple, delightful package. They’re akin to a really good Chocolate Chip Cookie, but with that delightful cool kick that makes them so uniquely special, especially around the holidays!
What is chocolate peppermint grahams?
So, what exactly *are* these little treasures? Think of them as the ultimate mashup of your favorite childhood cookie meets sophisticated holiday treat. At their heart, they’re essentially a tender, chocolate-infused graham cracker base, baked to a perfect crisp-chewy texture. But here’s where the magic happens: we’re not just talking about plain chocolate. We’re talking about a deep, rich cocoa flavor that’s perfectly balanced by a subtle, refreshing hint of peppermint. They’re not overwhelmingly minty – no toothpaste vibes here, I promise! – but just enough to give you that invigorating coolness that pairs so beautifully with chocolate. The “graham” part means they have that wonderfully wholesome, slightly nutty flavor profile we all know and love, but elevated. It’s essentially a homemade version of those fancy Chocolate Peppermint cookies you see in bakeries, but made with love and a lot less fuss. It’s that perfect bite that’s both familiar and excitingly new all at once.
Why you’ll love this recipe?
What are some of the reasons why this recipe has become a staple in my kitchen, andflavor is simply divine. It’s that classic chocolate-peppermint combination that just screams comfort and celebration. The rich cocoa is deeply satisfying, and the peppermint adds this bright, cooling contrast that keeps you coming back for more. It’s not too sweet, not too minty – it’s just right. And the texture? Oh, the texture! They have a wonderful chewiness in the center with slightly crisp edges, making every bite an adventure. What I truly adore is the simplicity. These aren’t complicated to make at all. Even if you’re not a seasoned baker, you can totally nail this. I’ve made them on super busy weeknights, and they still turn out beautifully. Plus, they’re surprisingly cost-effective. You probably have most of the ingredients in your pantry right now! Using simpleversatility! While they’re incredible on their own, they’re also fantastic crumbled over Ice Cream, dipped in coffee, or even used as a base for mini cheesecakes. My personal favorite reason? They transport me back to my grandma’s kitchen. Every time I smell that chocolate and peppermint mingling, I feel that same sense of warmth and nostalgia. They’re the kind of treat that makes people feel special, and that’s a priceless quality in any recipe, right?
How to Make Chocolate Peppermint Grahams
Quick Overview
This recipe is all about bringing together simple ingredients to create something truly special. We’ll start by mixing our dry ingredients, then our wet ingredients, and then bring them together to form a dough that’s incredibly easy to work with. The real fun comes in layering and swirling for that beautiful marbling effect before a short bake. It’s a process that feels almost meditative, and the results are so rewarding. You’ll end up with these gorgeous, flavorful cookies that taste like you spent hours in the kitchen, but in reality, it’s a pretty speedy affair!
Ingredients
For the Main Batter:
1 ½ cups all-purpose flour (or a good quality gluten-free blend if you need it!)
½ cup unsweetened cocoa powder (Dutch-processed gives a richer color and flavor, but natural works too!)
1 teaspoon baking soda
½ teaspoon salt
¾ cup unsalted butter, softened (or vegan butter sticks for a dairy-free option)
¾ cup granulated sugar
1 large egg, room temperature
1 teaspoon vanilla extract
½ teaspoon peppermint extract (start with this, you can always add a tiny bit more if you love a strong mint flavor, but don’t overdo it!)
¼ cup milk (any kind works – I’ve even used almond milk and it was fantastic and creamy!)
For the Filling:
¼ cup unsalted butter, softened
½ cup powdered sugar, sifted
2 tablespoons unsweetened cocoa powder
1 tablespoon milk
For the Glaze:
1 cup powdered sugar, sifted
2-3 tablespoons milk (or water for a thinner glaze)
¼ teaspoon peppermint extract (optional, for an extra minty kick!)
A few drops of red food coloring (optional, for a festive swirl)
Step-by-Step Instructions
Step 1: Preheat & Prep Pan
First things first, get your oven preheated to 350°F (175°C). Line a large baking sheet with parchment paper. This is crucial because it prevents sticking and makes cleanup a breeze. Trust me, I’ve forgotten this step before and regretted it!
Step 2: Mix Dry Ingredients
In a medium bowl, whisk together the flour, cocoa powder, baking soda, and salt. Give it a good whisk until everything is thoroughly combined. You want to make sure that baking soda and salt are evenly distributed so your cookies bake up perfectly. This little step ensures consistent flavor and texture throughout.
Step 3: Mix Wet Ingredients
In a larger bowl, cream together the softened butter and granulated sugar with an electric mixer until light and fluffy. This usually takes a couple of minutes. Beat in the egg until well combined, then stir in the vanilla extract and peppermint extract. Make sure they’re fully incorporated – you don’t want pockets of just peppermint!
Step 4: Combine
Gradually add the dry ingredients to the wet ingredients, alternating with the milk, beginning and ending with the dry ingredients. Mix on low speed (or by hand with a spatula) until *just* combined. Be careful not to overmix here! Overmixing develops the gluten too much and can lead to tough cookies. We want tender, delightful cookies, so stop as soon as you don’t see any dry streaks of flour.
Step 5: Prepare Filling
In a small bowl, beat together the softened butter, sifted powdered sugar, cocoa powder, and milk until smooth and spreadable. It should be a nice, thick consistency, almost like a frosting. This is what will give our Chocolate Peppermint Grahams that extra layer of decadent flavor and that beautiful swirl.
Step 6: Layer & Swirl
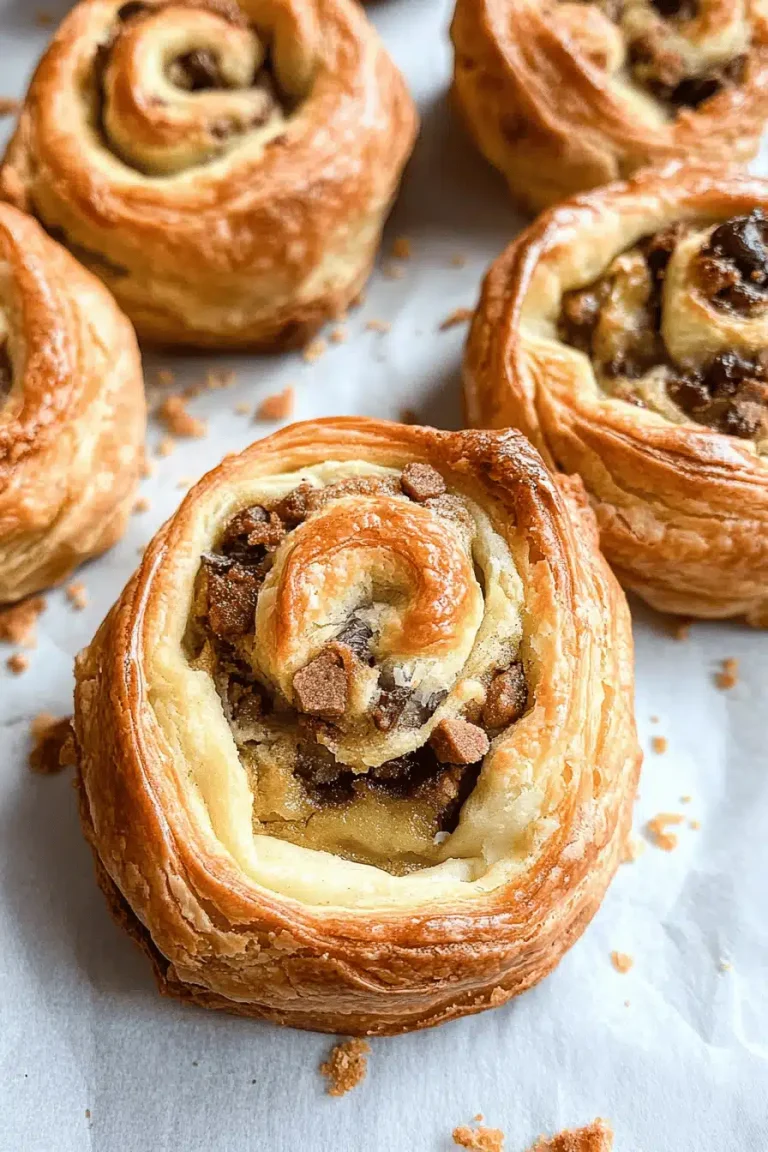
Take about half of the Cookie Dough and press it evenly into the bottom of your prepared baking sheet. It doesn’t have to be perfectly smooth, but try to get it relatively even. Then, dollop spoonfuls of the filling mixture all over the dough. Top with the remaining cookie dough, gently pressing it down to cover the filling. Now for the fun part! Grab a knife or a skewer and gently swirl the filling into the dough to create a marbled effect. Don’t go crazy and mix it all up; just a few gentle swirls are perfect for that beautiful visual appeal.
Step 7: Bake
Bake for 20-25 minutes, or until the edges are set and the center looks cooked through. You can test for doneness by gently pressing the center; it should spring back slightly. Keep an eye on it, as ovens can vary. I usually start checking around the 20-minute mark. You don’t want to overbake these, or they’ll lose that lovely chewiness.
Step 8: Cool & Glaze
Let the Chocolate Peppermint Grahams cool on the baking sheet for about 10-15 minutes before transferring them to a wire rack to cool completely. This is important for them to firm up properly. Once completely cool, whisk together the powdered sugar, milk, and optional peppermint extract for the glaze. You’re looking for a drizzly consistency – thick enough to coat but thin enough to drip nicely. Drizzle the glaze over the cooled bars. If you’re feeling fancy, swirl in a tiny bit of red food coloring for a festive touch. Let the glaze set completely before slicing.
Step 9: Slice & Serve
Once the glaze is set, use a sharp knife to slice the bars into squares or rectangles. I like to cut mine into about 2-inch pieces. Serve them at room temperature for the best texture and flavor. These are best enjoyed fresh!
What to Serve It With
These Chocolate Peppermint Grahams are so versatile, they fit into almost any occasion. For breakfast, I love pairing them with a strong cup of coffee. The richness of the coffee and the sweetness of the graham is just divine. They make a great little treat with your morning brew, a little something special to kickstart the day. For brunch, they look absolutely elegant served on a tiered platter with fresh berries. The pop of color from the berries and the deep chocolate of the cookie is visually stunning. A mimosa or a sparkling cider pairs wonderfully. As dessert, they are a dream! I often serve them after a hearty meal with a scoop of vanilla bean ice cream. The contrast of the warm cookie (if you’re feeling like a quick zap in the microwave) and the cold ice cream is pure heaven. They also pair beautifully with a robust red wine or a creamy hot chocolate. And for those simple, cozy snacks, just a glass of milk is perfect. My kids always grab one (or two!) with a tall glass of cold milk after school. My absolute favorite tradition is to have them with a hot mug of tea on a rainy afternoon, curled up with a good book. It’s pure bliss!
Top Tips for Perfecting Your Chocolate Peppermint Grahams
I’ve made these Chocolate Peppermint Grahams more times than I can count, and over the years, I’ve picked up a few tricks that I think really elevate them. When you’re mixing the dry ingredients (Step 2), make sure your cocoa powder is free of clumps. A quick sift or whisk can make a big difference in ensuring an even chocolate flavor throughout. For the wet ingredients (Step 3), creaming the butter and sugar until light and fluffy is key. This process incorporates air, which contributes to the cookie’s tender texture. Don’t rush this step! When you’re combining the wet and dry ingredients (Step 4), remember my cardinal rule: do NOT overmix. Seriously, stop as soon as you don’t see any dry flour. A few little streaks are fine; they’ll disappear during baking. Overmixing is the enemy of tender baked goods. For the filling (Step 5), ensure your butter is properly softened, not melted. This will give you a smooth, spreadable filling that won’t make the dough too greasy. When you’re layering and swirling (Step 6), don’t overdo the swirling. Gentle, artful swirls look best and prevent the filling from disappearing entirely into the dough. For the baking (Step 7), I always suggest keeping an eye on your oven. My oven tends to run a little hot, so I often reduce the temperature by 5-10 degrees Fahrenheit. Also, I try to bake them on the middle rack for even cooking. If you’re doing ingredient swaps, I’ve found that you can use a good quality gluten-free all-purpose flour blend with a binder like xanthan gum, and it works wonderfully – just be aware that the texture might be slightly different. For a vegan version, using vegan butter sticks and a dairy-free milk works like a charm; I tested this with oat milk, and it made the dough incredibly moist and rich. If you want more mint flavor, add an extra ¼ teaspoon of peppermint extract to the dough, but be very careful; too much can make it taste like toothpaste! For the glaze (Step 8), if it’s too thick, add milk a teaspoon at a time until it reaches your desired drizzling consistency. If it’s too thin, whisk in a bit more powdered sugar.
Storing and Reheating Tips
One of the things I love about these Chocolate Peppermint Grahams is how well they store. If you’ve managed to resist eating them all at once (good for you!), you can keep them at room temperature for about 3-4 days. Just make sure they are in an airtight container. The glaze should be fully set before storing. If you live in a very humid climate, they might soften slightly, so transferring them to the refrigerator might be a better option. For refrigerator storage, they’ll keep nicely for up to a week. Again, an airtight container is your best friend. They can become a little firmer in the fridge, so if you prefer them softer, just let them sit out at room temperature for about 15-20 minutes before serving. I’ve even frozen batches of these, and they thaw out beautifully! For freezer instructions, wrap individual bars or stacks of bars tightly in plastic wrap, then place them in a freezer-safe bag or container. They’ll last for up to 2-3 months. To thaw, simply unwrap them and let them come to room temperature. For that fresh-from-the-oven feel, you can gently reheat them in a low oven (around 300°F or 150°C) for about 5 minutes, or give them a quick zap in the microwave for 10-15 seconds. Regarding the glaze timing, I always advise letting the glaze set *completely* before storing at room temperature or refrigerating. If you’re freezing them, it’s actually a good idea to glaze them *after* thawing them, or ensure the glaze is rock solid before wrapping, to prevent any sticking or smudging.
Frequently Asked Questions
Final Thoughts
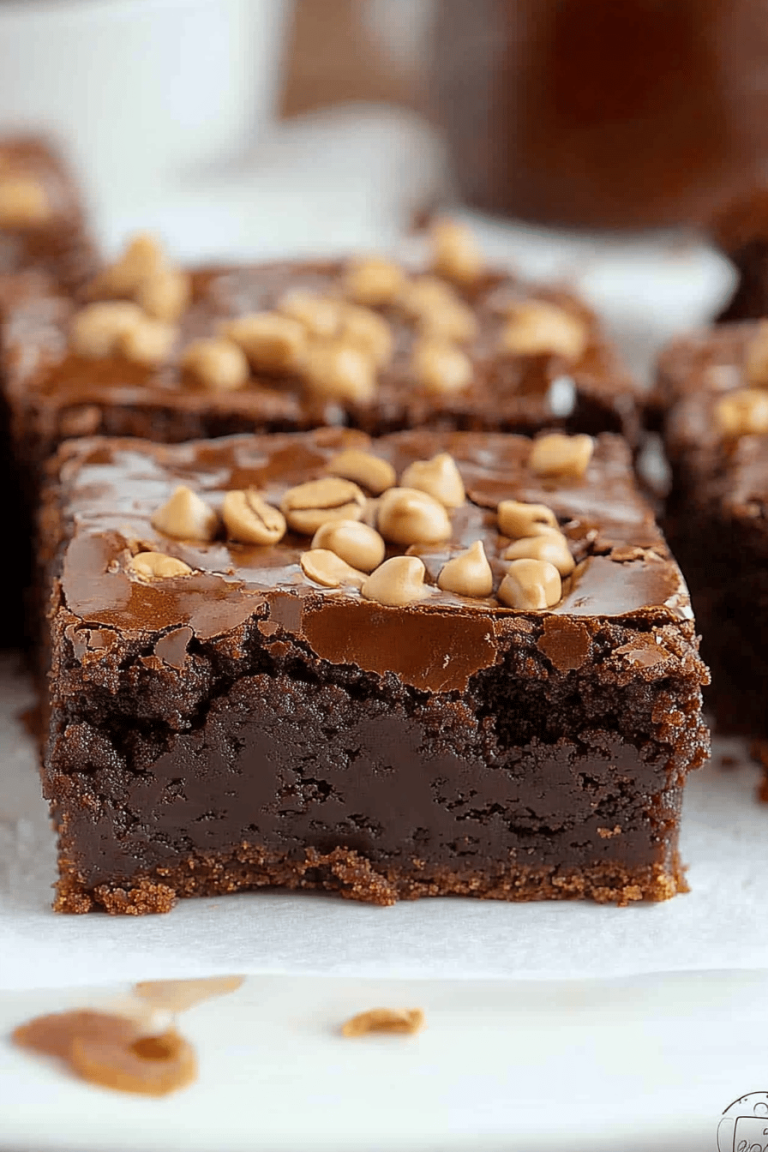
I really hope you give these Chocolate Peppermint Grahams a try. They’re more than just a treat; they’re a little slice of happiness that’s so easy to bring into your own kitchen. The way the rich chocolate and bright peppermint come together in that perfectly tender, slightly chewy base is just something special. It’s that perfect balance of comforting familiarity and delightful festivity that makes them a winner every single time. Whether you’re looking for a holiday bake, a special weekend treat, or just a way to brighten a regular day, these cookies deliver. If you loved this recipe and are looking for more cozy bakes, you might also enjoy my Classic Chocolate Chip Cookies or my Fudgy Brownies. They share that same spirit of simple, delicious comfort! I can’t wait to hear how yours turn out, so please leave a comment below and let me know your thoughts, or share your own twists and turns! Happy baking, everyone!
Chocolate Peppermint Grahams
Ingredients
Main Ingredients
- 24 graham crackers Graham Crackers
- 12 oz Semi-Sweet Chocolate Chips
- 1 tbsp Vegetable Oil
- 0.5 cup Crushed Peppermint Candies
Instructions
Preparation Steps
- Line a baking sheet with parchment paper.
- In a microwave-safe bowl, combine the chocolate chips and vegetable oil. Microwave in 30-second intervals, stirring in between, until the chocolate is melted and smooth.
- Dip each graham cracker into the melted chocolate, coating one side. Place the chocolate-covered graham crackers on the prepared baking sheet.
- Immediately sprinkle the tops with crushed peppermint candies.
- Place the baking sheet in the refrigerator for 15 minutes, or until the chocolate has set.