Oh, where do I even begin with this Coffee Cheesecake? It’s one of those recipes that feels like a warm hug on a plate, you know? I remember the first time I tasted a really good coffee-flavored dessert – I was visiting my aunt in Seattle, and she had this incredible Coffee Cake that just blew my mind. It wasn’t quite a cheesecake, but that rich, robust coffee flavor paired with something creamy and sweet? Pure magic. I’ve been chasing that feeling ever since, tinkering in my kitchen, trying to capture that exact same soul-satisfying essence. And I think, just maybe, I’ve finally nailed it with this Coffee Cheesecake. It’s honestly one of my go-to’s when I need a little pick-me-up or want to impress guests without spending all day in the kitchen. This recipe is pure comfort, and it’s surprisingly easy to whip up, which is a lifesaver on those busy weeknights when the dessert craving hits hard!
What is coffee cheesecake?
So, what exactly *is* Coffee Cheesecake? Think of it as the sophisticated, grown-up cousin of your everyday chocolate cake or vanilla cheesecake. It’s a rich, creamy, decadent cheesecake infused with the bold, aromatic essence of coffee. It’s not just a hint of coffee; we’re talking a deep, satisfying flavor that really sings. It’s essentially a classic New York-style cheesecake base, but with a twist that elevates it from a simple sweet treat to an experience. The coffee brings a wonderful bitterness that perfectly balances the sweetness of the Cream Cheese and sugar, creating a complex flavor profile that keeps you coming back for more. It’s smooth, it’s luscious, and that subtle coffee kick makes it absolutely irresistible. It’s a dessert designed for those who appreciate the finer, richer things in life!
Why you’ll love this recipe?
There are so many reasons why this Coffee Cheesecake has become an absolute staple in my recipe repertoire, and I just know you’re going to fall in love with it too. First off, let’s talk about that flavor. It’s absolutely divine. The coffee isn’t just an afterthought; it’s woven into the very fabric of the cheesecake, providing a deep, roasted complexity that complements the creamy tang of the Cream Cheese beautifully. It’s sophisticated without being fussy. And the texture? Oh, the texture! It’s incredibly smooth and velvety, melting in your mouth with every bite. What I love most, though, is how surprisingly simple this is to make, especially for something that looks and tastes so fancy. You don’t need any special equipment or advanced baking skills. I’ve tested this recipe more times than I can count, and it’s always a winner. It’s also wonderfully cost-effective; the ingredients are all pretty standard pantry staples, making it an accessible indulgence. Plus, it’s incredibly versatile. While I adore it plain, it’s also fantastic with a dollop of whipped cream or a drizzle of chocolate ganache. It truly stands out, even when compared to other delicious cheesecakes I’ve made. It’s a showstopper that tastes like it came straight from a gourmet bakery, but it’s made right in your own kitchen.
How do you make a coffee cheesecake?
Quick Overview
Making this Coffee Cheesecake is a wonderfully straightforward process, even if you’re new to cheesecakes. We’ll start by creating a simple graham cracker crust, then whip up a luxuriously smooth cheesecake batter infused with rich coffee flavor, bake it gently to perfection, and finish it off with a tempting coffee glaze. The key is to take your time, especially with chilling, to ensure that signature creamy texture. It’s a recipe designed to build confidence, and the results are always worth the small effort involved. Trust me, the aroma alone as it bakes will have everyone in your house gathering in the kitchen!
Ingredients
For the Crust:
Here’s what you’ll need for our simple graham cracker base. I always opt for good quality graham crackers because they really make a difference in the texture and flavor of the crust. You can find them at any grocery store. If you can’t find graham crackers, digestive biscuits or even Shortbread Cookies would work in a pinch, though they’ll give a slightly different flavor profile. Make sure you have enough for a nice, even layer on the bottom of your springform pan.
- 1 12 cups graham cracker crumbs (about 10-12 full graham crackers)
- ¼ cup granulated sugar
- 6 tablespoons unsalted butter, melted
For the Filling:
This is where the magic really happens! The Cream Cheese needs to be at room temperature for this to work properly – I’ve learned the hard way that cold cream cheese leads to lumps, and nobody wants that! Using good quality, full-fat cream cheese is essential for that rich, decadent texture we’re going for. As for the coffee, I highly recommend using a strong brewed espresso or a very concentrated coffee. Instant espresso powder works wonderfully here too, and it’s what I often use on busy days because it dissolves so easily and gives an intense flavor. Make sure it’s cooled before adding it to the batter.
- 3 (8-ounce) packages cream cheese, softened
- 1 ¼ cups granulated sugar
- 3 large eggs, at room temperature
- ½ cup sour cream, at room temperature
- 1 tablespoon vanilla extract
- ¼ cup strong brewed espresso or coffee, cooled (or 2 tablespoons instant espresso powder dissolved in 2 tablespoons hot water, then cooled)
- ½ teaspoon salt
For the Glaze:
This glaze is optional but highly recommended if you want that extra touch of coffee goodness and a beautiful finish. It’s super easy to whip up and adds a lovely sheen and a boost of coffee flavor. You can adjust the consistency by adding a little more powdered sugar or a splash more liquid. I like it to be thick enough to coat but still pourable.
- 1 cup powdered sugar
- 2-3 tablespoons strong brewed coffee or espresso, cooled
- ½ teaspoon vanilla extract
Step-by-Step Instructions
Step 1: Preheat & Prep Pan
First things first, let’s get our oven preheated to 325°F (160°C). This lower temperature is key to a cheesecake that bakes evenly and avoids cracking. Now, grab a 9-inch springform pan. This type of pan is perfect for cheesecakes because it allows you to easily release the sides once it’s done. Lightly grease the bottom and sides of the pan. I usually use a bit of butter or non-stick cooking spray. This prevents the cheesecake from sticking and makes for a cleaner release. Some people like to wrap the outside of their springform pan tightly in foil if they’re using a water bath, but I find for this recipe, a direct bake works just fine. Just make sure that pan is ready to go!
Step 2: Mix Dry Ingredients
In a medium bowl, combine your graham cracker crumbs and ¼ cup of granulated sugar. Give them a good whisk or stir to ensure the sugar is evenly distributed. This little bit of sugar helps to enhance the sweetness of the crust and adds a lovely caramelized note when it bakes. Make sure there are no clumps of sugar hanging around. We want a uniform mixture so the crust sets up beautifully and tastes consistent in every bite.
Step 3: Mix Wet Ingredients
Now, in a separate bowl, add the melted butter to the graham cracker and sugar mixture. Stir everything together until the crumbs are evenly moistened and resemble wet sand. This is exactly the texture you’re looking for. If it seems too dry, you can add another teaspoon or two of melted butter. The goal is for the mixture to hold together when you squeeze it. This is crucial for a sturdy crust!
Step 4: Combine
Pour the buttery crumb mixture into your prepared springform pan. Using the bottom of a glass or a flat measuring cup, press the crumbs firmly and evenly over the bottom of the pan. You can also press them slightly up the sides if you like a thicker crust, but I prefer just the base. Make sure it’s packed down really well. A compact crust prevents it from crumbling when you slice into the cheesecake. Once pressed, pop the crust into the freezer for about 10-15 minutes while you prepare the filling. This helps it set up and bake up firmer.
Step 5: Prepare Filling
In a large bowl (or the bowl of your stand mixer fitted with the paddle attachment), beat the softened cream cheese on medium speed until it’s completely smooth and creamy, with absolutely no lumps. This is the most important step for a lump-free cheesecake! Scrape down the sides of the bowl often. Gradually add the 1 ¼ cups of granulated sugar and continue beating until well combined and smooth. Now, add the eggs one at a time, beating on low speed just until each egg is incorporated. Don’t overmix here; overmixing can incorporate too much air, which can lead to cracks. Add the sour cream, vanilla extract, cooled espresso (or dissolved instant espresso powder), and salt. Beat on low speed just until everything is smoothly combined and the batter is uniform in color and texture. Again, scrape down the bowl as needed. The batter should be thick and luscious.
Step 6: Layer & Swirl
Pour the cheesecake filling evenly over the chilled graham cracker crust. You can gently tap the pan on the counter a couple of times to release any large air bubbles, but be careful not to tap too hard, as this can also cause cracking. If you’re feeling fancy, you could swirl some extra espresso into the top for a marbled effect, but I usually keep it smooth for this recipe. Ensure the filling is spread to an even layer across the entire pan.
Step 7: Bake
Carefully place the springform pan on a baking sheet (this catches any potential drips and makes it easier to move). Bake in the preheated oven for 55-70 minutes. The cheesecake is done when the edges are set and slightly puffed, but the center still has a slight wobble when you gently shake the pan. It will continue to set up as it cools. I always check it around the 55-minute mark. If it looks too done, it might crack. If it’s still very liquidy in the center, give it another 10-15 minutes. A small, slight jiggle in the very center is what you’re aiming for.
Step 8: Cool & Glaze
Once baked, turn off the oven, prop the oven door open slightly with a wooden spoon, and let the cheesecake cool in the oven for about 1 hour. This gradual cooling process is another key step to preventing cracks. After an hour, remove the cheesecake from the oven and let it cool completely on a wire rack. Once it’s at room temperature, cover it loosely with plastic wrap and refrigerate for at least 4-6 hours, or preferably overnight. Chilling is crucial for the cheesecake to fully set and develop its perfect texture and flavor. While the cheesecake is chilling, you can prepare the glaze. In a small bowl, whisk together the powdered sugar, 2-3 tablespoons of cooled coffee, and vanilla extract until smooth and pourable. Add more liquid a teaspoon at a time if it’s too thick, or more powdered sugar if it’s too thin. Once the cheesecake is completely chilled and ready to serve, gently remove the sides of the springform pan. Drizzle the glaze over the top, letting it drip down the sides slightly. You can also use a spatula to spread it evenly.
Step 9: Slice & Serve
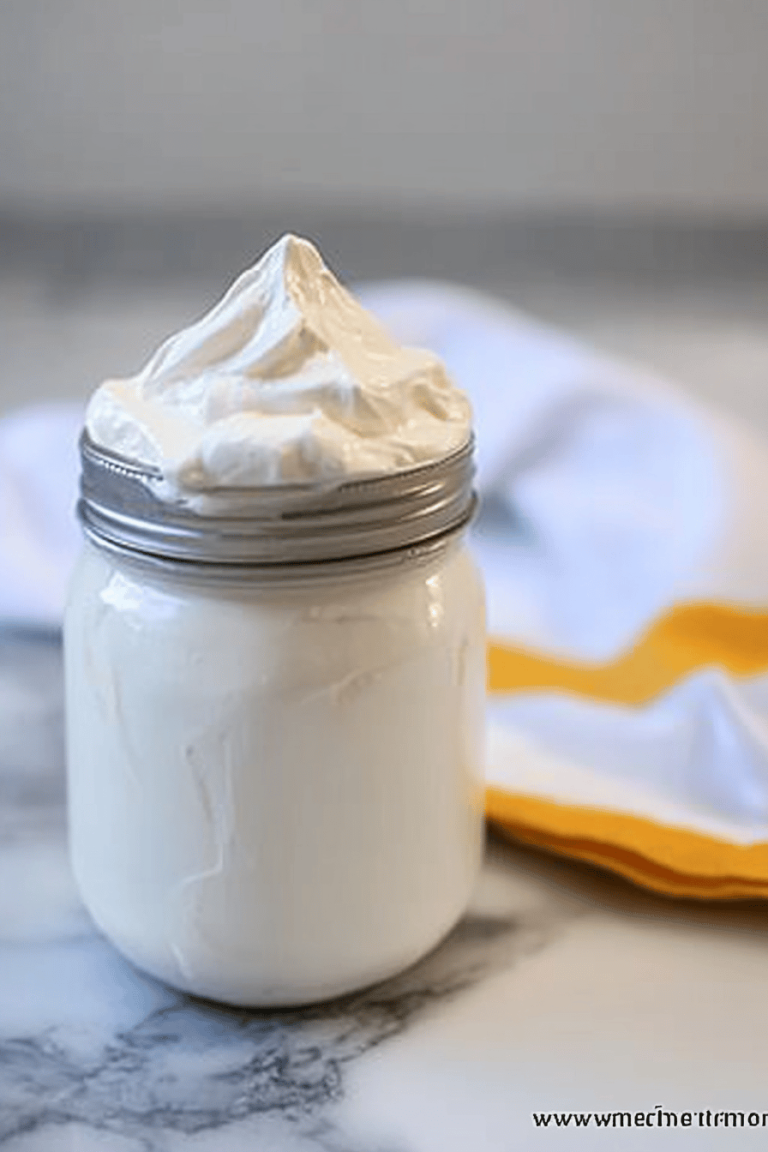
For the cleanest slices, use a sharp knife that has been dipped in hot water and wiped dry between each cut. This helps prevent the knife from dragging and making a mess. Slice into wedges and serve. It’s absolutely delicious on its own, but a dollop of freshly whipped cream or a sprinkle of cocoa powder on top is never a bad idea! Enjoy that rich, creamy, coffee-infused goodness!
What to Serve It With
This Coffee Cheesecake is pretty spectacular on its own, but serving it with the right accompaniments can elevate it from a great dessert to an unforgettable experience. For a cozy breakfast treat, imagine a slice alongside a perfectly brewed cup of your favorite morning coffee – maybe a dark roast or a smooth latte. The bitterness of the coffee actually complements the cheesecake’s flavor so well, making it feel less like a dessert and more like a sophisticated start to the day. For a more elegant brunch spread, I love to serve it with a side of fresh berries, like raspberries or blueberries, for a pop of color and freshness. A light dusting of cocoa powder or a few chocolate shavings also looks beautiful and adds another layer of flavor. When serving it as a dessert after a meal, it pairs wonderfully with a rich dessert wine or even a small glass of Irish cream liqueur. And for those late-night cravings when you just need something sweet and comforting, a simple slice with a warm mug of tea or a small espresso is pure bliss. My kids, surprisingly, adore it with a glass of cold milk – they say the creaminess of the milk balances the coffee flavor perfectly!
Top Tips for Perfecting Your Coffee Cheesecake
After making this Coffee Cheesecake more times than I can count, I’ve picked up a few tricks that I swear by for ensuring it turns out absolutely perfect every single time. For the crust, make sure your graham cracker crumbs are finely ground; using a food processor is the easiest way to get them consistent. Pressing the crust firmly into the pan is also super important – I use the bottom of a measuring cup, and really give it a good press to make sure it’s compact and even. When it comes to the filling, the absolute number one rule is room temperature ingredients. Seriously, cream cheese, eggs, and sour cream should all be at room temperature. This is how you avoid lumps and get that super smooth texture. I’ve learned the hard way that cold cream cheese just won’t incorporate properly. Also, don’t overmix the batter once you add the eggs. Just mix until they’re combined. Overmixing can incorporate too much air, leading to cracks in the top of your cheesecake. My favorite tip for the coffee flavor is using a good quality espresso or very strong coffee. If you use weak coffee, the flavor will be too subtle. Instant espresso powder is a fantastic shortcut if you don’t have strong brewed coffee on hand. For baking, I always use a water bath when I bake cheesecakes, especially if I’m worried about cracking. You can wrap your springform pan in a couple of layers of heavy-duty foil and place it in a larger roasting pan, then add about an inch of hot water. It creates a steamy environment that helps the cheesecake bake evenly and gently. However, this recipe has been tested and works well without one, but it’s a good trick to have up your sleeve! Cooling is also crucial. Letting it cool in the oven with the door ajar is a game-changer for preventing cracks. And then, patience with the chilling! It might be tempting to dig in right away, but letting it chill overnight is what allows the flavors to meld and the texture to become perfectly set and creamy.
Storing and Reheating Tips
Storing this Coffee Cheesecake properly is key to enjoying its deliciousness over a few days. Once it’s fully baked and has gone through the initial cooling process in the oven, and then cooled completely on the counter, it’s time to chill. I always cover the cheesecake loosely with plastic wrap before refrigerating. This prevents it from picking up any odors from other foods in your fridge and keeps the surface from drying out. Stored this way in the refrigerator, it will keep beautifully for up to 3-4 days. I’ve honestly had it taste even better on the second day as the flavors continue to meld! If you’re planning to store it for longer, freezing is a great option. You can freeze the entire cheesecake or individual slices. For the best quality, make sure the cheesecake is completely chilled first. Then, wrap it tightly in a layer of plastic wrap, followed by a layer of aluminum foil. This double layer of protection is essential to prevent freezer burn. It can be stored in the freezer for up to 2-3 months. To thaw, transfer the frozen cheesecake (still wrapped) to the refrigerator and let it thaw overnight. This slow thawing helps maintain its texture. If you’re freezing slices, you can thaw them individually in the fridge or at room temperature for about an hour. I usually add the glaze *after* the cheesecake is fully chilled and just before serving, especially if it’s going to be refrigerated for a while. If you glaze it and then refrigerate for a long time, the glaze can sometimes become a bit sticky or even melt slightly, so it’s best to add it just before you plan to enjoy it.
Frequently Asked Questions
Final Thoughts
So there you have it – my beloved Coffee Cheesecake recipe! It’s honestly a dessert that brings me so much joy, and I truly hope it does the same for you and your loved ones. It’s the perfect blend of comforting familiarity and sophisticated indulgence, a dessert that feels special enough for celebrations but is also wonderfully approachable for any occasion. The deep coffee notes paired with the creamy, tangy cheesecake base are simply irresistible, and the easy-to-follow steps mean you can achieve bakery-quality results right in your own kitchen. If you enjoyed this recipe, I think you might also love my decadent Chocolate Lava Cakes or my incredibly moist Spiced Apple Crumble. They’re also favorites that bring a smile to everyone’s face. I can’t wait to hear what you think of this Coffee Cheesecake! Please leave a comment below with your thoughts, your rating, or any fun variations you try. And if you share it on social media, be sure to tag me – I’d love to see your beautiful creations!
Coffee Cheesecake
Ingredients
Crust
- 1.5 cup Chocolate cookie crumbs
- 0.25 cup Granulated sugar
- 0.5 cup Unsalted butter Melted
Filling
- 32 ounce Cream cheese Softened
- 1.5 cup Granulated sugar
- 0.5 cup Sour cream
- 2 teaspoon Vanilla extract
- 4 large Eggs
- 2 tablespoon Instant coffee granules
- 2 tablespoon Hot water
Instructions
Make the Crust
- Preheat oven to 350°F (175°C).
- Combine cookie crumbs, sugar, and melted butter in a bowl. Press into the bottom of a 9-inch springform pan.
- Bake for 8-10 minutes. Let cool.
Make the Filling
- In a large bowl, beat cream cheese and sugar until smooth.
- Stir in sour cream and vanilla extract.
- In a small bowl, dissolve instant coffee in hot water. Add to cream cheese mixture.
- Beat in eggs, one at a time, until just combined.
- Pour filling over crust.
- Bake for 55-65 minutes, or until the edges are set and the center jiggles slightly.
- Let cool completely before refrigerating for at least 4 hours.