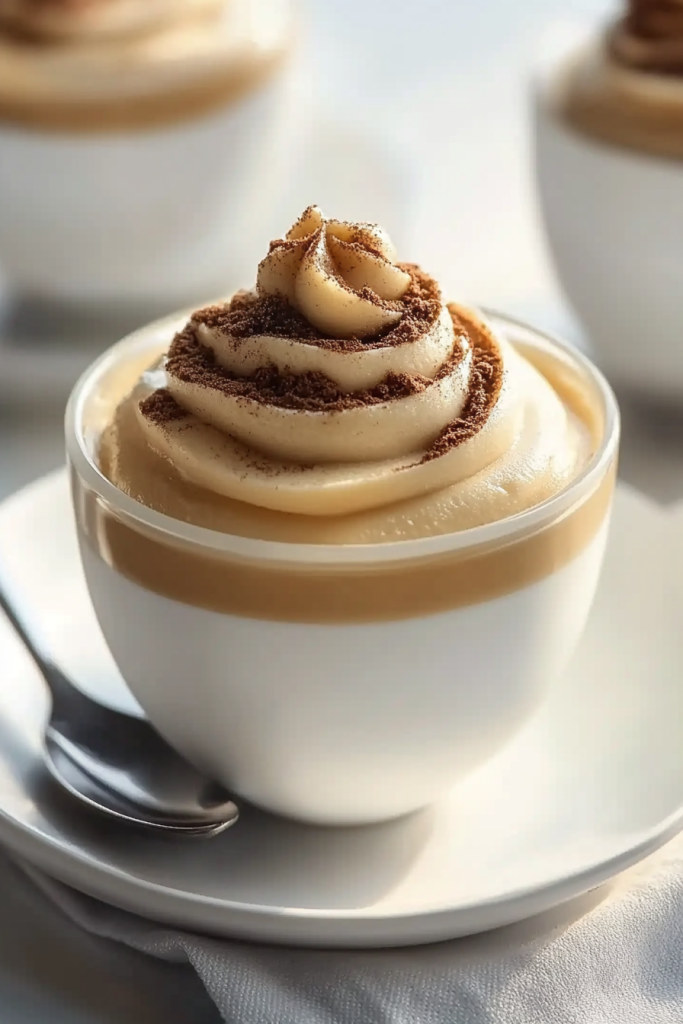
Oh, this coffee mousse. It’s one of those recipes that feels like a warm hug and a little bit of magic all rolled into one. I remember the first time I made it; it was a spur-of-the-moment decision because I was desperately craving something sweet, but the thought of baking a cake felt like too much work. This coffee mousse, though? It was a lifesaver. It’s so ridiculously simple, yet it tastes like something you’d find in a fancy French patisserie. If you’ve ever had a rich, velvety chocolate mousse and thought, “Wow, I wish that had a coffee kick,” then you are in for a treat. This coffee Mousse Recipe is that dream come true, and honestly, it’s become my go-to for dessert emergencies and lazy Sunday afternoons alike. It’s less fussy than a tiramisu but delivers that same sophisticated coffee flavor that just makes everything feel a little bit more special.
What is coffee mousse?
So, what exactly is this delightful creation? Think of coffee mousse as a light-as-air dessert that’s intensely flavored with rich coffee. It’s not a cake, it’s not a pudding, and it’s definitely not Ice Cream. It’s something in between, a dreamy, ethereal cloud of coffee goodness. Traditionally, mousses rely on whipped cream and sometimes whipped egg whites to get that signature airy texture. This particular coffee mousse recipe is a streamlined version that still achieves that incredible, melt-in-your-mouth lightness without being overly complicated. It’s essentially a beautifully aerated, intensely flavored coffee dessert that’s served chilled. The “mousse” part comes from the way air is incorporated, making it feel wonderfully decadent without being heavy. It’s the perfect way to capture that beloved coffee flavor in a dessert form that’s both elegant and surprisingly easy to whip up.
Why you’ll love this recipe?
Honestly, where do I even begin with why this coffee mousse is a winner? For starters, the flavor is out of this world. It’s got that deep, roasted coffee essence that’s not too bitter, not too sweet, just perfectly balanced. It’s like drinking your favorite espresso, but in dessert form! And the texture? Oh my goodness. It’s unbelievably creamy and smooth, with this delicate lightness that just dissolves on your tongue. You expect it to be heavy, but it’s the complete opposite. It’s surprisingly simple to make, too. I know “mousse” can sound intimidating, but this recipe is designed for real life. You don’t need a double boiler or any fancy techniques. I’ve made this countless times when I’ve only got about 20 minutes to spare before guests arrive, and it always impresses. Plus, it’s pretty budget-friendly. The ingredients are simple, everyday items you probably already have in your pantry or can grab at any grocery store. What I love most about this coffee mousse is its versatility. You can serve it in individual glasses for an elegant touch, or scoop it into a big bowl for a more casual family gathering. It’s perfect for those nights when you’re craving something sweet at 10 pm but don’t want to bake a whole cake. It truly hits that spot perfectly. I’ve even experimented with adding a splash of liqueur, like Kahlua or Baileys, which takes it to a whole new level of indulgence. Seriously, this coffee mousse recipe is a keeper.
How do I make coffee mousse?
Quick Overview
The process is incredibly straightforward: you’ll essentially whip up a quick coffee base, gently fold in Whipped Cream to achieve that signature airy texture, and then let it chill to perfection. It’s a no-bake wonder that comes together in just a few simple steps. What makes this method so special is how it balances intense coffee flavor with an unbelievably light and creamy consistency, all without requiring much fuss or specialized equipment. You’ll be amazed at how quickly you can go from ingredients to a stunning dessert.
Ingredients
For the coffee base:
Here’s what you’ll need to get that deep, delicious coffee flavor going. I always use a good quality instant espresso powder because it dissolves beautifully and gives the most intense coffee punch without any grittiness. If you can’t find instant espresso, strong brewed coffee that has been reduced slightly will work, but the powder is my secret weapon for consistency and flavor. You’ll want about 2 tablespoons of the instant espresso powder. Then, we’ll need about 1/2 cup of hot water to dissolve it into. Make sure it’s hot, but not boiling, so it dissolves smoothly. For a touch of sweetness and to help with texture, we’ll add about 1/4 cup of granulated sugar. A pinch of salt is also crucial here; it doesn’t make it taste salty, but it really amplifies all the other flavors, especially the coffee and chocolate notes if you add them.
For the Creamy Smoothness:
This is where the magic happens and we get that super light, airy texture. You’ll need about 1 1/2 cups of heavy whipping cream. Make sure it’s nice and cold; cold cream whips up much better and faster. I always try to chill my bowl and whisk attachments in the freezer for about 10-15 minutes beforehand – it makes a huge difference! Sometimes, I like to add a teaspoon of vanilla extract to the cream as it whips, just to round out the flavors and add a little warmth. A tablespoon of powdered sugar also helps stabilize the Whipped Cream and adds just a hint more sweetness, but you can adjust this to your liking.
Optional, but highly recommended:
For an extra layer of decadence, I often add about 2 ounces of finely chopped semi-sweet chocolate to the coffee base. It melts right in and adds this beautiful richness and a subtle chocolatey undertone that pairs *perfectly* with coffee. If you’re a chocolate lover, trust me on this one.
Step-by-Step Instructions
Step 1: Dissolve the Coffee
In a medium-sized bowl, combine the instant espresso powder, granulated sugar, and the pinch of salt. Pour in the hot water and whisk vigorously until the sugar and espresso powder are completely dissolved and you have a smooth, dark liquid. If you’re using the chopped chocolate, add it now and stir until it’s fully melted and incorporated into the coffee mixture. Set this aside to cool slightly while you prepare the cream. You don’t want it piping hot when you add it to the whipped cream, or it could deflate it!
Step 2: Whip the Cream
In a separate, large, chilled bowl, pour in the cold heavy whipping cream. Add the vanilla extract and the powdered sugar. Using an electric mixer (handheld or stand mixer with a whisk attachment), beat the cream on medium-high speed. Start slowly so you don’t splash, then gradually increase the speed. Whip until medium-stiff peaks form. This means when you lift the whisk, the cream holds its shape but the tip curls over slightly. Be careful not to overbeat, or you’ll end up with butter!
Step 3: Gently Combine
Now comes the delicate part! Take about a third of the whipped cream and gently fold it into the slightly cooled coffee mixture. This step is called “tempering” the coffee base, and it lightens it up, making it easier to fold into the rest of the cream without deflating it. Use a spatula and fold gently, as if you’re bringing the mixture from the bottom up and over the top. Once that’s mostly incorporated, pour the lightened coffee mixture back into the remaining whipped cream. Fold everything together very gently until just combined and you have a uniform, beautiful mocha color with no streaks of white cream. You want to maintain as much air as possible, so don’t overmix!
Step 4: Portion and Chill
Spoon or pipe the coffee mousse into individual serving glasses, ramekins, or small bowls. You can also pour it into one larger serving dish if you prefer. Smooth the tops with the back of your spoon or spatula. Cover each serving (or the larger dish) with plastic wrap, making sure the wrap doesn’t touch the surface of the mousse if possible, or gently press it down to prevent a skin from forming. Refrigerate for at least 2-3 hours, or until firm and set. The chilling time is crucial for the flavors to meld and the mousse to achieve its perfect, wobbly texture.
Step 5: Garnish and Serve
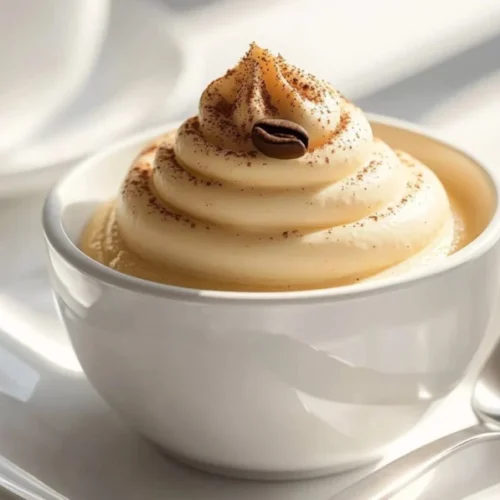
Once the coffee mousse is chilled and set, it’s time for the fun part – garnishing! A dusting of cocoa powder or a sprinkle of finely chopped chocolate is always a classic choice. A dollop of extra whipped cream, a coffee bean, or even a delicate chocolate curl can elevate it further. Serve chilled and enjoy the dreamy, creamy goodness!
What to Serve It With
This coffee mousse is so versatile, it’s practically a dessert chameleon! For breakfast, if you’re feeling adventurous and want a little coffee treat without the baking, a small spoonful of this mousse alongside some fresh berries and maybe a dollop of Greek yogurt can be surprisingly delightful. Think of it as a decadent start to your day! For a proper brunch affair, I love serving it in elegant stemware, perhaps with a delicate biscuit or a piece of biscotti on the side for a little crunch. A drizzle of caramel sauce over the top adds a lovely visual appeal and another layer of flavor. As a stand-alone dessert, it’s pure perfection after a hearty meal. You can serve it with a side of fresh raspberries or a sprig of mint for a pop of color and freshness. It also pairs beautifully with a shot of espresso or a delicate dessert wine if you’re feeling fancy. For those cozy snack times, honestly, just a spoon and a comfy spot on the couch is all you need! It’s perfect for satisfying a late-night craving without being too heavy. My family loves it with a glass of cold milk; it’s a comforting combination that reminds me of simpler times.
Top Tips for Perfecting Your Coffee Mousse
I’ve made this coffee mousse more times than I can count, and I’ve learned a few tricks along the way that I think can really help make yours absolutely spectacular. First off, when it comes to the coffee base, don’t skimp on the quality of your instant espresso powder. A good brand makes a world of difference in the depth of flavor. Make sure it’s completely dissolved – any undissolved granules can be unpleasant in the final texture. Also, let that mixture cool down sufficiently before folding it into the whipped cream. I’ve made the mistake of adding it too warm, and it can melt the whipped cream, leading to a less airy, more pudding-like consistency. Trust me, a little patience here pays off! For the whipped cream, remember that everything should be cold: the cream, the bowl, and the whisk attachments. This helps the cream whip up faster and achieve those lovely stiff peaks. Watch it carefully; it can go from perfectly whipped to overbeaten and grainy in a matter of seconds. If you accidentally overbeat it slightly, you can sometimes salvage it by gently folding in a tablespoon or two more of unwhipped cold cream. When you’re folding the coffee mixture into the whipped cream, be gentle. Think of it as a dance, not a fight. You want to preserve all that lovely air you’ve whipped in. Fold until just combined; a few faint streaks are better than overmixing and losing the lightness. I learned this lesson the hard way after my first few attempts where I was just too eager to get it all mixed. If you want to add chocolate, chopping it very finely is key. Melt it into the hot coffee mixture and ensure it’s completely smooth. If you add chunks, they might not fully incorporate. For ingredient swaps, I’ve successfully used decaf instant espresso powder when I wanted a coffee flavor but not the caffeine kick. I’ve also tried a splash of almond extract instead of vanilla for a slightly different nutty note, which was lovely! If you find your mousse isn’t setting quite as firmly as you’d like, it might be because your cream wasn’t whipped to stiff enough peaks, or perhaps your coffee mixture was too warm. A longer chilling time can also help. Don’t be afraid to taste and adjust the sweetness of your coffee base before folding it into the cream; everyone’s preference is different. And for serving, I love making little swirls on top with a spoon right before chilling, or even adding a tiny pinch of sea salt right before serving for a sophisticated sweet-and-salty contrast.
Storing and Reheating Tips
This coffee mousse is best enjoyed fresh, but it stores surprisingly well, which is another reason I love it so much! For the best texture and flavor, it’s ideal to eat it within 2-3 days. You can store individual servings or a larger bowl in an airtight container in the refrigerator. Make sure it’s well-covered with plastic wrap to prevent it from absorbing any odors from other foods in the fridge and to keep that lovely smooth top from drying out. If you’re storing it for longer than a day or two, the texture might change slightly, becoming a little denser, but it will still be delicious. I wouldn’t recommend leaving it at room temperature for more than an hour or so, as it’s a dairy-based dessert and can spoil. It also doesn’t really “reheat” in the traditional sense; you just want to serve it cold. If it’s been in the fridge for a while, it should be perfectly chilled. Freezing is possible, but it can alter the texture, making it a bit icy. If you do choose to freeze it, make sure it’s in an airtight container and thaw it in the refrigerator overnight. The texture might be a little softer after thawing, but it’s still quite enjoyable. For the glaze timing advice, if you plan to freeze, it’s best to add any garnishes like cocoa powder or chocolate shavings *after* thawing, as they can get clumpy when frozen. For refrigerator storage, you can add garnishes before chilling, as long as they are applied just before serving or are frost-proof. The key is to keep it cold and covered to maintain its delicate texture and fresh coffee flavor.
Frequently Asked Questions
Final Thoughts
So there you have it – my absolute favorite, no-fuss, unbelievably delicious coffee mousse recipe. It’s proof that you don’t need to spend hours in the kitchen to create something truly special and decadent. This recipe is a testament to simple ingredients coming together to create pure magic. Whether you’re serving it to impress guests, as a treat for your family, or just for a little solo indulgence, it never fails to deliver that perfect balance of rich coffee flavor and airy, creamy texture. If you love coffee and you love creamy desserts, you’re going to adore this. It’s the kind of dessert that makes you close your eyes with the first bite. I really hope you give this coffee mousse a try. I can’t wait to hear how yours turns out in the comments below! Don’t forget to rate it if you loved it, and feel free to share any of your own creative twists or variations – I always love seeing what you come up with!
Coffee Mousse Recipe
Ingredients
Main Ingredients
- 1 cup Heavy cream
- 0.5 cup Strong brewed coffee, cooled
- 0.5 cup Granulated sugar
- 1 teaspoon Vanilla extract
- 2 tablespoons Unsweetened cocoa powder (for dusting)
Instructions
Preparation Steps
- In a chilled bowl, whip the heavy cream until soft peaks form.
- In a separate bowl, whisk together the cooled coffee, sugar, and vanilla extract until the sugar is dissolved.
- Gently fold the coffee mixture into the whipped cream until combined.
- Spoon the mousse into serving glasses or a single large bowl.
- Refrigerate for at least 1 hour to allow the mousse to set.
- Before serving, dust with cocoa powder.


