There are some treats that just transport you back in time, aren’t there? For me, nothing does that quite like a perfectly layered dirt pudding cup. It’s more than just a dessert; it’s a memory of lazy summer afternoons, birthday parties where the ice cream truck was the main event, and that unmistakable, sweet, chocolatey goodness that felt like pure magic. I remember my mom making these for school events, and the little plastic cups would disappear faster than you could say “chocolate cookie crumbs.” They’re so simple, yet so incredibly satisfying, almost like a humble, delicious cousin to a fancy chocolate mousse or a rich tiramisu, but with way less fuss and a lot more playful charm. If you’re looking for a recipe that’s a guaranteed crowd-pleaser, especially with the younger (and let’s be honest, the young at heart) crowd, then you absolutely have to try these dirt pudding cups. They’re a lifesaver on busy nights and a guaranteed hit for any gathering.
What are Dirt Pudding Cups?
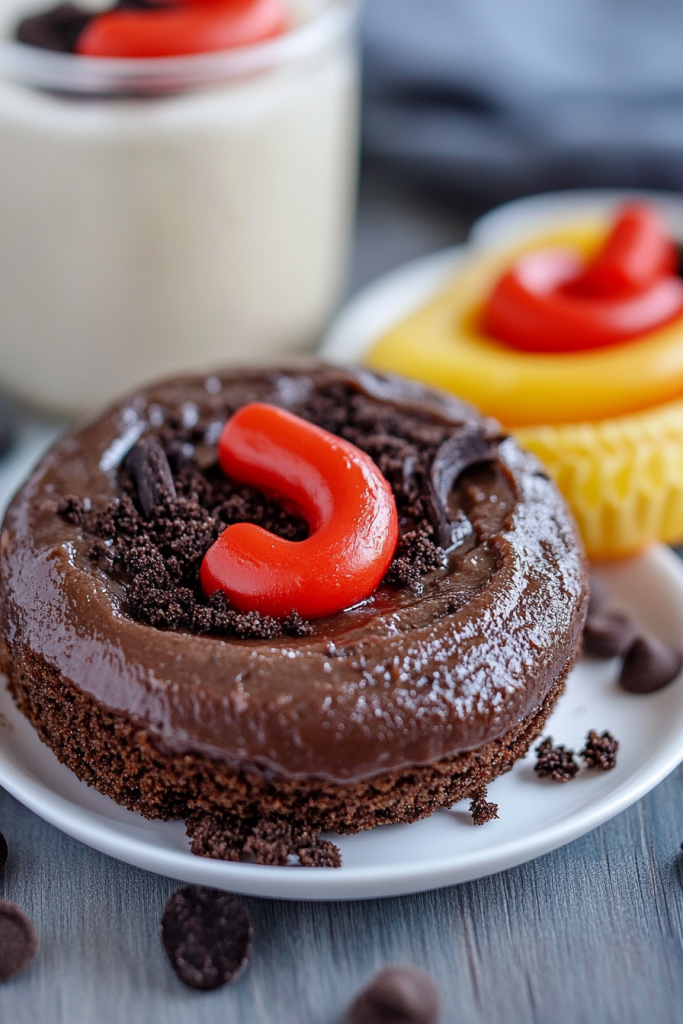
So, what exactly are these delightful little concoctions we call dirt pudding cups? At its heart, it’s a no-bake dessert that’s all about texture and familiar, comforting flavors. Think of it as a playful, edible garden. The “dirt” is typically made from crushed chocolate sandwich cookies, like the classic Oreos you probably grew up with. Then, you layer that “dirt” with a creamy, dreamy chocolate pudding. Sometimes people add gummy worms peeking out, giving it that extra whimsical touch of being in a little edible planter. It’s essentially a deconstructed, miniaturized, and incredibly fun version of a chocolate pudding pie or a chocolate trifle, but served in individual portions that are just begging to be dug into. The beauty lies in its simplicity; it’s a recipe that’s forgiving, fun to assemble (especially with kids!), and delivers a big punch of flavor without any complicated baking or fancy techniques.
Why you’ll love this recipe?
Honestly, where do I even begin with why this recipe is so special? First off, the flavor profile is just pure, unadulterated chocolate joy. It’s rich, it’s creamy, and the slightly bitter crunch of the chocolate cookie crumbs cuts through the sweetness of the pudding perfectly. It’s that classic chocolate-on-chocolate combo that never, ever gets old. Then there’s the simplicity. I’m talking about a recipe you can whip up in under 30 minutes, with no oven required. This is a serious lifesaver when you need a dessert in a pinch or when you’re just not feeling the whole baking ordeal. Plus, it’s incredibly budget-friendly. The ingredients are pantry staples for most people, making it an economical choice for parties or just a weeknight treat. I’ve tested this with different brands of cookies and puddings, and while there are subtle differences, the core deliciousness remains. What I love most about this dirt pudding recipe, though, is its sheer versatility. You can serve it in little plastic cups, mason jars, or even a big trifle bowl. You can add gummy worms, chocolate chips, or a dollop of whipped cream. It’s a dessert that’s as adaptable as it is delicious. It’s also a fantastic way to introduce younger kids to helping in the kitchen because crushing cookies and layering is super fun for them, and they get to eat their creation!
How do I make Dirt Pudding Cups?
Quick Overview
Making these dirt pudding cups is as easy as one, two, three… well, maybe a few more steps, but they’re all simple! You’ll whip up a quick, creamy chocolate pudding (or use your favorite instant variety if you’re really short on time), crush up some chocolate sandwich cookies to mimic rich soil, and then layer it all together in charming individual cups. The key is the creamy texture of the pudding contrasted with the crumbly cookie “dirt.” It’s a no-bake wonder that’s perfect for potlucks, kids’ parties, or just satisfying a serious chocolate craving without any fuss. Trust me, this method delivers that perfect, nostalgic taste and texture every single time.
Ingredients
For the “Dirt” Crumb Layer:
You’ll need about 2 sleeves of your favorite chocolate sandwich cookies (the kind with the creamy filling – those are crucial for flavor!). I always go for the classic ones, but feel free to experiment! You want enough to generously coat the bottom and top of your cups. Make sure they’re finely crushed, but a few slightly larger bits are okay – it adds to the “garden soil” look!
For the Creamy Pudding Layer:
This is where the magic happens. You’ll need a good quality instant chocolate pudding mix. I usually grab a 3.4-ounce box – one box makes enough for about 4-6 servings depending on how generous you are with your layering. You’ll also need the cold milk specified on the pudding box (typically around 2 cups). If you’re feeling a little fancy, you can use chocolate pudding made from scratch, but honestly, the instant stuff is a lifesaver and tastes just like childhood to me.
For Garnish & Extra Flair (Optional):
Gummy worms are a classic and add such a fun, playful touch. I usually grab a small bag. You can also add a dollop of whipped cream on top, a few chocolate chips, or even some crushed chocolate toffee bits for extra texture and flavor. A small sprig of mint can also make it look like a little edible plant!
Step-by-Step Instructions
Step 1: Prepare Your “Dirt”
First things first, let’s get our “dirt” ready. Take your chocolate sandwich cookies and pop them into a food processor. Pulse until they are finely crushed, resembling coarse sand or soil. If you don’t have a food processor, no worries! Just pop them into a sturdy zip-top bag, seal it tightly, and use a rolling pin or the bottom of a heavy glass to crush them. You want them pretty fine, but a few slightly larger crumbs are actually great for texture. Set this aside.
Step 2: Make the Pudding
Now, let’s whip up that glorious chocolate pudding. In a medium bowl, whisk together the instant chocolate pudding mix and the cold milk according to the package directions. Whisk vigorously for about 2 minutes, until it starts to thicken. Don’t overmix, but make sure there are no dry pockets of pudding mix. Let it sit for about 5 minutes to fully set up. It should be thick and luscious.
Step 3: Assemble Your Cups
This is the fun part! Grab your serving cups. Small clear plastic cups (like the ones for sample servings or party cups) work wonderfully because you can see the layers. Start by putting a layer of your crushed chocolate cookie “dirt” at the bottom of each cup. You don’t need a ton, just a nice even layer.
Step 4: Add the Pudding Layer
Next, spoon a generous layer of your prepared chocolate pudding over the cookie crumbs. Fill it up about halfway or a little more, depending on how big your cups are and how many layers you want. Make sure to get a nice, smooth layer so the next bit of “dirt” has something to rest on.
Step 5: More Dirt!
Now, sprinkle another layer of your chocolate cookie “dirt” over the pudding. Be a little more generous with this layer, as it’s meant to look like the top layer of soil. You can even use a spoon to lightly press it down, but don’t pack it too hard.
Step 6: Add Gummy Worms (Optional)
If you’re using gummy worms, this is the time to add them! Gently stick one or two worms out of the “dirt,” so it looks like they’re crawling out of the ground. It’s such a cute and classic touch that kids absolutely adore.
Step 7: Chill for Best Results
Once your dirt pudding cups are assembled, it’s best to pop them into the refrigerator for at least 15-20 minutes before serving. This allows the pudding to firm up a little more and the flavors to meld together beautifully. It also makes them nice and cold, which is perfect for a summer treat.
Step 8: Serve and Enjoy!
Serve your dirt pudding cups chilled. They are absolutely delightful on their own. If you want to add a little extra pizzazz, a tiny dollop of whipped cream on top before serving adds a nice touch of elegance (and extra creaminess!).
What to Serve It With
These dirt pudding cups are so versatile, they can truly fit into almost any meal or occasion. For a casual breakfast or brunch, especially if it’s a special occasion, I love serving them alongside fresh fruit like berries. The bright, fresh flavors of the fruit are a wonderful contrast to the rich chocolate. Imagine a little fruit salad and a dirt pudding cup – it feels indulgent but still a bit balanced! For a more elegant brunch spread, you can serve them in small mason jars or even delicate glasses with a tiny sprig of mint on top. They look surprisingly sophisticated and are always a talking point. As a dessert, they are, of course, perfect! They’re the ideal sweet ending after a hearty meal, and they pair wonderfully with a glass of cold milk (for the kids, naturally) or even a rich coffee liqueur for the grown-ups. My family tradition is to have these after a backyard barbecue in the summer, and they’re also a staple for any kid’s birthday party. For cozy snacks, they’re just brilliant. On a rainy afternoon, curled up with a good book, a dirt pudding cup is pure comfort. I sometimes serve them alongside a warm brownie or a scoop of vanilla ice cream if I’m feeling extra decadent. Honestly, they’re so good, they don’t really need anything else, but the right pairing can elevate the experience even further!
Top Tips for Perfecting Your Dirt Pudding Cups
I’ve been making these dirt pudding cups for what feels like forever, and I’ve picked up a few tricks along the way that I think really make a difference. First, when you’re crushing the cookies, don’t aim for a totally uniform powder. A few slightly larger crumbles add a much more interesting texture, making it feel more like actual garden soil. I’ve learned that over-processing can sometimes lead to a slightly gummy “dirt,” so just pulse until it’s the consistency you like. For the pudding, while instant is super convenient (and honestly, that’s what I usually use!), if you do opt for homemade, make sure it’s thoroughly chilled before assembling. A lukewarm pudding won’t set as nicely. I’ve found that using whole milk for the pudding gives it the creamiest, richest texture. I once tried it with skim milk when I ran out, and while it worked, it just wasn’t quite the same lusciousness. When you’re layering, don’t be afraid to be generous! A good amount of pudding is key to that creamy contrast with the cookies. I also love to press down the final layer of cookie crumbs very gently with the back of a spoon. This helps create a nice surface for your gummy worms to stand up in. Speaking of gummy worms, if you find they’re sliding down, you can sometimes stick them in the fridge for a few minutes to firm them up before inserting them. This recipe is also fantastic for ingredient swaps! If you’re not a fan of milk chocolate pudding, dark chocolate is amazing too. You can even use white chocolate pudding for a different look and flavor. For a slightly richer flavor, I sometimes add a teaspoon of espresso powder to the pudding mix when I’m making it – it really deepens the chocolate flavor without making it taste like coffee. And don’t underestimate the power of a good chill! The longer these sit in the fridge (within reason, of course – you don’t want them to get soggy), the better the flavors meld. I usually make them at least an hour or two before serving if I have the time, and they’re even better the next day, though they are truly delightful straight out of the fridge after a brief chill.
Storing and Reheating Tips
Ah, storing these delightful little treats! Honestly, dirt pudding cups are best enjoyed fresh, but they do hold up pretty well if you need to make them ahead. If you’re storing them at room temperature, I wouldn’t recommend keeping them out for more than a couple of hours, especially if it’s warm. The pudding can start to get a little… well, un-pudding-like, and the cookies can soften too much. For short-term storage, just cover them tightly with plastic wrap to prevent them from drying out. If you plan on storing them for longer, or if you want to make them the day before a party, the refrigerator is your best friend. Use airtight containers or cover them very well with plastic wrap. They’ll stay good in the fridge for about 2 to 3 days. The cookies will soften a bit over time, but it’s still really tasty – it just changes the texture slightly, becoming more like a moist cake. If you’re going to freeze them, I’d suggest freezing them *before* adding the gummy worms, as they can get a bit tough and icy when frozen. Wrap each cup very well in plastic wrap, then place them in a freezer-safe container or bag. They can stay frozen for up to a month. To thaw, transfer them from the freezer to the refrigerator overnight. Once thawed, you can add your gummy worms and serve. For the glaze – well, there’s no glaze on this one! The magic is in the pudding and the cookie crumbs. Just make sure you’ve got those layers nicely topped with ‘dirt’ before you seal them up for storage.
Frequently Asked Questions
Final Thoughts
So there you have it – my beloved dirt pudding cups! It’s a recipe that’s so much more than just a dessert; it’s a ticket back to simpler times, a guaranteed smile-maker, and an absolute breeze to put together. The magic is in that contrast between the creamy, dreamy chocolate pudding and the delightfully crumbly chocolate cookie “dirt.” It’s a treat that proves you don’t need fancy techniques or exotic ingredients to create something truly special and memorable. If you loved this recipe, you might also enjoy my other no-bake desserts, like my easy no-bake cheesecake or my fun chocolate lava mug cakes. They offer similar levels of ease and deliciousness! Give these dirt pudding cups a try, and I truly hope they bring as much joy and nostalgic delight to your kitchen as they do to mine. I can’t wait to hear how yours turn out! Please leave a comment below and share your own tips or variations – I love hearing from you all!
Dirt Pudding Cups
Ingredients
Main Ingredients
- 1 cup Unsalted Butter softened
- 1 cup Granulated Sugar
- 0.5 cup Brown Sugar packed
- 2 large Eggs
- 2 tsp Vanilla Extract
- 1 box (3.9 oz) Instant Chocolate Pudding Mix
- 1 tsp Baking Soda
- 1 tsp Salt
- 2 cups All-Purpose Flour
- 1 cup Mini Semi-Sweet Chocolate Chips
- 1.5 cups Crushed Oreos about 13 cookies
- 30 Gummy Worms
- 3 cups Powdered Sugar
- 0.66 cup Cocoa Powder
- 0.5 cup Water
- 4 tsp Vanilla Extract
Instructions
Preparation Steps
- Preheat oven to 350°F and line a cookie sheet with parchment paper.
- Combine butter, granulated sugar, and brown sugar in a medium-sized mixing bowl and cream together well.
- Add eggs and vanilla extract to the creamed butter and sugar and mix well.
- Mix in the pudding mix, baking soda, and salt. Mix this in at low speed until the ingredients are well combined and you have a nice chocolate batter.
- Slowly add the flour and mix until everything is well combined.
- Gently fold in the chocolate chips and mix until chips are evenly distributed throughout dough.
- Use a large cookie scoop to scoop out balls and place them 2" apart on prepared cookie sheet.
- Bake for 10 minutes. Allow cookies to cool on the cookie sheet for 8 minutes, then transfer to a cooling rack.
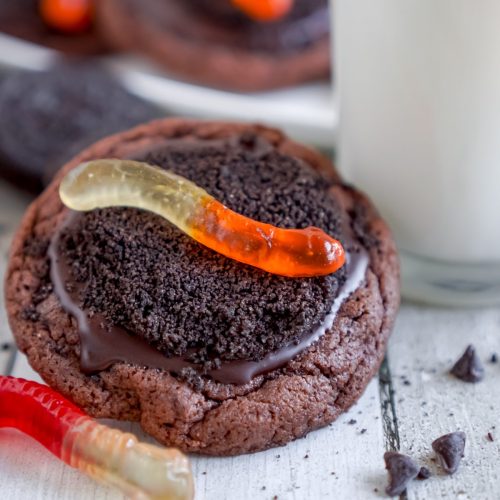
- While cookies are cooling, make the glaze by combining the powdered sugar, cocoa powder, vanilla extract, and water in a bowl and mix until it reaches a good consistency. Spoon the glaze onto each cookie, then top with crushed Oreos and a gummy worm. Let cool before serving.


